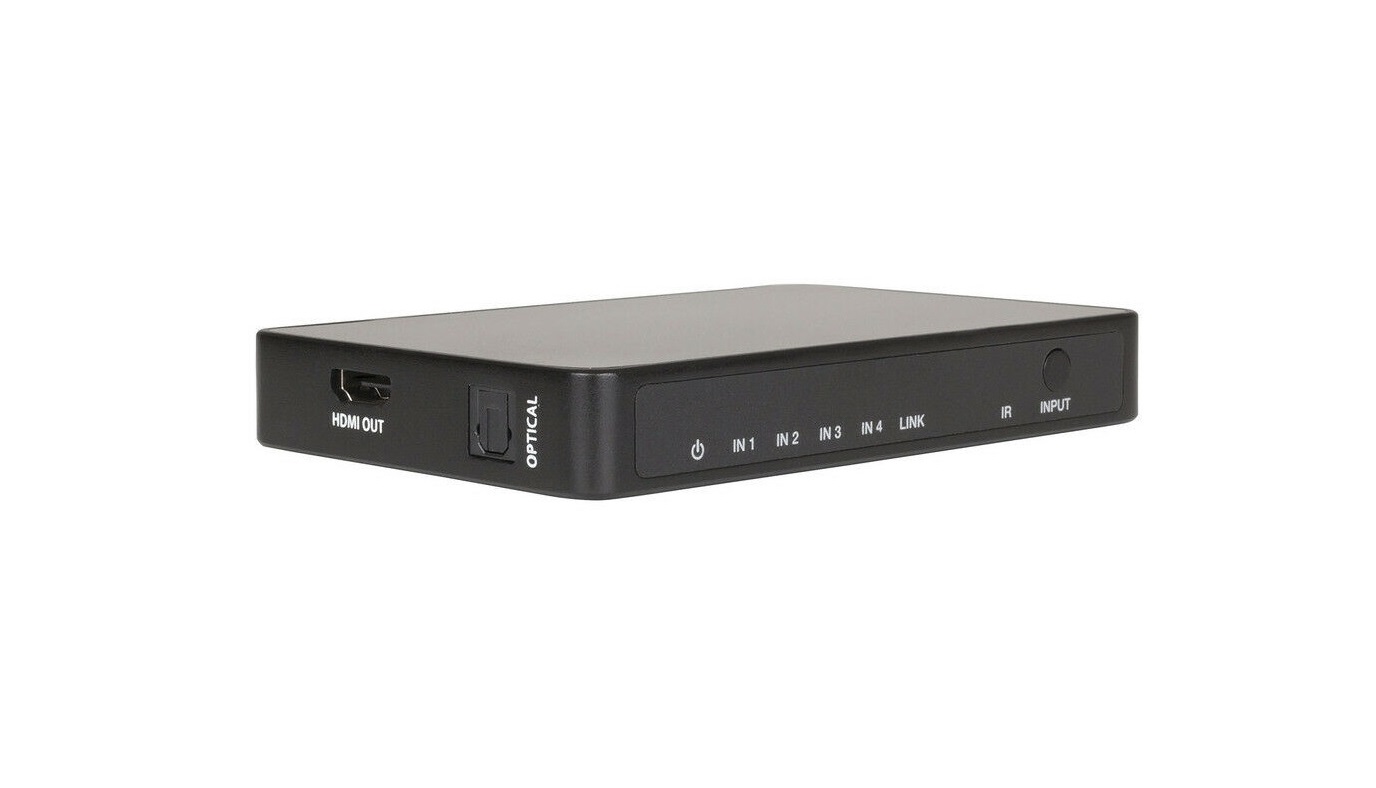
CONCORD HDMI 4 Way Switcher
Introduction
The product can switch any of these 4 HDMI 2.0 sources to an HDMI 2.0 display. It supports 10bits HDR (High Dynamic Range) pass through and resolution up to /60Hz 4:4:4. An optical output is supported. The product is built-in WiFi function, so it supports voice control through connecting an amazon voice product and APP control. Furthermore, the product can also be controlled by on-panel button and n IR remote control.
Features
- HDMI 2.0, HDCP 2.2 compliant
- Support 18Gbps bandwidth
- Resolution up to /60Hz YCbCr 4:4:4
- 10bits HDR pass through supported
- Support an optical output Support connecting an amazon voice control(Please check “6. Echo Connection and Operation” detail description)
- Support “Smart switch” APP control(Please check “6.2 To set Switcher and use APP control”)
- IR remote and on-panel button control
- 4 HDMI inputs and 1 HDMI output
- Compact design for easy and flexible installation
Package Contents
- 1× 18Gbps HDMI 4×1 Switcher
- 1× 5V/1A DC Power Adapter
- 1× IR Remote
- 1× User Manual
Specifications
| Technical | |
| HDMI Compliance | HDMI 2.0 |
| HDCP Compliance | HDCP 2.2 / HDCP 1.4 |
| Video Bandwidth | 594MHz/18Gbps |
| Video Resolution | 480i ~1080p50/60Hz, /30Hz, |
| Color Depth | 8/10/12-bit [1080P, 4K30Hz, 4K60Hz (YCbCr 4:2:0)] 8-bit [4K60Hz 4:4:4] |
| Color Space | RGB, YCbCr 4:4:4 / 4:2:2. YUV 4:2:0 |
| HDMI Audio Formats | LPCM, Dolby Digital/Plus/EX, Dolby True HD, DTS, DTS-EX, DTS-96/24, DTS High Res, DTS-HD Master Audio, DSD |
| Optical Audio Formats | PCM2.0, Dolby Digital / Plus, DD+, DTS |
| ESD Protection | Human body model—±8kV (Air-gap discharge) & ±4kV (Contact discharge) |
| Connections | |
| Input Ports | 4×HDMI Type A (19-pin female) 1×IR Receive Window |
| Output Ports | 1×HDMI Type A (19-pin female) 1×OPTICAL audio out (S/PDIF) |
| Mechanical | |
| Housing | Plastic Enclosure |
| Silkscreen Color | Black |
| Dimensions | 122mm (W) × 64mm (D) × 19mm (H) |
| Weight | 230g |
| Power Supply | Input: AC100 – 240V 50/60Hz, Output: DC 5V/1A |
| Power Consumption | 1.45W |
| Operation Temperature | -10°C ~ 50°C / 14°F ~ 122°F |
| Storage Temperature | -20°C ~ 60°C / -4°F ~ 140°F |
| Relative Humidity | 20~90% RH (non-condensing) |
Operation Controls and Functions
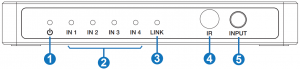
Front Panel
|
Number |
Name |
Function description |
| 1 | POWER LED | The LED will illuminate in red when the device is connected to power supply. |
| 2 | IN 1/2/3/4 LED | The LED will illuminate in green when HDMI OUT port is selected an input source. |
| 3 | LINK | Network connection LED. The LED will illuminate when the device connects network signal. |
| 4 | IR IN | IR receiver window. It receives the IR remote control from this product only. |
| 5 | INPUT button | Pressing this button will select IN1/IN2/IN3/IN4 input source to OUTPUT port. |
Rear Panel

| Number | Name |
Function description |
| 1 | RESET button | Network connection and firmware upgrade button.
|
| 2 | DC 5V | Plug the DC 5V/1A power supply into the unit and connect the adapter to an AC outlet. |
| 3 | INPUT 1/2/3/4 | Connect to HDMI source devices such as DVD player or set-top box with an HDMI cable. |
Side Panel

| Number | Name |
Function description |
| 1 | HDMI OUTPUT | Connect to one HDMI display device such as TV or Monitor with an HDMI cable. |
| 2 | OPTICAL port | Connect to audio output device such as amplifier with an optical wire. |
Echo connection and operation
To set Voice Box and to connect Amazon Account
There are two ways to enter amazon Alexa login page.
a. You can input the “https://alexa.amazon.com” web site to your PC/laptop/ mobile Internet Explorer and click “Search” to enter amazon Alexa page.b. You can download and install the app “amazon Alexa”. Open this app “amazon Alexa” to enter amazon Alexa page.The login page of the amazon Alexa is shown as below:
You need to fill in some information to create an account. You can enter the login page when the account creates successfully. The page is show as below: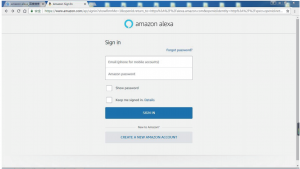
Sign in the account successfully, you will enter the following page. You need to setup a new device on the “Settings” page.
At this time, according to your speaker box to select one product. Our company uses the product about “Echo Dot”, and clicking the “Echo Dot” icon will setup the product at the following steps.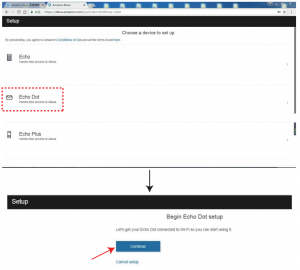
At this step, you need to power on your Echo Dot. When the blue horse race lamp is off, you need to press the ‘round dot’ button (the button on the right) until it appears yellow horse race lamp. Click the ‘Continue’ button. The page is show as below: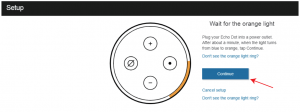
At this step, go to your Wi-Fi setting on this computer and select the networkof the format ‘Amazon-XXX’ to connect it. After connecting to ‘Amazon XXX’, you can continue setup. These page are show as below:
At this step, you need to select one available Wi-Fi network on this computerand connect it.
At this step, the Echo Dot is connected to the Internet. Click the ‘Continue’ button. The page is show as below:
You can connect an external speaker to your Echo Dot. Our company does not an external speaker to connect the Echo Dot, so I will select ‘Use built-in Echo speaker’. The page is show as below: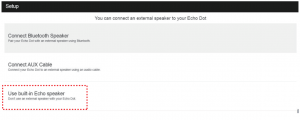
At this step, all settings about the Echo Dot has been finished.
To set Switcher and use APP control
Please download a “Smart switcher” APP on your iOS device. Click this APP icon, if you registered before, click “SIGN IN” to login, but if you have not register, please click “Registered”. Then you will see the following register page.
Note: You need to input a real e-mail address if you want to change the password. In addition, the e-mail need to be used when connected the voice box
Step 1: Fill in these information and click “Create my account”. Then to enter login page.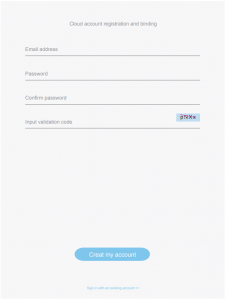
Step 2: Please enter the email and password before you have registered, and then click the “Sign in” to login.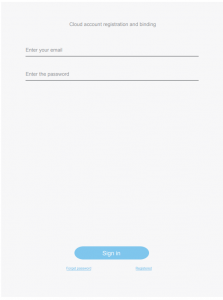
Step 3: Click the “+” sign
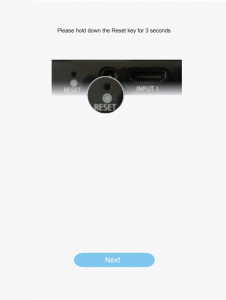
Step 4: Press and hold the “RESET” button for 3 seconds, then click the “Next” button.
Step 5: Input has recognized the Wifi password and then click the “Next” button.
Step 6: When you see this page, the Wifi has connected success, click “OK” button and then click “Set” button to enter the following page. At this time, the LINK LED is always light.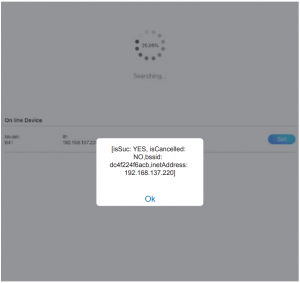
Step 7: Input the name of device and connecting source, click Submit. Then select Home to return for main page.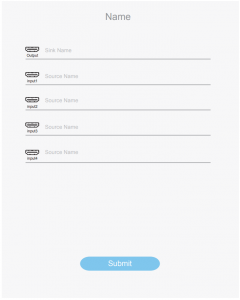
① Green means connected success.② Gray means unconnected success, refresh this page and wait for a moment. If it still is unsuccess, please connect it again from Step 3.③ Black means the product can be controlled by voice box.④ Gray means the product can not be controlled by voice box.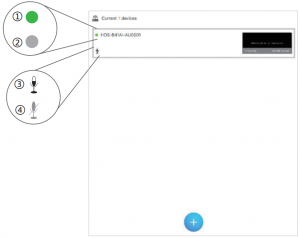
If the product is connected success, click it to enter control page.
 Push the corresponding button to control your device.
To activate Skills and connect product
At the Amazon Alexa page, You need to select “Skills” option and input “smart switcher” and click “search” button to enter the next step.
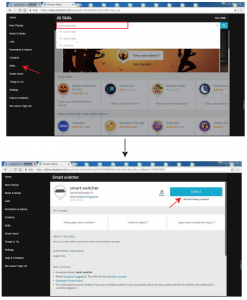
I have registered the Email address and Password at the front and fill in it atthis page.
At this step, the smart switcher has been successfully linked. You can use the Echo Dot product to switch the switcher input source.
Echo voice command list
| Function | Voice command |
| Wake up product | open smart switcher |
| switch to input channel |
|
Automatic switch features
- The product has power off memory function. After power off, and theseinput signal sources have not been pulled out. The output device will display the input source of the last power down when the product is powered on again.
- The product is powering on. The output device will display the next input channel signal when you pull out current input signal source. The priority order is 1->2->3->4->1…etc.
- The product is power off. If you pull down current input signal source.The output device will display the next input channel signal when the product is powered on again. The priority order is 1->2->3->4->1…etc.
IR Remote
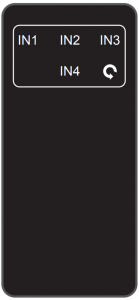 IN1/IN2/IN3/IN4: Select IN1/IN2/IN3/IN4 input source to output display.
![]() : Loop select input source to output display.
: Loop select input source to output display.
FAQ
1. Q: Does this product require an HDMI line length for the connection interface?A: According to HDMI line length test, HDMI input / output with 8bit or YCbCr 4:4:4 is the longest line length up to 16.4ft / 5m.The use of “Premium High Speed HDMI” cable is highly recommended.
Application Example

References
[xyz-ips snippet=”download-snippet”]