COOLER MASTER Curved Gaming Monitor User Guide
Instructions
Please read the following instructions carefully.
- To clean the LCD monitor screen:Turn off the LCD monitor and unplug the power cord. Spray a non-solvent cleaning solution onto a rag and clean the screen gently.
- Do not place the LCD monitor near a window. Exposing the monitor to rain, moisture or sunlight can severely damage it.
- Do not apply pressure to the LCD screen. Excessive pressure may cause permanent damage to the display.
- Do not remove the cover or attempt to service this unit yourself. An authorized technician should perform servicing of any nature.
- Store the LCD monitor in a room with a temperature of -20′ to 60′ C (- 4o to 40oF). Storing the LCD monitor outside this range may result in permanent damage.
- Immediately unplug your monitor and call an authorized technician if any of the following circumstances occur:
- Monitor- to .PC signal cable is frayed or damaged.
- Liquid spills onto the LCD monitor or the monitor is exposed to rain.
- The LCD monitor or case is damaged .
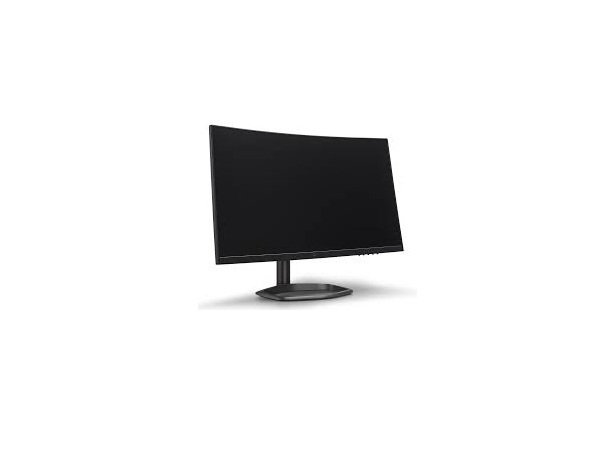
Package Contents
- A. Monitor x 1

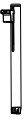
- B. Lift monopod x 1
- C. Support base x 1
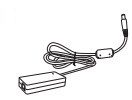
- D. Power cord x 1
- E. Power adapter x 1
- F. HDMI 2.0
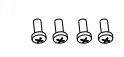
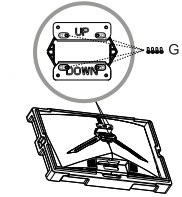
- G. Screw x 1(Used for installation of the wall-mounted adapters and the hinge reinforcing plate)
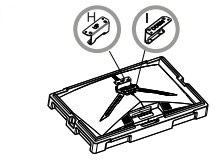
- H. Wall-mounted adapter (up) x 1
- I. Wall mounted adapter (down) x 1
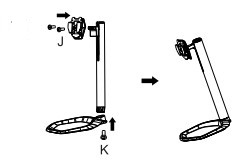
- J. Screws x 2(Used for installation of the hinge cover assembly and support)
- K. Screw x 1(Used for Installation of the support base and support arm)


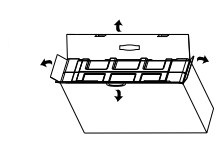
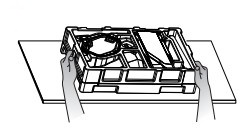
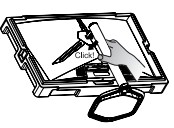
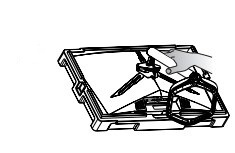
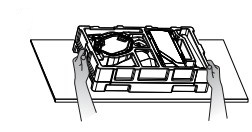
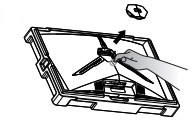
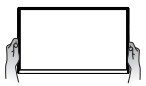
Connect the Monitor to the Support Base


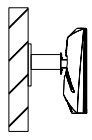
Installation of the Wall-Mounted Bracket
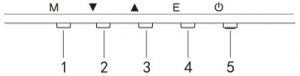
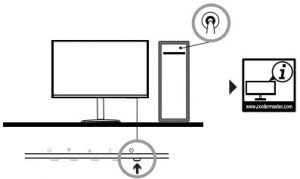
Press any of the buttons to enter the quick navigation menu, i.e to activate the quick mode.
|
1 |
 |
OSD Menu | a. Press the button to enter the OSD menu to activate the quick mode.
b. After entering the OSD menu, press the button to enter submenu. |
|
2 |
 |
Quick button for in-game crosshairs | a. Press the button under the quick Mode to turn on in-game crosshairs.
b. When the OSD menu is activated, press the button for Down. |
|
3 |
 |
Quick button for scene mode | a. Press the button to quickly switch between the game and graphic scene mode.
b. When the OSD menu is activated, press the button for up. |
|
4 |
 |
Quick button for HDR | a. Press the button under the quick mode to switch to HDR to turn on/off the signal mode.
b. When the OSD menu is activated, press the button to return to the last menu/exit the OSD menu. |
| 5 |  |
Power button | Turn on/off the monitor. Blue indicates the power is on. Flashing blue light indicates the monitor is under Standby mode. |
Free SyncSwitch to the Game Mode to activate Free Sync + HDRThis function enables the graphic source supporting Free Sync to adjust the screen refresh rate of the monitor in a dynamic manner based on the energy-saving typical content frame rates. It is almost able to totally prevent screen tearing and stuttering display.
 Note:
Note:
- DP (1.2): 1920 x 1080 can support 165Hz, Adaptive Sync
- HDMI (2.0): 1920 x 1080 can support 165Hz, Adaptive Sync
- HDMI 1.4): 1920 x 1080 can support 120Hz, Adaptive Sync
Requirements and Safety Notice
FCC Safety Notice
This product has been tested and determined to be meeting the limits for a Class B digital device and in compliance with Part 15 of the FCC Regulations.These requirements are set to reasonably protect the home Install at on environment from hazardous interference. This product will generate, use and emit radio frequency energy.Failure to Install and use it as instructed may cause hazardous interference to radio communication.However,we cannot guarantee zero interference for certain installation methods. If this product has caused hazardous interference to radio or TV reception (turn on or tum off this product to for confirmation), the user may try to make adjustment with the following methods:
- Re-.adjust the angle and position of the reception antenna.
- Increase the distance between the device and receiver.
- Do not use the power sockets of the device and receiver together.
- If assistance is needed, count the distributor or a professional radio/TV technician.
CE Compliance Statement
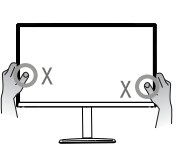
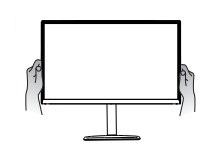
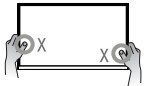
Cooler Master Technology Inc. hereby declare that the monitor conforms to the following key standards and other related provisions:EMC Drective 2014130/EU, LOW Voltage Directive 2014/35/EU, RoHS Directive- 2011/65/EU and Directive- 2009/125/EC establishing a framework for the setting of Eco-design requirements for energy-related products.Note:To prevent damage of the monitor. do not lift the monitor from the support base.Note: Shielded CableTo comply with the EMC requirements, a shielded cable must be used for connection between this product and any other computer device.Note:The monitor is exclusively used in the video and image display of information acquired from electronic devices.Note: PeripheralsOnly a peripheral device (1/0 device.terminal. printer, etc.) that has been certified and met the Class B limits can be sold together with this product. If this product is used together with any other uncertified peripheral device, it may cause Interference to radio and TV reception.WarningAny change or modification not approved by the original manufacturer may lead to the user losing the right to operate this product.Such authorization s given by the Federal Communications Commission.Requirements for UseThis product meets the limits Part 15 of the FCC Regulations. When operating this product, please meet the following two requirements.
- This product may not generate hazardous interference; and
- This product must accept any interference signal received, including interference that is likely to lead to unexpected operation.
Disposal of Waste Equipment by Home Users in EU
 If this symbol appears on a product and its package, it indicates that the product cannot be disposed of together with other household waste. You have to deliver the waste equipment to a designated recycling center for recycling of waste and electronic equipment., proper sorting and recycling of resources during the disposal of waste equipment is helpful for protecting natural resources and ensuring that resource recycling can protect human health and environment. For detailed information about recycling centers where waste equipment is disposed of, contact the local municipal office, cleaning service of the store where the purchased product is found.
Specification
| LCD Panel | Drive system | TFT Color LCD |
| Size | 27” | |
| Pixel pitch | 0.3114 (H) – 0.3114 (V) | |
| Brightness | 300 nits | |
| Contrast | 3000:1 | |
| Viewing angle | 178 (Horizontal) 178 (Vertical) | |
| Response time | OD 3ms | |
| Panel Type | VA | |
| Horizontal frequency | 53.28 – 183.15 kHz | |
| Vertical frequency | 48 ~165Hz | |
| Display Colors | 16.7 Million Colors | |
| Max Resolution | DP: 1920 x 1080 165Hz
HDMI 2.0: 1920 x 1080 165HzHDMI 1:4: 1920 x 1080 120 Hz |
|
| Power Consumption | AC input power consumption | 34W Typical 48W Max |
| Standby power consumption (Max) | Standbys 0.5 W | |
| Input Connector | DP (only for DP model)HDMI signal (only for HDMI input model) | |
| Input video signal | DP Signal (only for DP input model)HDMI signal (only for HDMI input model) | |
| Speakers | 3W x 2 | |
| Audio effect | Audio output (only for audio output model) | |
| Adapter | DC12 |
|
| Environmental conditions | Operating temperature 0oC – 40oCStorage temperature 20oC – 60oC
Operating humidity: 10-85%RH |
|
| Machine size | 616.2 x 528 x 238.5 mm | |
| Weight (net) | 5.13 kg/Unit (net) | |
| Machine Specifications | Indication: -5o to 15o
Rotation: Left or right rotation by 15o Height adjustable: Lift support base with 110mm travel removable monopod: Yes |
If you have any question regarding use of the monitor, Please visit:https://www.coolermaster.com/warranty
[xyz-ips snippet=”download-snippet”]