![]()

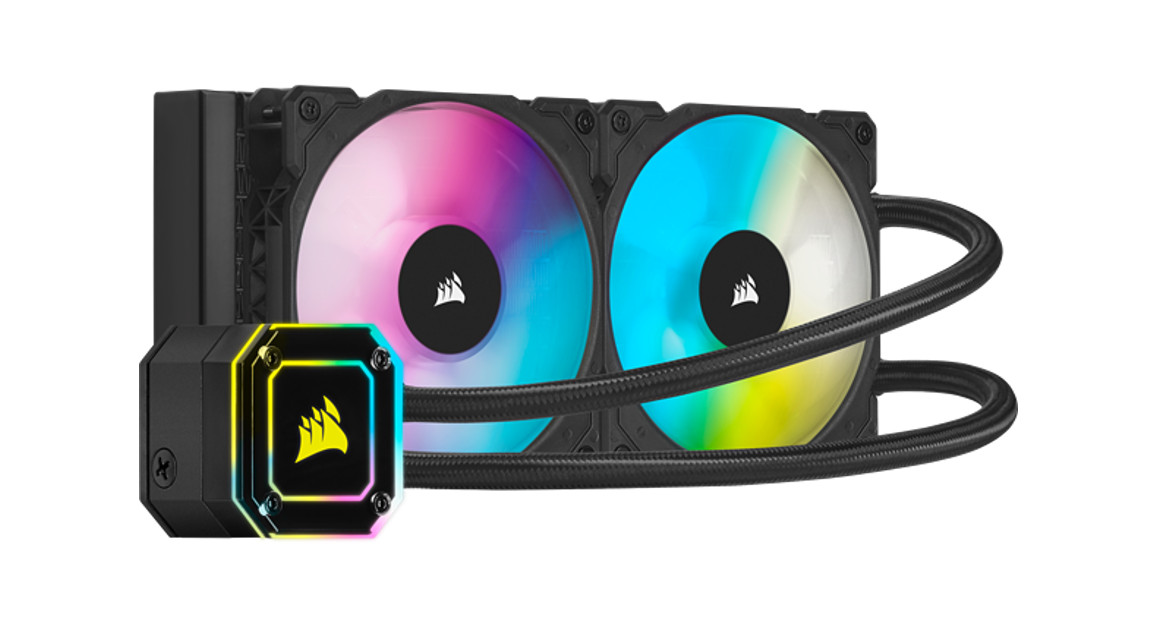
iCUEH100i | H115i | H150i | H170iELITE CAPELLIXHigh Performance RGB Liquid CPU Cooler
NOTE: Most newer PC cases include a CPU cutout to allow access to the underside of the motherboard.If your case does not include a cutout, you will need to remove your motherboard from the case before installation. The iCUE RGB ELITE CAPELLIX coolers come with the Intel mounting bracket pre-installed on the pump for quick installation.
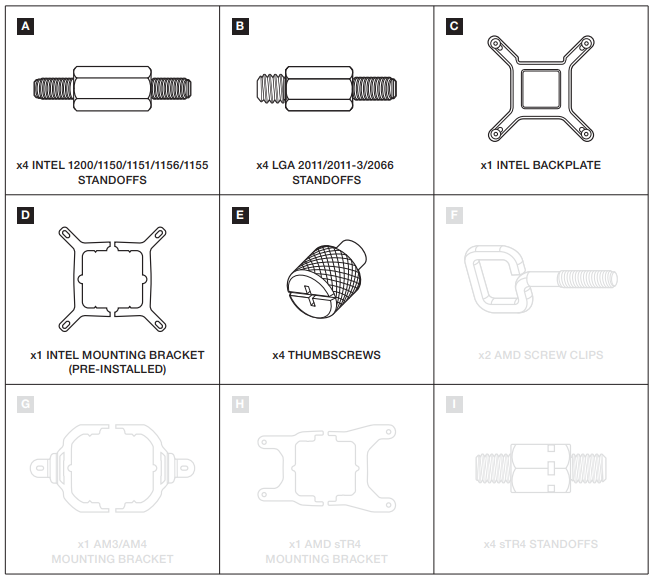
INCLUDED HARDWARE
Highlighted parts for Intel installation only

INSTALLING THE INTEL BACKPLATE
NOTE: Intel LGA 2011/2011-3/2066 do not require backplate installation. Proceed to step 2.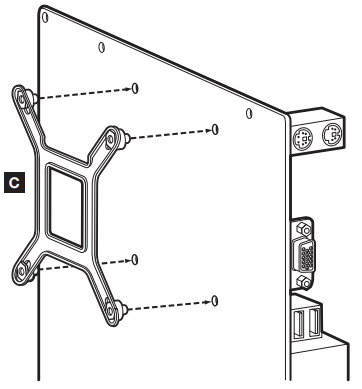
INSTALLING THE INTEL STANDOFF SCREWS
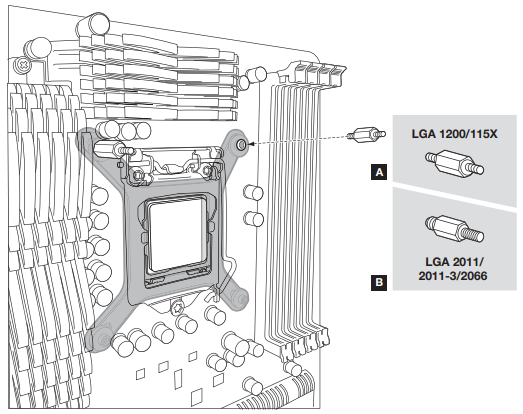
> Attach the provided Intel standoff for your socket.> Use (A) for LGA 1200/115X or (B) for LGA 2011/ 2011-3/2066.> Tighten all four screws until firmly secured.
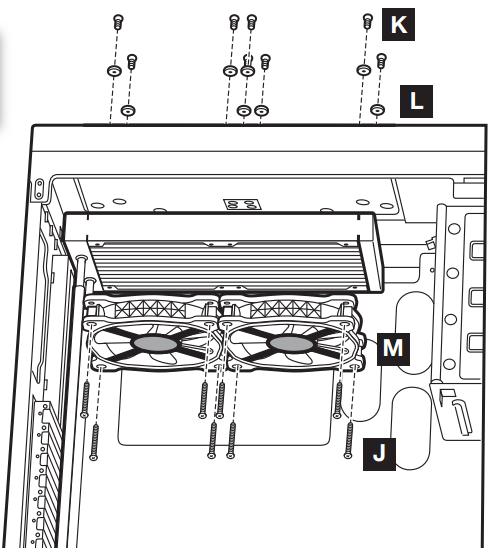
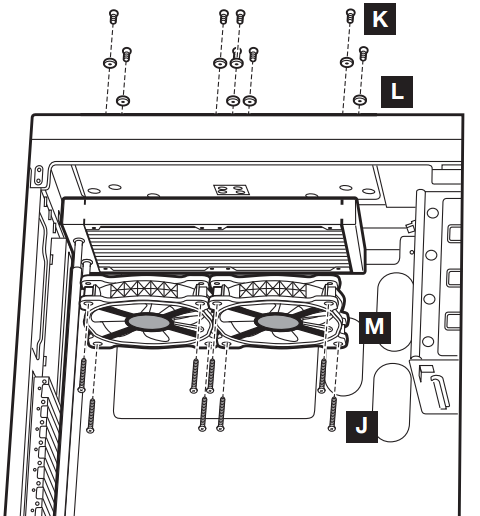
INSTALL THE FANS AND RADIATOR
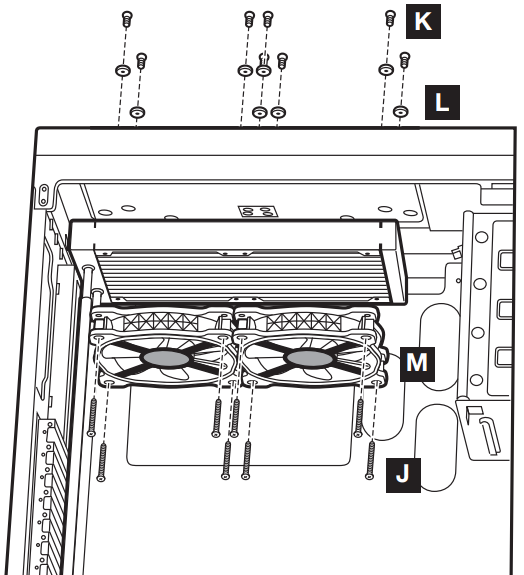
Attach the radiator and the fans as shown. For the best cooling performance, we recommend mounting the fans as an air-intake to your PC case.
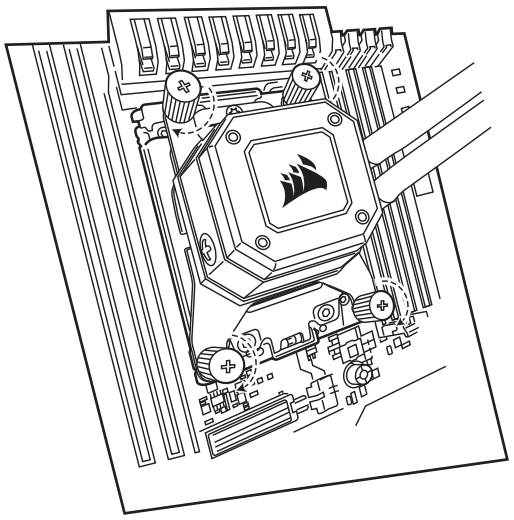
INSTALLING THE PUMP UNIT
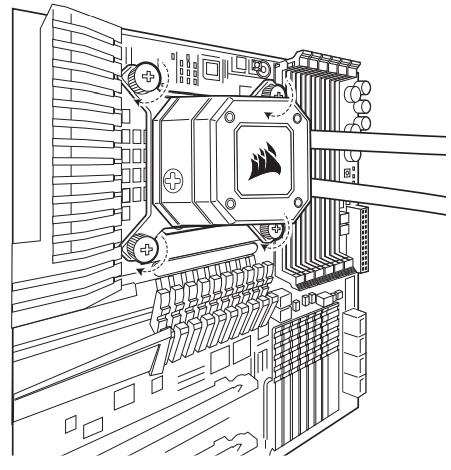
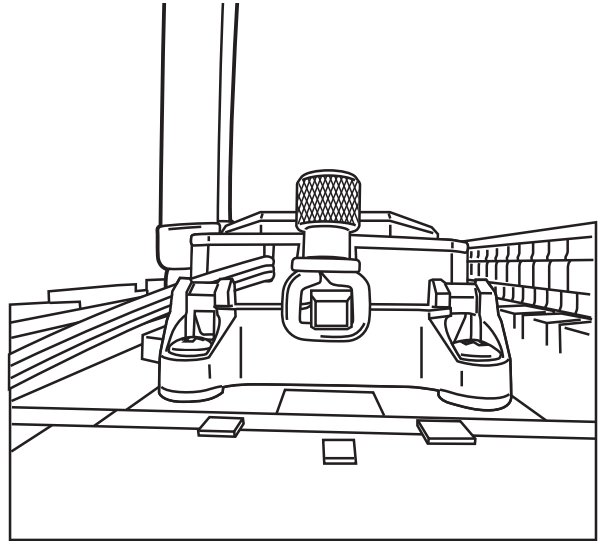
> Align the bracket and pump over the standoff screws as shown.> Attach the thumbscrews (E) to the standoff screws as shown.> Tighten the thumbscrews until all four corners are firmly secured.
PLEASE CONTINUE TO PAGE 26 TO CONTINUE YOUR INSTALLATION.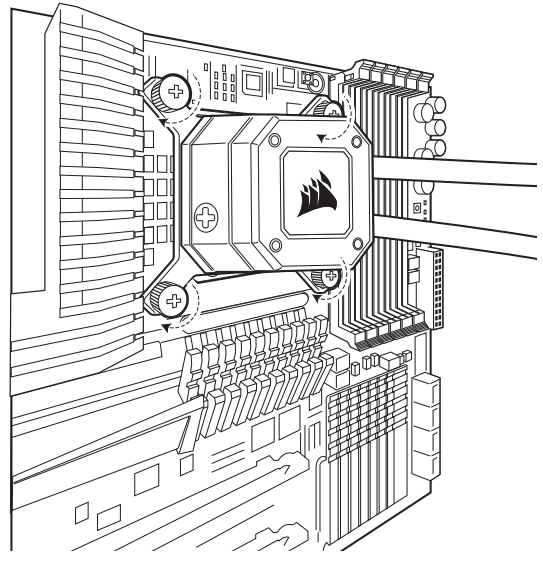
INCLUDED HARDWARE
Highlighted parts for AMD (non-sTR4) installation only
INSTALLING THE AMD (AM3/AM4) MOUNTING BRACKET
> Remove the integrated Intel mounting bracket (figure 1).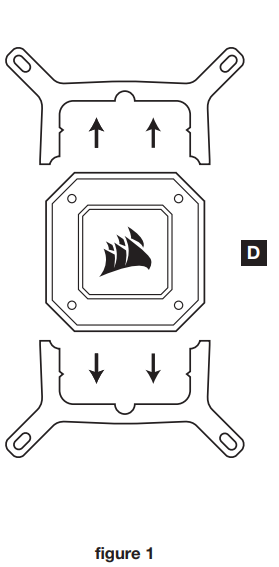 > Install the AMD bracket by pushing both sides into the slot on the pump until secure (figure 2).
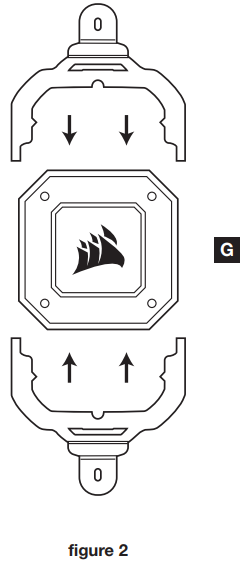 NOTE: It is important that the AMD retention bracket be evenly secured on all sides before installation.
INSTALL THE FANS AND RADIATOR
Attach the radiator and the fans as shown. For the best cooling performance, we recommend mounting the fans as an air-intake to your PC case.
PREPARE THE MOUNTING BRACKET

Insert the AMD screw clips and secure with the thumbscrews as shown. Do not tighten the thumbscrews all the way.
INSTALL THE PUMP UNIT
Align the bracket with the stock AMD mounting clips as shown. Tighten the thumb screws until secure.
PLEASE CONTINUE TO PAGE 26 TO CONTINUE YOUR INSTALLATION.
INCLUDED HARDWARE
Highlighted parts for AMD sTR4 installation only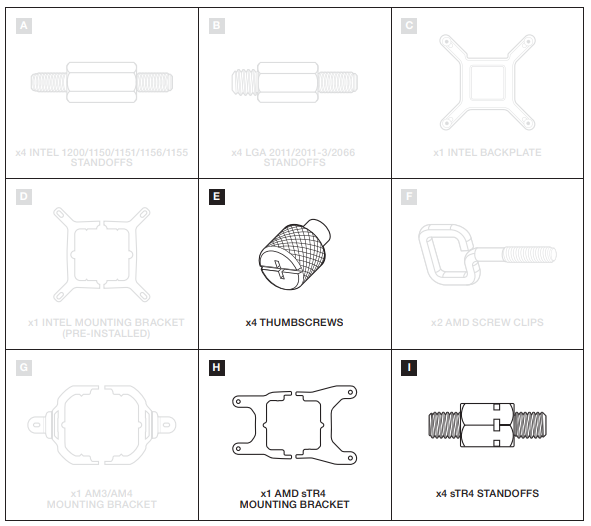
INSTALLING THE AMD sTR4 MOUNTING BRACKET
> Remove the integrated Intel mounting bracket (figure 1).> Install the AMD sTR4 bracket by pushing both sides into the slot on the pump until secure (figure 2).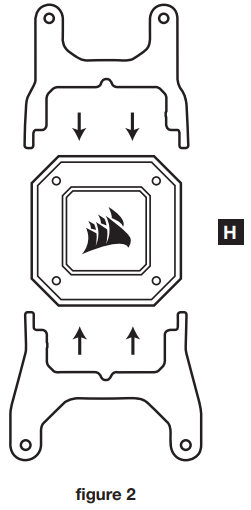 NOTE: It is important that the AMD sTR4 retention bracket be evenly secured on all sides before installation.
INSTALLING THE AMD sTR4 STANDOFF SCREWS
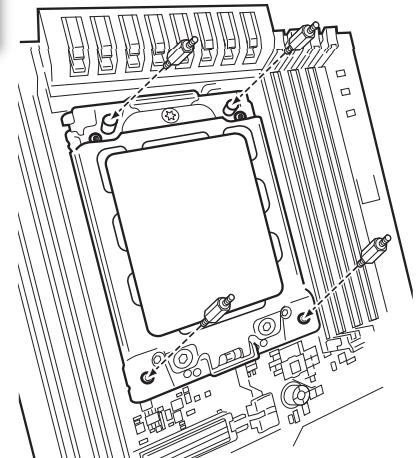
> Attach the provided AMD sTR4 standoffs to the CPU socket.> Tighten all four screws until firmly secure.
INSTALL THE FANS AND RADIATOR
Attach the radiator and the fans as shown. For the best cooling performance, we recommend mounting the fans as an air-intake to your PC case
INSTALLING THE PUMP UNIT
> Align the bracket and pump over the standoff screws as shown.> Attach the thumbscrews (E) to the standoff screws as shown.> Tighten the thumbscrews until all four corners are firmly secured.
PLEASE CONTINUE TO PAGE 26 TO CONTINUE YOUR INSTALLATION.
CONNECT FANS AND PUMP TO COMMANDER CORE
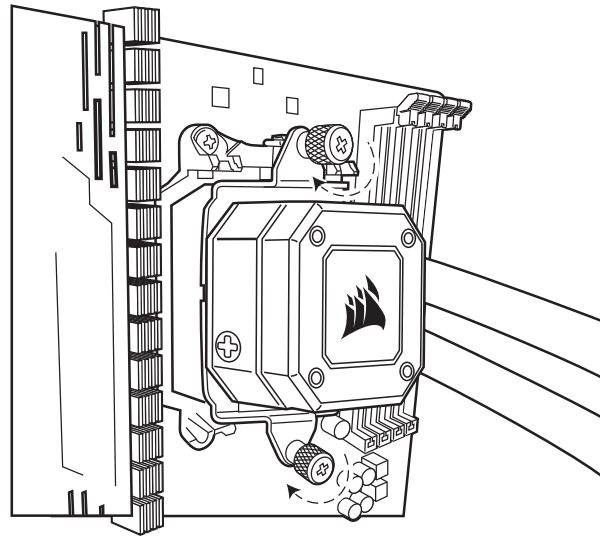
> Connect pump 24-pin cable to your Commander CORE (figure 1).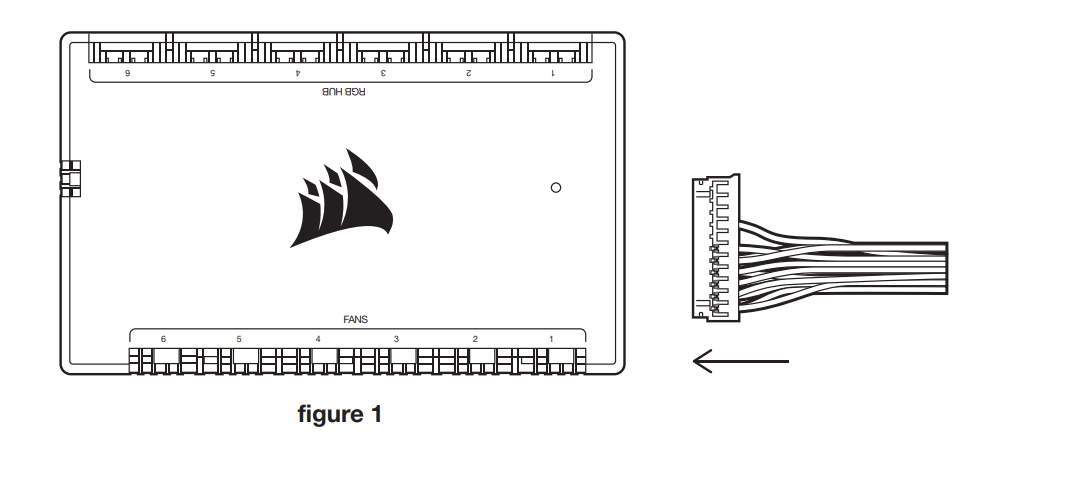 > Connect pump tach cable to the CPU_FAN header on your motherboard (figure 2).
 > Connect each fan to the Commander CORE (figure3)
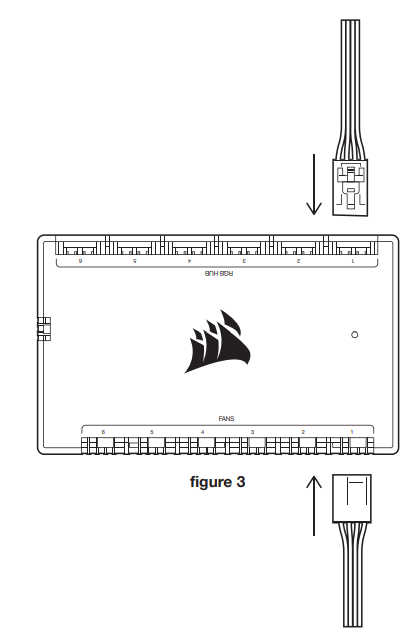 > Connect each fan RGB lead to the Commander CORE (figure 3)
CONNECT COMMANDER CORE TO USB 2.0 HEADER AND POWER

> Using the attached USB cable, connect the Commander CORE to a motherboard USB 2.0 header.> Connect the pump power cable to an available SATA power plug from your power supply.
FAQ
- How do I know the direction of the air flow of the fan?An arrow located on the side of the fan indicates the direction of air flow.
- Can I reuse the pre-applied thermal paste on the cooler for re-installation?Re-installation of the cooler will require you to clean off the pre-applied thermal paste and apply an aftermarket paste.
- What orientation should I install my radiator?The best way to install a radiator is with the tubes on the bottom of the case, though you can install it with the tubes in any position, including an inverted radiator, as long as the highest point in the radiator is visibly higher than the CPU pump.
POWER RATING
: 12V![]() 0.3A (H100i Cooler/RWF0047): 12V
0.3A (H100i Cooler/RWF0047): 12V![]() 0.3A (H115i Cooler/RWF0047): 12V
0.3A (H115i Cooler/RWF0047): 12V![]() 0.3A (H150i Cooler/RWF0047): 12V
0.3A (H150i Cooler/RWF0047): 12V![]() 0.3A (H170i Cooler/RWF0047): 12V & 5V
0.3A (H170i Cooler/RWF0047): 12V & 5V![]() 4.5A (Controller/RWF0048)
4.5A (Controller/RWF0048)
| WEB: corsair.com
PHONE: (888) 222-4346 SUPPORT: support.corsair.com |
BLOG: corsair.com/blog
FORUM: forum.corsair.com YOUTUBE: youtube.com/corsairhowto |
|
| © 2021 CORSAIR MEMORY, INC. All rights reserved. CORSAIR and the sails logo are registered trademarks in the United States and/or other countries. All other trademarks are the property of their respective owners. Product may vary slightly from those pictured. 49-002033 AC |  |
References
[xyz-ips snippet=”download-snippet”]