
![]()
SLIDINGSHOWER & TUB DOOR
COPY THE MODEL NUMBER FOR YOU RECORDS HERE #
READ THE INSTRUCTIONS CAREFULLYFamiliarize yourself with all the parts as shown in the exploded view. The exploded view will also provide a helpful reference when relating to the location of the various parts and how they are mounted.

Please visit us on YouTube and view our shower door installation videos.One may be available for your installation. www.youtube.com/foremostgroups.
Toll Free Customer AssistanceMonday-Friday, 9:00 a.m. To 5:30 p.m. EST
6241 Northwind Parkway, Hobart, IN USA 46342www.ForemostBath.com
1-888-620-3667 US Customers1-888-256-7551 Canada Customers
5970 Chedworth Way, Unit B, Mississauga, Ontario, Canada L5R 4G5www.ForemostCanada.com

– 1 –
PART LIST
(1)  TOP TRACK (1 pc)(2)
 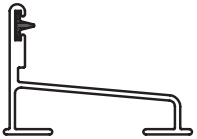 BOTTOM TRACK (1 pc)(3)
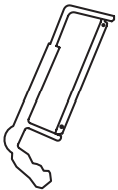
  WALL JAMB (2 pcs)(4)
  DOOR PANEL (Outside / Inside)(5)
 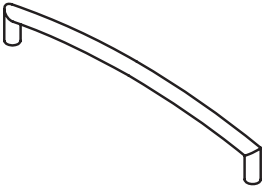 TOWEL BAR (2 pcs)(6)
 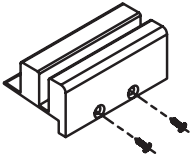 PANEL GUIDE (1 pc)(7)
 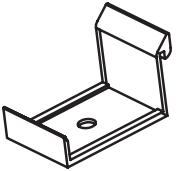 BUMPER GUIDE (2 pcs)(8)
  WALL BUMPER (6 pcs)(9)
  SAFE SLIDER CLIP (4 pcs)(10)
  GLASS HANGER (4 pcs)(11)
 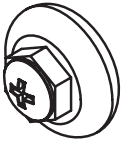 ROLLER (4 pcs)(12)
 ![]() WALL PLUG (6 pcs)(13)
WALL PLUG (6 pcs)(13) ![]() 1 1/2″ PAN HEAD SCREW (6pcs)(14)
1 1/2″ PAN HEAD SCREW (6pcs)(14) ![]() 3/8″ PAN HEAD SCREW (2pcs)(15)
3/8″ PAN HEAD SCREW (2pcs)(15)  2 3/8″ TOWEL BAR WRENCH (2 3/8″ LONG 1 pc)(16)
  SAFE SLIDER INSTALL ROD (4″ LONG 1 pc)
![]()
WARNING: Safety glass should alway be worn when working with tempered glass.
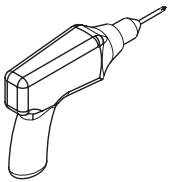
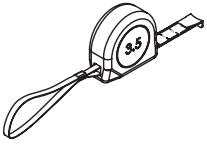
RECOMMENDED TOOLS
(1)  (2)
(2)  (3)
(3)  (4)
(4) 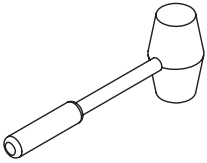
SILICONE DRILL TAPE MEASURE RUBBER MALLET(5) ![]() 1/8″ (3mm)
1/8″ (3mm) ![]() 1/4″ (6mm) (6)
1/4″ (6mm) (6) 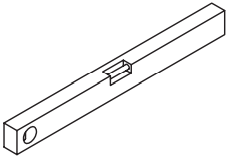
DRILL BITS LEVEL
(7)  (8)
(8)  (9)
(9)  (10)
(10) 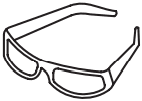
PENCIL SCREW DRIVERS HANDSAW SAFETY GLASSES
– 2 –
INSTALLATION PROCEDURE / STEP 1
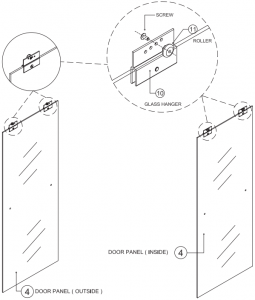
1 Attach rollers to hanger clips on both panels. Rollers should be mounted so that the head of the mounting screw is on the same side of the panel as the screw head set into the hanger clip(see inset drawing).
NOTE: The various holes in the hanger clip are used to fine tune the adjustment of the panel to make up for walls that are slightly out of square or plumb. For best results start with all rollers in the second hole from the top and then make adjustments as needed.
– 3 –
INSTALLATION PROCEDURE / STEP 2
2 Measure opening on bottom and cut bottom track (2) 1/8″ shorter than opening.
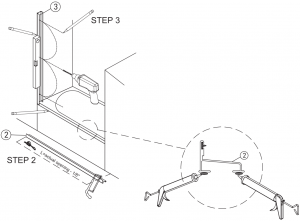
INSTALLATION PROCEDURE / STEP 3 & STEP 4
3 Place wall jamb down over bottom track so that the back of the jamb is between the bottom track and the wall. Using a level to ensure jamb is plumb, mark hole locations. Remove jamb and drill holes about 1 1/2″ deep at each of the marked locations.
![]()
NOTE: When drilling into ceramic, glass or stone use a 1/4″ (6mm) MASONRY drill bit.

NOTE: When installing on fiberglass or acrylic use a 1/8″ (3 mm) drill bit and discard the wall plugs.When installing on fiberglass or acrylic the side jambs may need to be filed at the bottom to fit the contour of the unit.
4 Repeat Step 3 on the other side.
– 4 –
INSTALLATION PROCEDURE / STEP 5
5 Run a thin bead of silicone caulk down the entire length of both bottom ledges on the bottom track. Place the bottom track into position and press down firmly along the length of the track.
![]()
(13) 1 1/2″ PAN HEAD SCREW
INSTALLATION PROCEDURE / STEP 6 / STEP 7
6 Push wall plugs into holes drilled in Step 3 and tap them in with a rubber mallet.
NOTE: If you are installing on fiberglass or acrylic, skip this step and discard the wall plugs.
7 Dab silicone into all 3 holes on each side. Run 1 1/2″ pan head screws through wall bumper and use to attach wall jamb to wall in top and bottom holes only on both sides.
– 5 –
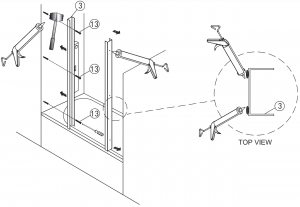
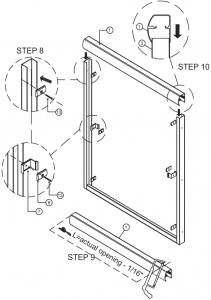
INSTALLATION PROCEDURE / STEP 8 / STEP 9 / STEP 10
8 Use 1 1/2″ pan head screws to anchor wall bumper and bumper guide into center hole on each side.
9 Measure opening at top of wall jamb, cut top track (1) 1/16″ shorter than opening.
10 Place top track down over wall jambs as shown.
![]()
(13) 1 1/2″ PAN HEAD SCREW
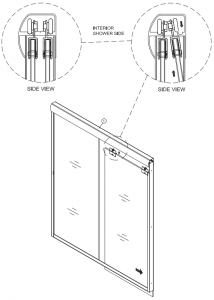
INSTALLATION PROCEDURE / STEP 11
11 Install outer door panel by lifting up & into top track (1) (Do not lift by towel bar, be careful not to bump panel against metal track.)

– 6 –
INSTALLATION PROCEDURE / STEP 12
12 Install inner door panel by lifting up & into top track (Do not lift by towel bar).
– 7 –
INSTALLATION PROCEDURE / STEP 13 / STEP 14
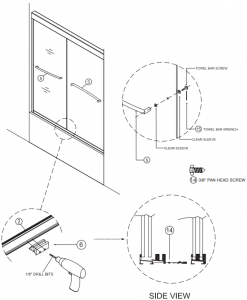
13 Install towel bars (5).
14 Position panel guide in center of bottom track. Drill two 1/8″ holes through screw holes in guide and into bottom track. Position panels in guide as shown in inset drawing and attach guide to bottom track using 3/8″ pan head screws.
– 8 –
INSTALLATION PROCEDURE / STEP 15
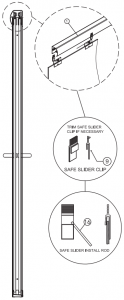
15 Install safe slider clip (9).To install safe slide clip, put install bar into clip and lift onto clip hanger pull down leaving clip in place.
![]() 24 Hours
24 Hours
FINAL STEP:Caulk both sides of the shower door frame to seal. Keep the entire area dry for a minimum of 24 hours.

– 9 –
![]()
ATTENTIONCONSUMER:
IMPORTANT SHOWER ENCLOSUREWARRANTY INFORMATION
PLEASE DO NOT DISCARD
Thank you for your purchase of a shower door from Foremost® Groups, Inc.
In order to be eligible for product warranty, please register your door on our website within two (2) weeks of installation.Go to:www.ForemostBath.com/registrationand follow the instructions.
For any questions or comments about your new shower door, please contact our Customer Service at:
US CUSTOMERS:1-888-620-3667[email protected]
6241 Northwind ParkwayHobart, IN USA 46342
CANADA CUSTOMERS:1-888-256-7551[email protected]
5970 Chedworth Way, Unit BMississauga, Ontario, Canada L5R 4G5
© 2021 Foremost® Groups,Inc.
References
[xyz-ips snippet=”download-snippet”]