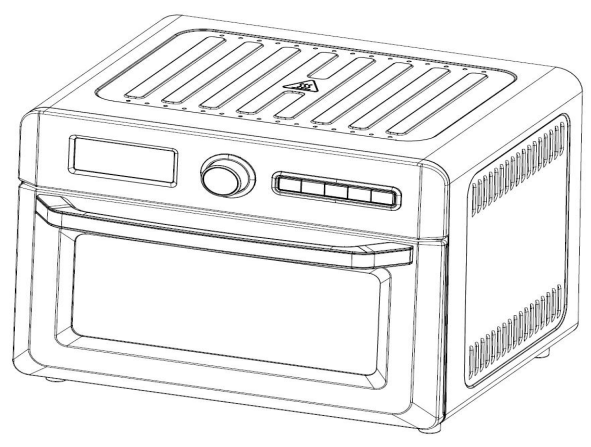
CROWN AIR FRYER OVEN 19QTINSTRUCTION MANUAL

Model: TO5712T-UL
Read this manual thoroughly before using it and save it for future reference.For product concerns, please contact [email protected]
IMPORTANT SAFEGUARDSWhen using this electrical appliance, basic safety precautions should always be followed, including the following:
- Read all instructions, product labels, and warnings before using the air fryer oven.
- Do not touch hot surfaces. The temperature of the door or the outer surface could be hot when the air fryer oven is operating. Always use oven mitts when handling hotmaterials, and allow metal parts to cool down before cleaning. Allow the units to thoroughly cool before putting in or taking off any parts. Always use the handle when opening or closing the cooking compartment or the door.
- Unplug the air fryer oven from the wall outlet, when the unit is not used and before cleaning.
- To protect against the risk of electrical shock, do not immerse the unit in water or other liquid.
- Do not operate any appliance when the plug or cord is damaged or when the appliance malfunctions or got broken in any manner. Return the appliance to the nearest authorized service facility for examination, repair, or adjustment.
- The use of accessory that is not recommended by the manufacturer may cause injury to the user or may damage the appliance.
- Do not store or use anything in the air fryer oven especially if it is not recommended by the manufacturer.
- Do not use outdoors or for commercial purposes. Do not use this air fryer oven for other functions except for the intended purposes.
- Do not let the cord hang over the edge of the table or counter. Store it properly.
- Do not place the appliance near any stovetop, hot gas, electronic burner, near other toaster oven or hot equipment for this may cause damage to the unit or fire.
- A fire may occur if the air fryer oven gets near flammable liquid or materials. Avoid positioning it near curtains, draperies, walls, and the like when in operation. Do not put any items on top of the appliance during operation.
- Do not place any flammable materials such as paper, cardboard, plastic, or other things near or inside the unit as these may easily catch fire in the air fryer oven.
- Do not cover the crumb tray or any part of the air fryer oven with metal foil for it will cause overheating.
- Avoid putting oversized food into the cooking compartment for it will cause fire or electronic shock on the air fryer oven.
- Extreme caution is necessary when disposing of hot grease after broiling. Let the unit cool down first.
- Do not clean with a metal scouring pad. Pieces may break off from the pad and may get in contact with other electrical parts which may cause electrical shock or electronic issues.
- To turn this appliance off, switch or set all the controls to “OFF”.
- To prevent a burn, do not touch the tab of the crumb tray unless the unit cools down completely.
- The appliance can be used by children aged 8 years and above. Persons with reduced physical, sensory or mental capabilities or lack of experience and knowledge may be able to use it if they will be properly assisted or supervised while using the appliance.Safe practice and safety measures must be observed. Children should not play with the appliance. Cleaning and user maintenance shall not be made by children unless they are older than 8 and if they are properly assisted or supervised.
- Keep the appliance and its cord out of children’s reach.
- The appliance is not intended to be operated by means of an external timer or separate remote-control system.
KNOW YOUR AIR FRYER OVEN


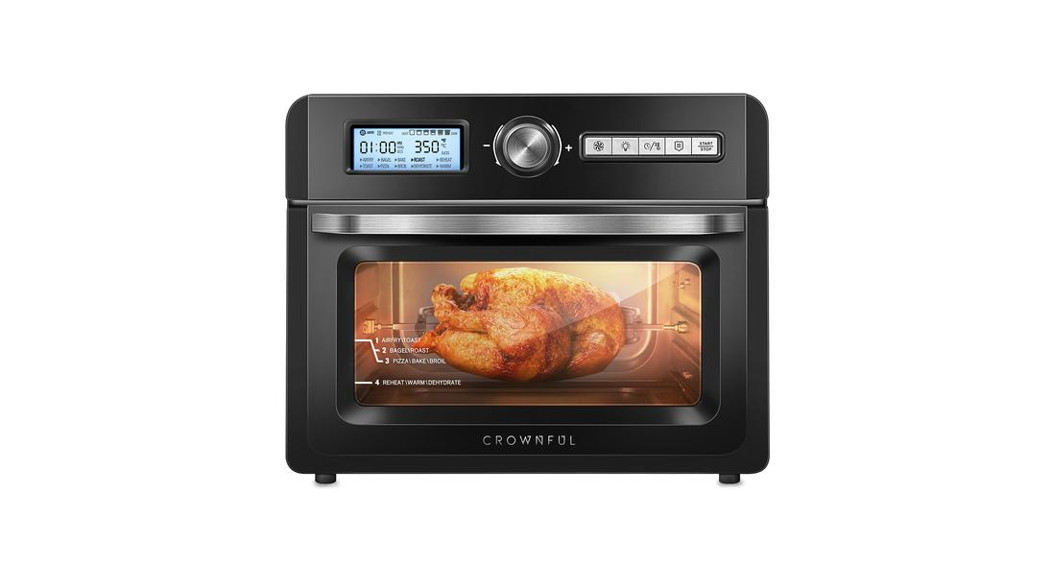
CONTROL PANEL

Function knob: This knob could set the operation status of heat element.
- AIRFRY: Both the upper heat elements and fan will be activated during the operation. Note: AIRFYER mode without rotating function.Default time and temperature is 15mins/400º F Adjustable time range is 1min-45min,The adjustable temperature range is 120-4001′ .
- BAGEL: Both the upper 2 and lower heat elements will be activated. Adjustable bagel pieces: 1-6, adjustable bagel color: 1-6.
- BAKE: Both the upper 2, the lower heat elements, and the fan will be activated during operation. You can turn off the fan by pressing the fan button.Default time and temperature is 1 hour/325T.The adjustable time range is min-4 hours. The adjustable temperature range is 120-4501″.
- ROAST: Both the upper 2 and lower heat elements, the fan, and the synchronous motor will be activated during the operation. You can turn off the fan by pressing the fan button. Default time and temperature is 1 hour/350’F Adjustable time range is min-4 hours. Adjustable temperature range is 120-450’1′.You can use the rotating function with the roasting basket, rotisserie forks, and skewer rank under the ROAST preset.
- REHEAT: Both the upper 2, the lower heat elements and the fan will be activated during operation. You can turn off the fan by pressing the fan button. Default time and temperature is 15mins/320℉The adjustable time range is 1min-2 hours. The adjustable temperature range is 120-450℉.
- TOAST: Both the upper 2 and the lower heat elements will be activated during the operation.Adjustable toast pieces:1-6. Adjustable toast color: 1-6.
- PIZZA: Both the upper 2, the lower heat elements and the fan will be activated during the operation. You can turn off the fan by pressing the fan button.Default time and temperature is 20mins/375℉The adjustable time range is 1min-60mins. The adjustable temperature range is 120-400℉.
- BROIL: Both the upper heat element and the fan will be activated during the operation. Default time and temperature is 20mins/400℉The adjustable time range is 1min-20mins.There are 2 adjustable temperature settings: the low setting is at 300 ℉, the high setting is at 400℉.
- DEHYDRATE: Both the upper 2 heat elements and fan will be activated during operation. Default time and temperature is 6 hours/120℉The adjustable time range is 30mins-72 hrs. The adjustable temperature range is 85-175℉.
- WARM: Both the upper 2 and lower heat elements will be activated during the operation. Default time and temperature is 1 hour/160℉.
Fan button: If the function you choose has the fan activated already, you can press the fan button to turn off the fan. If the fan is not running (OFF), press the fan button to activate the fan.NOTE: You can’t change the fan status when you are using the following modes: Airfry, Bagel, Toast, Broil and Dehydrate mode.Lamp button: You can press the lamp button at any time to turn on or turn off the lamp.TIME/TEMP button: You can press the time/temp button, and then turn the function knob clockwise to add time/temperature (+), turn the function knob counterclockwise to decrease time/temperature (–).If you choose Bagel and Toast mode, you can press the time/temp button, and then turn the function knob clockwise to add pieces/toast color (+), turn the function knob counterclockwise to decrease pieces/toast color (–).NOTE: You can’t change the time/temperature when you are using the following modes:Bagel and Toast mode.Menu button: In standby and pause mode, if you need to choose or change the cooking preset mode, you can press the menu button.Start/Stop button: You may stop the cooking process by short pressing the start/stop button at any time, and you can adjust the time and temperature when the unit is at pause/ stand by status. During the cooking process, you can long press the start/stop button to go back to the main menu.
USING THE UNIT FOR THE FIRST TIME:Remove packing materials and any stickers. Remove the detachable accessories from air fryer oven. Wash in soapy water, rinse and dry with a cloth or paper towel.Return all the detachable accessories back in the oven.Select a location for the unit. Do not place the unit under cabinets or too close to the wall or other equipment to allow the heat to flow. Plug the unit into a designated electrical outlet.
NOTE:
- Initial start-up operation may produce a smell and smoke (For about 15 mins.). This is normal. It is due to the protective substance on heating elements which protects them while they are stored. Cook slices of lemon at 400 ℉ for 5-10 minutes to minimize the smell.
- There should be at least 30mm space between the food and the upper heating element.Observe proper spacing. Do not overfill the unit with the food.
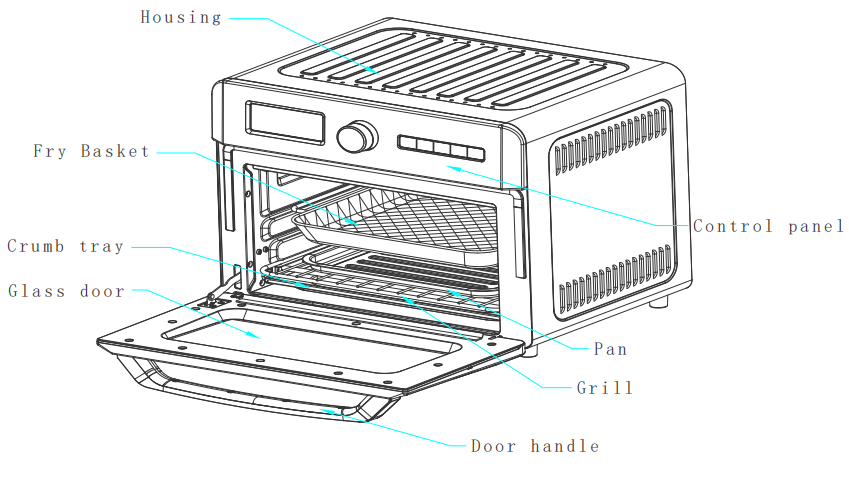
- The baking pan can be placed on the grill rack/ slot.
- Always monitor the food when the cook at a high setting to ensure that you are not overcooking. Check or turn over halfway through the cooking process.
- The inner compartment is equipped with different heights of slots for variations of cooking in order to get a perfect result.
- Make sure that the crumb tray is in place before using it.
USING YOUR AIR FRYER OVEN
- Plug the power cord into the outlet.
- The LCD display lights up, the default mode is the AIRFRY function. You can choose the function you need by turning the function knob.
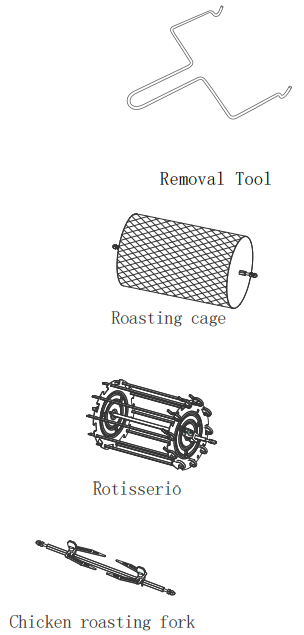
- There are 10 preset functions to choose from: airfry, toast, bagel, pizza, bake, broil, roast, dehydrate, reheat, warm. Turning the knob once changes the functions.Note:① If you choose the Roast function, you should take out the roasting cage, chicken roasting fork (roasting spit) or other rotisserie tools after the unit has totally cooled down to avoid burning.② If you want French fries, you can choose the Airfry function, we suggest you use the fry basket. If you want to toast meat or other food, better use the toasting pan, not the fry basket.③ Dehydrate function is used to dry vegetables and fruit. You can use a fry basket to cook.④ Roasting cage is used for roasting nuts and coffee beans.⑤ Rotisserie is used for roasting sausage and chunky meat.⑥ Chicken roasting fork is used for roasting whole chicken around 1250g and roasting/ cooking chicken wings.
- After choosing the function you need, you can press the start/stop button to start working, The unit will work in its default time and temperature.If you need to adjust the time or temperature, you can do that in a standby or pause status.Press the TIME/TEMP button, and turn the function knob to choose the time you need, then press the TIME/TEMP button again to confirm the time and the display will show the temperature adjusting mode.Adjust the temperature by turning function knob (+) or (-).Once set, press the start/stop button again to start cooking.
- Unplug the unit from the outlet after use.
USEFUL TIPS
- Condensation or moisture may appear on the air fryer oven’s door while cooking some foods. This is normal.
- Cook food immediately after defrosting.
- Frozen foods and thick meat will take longer to cook. Add cooking time if necessary.
- Avoid opening the air fryer oven’s door too frequently to prevent heat loss.
- When baking, smoke will likely to appear. Removing excess fat prior to baking can reduce this.
CLEAN AND MAINTENANCECaution: Before cleaning the air fryer oven unplug it and allow it to cool completely.
- Wash all the attachments with mild soap and water.
- Use a damp soft cloth to clean the inner of the oven, remember to clean it regularly.
- Clean the door by using a warm cloth with soap.
- Do not immerse the unit in the water to clean the appliance.
- When cleaning the crumb tray, open the air fryer oven door and simply pull out the crumb tray outwards.Wipe the crumb tray with a damp cloth. After cleaning, push the crumb tray back into its position.
- DO NOT use the dishwasher to clean any of the accessories that are included with this product.
- DO NOT use any abrasive cleaning products.
- CLEAN accessories with a soft cloth in warm water with liquid detergent or soap.
- Do not wipe the heating elements.
- Do not install the wire rack or baking pan on the lower heating element directly.
- Do not use any metal pad to clean the surfaces of the oven to avoid damaging the finish and the surface.
CAUTIONTo prevent the countertop from any damage, the air fryer oven must be operated with the crumb tray properly in place, securely closed, and free of any excess food or grease.Never operate your air fryer oven with the opened oven door.Never put the baking pan (or any other accessory) directly on any of the heating components. Use the tracks or the slots and observe the proper spacing of the attachments and the food inside.
TECHNICAL PARAMETERS
Model: T05712T-ULPower source:120V — 60HzRated power:1550WUnit size: 400 X 380 X 340mmCUSTOMER SUPPORT:
For product concerns, please contact [email protected]
[xyz-ips snippet=”download-snippet”]

