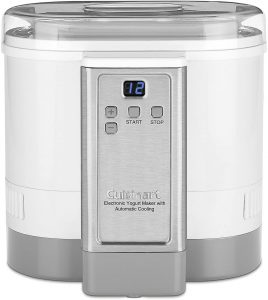
Cuisinart Electronic Yogurt Maker with Automatic Cooling Instruction and Recipe Booklet
CYM-100
For your safety and continued enjoyment of this product, always read the instruction book carefully before using.
IMPORTANT SAFEGUARDS
When using an electrical appliance, basic safety precautions should always be adhered to, including the following:
- READ ALL INSTRUCTIONS.
- Always unplug unit from outlet when not in use, before putting on or taking off parts and before cleaning. To unplug, grasp plug and pull from electrical outlet. Never pull cord. Allow to cool before handling.
- To protect against risk of electric shock, do not put motor base in water or other liquids.
- Close supervision is necessary when any appliance is used by or near children.
- Do not operate any appliance with a damaged cord or plug, after the appliance malfunctions, or if appliance has been dropped or damaged in any manner. Return the appliance to the nearest authorized Cuisinart Service Facility for examination, repair, and electrical or mechanical adjustment.
- The use of attachments not recommended or sold by Cuisinart may cause fire, electric shock or injury.
- Do not let cord hang over edge of table or counter, or touch hot surfaces.
- Do not plug in or take out plug when your hands are wet.
- Do not use outdoors.
- Do not touch hot surfaces. Use handles or knobs.
- Do not operate your appliance in an appliance garage or under a wall cabinet. When storing in an appliance garage always unplug the unit from the electrical outlet. Not doing so could create a risk of fire, especially if the appliance touches the walls of the garage or the door touches the unit as it closes.
- Do not use the appliance for other than intended use.
- Where applicable, always attach plug to appliance and check that the control is off before plugging cord into wall outlet. To disconnect, turn the control to OFF, then remove plug from wall outlet.
- Do not place on or near a hot gas or electric burner, or in a heated oven.
SAVE THESE INSTRUCTIONS
FOR HOUSEHOLD USE ONLY
SPECIAL CORD SET INSTRUCTIONS
A short power supply cord is provided to reduce the risks of becoming entangled in or tripping over a longer cord. Extension cords may be used if care is exercised.
If an extension cord is used, the marked electrical rating of the extension cord should be at least as great as the electrical rating of the appliance. The longer cord should be arranged so that it will not drape over the countertop or tabletop, where it can be pulled on by children or tripped over unintentionally.
NOTICE
This appliance has a polarized plug (one prong is wider than the other). As a safety feature, this plug will fit into a polarized outlet only one way. If the plug does not fit fully in the outlet, reverse the plug. If it still does not fit, contact a qualified electrician. Do not attempt to defeat this safety feature.
PARTS AND ACCESSORIES
 Scoop
Scoop- Housing Lid
- Yogurt Container Lid
- Yogurt Container
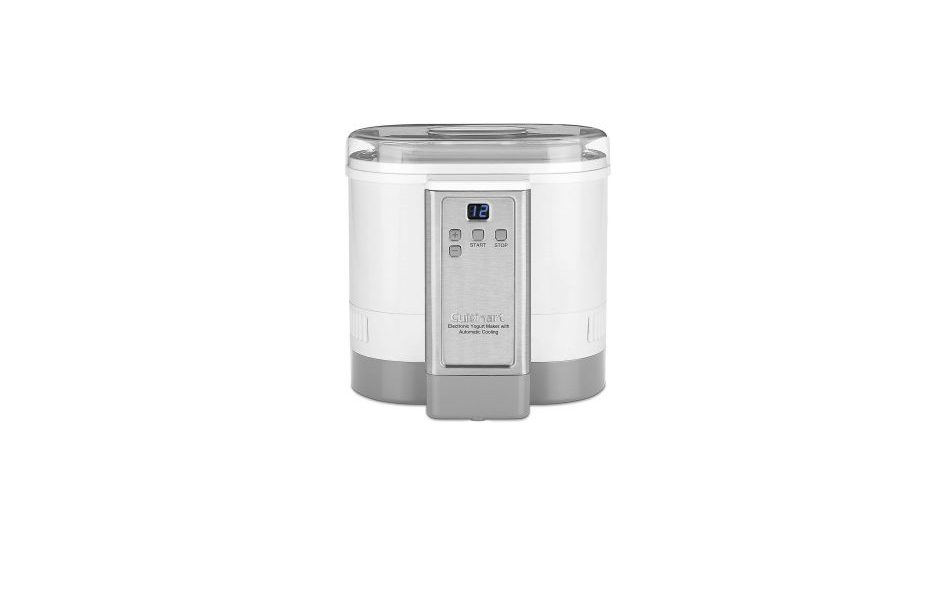
- Control Panel with LED display
- Detachable Cord
- Housing
BEFORE THE FIRST USE
Carefully unpack the unit and remove any packaging and promotional labels in or on the yogurt maker. Rinse all accessories thoroughly in warm soapy water, then dry completely
INTRODUCTION
The Cuisinart Electronic Yogurt Maker takes the guesswork out of making yogurt at home. Simply mix together ingredients and pour into the yogurt container, letting the yogurt maker do the rest. You will love the ready-to-eat chilled results.
Homemade yogurt is a healthy and more economical option to store-bought yogurt. Not only a great source of protein and calcium, yogurt also contains probiotics, or good bacteria, that are crucial for a healthy digestive system.
Either plain or flavored, yogurt is the perfect anytime food to enjoy alone, with granola or in your morning smoothie. Yogurt is also a great ingredient to have on hand in the kitchen for delicious and moist baked goods, as a secret ingredient to marinades for meat and poultry, and also the perfect vehicle for soups and sauces.
OPERATION
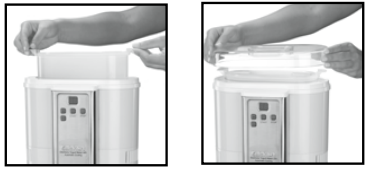
- Put all of the ingredients in the yogurt container and then cover it with the yogurt container lid.

- Place the filled container into the housing and cover with the housing lid.

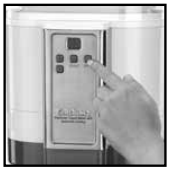
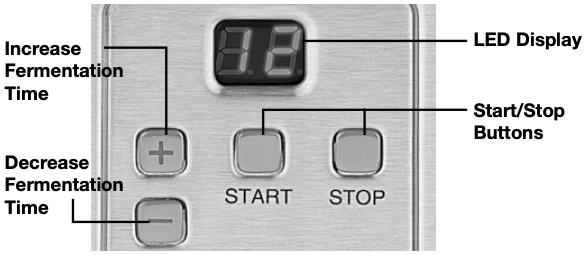
- Plug the unit in and the default* fermentation time will begin flashing on the screen. To change the fermentation time (1–24 hours) use the “+” and “-” buttons, then press the START button.
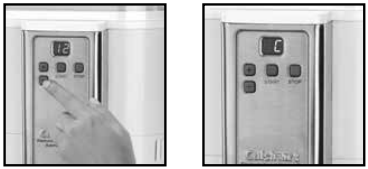
 * 8 hours is the default starting point, but refer to recipes for more specific guidelines.Note: In the case that the yogurt maker is accidentally turned off during the cooling process, it is possible to skip fermentation and proceed directly to cooling mode. To do so, scroll down past 1 hour and the LED will display “C”. Once Start is pressed, the cooling mode will begin.
- Once desired fermentation time is flashing on the LED display, press the Start button. At this point the fermentation numbers on the LED will become solid and fermentation countdown will begin.NOTE: To change the fermentation time during operation, press the StOP button. The fermentation time will begin flashing again and you can adjust the time using the “+” and “-” buttons. Once adjusted time is shown flashing on the screen, press the Start button again and the unit will adjust the time accordingly.

- After the fermentation is complete, the unit will automatically switch into cooling mode and display “C” in the LED. As long as the unit is plugged in, it will stay in cooling mode until you turn the unit off. After 8–12 hours the temperature of the yogurt will be between 43 and 52 degrees Fahrenheit (6–11 degrees Celsius).
 Note: Yogurt will be at its best and should be eaten within the first three days after completion. Yogurt can be kept for up to 8 days.
 - To turn the unit off or end the cooling cycle, press and hold the Stop button for 3 seconds.

- Once the unit is off, you can either remove the yogurt container and place it directly in the refrigerator, or use the yogurt scoop provided and divide yogurt into individual portions.
TIPS AND HINTS
Cultures and Fermentation
The taste, texture and consistency of your yogurt will depend on the type of culture that is used. Each type of culture contains different bacteria strains with individual properties that affect the tang and taste of the yogurt as well as its texture. Some yogurts are meant to be thin and runny where others are meant to be thick.
Yogurt can be fermented from a purchased culture or from yogurt that is either store bought or homemade with a reusable culture.
Use only one type of culture per batch of yogurt. Mixing cultures may force different bacteria that are not meant to coexist to compete with one another instead of properly fermenting.
Fermenting times vary depending on the type of culture used. There are two types of yogurt cultures – direct-set and reusable. These two types of cultures also vary depending on yogurt flavor – Bulgarian, Piima, Greek, etc.
Direct set cultures can be used only once and take less time to ferment, about 8–12 hours.
Reusable cultures take longer the first time used, up to 16 hours. When used again as a culturing agent, the fermentation time will be shorter, about 6–8 hours.
The Cuisinart® Electronic Yogurt Maker uses thermophilic culture. Thermophilic (heat-loving) culture needs an elevated temperature to ferment as opposed to mesophilic culture, which is best suited to ferment at room temperature. If you are unaware of what type of culture you have, check the ingredient list of the culture or ask your supplier.
When fermenting with store-bought yogurt, the average fermentation time is 6 hours.
The fermenting time can always be increased or decreased while yogurt maker is in operation.
Heating and Consistency
Different cultures yield different results, with some producing thinner yogurts than others. If after making a batch of yogurt thicker results are desired, we recommend following the step for heating the milk below before adding the yogurt base to the yogurt maker.
Heating the milk breaks down its proteins, allowing yogurt to coagulate, facilitating the thickening process during fermentation.
Heat milk on the stove to 180°F (some cultures recommend only 160°F, so follow the instructions per the particular culture).
For best results (but not essential), keep milk at this temperature for about 20 minutes.
Cool milk until a thermometer reads 110°F. Once cooled to 110°F, stir in culture and any other thickening agent into the milk so that it is fully incorporated. Transfer mixture to the yogurt maker and set the appropriate fermentation time.
If following the recommended step, subtract one to two hours from the fermentation time.
Adding dry milk powders to a culture-based yogurt will add to the thickness in the final product. For every 4 cups of milk add ¼ to ½ cup powdered milk when using cow’s milk, and ½ to 1 cup milk powder to the base when using goat’s milk.
Other thickeners can also be used to thicken yogurt. Always make a slurry with the thickener and a small amount of the milk before mixing into the entire batch.
Approximate amounts for 4 cups milk:
Tapioca starch – 2 tablespoons
Agar-agar powder– ½ teaspoon (dissolve into ½ cup water, bring to a boil and then cool before adding to mixture)
Cornstarch – 2 tablespoons
Powdered gelatin – 1 teaspoon
Finished Yogurt and Taste
We recommend checking consistency of yogurt during the fermentation process to avoid over-culturing. Begin checking yogurt on the earlier side of the recommended time range.
Yogurt should have some body and be slightly firm when fully fermented.
Always stir yogurt before serving.
Yogurt starts to over-culture when whey begins to separate. Yogurt is over-cultured when curds and whey have completely separated.
More time can always be added to under-cultured yogurt, even if it has been through the cooling cycle. However, once over-cultured, yogurt is no longer edible.
Longer fermentation times will produce a tangier yogurt, but also aid in thickening.
Strain yogurt overnight using a strainer lined with a coffee filter, for an ultra-rich and thick treat.
Do not consume any yogurt that smells, looks or tastes displeasing.
We recommend using whole milk for making yogurt, and avoiding ultra-pasteurized milk. Fuller-fat milks produce thicker yogurts.
When adding a flavor to yogurt, we recommend waiting until 6 hours after the cooling process has begun. Flavors can also be added to individual portions as needed instead of to the entire batch.
Certain flavors may shorten the shelf life of yogurt. Fruit mix-in flavors last longer and are better added to the entire batch, while sweeter syrups are best added to individual portions.
TROUBLESHOOTING
Q: Why is the consistency of my yogurt so thin?
A: To thicken the consistency of your yogurt you can heat the milk first on a stove or add a thickening agent like dry milk or gelatin. See the Tips and Hints section for more information.
A: Fermentation may not have been long enough.
A: Culture was damaged.
Q: Why did my yogurt curdle?
A: Yogurt has been over-fermented. Reduce fermentation time and begin checking yogurt on the earlier side of the recommended time range.
A: Culture was damaged.
CLEANING AND MAINTENANCE
Always make sure the appliance is unplugged before you start cleaning it.
Cleaning Accessories and Housing/Base:
Rinse the yogurt container, yogurt container lid and housing lid immediately after each use so food doesn’t dry on them. All can be washed with warm soapy water or on the top rack of the dishwasher.
Wipe the housing/base clean with a damp sponge or cloth. Dry it immediately. Never submerge the base or the plug in water or other liquids.
Storage
The Cuisinart Electronic Yogurt Maker stores neatly on the countertop in a minimum of space. When it is not in use, store the unit assembled to prevent loss of parts.
The Cuisinart Electronic Yogurt Maker is intended for HOUSEHOLD USE ONLY. Any service other than cleaning and normal user maintenance should be performed by an authorized Cuisinart Service Representative.

Cuisinart offers an extensive assortment of top quality products to make life in the kitchen easier than ever. Try some of our other countertop appliances, cookware, tools and gadgets.
Cuisinart CYM-100 Electronic Yogurt Maker with Automatic Cooling Instruction and Recipe Booklet – Cuisinart CYM-100 Electronic Yogurt Maker with Automatic Cooling Instruction and Recipe Booklet –
[xyz-ips snippet=”download-snippet”]

 Scoop
Scoop
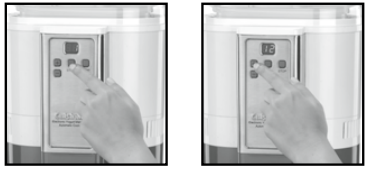 * 8 hours is the default starting point, but refer to recipes for more specific guidelines.Note: In the case that the yogurt maker is accidentally turned off during the cooling process, it is possible to skip fermentation and proceed directly to cooling mode. To do so, scroll down past 1 hour and the LED will display “C”. Once Start is pressed, the cooling mode will begin.

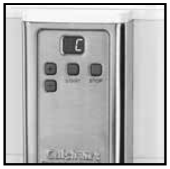 Note: Yogurt will be at its best and should be eaten within the first three days after completion. Yogurt can be kept for up to 8 days.