CZERFTransmitter radio Stereo Station wireless BroadcastInstructions Manual
Model:CZE-15A
1. Precautions for Use:
- Ensure that the supply voltage within the permissible range;
- Maintenance can only be operated by professional technician;
- Do not touch the antenna when transmitter powered;
- Do not boot in the case of not connecting antenna;
- Do not use transmitter in explosive environment (such as gas station, gas, steam, etc.);
- Do not place or use the transmitter in extremely dusty, humid and high temperature environment;
- Be sure to comply with local regulatory agencies require to use transmitter.
2. Product Feature
This model 15W stereo audio fm transmitter is one of the most classical models in our factory. It is the largest selling item and with compact body. It has 8 major characteristics.
- High fidelity and high stable: Its main board is adapted new generation integrated NC FM stereo radio transmitter chip BH414 from Japan ROHM Company. It built-in PLL frequency PLL, audio pre-emphasis, limiter and low pass filter circuit. It can achieve high-fidelity, highly stable signal transmission.
- Stereoscopic tune is clear: Control panel is composed of AT89C2051 and AT24C02; After the 2 pieces of 2sc3355 three-level power amplifier and 1 piece of 2sc2053 and ensure that the output of the stereo sound effect;;
- Good shielding: compact design, would not happen frequency drift resulting from induction because of external signal.
- Good heat dissipation: Use high-quality aluminum alloy chassis, lightweight and excellent heat dissipation, can guarantee the stability of continuous work equipment;
- Easy to use:Panel with LCD, display transmission frequency, according to the identity of each interface to connect to other hardware, easy to adjust, and intuitive.
- Switching Power:3W and 15W can be switched using.
- Switching Frequency:87.5M ~ 110M range can be set, such as 86M ~ 90M, 95M ~ 108M, 87M ~ 108M
- This subsection with microphone and volume control functions.
- Temperature Protection, can set up their own temperature protection.
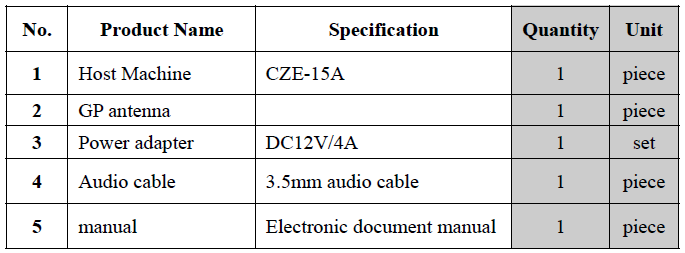
3. Product Configuration
Operation Instruction
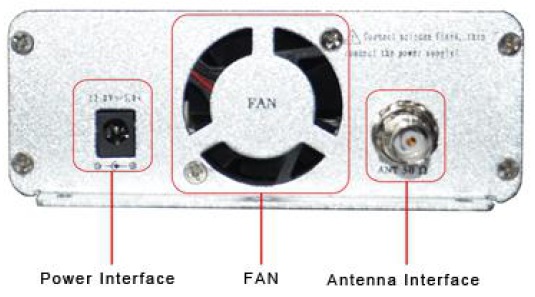
Schematic diagram of front panel and back panel
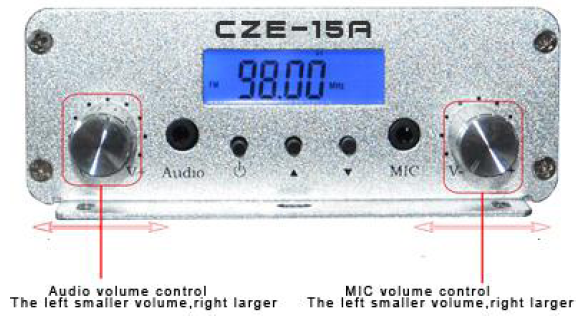
Front Panel

Back Panel
Audio Volume and Microphone Adjustment
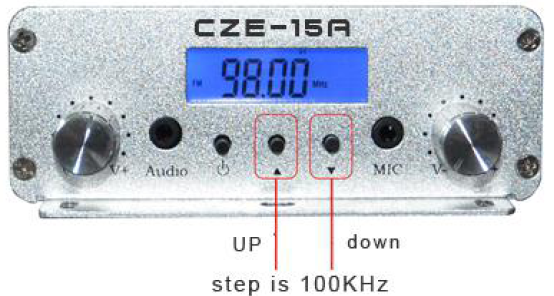
Frequency Adjustment
Power Adjustment
The power output of two tranches: High Profile (H): > 15W; low power profile (L): <3W Connect power adapter, Operate it as follows in power off state:(Note:In different operation ways to CZE-7C and CZE-05B)
1. Press ![]() button and do not let go. Then loosen this button after 3 seconds. At this time it comes into power adjustment state, LCD screen displays “L” or “H”(Picture default as H high power profile) see it as below:
button and do not let go. Then loosen this button after 3 seconds. At this time it comes into power adjustment state, LCD screen displays “L” or “H”(Picture default as H high power profile) see it as below:

2. Press ![]() button , and set it as high power (H),3. Press
button , and set it as high power (H),3. Press ![]() button , and set it as low power (L),4. Choose the power profile you need, then press button
button , and set it as low power (L),4. Choose the power profile you need, then press button ![]() , power setting completed. And it comes into frequency range setting state.
, power setting completed. And it comes into frequency range setting state.
Temperature Control Alarm Setting:
- First, ensure that the host power supply not connected, press and hold the key to open the leftmost let go;
- Connect power supply, at this time screen displays temperature character.
- Then through the middle and right up and down keys to set the desired temperature alarm;
- Press the left key to open the confirmation, the screen display OFF;
- At last, extract the power supply adapter.
- Complete above procedures means successful setting, when you connect power it can work normally.
Frequency Range Setting:
- After power setting finished, it will come into frequency range setting state. Power setting completed, press
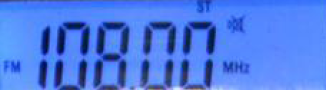
 button and LCD screen display one group of frequency. This group of frequency data is the high end of working frequency.( as picture below shows) (Its default frequency is 108MHz before leaving factory.)
 - For example, when you want to set working frequency range as 90MHz to 100MHz, through this button to adjust frequency date as 100.00MHz.
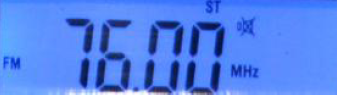
- Frequency band high end setting completed, press button , it will be into frequency band low end setting. LCD displays data as frequency band low end frequency (shown as picture) , through button to adjust data as 90.00MHz.
- Then press button again, at this time, setting finished.
- (Note: frequency band low end can not be higher than frequency band high end)
Product Technical Parameter:

Trouble Removal

[xyz-ips snippet=”download-snippet”]