D-Link Dual Band Wi-Fi Range Extender Before You Begin
 Before You Begin
- For setup, you will want your Range Extender to be plugged in to an available outlet as close to your Wi-Fi Router as possible. Once setup is complete, you can plug it in to an outlet in an area between your Wi-Fi router and where you want improved coverage. See the Troubleshooting section for tips on Wi-Fi Extender placement.
- If your wireless router or access point does not have a WPS button ( , ), follow the steps under Method Two: QRS Mobile Setup to set up your Range Extender.
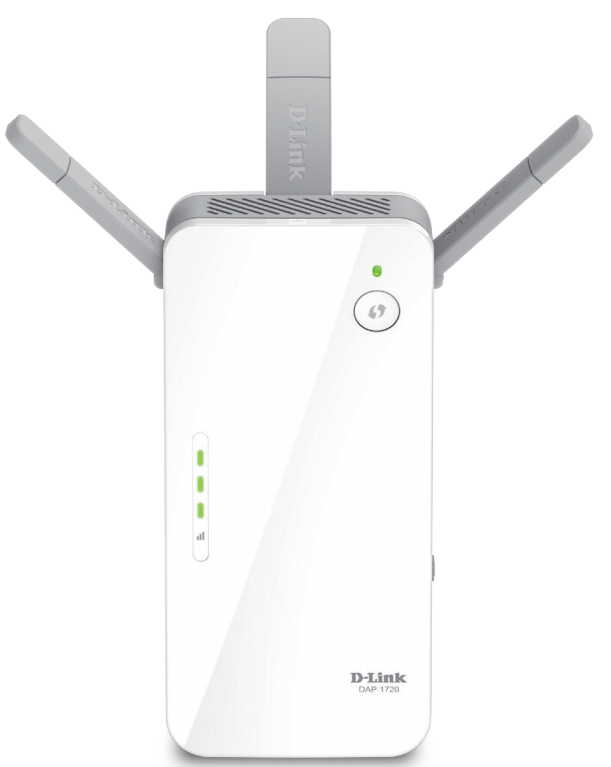
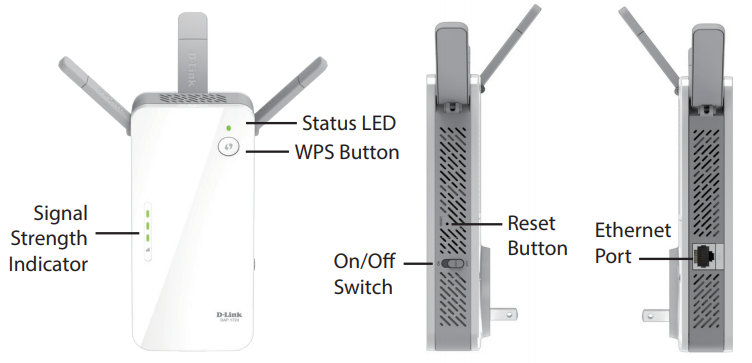
Product Overview
Method One: Quick WPS Setup
 Method One: Quick WPS Setup
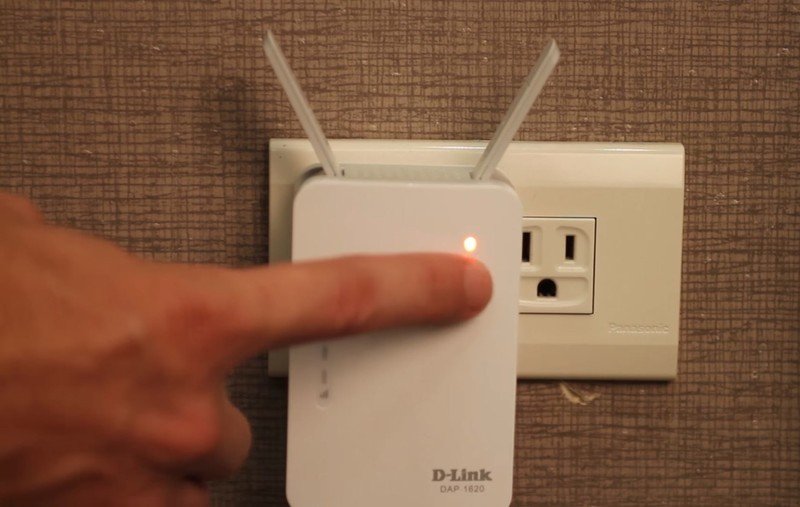
Plug your Range Extender into an available outlet near your wireless router and wait until the Status LED is blinking amber (this may take up to 3 minutes). You can move it to a more suitable location after it is set up.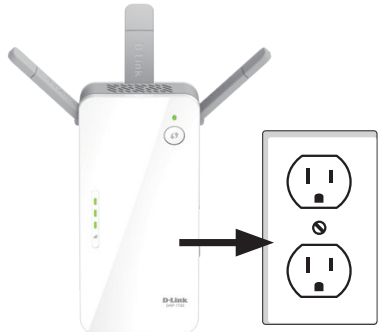
Press the WPS (Wi-Fi Protected Setup) button on your wireless router for 3 seconds. Look for the WPS light ( , ) on your router and make sure it is blinking. If it does not blink, see the important note below. WPS
Once confirmed that the WPS light is blinking on your router, within one minute, press the WPS button on your Range Extender for 2-3 seconds. The Status LED should start to blink green.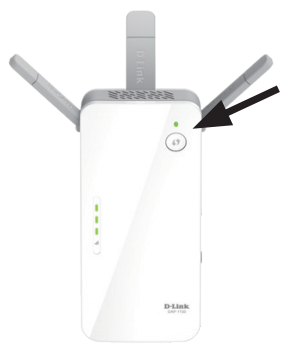
When the Status LED turns solid green (may take up to 3 minutes), this indicates that your Range Extender is connected to your wireless router. You can now unplug and move your Range Extender to a location between your wireless router and the area where you want wireless coverage.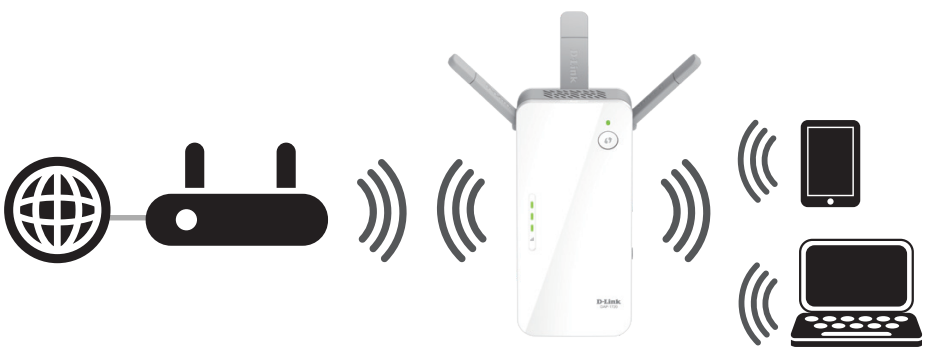 Note: If the Status LED on your Range Extender does not turn solid green after running WPS setup, try resetting the unit (see Troubleshooting – What if I forgot my Range Extender’s Admin password or want to reset my Range Extender?) and try WPS setup again. If it still does not turn solid green after following all the steps, see Method Two: QRS Mobile Setup,
If after moving your Range Extender, the signal strength indicator is showing one single amber bar or if your Range Extender LED does not turn solid green within 3 minutes, move your Range Extender to a wall outlet closer to your wireless router.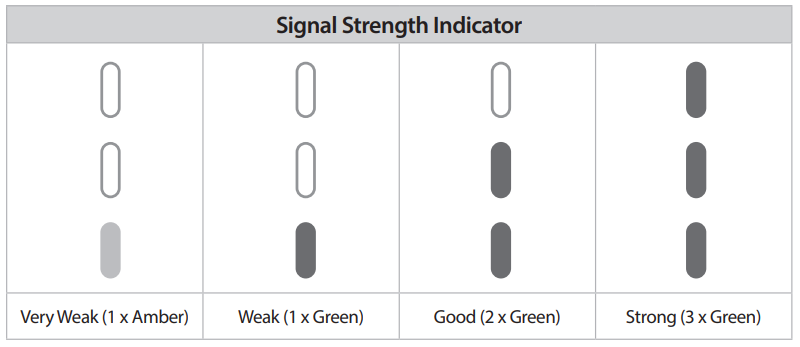
 Your setup is complete! To connect your wireless devices to your Range Extender, see Connect Your Wireless Devices
Method Two: QRS Mobile Setup
Search for “QRS Mobile” on the App Store or Google Play and download the QRS Mobile App to your iPhone, iPad, or Android device. Do not launch the app until step 4.
Plug your Range Extender into an available outlet near your wireless router and wait until the Status LED is blinking amber (this may take up to 3 minutes). You can move your Range Extender to a more suitable location after it is set up.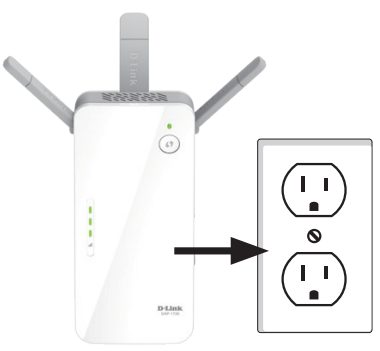
You now need to connect to your Range Extender. Go to Wi-Fi Settings on your mobile device. From the list of available Wi-Fi networks, select the Wi-Fi Name (SSID) as listed on the supplied Wi-Fi Configuration card and enter the Wi-Fi Password when prompted. Note: It is OK if you see an “Internet may not be available” notification or similar during the setup process.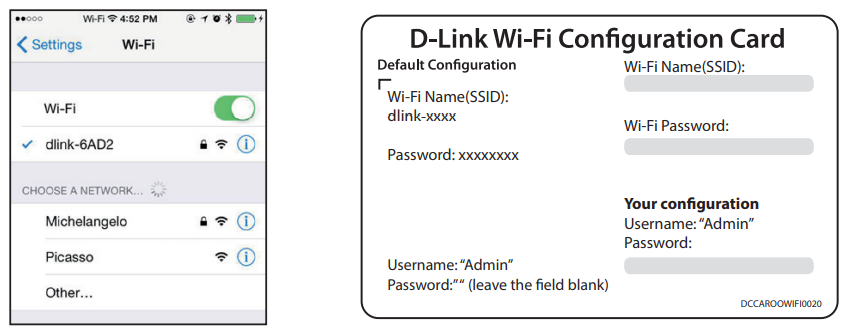
Once connected to your Range Extender, launch the QRS Mobile app, wait for the Introduction Screen to change to the Welcome Screen (this may take up to 30 seconds), then tap Start to continue.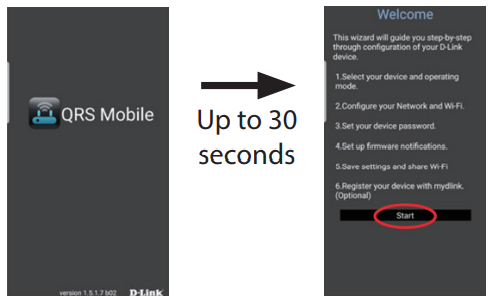
When prompted to select a Mode, select Repeater (default), then tap Next to continue. Please follow the on-screen instructions to complete the setup.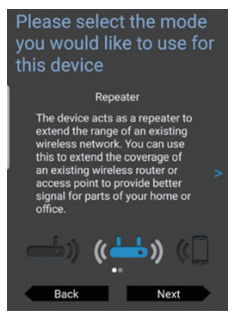
Your setup is complete! To connect your wireless devices to your Range Extender, see Connect Your Wireless Devices, below.
Connect Your Wireless Devices
From your wireless device go to Wi-Fi Settings to display the available wireless networks.If Quick WPS Setup was used to set up your Range Extender, the SSID on your Range Extender will automatically be assigned the following:
- 2.4GHz (Your Router’s SSID)-EXT
- 5GHz (Your Router’s SSID)-EXT5G
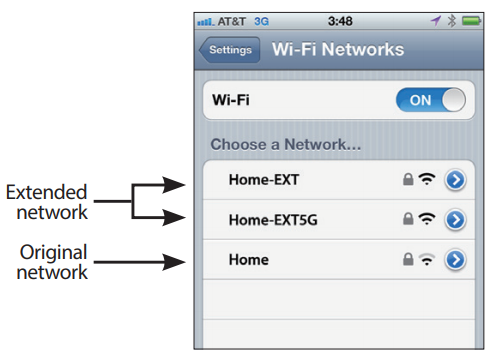
The Wi-Fi Password for your Range Extender will be the same as your router’s Wi-Fi password.If QRS Mobile Setup was used to set up your Range Extender, use the SSID and Wi-Fi Password you specified during the setup process.
Your device is now connected to your Range Extender. To connect additional devices, repeat step 1.
Troubleshooting
Why can’t I connect to my wireless router or my wireless connection drops?
1. Verify that your Range Extender is within range of your wireless router. Try plugging it into a location closer to the router and verify the Status LED is solid green.2. Note that when extending a wireless signal from a router or access point, devices connected to the Range Extender will not get the same speed/throughput as when connected directly to the router.
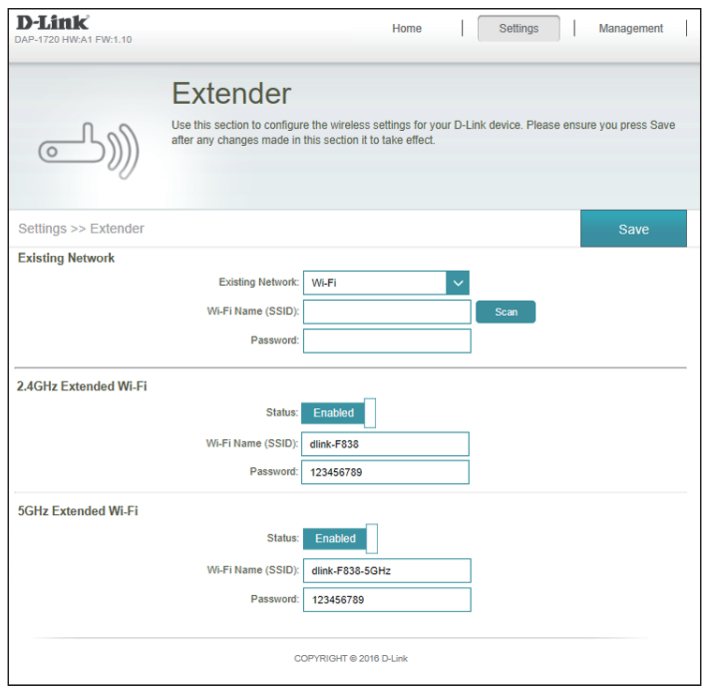
How do I change the wireless settings on my Range Extender?
- Open a web browser (e.g., Internet Explorer, Firefox, Chrome, or Safari) and go to http://dlinkap.local./
- At the login screen, enter your Admin Password (If WPS Setup was used, password is blank by default – just leave blank) and click Log in.
- Go to Settings > Extender.
- Enter a new Wi-Fi Network Name (SSID) and modify the security (Wi-Fi password) settings as needed.
- Click Save.
Note: If you have changed the Wi-Fi Network name, the device you are currently using to connect to your Range Extender will drop. You will need to go to your Wi-Fi Settings and connect to your Range Extender using the new network name and password.
Where should I place my Range Extender for best performance?
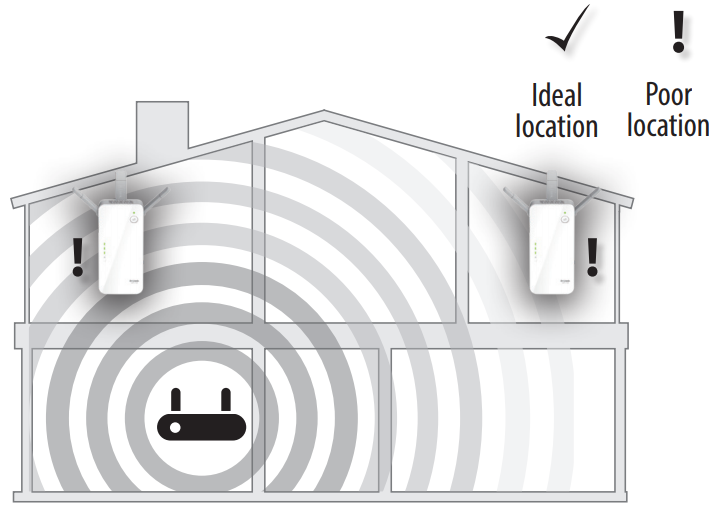
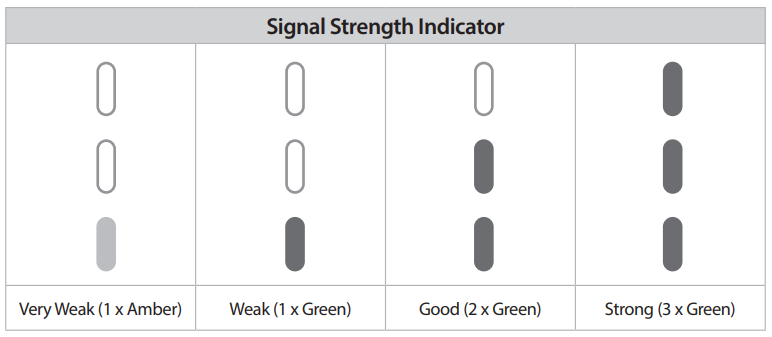
A Range Extender only works as well as the signal it is extending. Therefore, proper placement of your Range Extender is important in achieving desired results.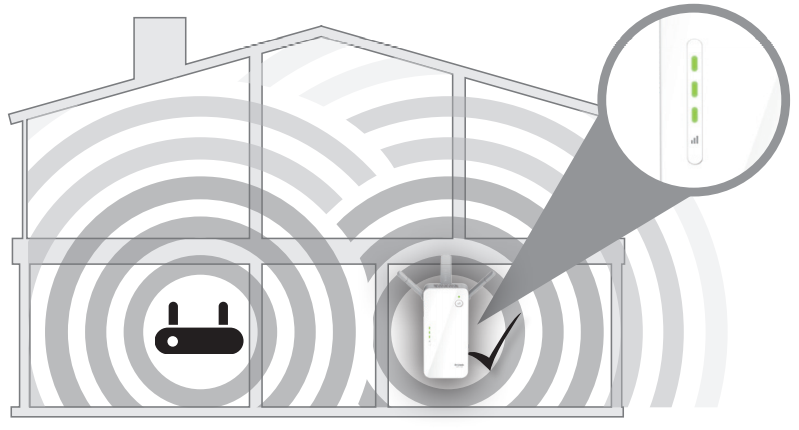 For best performance, place your Range Extender in between your router and your dead zone, making sure it is placed in a location where the Wi-Fi signal is still strong. Use the Smart Signal Indicator to help find a location with a strong signal. The more bars lit on the signal indicator, the stronger the Wi-Fi signal is
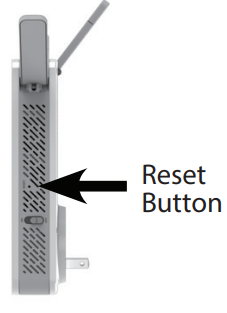
What if I forgot my Range Extender’s Admin password or want to reset my Range Extender?
- If you forgot your Admin password or want to reset your Range Extender back to the factory default settings, press and hold the reset button on the bottom of the extender using a paper clip and release after a minimum of 10 seconds. The Status light will turn red.Note: This process will erase all your settings.
- Setup your Range Extender using your preferred method
What if WPS setup is not working?
WPS may be disabled on some Routers or Modems. If the WPS Status LED on your Router or Modem does not start blinking when you have pressed the WPS button, try again and hold it a little longer. If it still does not blink, STOP, and configure your Range Extender using Method Two: QRS Mobile Setup,
GPL Code Statement
This D-Link product includes software code developed by third parties, including software code subject to the GNU General Public License (“GPL”) or GNU Lesser General Public License (“LGPL”). As applicable, the terms of the GPL and LGPL,and information on obtaining access to the GPL code and LGPL code used in this product, are available to you at: http://tsd.dlink.com.tw/GPL.aspThe GPL code and LGPL code used in this product is distributed WITHOUT ANY WARRANTY and is subject to the copyrights of one or more authors. For details, see the GPL code and the LGPL code for this product and the terms of the GPL and LGPL.
Written Offer for GPL and LGPL Source Code
Where such specific license terms entitle you to the source code of such software, D-Link will provide upon written request via email and/or traditional paper mail the applicable GPL and LGPLsource code files via CD-ROM for a nominal cost to cover shipping and media charges as allowed under the GPL and LGPL. Please direct all inquiries to:
Email: [email protected]Snail Mail: Attn: GPLSOURCE REQUESTD-Link Systems, Inc.17595 Mt. Herrmann StreetFountain Valley, CA 92708
Technical Support
This guide is for first time configuration. Please refer to the user manual to learn more. U.S. customers can contact D-Link Technical support through our website. http://support.dlink.com/
References
[xyz-ips snippet=”download-snippet”]