DALI KATCH G2 Battery Powered WiFi Bluetooth
Loudspeaker User Manual
1. INTRODUCTION
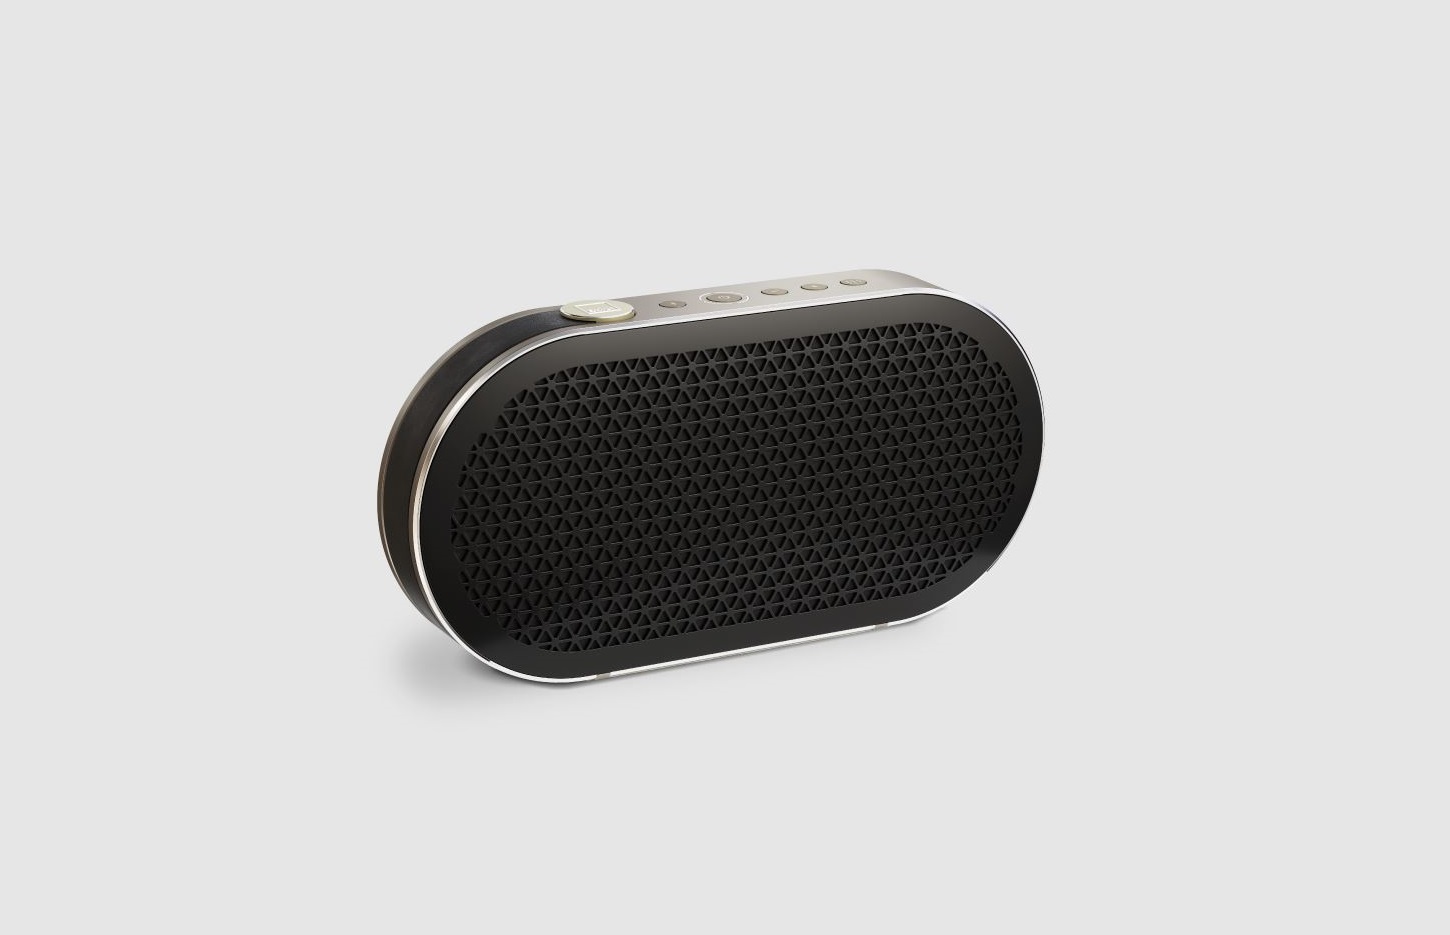
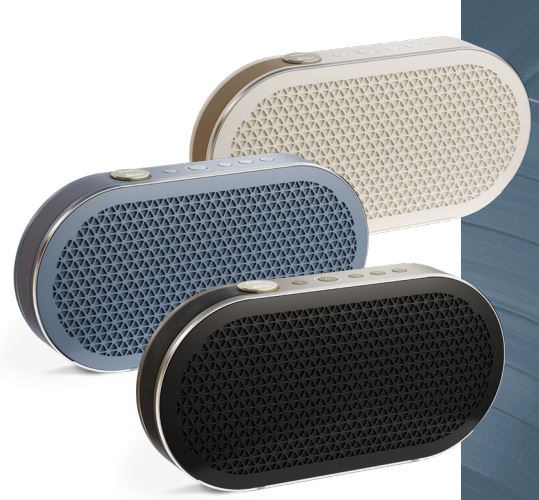
Welcome to the DALI KATCH G2, and thank you for trusting DALI with your portable music. The KATCH G2 takes the features and performance of the original DALI KATCH and brings evolution to bear, with new colors, more battery life, enhanced Bluetooth 5.0 aptX HD wireless performance, and a True Wireless Stereo mode that enables two KATCH G2 speakers to link and play stereo.
Some things have no need of change however and the DALI KATCH G2 borrows its predecessor’s stylish Danish design, vivid multi-driver sound, and exceptional build quality. The newly evolved DALI KATCH G2 is the latest word in compact portable music.
Your DALI KATCH G2 packaging contains:
- Universal Mains Charger (1.75 m cable length)
- Quick Start Guide
- Mains Charger Plugs
- Travel Bag
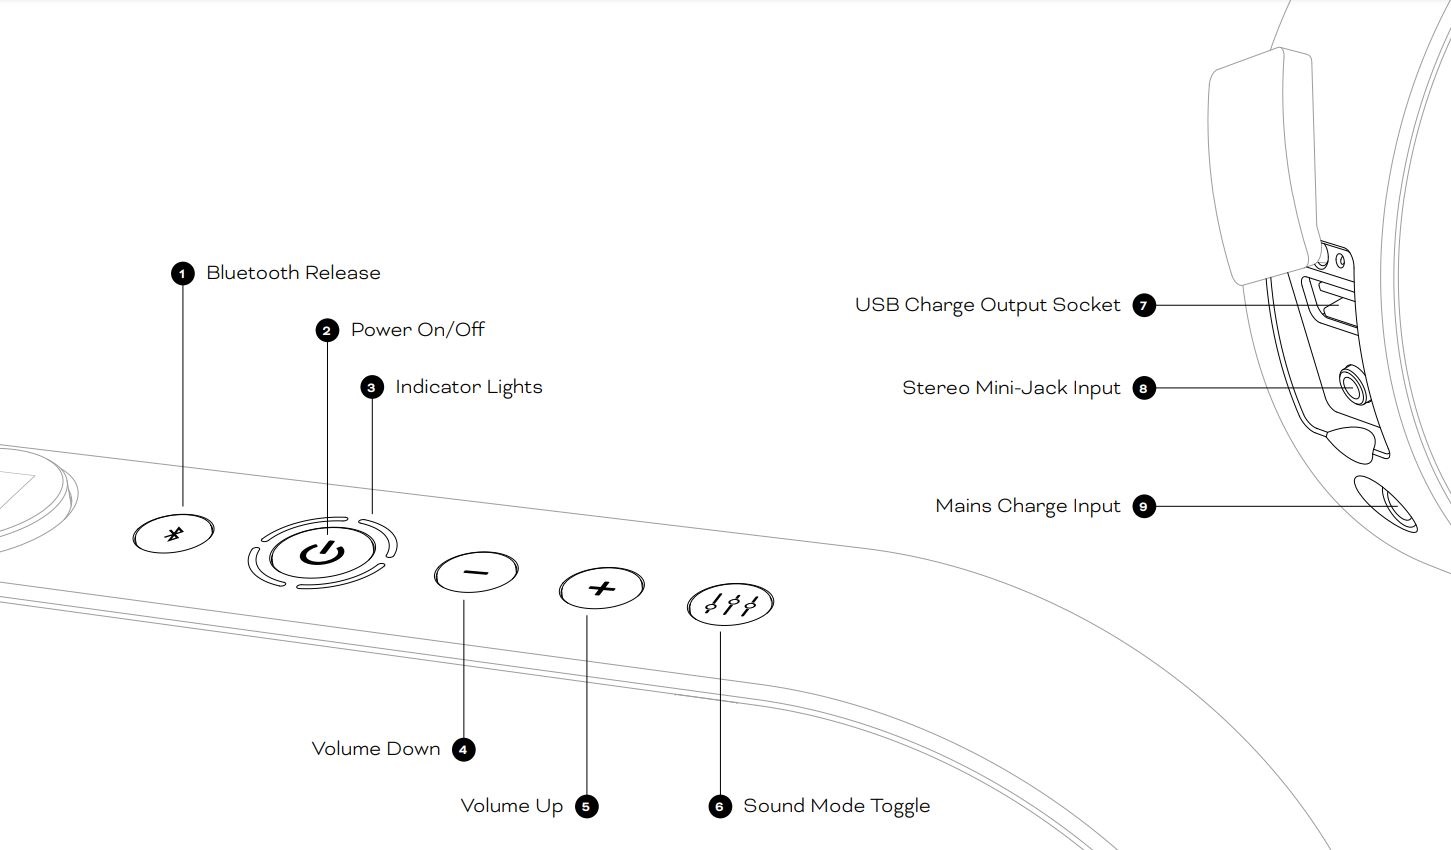
2. GETTING TO KNOW YOUR KATCH G2
3. SWITCH ON AND OFF
3.1 Switch ON
To switch ON your DALI KATCH G2:
- Press and hold the Power On/Off button (Button 2 ) until the switch-on sound plays.
- The indicator lights (Lights 3 ) will illuminate to show that the KATCH G2 is ready for use.
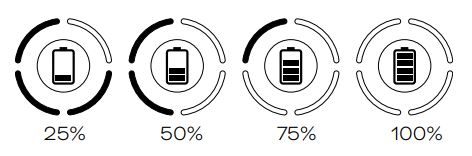
When your DALI KATCH G2 is switched on, the indicator lights (Lights 3 ) show the battery charge state.
If your KATCH G2 does not switch on, connect it to mains power via its charger (See 4.0).
3.2 Switch OFF
To switch OFF your DALI KATCH G2:
- Press and hold the Power On/Off button (Button 2 ) until the switch-off sound plays.
- The indicator lights (Lights 3 ) will switch off unless the KATCH G2 is connected to mains power via its charger (see 5.0).
If your DALI KATCH G2 remains unused for 20 minutes while running on battery power it will switch off automatically.

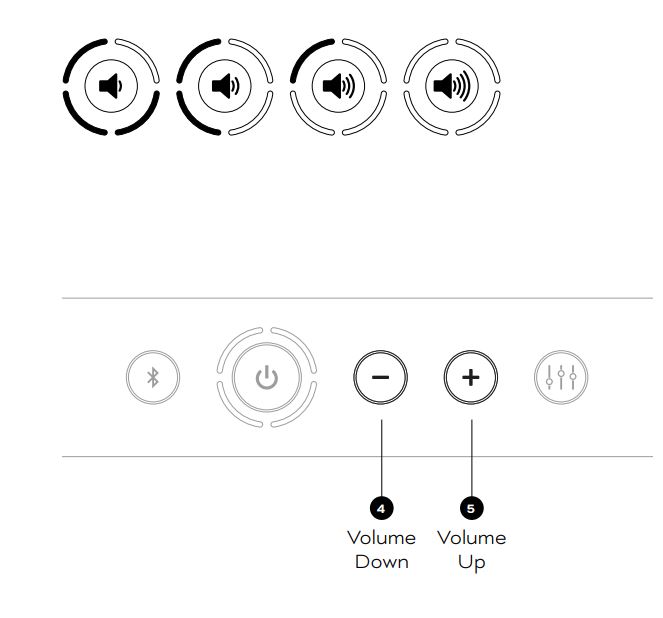
4. VOLUME CONTROL
4.1 Volume Down
To reduce the volume of your DALI KATCH G2 press the Volume Down button (Button 4 ).To reduce the volume quickly, press and hold the Volume Down button (Button 4 ).
4.2 Volume Up
To increase the volume of your DALI KATCH G2 press the Volume Up button (Button 5 ).To increase the volume quickly, press and hold the Volume Up button (Button 5 ).
4.3 Volume Indications
The indicator lights (Lights 3 ) indicate the volume setting.
NOTEWhen playing Bluetooth audio, as well as adjusting volume with the KATCH G2 buttons, you can also use the volume buttons on your Bluetooth device.
5. BATTERY CHARGING
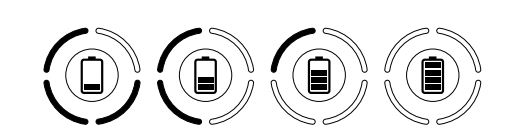
To charge the DALI KATCH G2 internal battery, connect the included mains charger to the KATCH G2 (Connector 9 ). Charging will begin as soon the charger is connected to mains power. The indicator lights (Lights 3 ) will pulse slowly while charging is underway while simultaneously indicating charge state. A full battery charge will take little more than 2 hours. Playing music or using the USB charge output (Connector 7 ) will increase charge time.
With a fully charged battery your KATCH G2 can play music for up to 30 hours.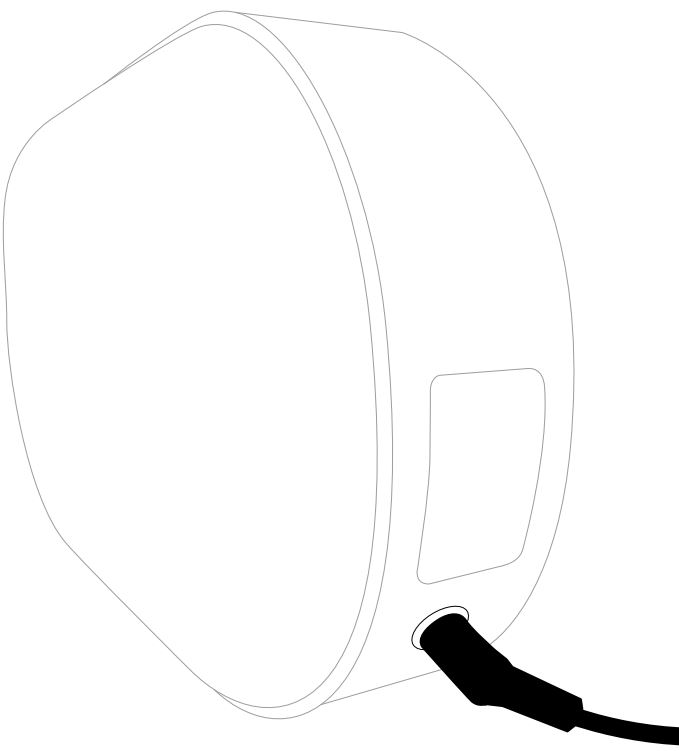
![]() NOTEPowering the DALI KATCH G2 through the mains charger enables it to play louder and with more energy. This is recommended for optimal performance when playing loud party music.
NOTEPowering the DALI KATCH G2 through the mains charger enables it to play louder and with more energy. This is recommended for optimal performance when playing loud party music.
The KATCH G2 has class leading battery life but it will vary depending on use. Play your music louder and the battery will drain a little faster.
6. BLUETOOTH
6.1 Pairing
To connect a Bluetooth audio device to your DALI KATCH G2:
- Switch on the KATCH G2 (See 3.1). It will immediately become visible for pairing.
- Initiate Bluetooth pairing from your audio device settings and select “DALI KATCH G2”.
- When pairing is established, the KATCH G2 Bluetooth pairing sound will play and the indicator lights (Lights 3 ) will illuminate in blue.

If a Bluetooth audio device has been previously paired with your DALI KATCH G2 and is within range, the KATCH G2 will automatically reconnect to that device.It is possible for two devices to be paired with your DALI KATCH G2 simultaneously, only one device at a time however will be able to connect and play audio.
NOTEThe DALI KATCH G2 employs Bluetooth 5.0 for enhanced range and connection stability, and implements the aptX HD wireless audio codec for optimum sound quality.
6.2 NFC Pairing
DALI KATCH G2 Bluetooth pairing can also be initiated using NFC:
- Switch on the DALI KATCH G2 (See 3.1).
- Ensure that NFC is enabled in your Bluetooth audio device.
- Locate the NFC sensing area of your Bluetooth audio device.
- Hold the NFC sensing area of the audio device close to the side of your KATCH G2, adjacent to the Power On/Off button (Button 2 ), as shown in the illustration.
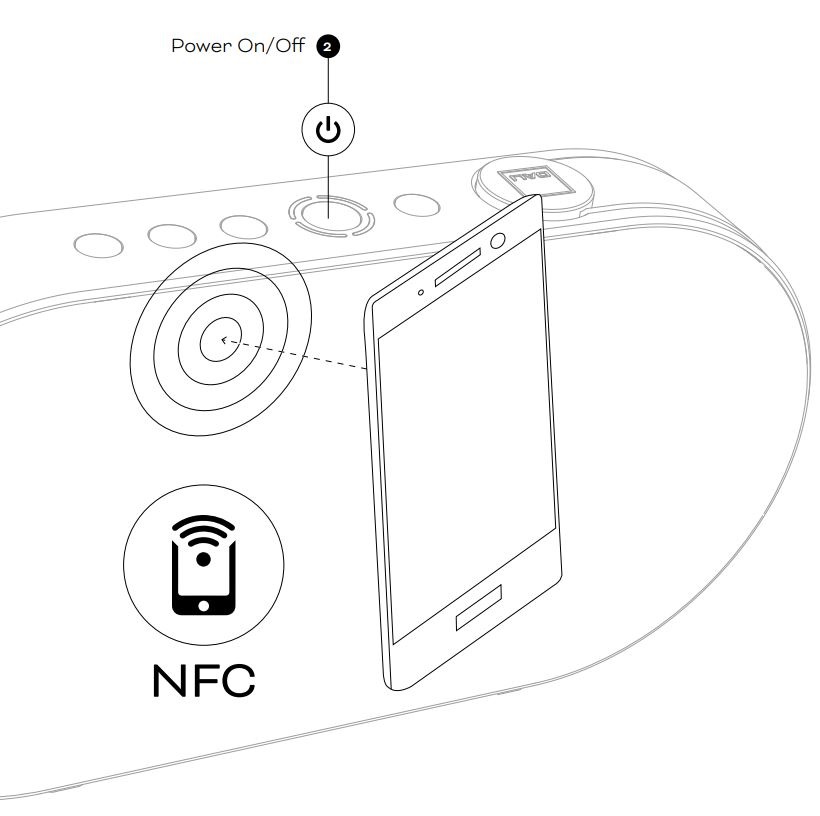
NOTENFC is short for “Nearfield Communication”. It employs the same short range mobile technology used for mobile phone payments. NFC Bluetooth pairing is currently available only with Android mobile devices.
6.3 Bluetooth Release
If you are unable to pair a Bluetooth device with your DALI KATCH G2 it is likely that two devices are already paired. In this case:
- Press and hold the KATCH G2 Bluetooth release button (Button 1 ) until the Bluetooth release sound plays and the indicator lights flash blue.
- All paired devices will now be released, enabling two new devices to be paired.
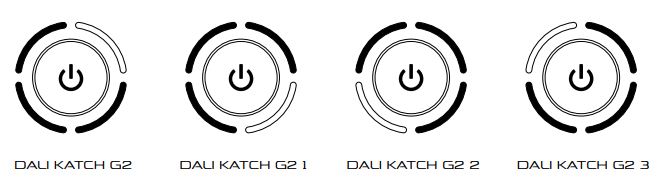
6.4 Bluetooth Naming
If you have multiple DALI KATCH G2 speakers it is possible to change their Bluetooth names so that you can keep track of which is which.
- Switch off each DALI KATCH G2 (See 3.2).
- Press and hold the Power On/Off button (Button 2 ).
- When the switch on sound plays, keep holding the Power On/Off button (Button 2 ), while simultaneously pressing either the Volume Up (Button 5 ) or Volume Down (Button 4 ) to scroll through the possible name options (DALI KATCH G2, DALI KATCH G2 1, DALI KATCH G2 2 and DALI KATCH G2 3). The indicator light display for each option is illustrated in the diagram.
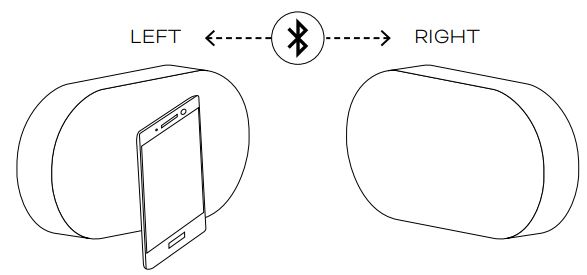
7. TRUE WIRELESS STEREO
It is possible to connect two DALI KATCH G2 speakers in True Wireless Stereo (TWS) mode to create a stereo pair, playing left and right channels.To initiate the stereo connection:
- Switch on the first DALI KATCH G2 and pair it with a Bluetooth device (See 6.1). This KATCH G2 will play the left channel when the stereo setup is complete.
- Switch on the second DALI KATCH G2.
- To engage stereo pairing mode, simultaneously press and hold the Bluetooth Release button (Button 1 ) and the Volume Up (Button 5 ) on each KATCH G2 speaker in turn until their indicator lights begin blinking white and blue.
- The two DALI KATCH G2 speakers will now connect to each other as a stereo pair. This may take up to 25 seconds. When the TWS connection is established, the Bluetooth connect sound will play from both speakers and their indicator lights will switch to white.
Volume control will automatically synchronize between the two speakers when using volume up/down on either one.
The two units will stay connected in TWS mode until the connection is manually cancelled.
To cancel TWS Mode, press and hold the Bluetooth release button (Button 1 ) on either of the two DALI KATCH G2 speakers until the Bluetooth release sound plays.
If TWS mode is cancelled by pressing the right channel KATCH G2 Bluetooth release button (Button 1 ), the left channel KATCH G2 will remain paired with the Bluetooth device. If TWS mode is cancelled by pressing the left channel KATCH G2 Bluetooth release button, device pairing will also be released.
NOTESTWS mode is only available when the KATCH G2 speakers are playing Bluetooth audio.
Both KATCH G2 speakers of a TWS pair are best located in the same room or space. TWS mode is not intended to enable multiroom audio.
In TWS mode, it is only possible to pair one device at a time to the KATCH G2 pair.
8. SOUND MODES
DALI KATCH G2 sound mode options provide two alternative sound profiles intended to suit different KATCH G2 locations, audio material or moods. The Clear option emphasizes detail and intelligibility while the Warm option majors on more relaxed music enjoyment.
To toggle between the two sound modes press the Sound Mode button (Button 6 ). The indicator light display for each option is illustrated in the diagram.

NOTEIf two KATCH G2 speakers are connected to each other in TWS mode, the sound mode must be adjusted individually on both units.
The DALI KATCH G2 is designed to deliver the best possible sound in all locations, however different locations will be reflected in the sound. For example, placing the KATCH G2 on the floor close to a wall or in a corner will increase the bass level. You can use the Sound Mode options (See 8.0) to help match the sound to the location.
9. WIRED CONNECTIONS
9.1 USB Charge (Connector 7)
The DALI KATCH G2 USB Charge socket supplies up to 1 Amp at 5 Volts and is able to charge most mobile devices. The Charge socket is also able to power an external USB device such as Google Chromecast Audio dongle, the audio output of which can be connected to the KATCH G2 Mini-Jack input.
9.2 Stereo Mini-Jack (Connector 8)
You can connect wired audio sources to your DALI KATCH G2 using a stereo mini-jack cable. When a mini-jack plug is inserted, the KATCH G2 will automatically switch to the mini-jack input and stop Bluetooth playback. To return the KATCH G2 to Bluetooth playback, unplug the mini-jack or short-press the Bluetooth release button (Button 1 ). When a mini-jack is connected, the KATCH G2 Bluetooth release button (Button 1 ) acts as a Bluetooth/mini-jack selection toggle.
NOTESAs long as it has sufficient battery reserves, your KATCH G2 is able to charge a mobile device even when it is not connected to mains power. This Power Bank feature means your KATCH G2 can come to the rescue when your phone battery is exhausted.The USB Charge socket cannot be used for music playback.
10. STRAP EXTENSION
The DALI KATCH G2 leather strap can be extended to act as a handle. You can lock the strap in the extended position by using your thumb to push and release the strap lock on the bottom of the KATCH G2. The reverse maneuver will lock the strap back in place.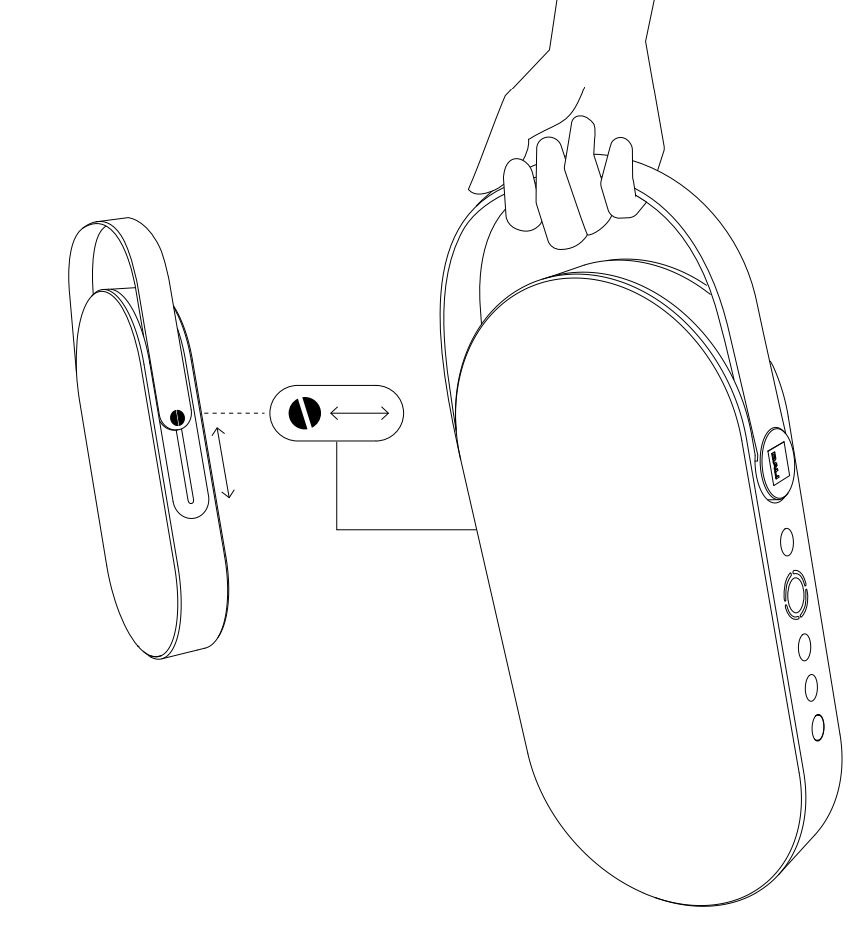
11. FACTORY RESET & FIRMWARE UPGRADE
11.1 Factory Reset
To reset your DALI KATCH G2 to its factory default settings:
- Stop any audio playback.
- Switch off the KATCH G2 (See 3.2).
- Press and hold the Sound Mode button (Button 6 ) and press the Power On/Off button (Button 2 ) until the indicator lights (Lights 3 ) switch on, one by one.
- Wait for about 10 seconds.
- Switch off the KATCH G2 (See 3.2).
- The unit will now next switch on with its factory default settings.
11.2 Firmware upgrade
Copy the firmware file to the root directory of a USB memory stick. The file must be named “ketch. hex”.
Connect the KATCH G2 to its mains charger and insert the USB memory stick into the KATCH G2 USB Charge socket (Connector 7 ). Execute points 1 to 4 of the factory reset (See 11.1).
All the indicator lights (Lights 3 ) switch on, the firmware update sound is played and the KATCH G2 turns off by itself. Following the reset the firmware is upgraded.
NOTECheck for new firmware here:
12. CLEANING
You can clean your DALI KATCH G2 cabinet with a soft, dry cloth. If the cabinet is particularly grimy, wipe it with a soft cloth dipped in an all-purpose cleaner and well wrung-out. Be careful not to get the KATCH G2 wet: it contains electronic components that will be damaged by water.
The travel bag can be cleaned by gently hand washing it in lukewarm water. It should not be necessary to use any detergent.
The surfaces of the DALI KATCH G2 may fade or become discolored over time when exposed to direct sunlight. Avoid leaving your KATCH G2 in direct sunlight for extended periods.
13. DISPOSAL
If you want to dispose of this product, do not mix it with general household waste. There is a separate collection system for used electronic products in accordance with legislation that requires proper treatment, recovery and recycling. Private households in the EU member states, Switzerland, Liechtenstein and Norway may return their used electronic products free of charge to designated collection facilities or to a retailer (if you purchase a similar new one).
If you reside in countries not mentioned above, please contact your local authorities for the correct method of disposal. By following this process, you will ensure that your disposed product undergoes the necessary treatment, recovery and recycling and thus prevent potential negative effects on the environment and human health.
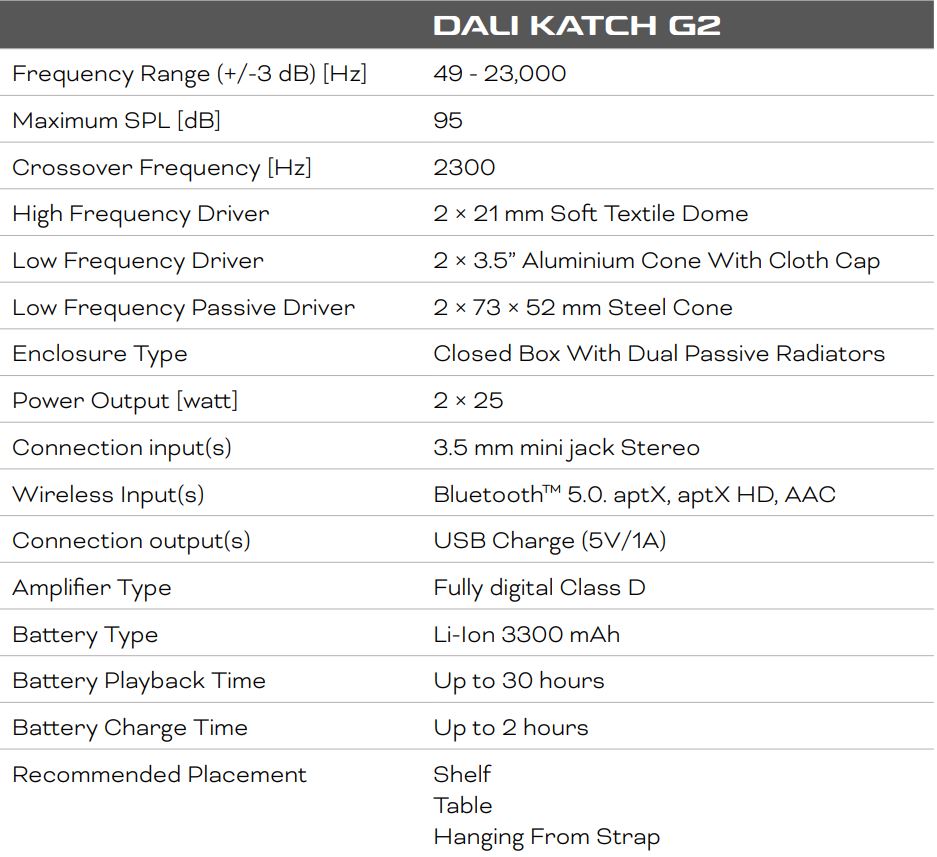
14. TECHNICAL SPECIFICATIONS

 report this ad
![]()
References
[xyz-ips snippet=”download-snippet”]