![]()
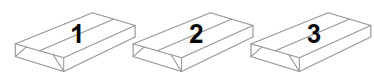
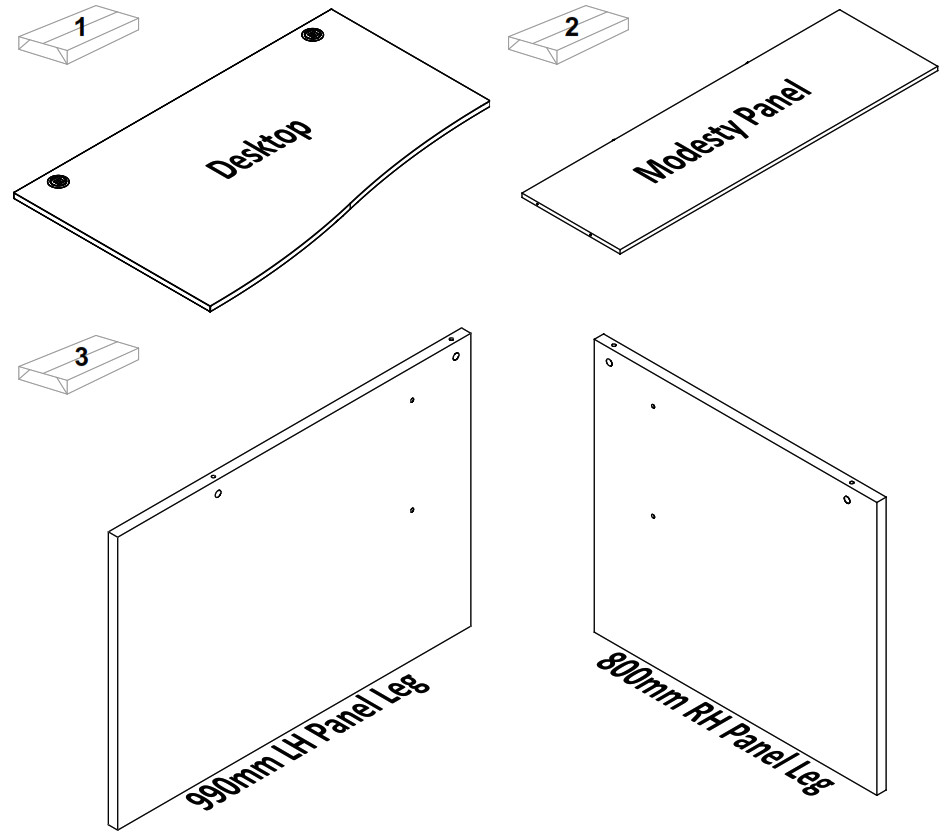
 Please check that you have all the components!
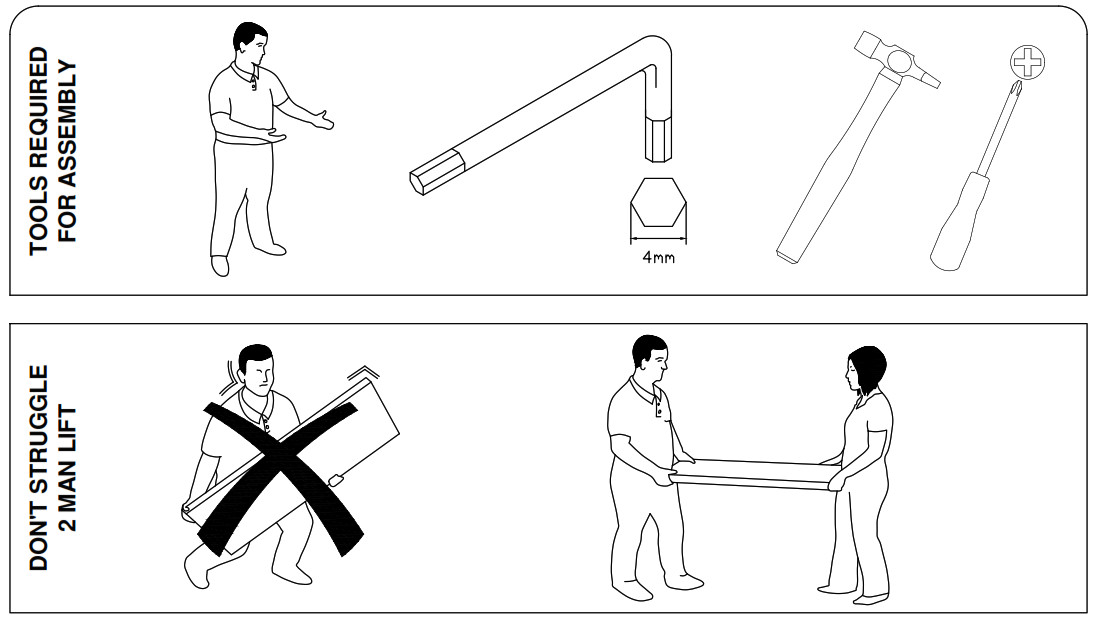
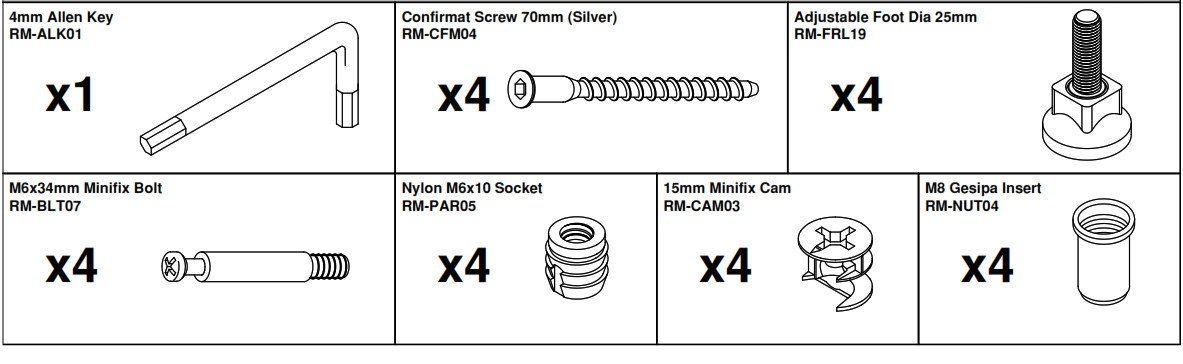
Please check that you have all the hardware!
Step 1Place your desktop face down onto a clean dry surface and knock the nylon inserts into the pre-drilled holes on the underside of the desktop.

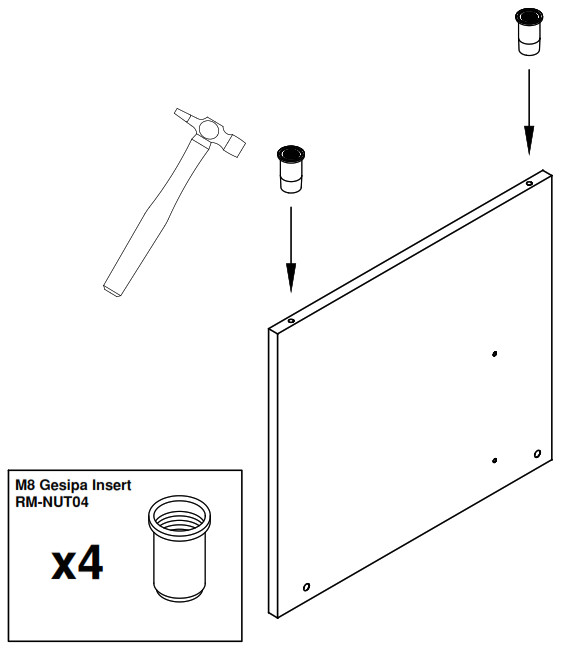
Step 2Knock in the gesipa inserts into the holes on the bottom edge of the panel end leg. Repeat for both legs.
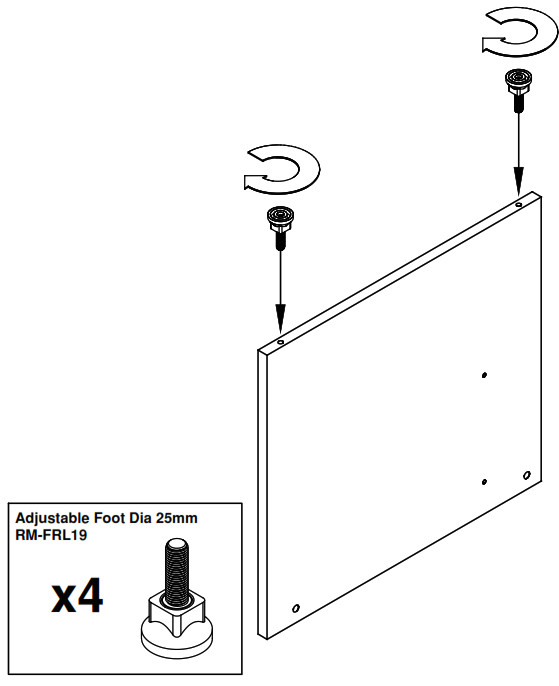
Step 3Screw the 25mm adjustable feet into the bottom of the panel end leg. Repeat for both legs.
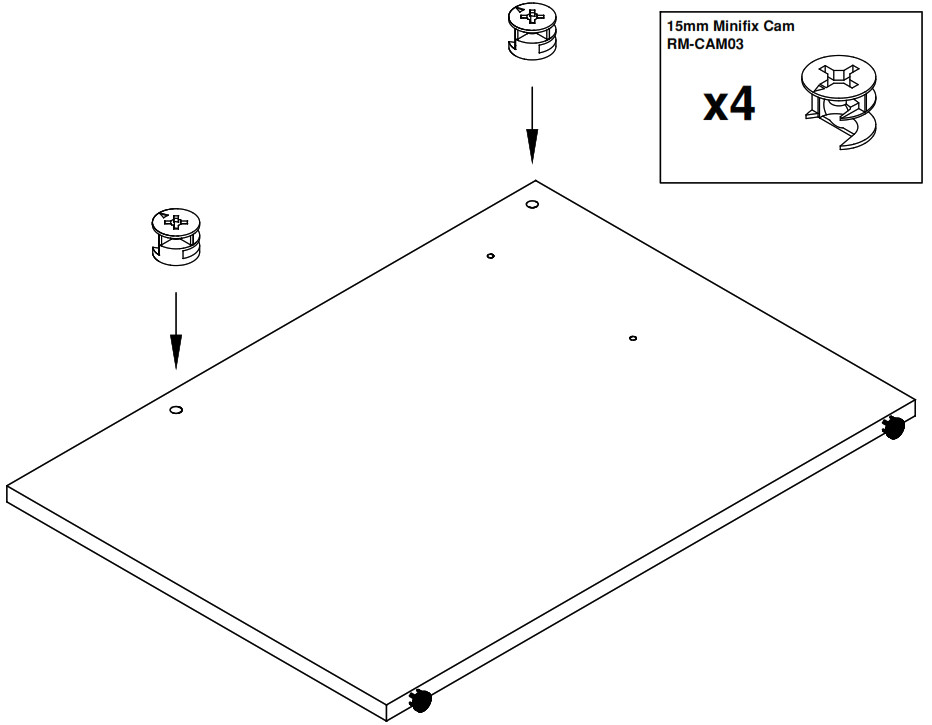
Step 4Insert the mini fix cams into the panel end leg. Ensure the fitting is pushed all the way down and that the arrow guideline is aligned with the hole in the edge of the panel. Repeat for both legs.
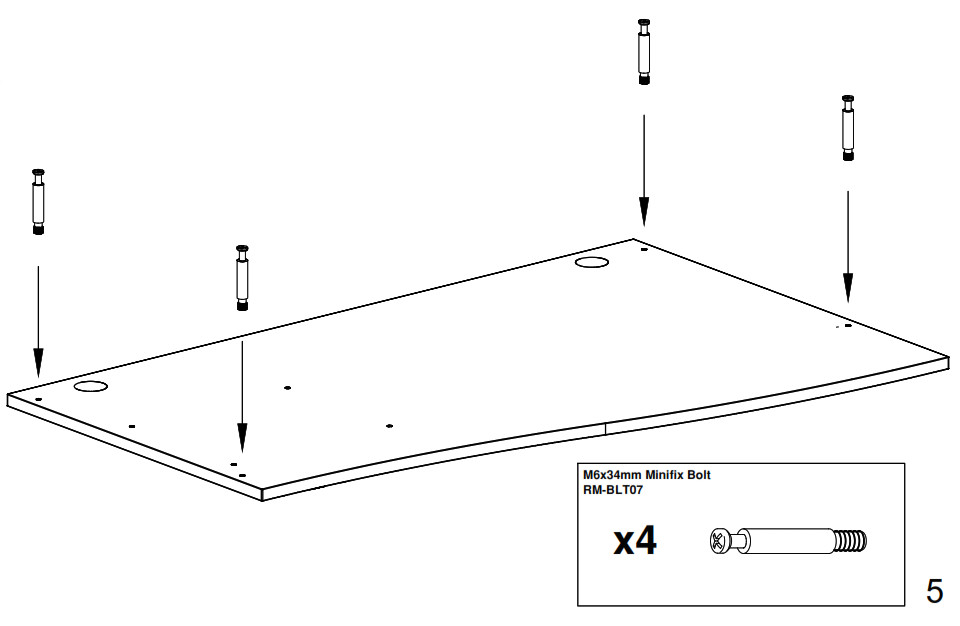
Step 5Screw the M6x34mm mini fix bolts into the nylon inserts that you inserted in step 1.
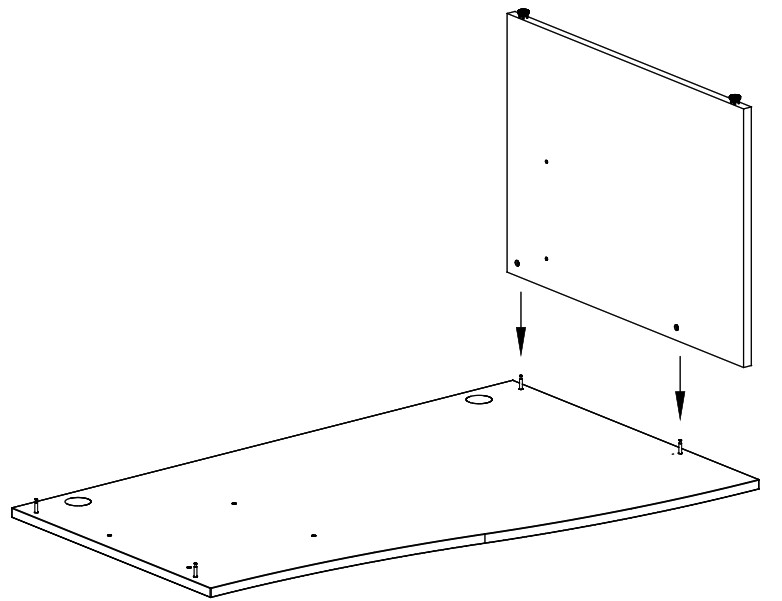
Step 6Place the LH Leg onto the desktop ensuring that the cam fittings engage over the mini fix bolts. Once in place tighten the cams to lock the panel end leg into place.
Step 7Line the back panel up with the panel end leg ensuring the pre-drilled holes are in aligned.
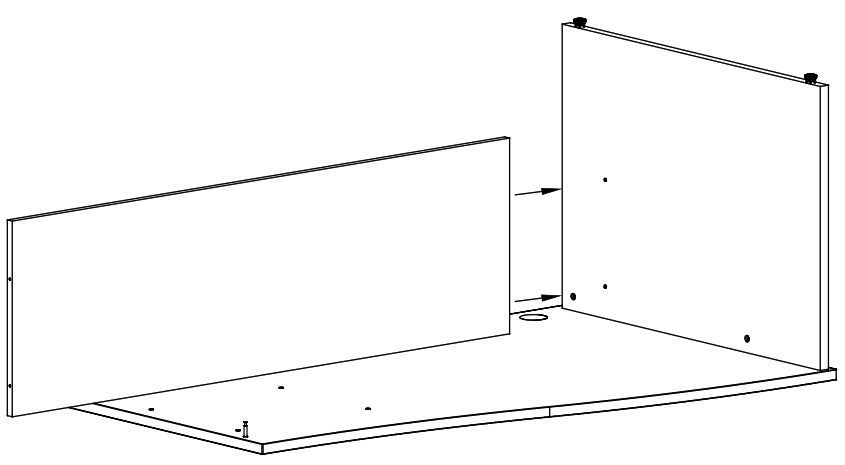
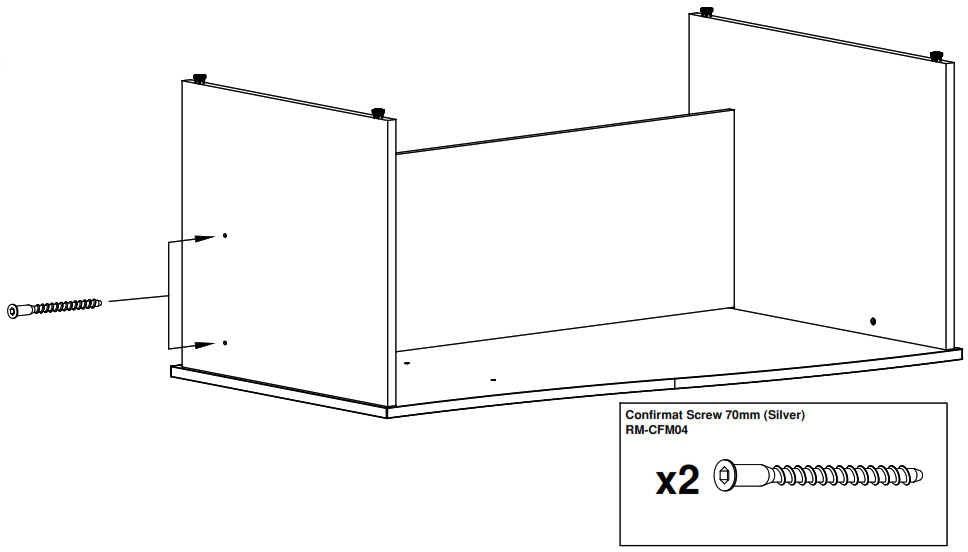
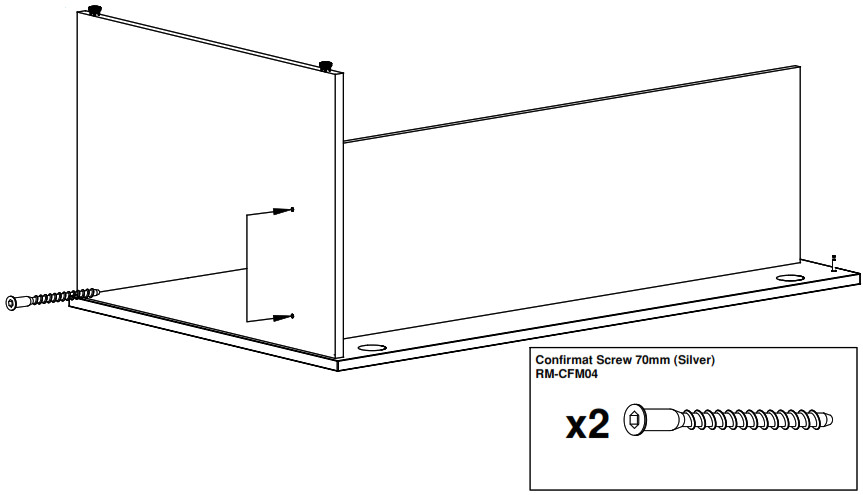
Step 8Attach the leg panel to the back panel using the 70mm confirmat screws.
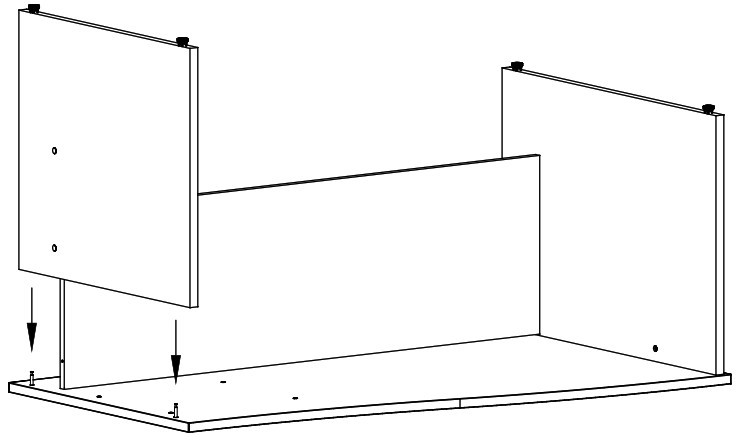
Step 9Place the remaining leg onto the desktop ensuring that the cam fittings engage over the mini fix bolts. Once in place tighten the cams to lock the panel end leg into place.
Step 10Attach the leg panel to the back panel using the 70mm confirmat screws.
Matching adhesive caps are provided to cover any visible screw heads or cam fittings.

[xyz-ips snippet=”download-snippet”]