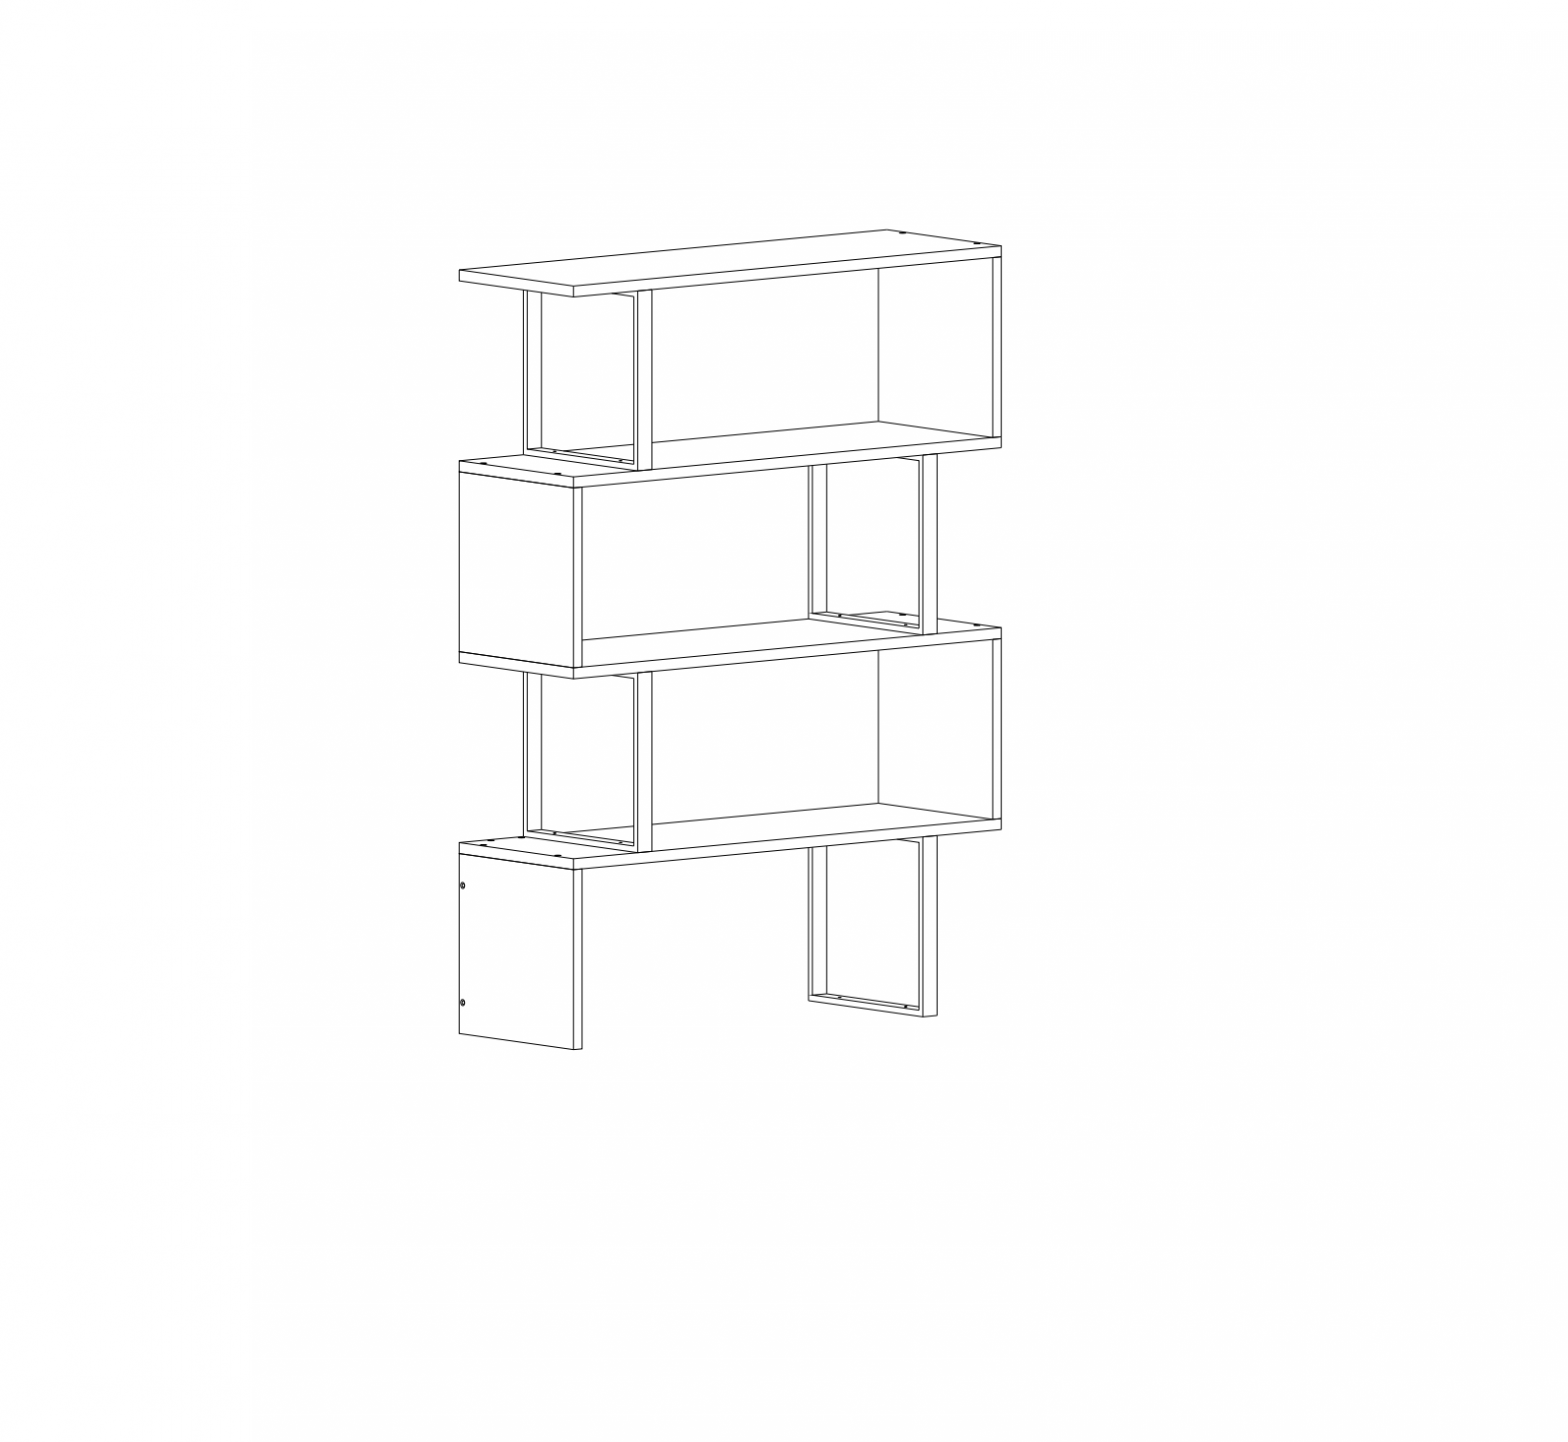
DECOROTIKA Adriana Bookcase

Introduction
 Valued Customer,We deign and carefully manufacture our products for our customers, We wish that our customers to have fun while they are dong their new furnitureThe product you just purchased was subjected to all sorts of tests and controls before sending out to you.Hope you enjoy your new furniture!!!
 Before starting, please check all components and accessors according to the provided 1st. If you purchased more than one product, to prevent confusion, be sure that you completed the first product, then start the next one. Please make sure that you select correct numbered part and use specific connector to assemble. We do not recommend any modification or rotation n assembly. Please follow the manual carefully.
 Furniture parts are gong to several manufacturing procedures. During this process, parts can have little dust or marks. Please clean the parts with dump cloth before assembly to get the best result. Usual cleaning would be suffice.
 Although all products are carefully manufactured and packed, sometimes we experience damage during transportation. In such cases, please check the damaged part, note the part number written on the part and do not hesitate to contact us
 Do not use your furniture for out of purposes. If you would like to use t out of purpose or would like to do some modification or rotation, please contact us for more details.Please do not expose your furniture with excessive heat, cold and humpty because product can be affected negatively.
You may reach us with below contact information for assembly questions.For all other inquiries please contact directly with marketplaces which you have placed your order. Thanks for choosing our products
email: [email protected]The US Phone : +1 302 327 8923 Working Hours: Mon- Fr (09 am – 05 pm)EUROPE Phone : +90 553 966 7517 Working Hours: Mon- Fr (07 am – 05 pm)
Before You Start
Get required installation tools prepared.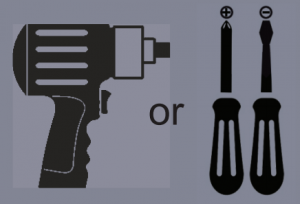

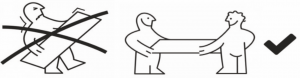
Do not install the product on rough surfaces.

Get help from someone else!
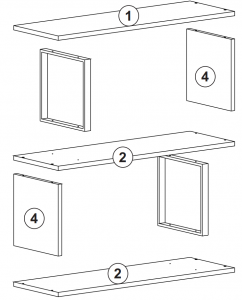
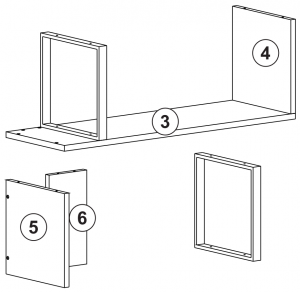
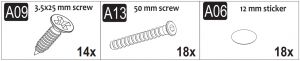
Components
|
Part 1 |
1x |
|
Part 2 |
2x |
|
Part 3 |
1x |
|
Part 4 |
3x |
|
Part 5 |
1x |
|
Part 6 |
1x |
|
TOTAL |
9x |
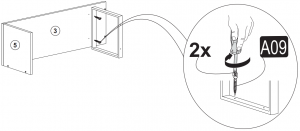
1. Step A:
- Please attach the pieces #5 and #3 together as shown below
- Now screw the A13(50 mm screw) with the help of a screwdriver clockwise direction


2. Step B:
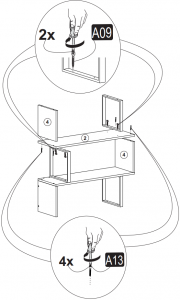
- Please put the one of metal pieces on the piece #3 as shown below
- Now screw the A09(3.5×25 mm screw) with the help of a screwdriver clockwise direction
3. Step C:
- Please attach the piece #6 to the pieces #3 and #5 as shown below
- Now screw the A13(50 mm screw) with the help of a screwdriver clockwise direction

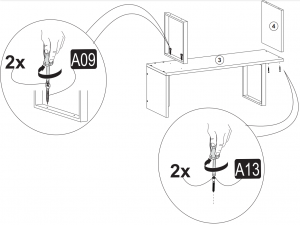
4. Step D:
- Please put the one of metal piece on the piece #3 as shown below
- Then screw the A09(3.5×25 mm screw) with the help of a screwdriver clockwise direction
- Please put the piece #4 on the piece #3 together as shown below
- Now screw the A13(50 mm screw) with the help of a screwdriver clockwise direction
5. Step E:
- Please put the piece #2 on the metal piece and piece #4 as shown below.
- Then screw the A09(3.5×25 mm screw) on the metal piece with the help of a screwdriver clockwise direction
- Please put the piece #4 and metal piece on the piece #2 as shown below
- Now screw the A13(50 mm screw) on both pieces #4 with the help of a screwdriver clockwise direction
- Then screw the A09(3.5×25 mm screw) on the metal piece with the help of a screwdriver clockwise direction
6. Step F:
- Please put the pace #2 on the metal piece and piece #4 as shown below.
- Then screw the A09(3.5×25 mm screw) with the help of a screwdriver clockwise direction as shown below
- Now screw the A13(50 mm screw with the help of a screwdriver clockwise direction as shown below

7. Step G:
- Please put the metal piece and piece #4 on the piece #2 as shown below.
- Then screw the A09(3.5×25 mm screw) with the help of a screwdriver clockwise direction as shown below
- Now screw the A13(50 mm screw) with the help of a screwdriver clockwise direction as shown below

8. Step J:
- For the best appearance of your furniture please place all A06(12 mm sticker) 9onto the A13 (50 mm screw)
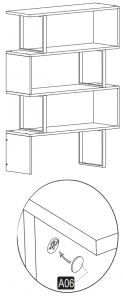
Final Look
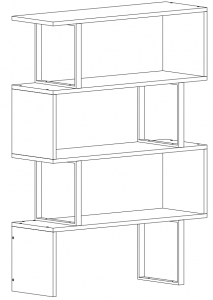
Enjoy your Decorotika product!
www.decorotka.uswww.decorotka.com
References
[xyz-ips snippet=”download-snippet”]