DEFENDER CA6150 Carbon Monoxide Alarm User Guide
Product Overview
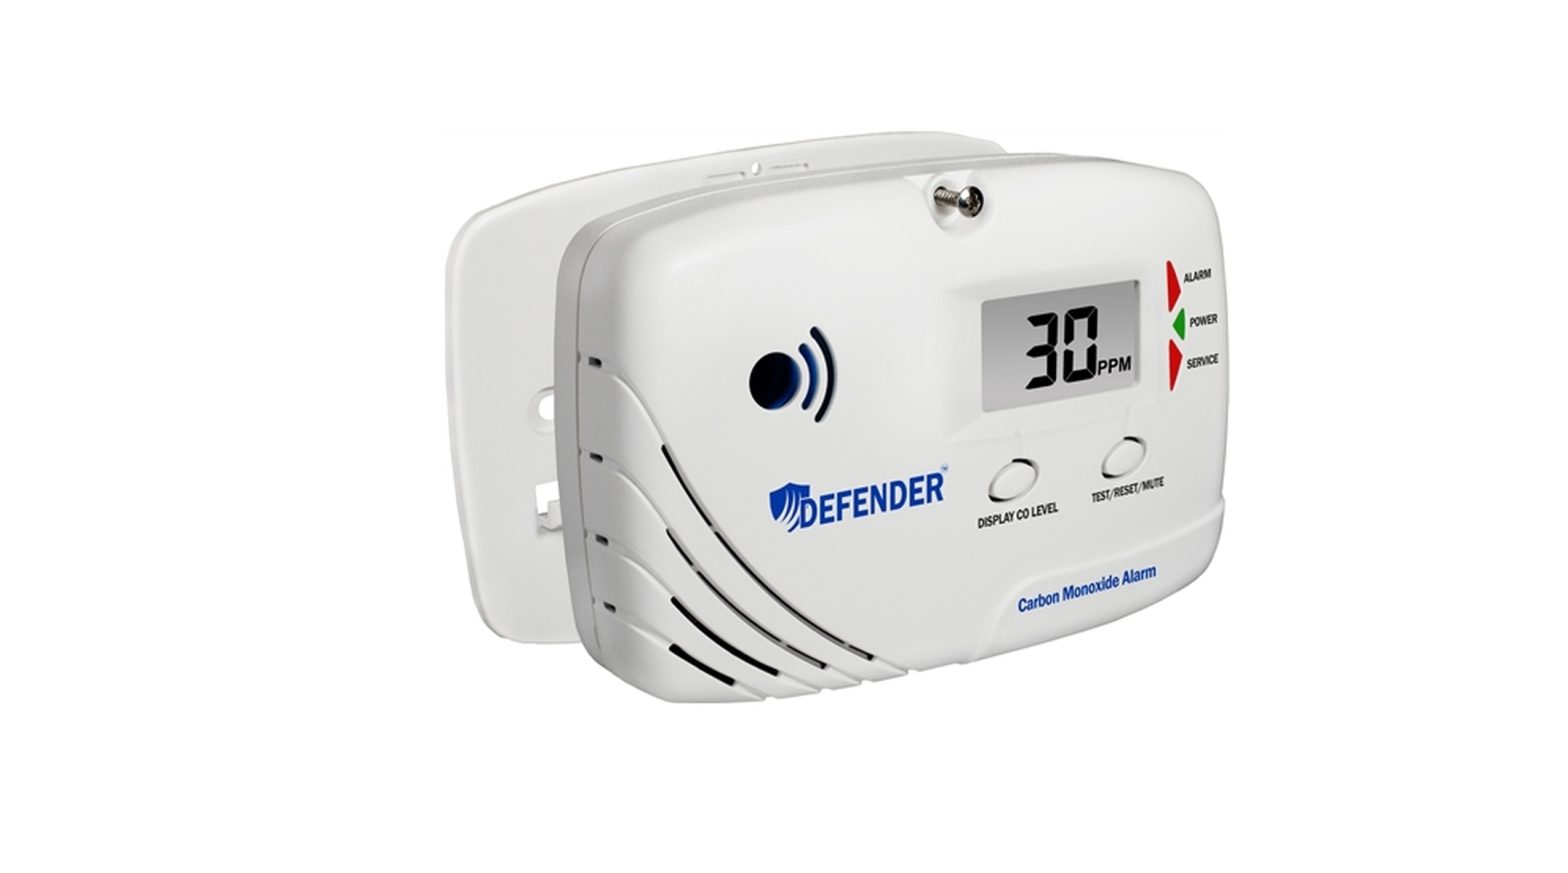
The Defender CA6150 Carbon Monoxide Alarm is Underwriters Laboratories Tested and Listed to the ANSI/UL 2034 residential safety standard. The CA6150 also provides added protection for your health, and enables you to monitor the current and peak CO levels as low as 10 PPM, and the duration of the peak level, at the touch of a button.This alarm is not designed to measure compliance with OSHA or commercial standards.
RECOMMENDED LOCATION OF ALARMS
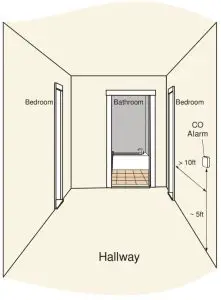
CO poisoning can happen anywhere in the building, but because most CO poisoning cases occur while people are sleeping, the best location for the CO alarm is in or near the sleeping area. If there is more than one sleeping area in the dwelling or on a different floor, or if bedroom doors are closed during the night, you may need more than one CO alarm.CO alarms should be installed onto an interior wall, five feet off the floor, and on every conditioned level of the building. At the minimum, install CO alarms:
- In the immediate area of the bedrooms. If more than one sleeping area exists, locate additional alarms near or within each sleeping area.
- Inside every room where someone sleeps with a door closed. The closed door may prevent the alarm from waking the sleeper.
- On every conditioned level of the dwelling.
CO detection is best achieved by the installation of CO alarms within all conditioned areas and rooms of the building.
LOCATIONS TO AVOID
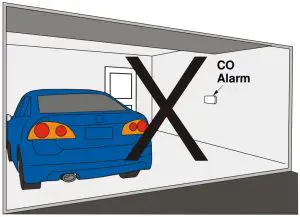
Do not install a CO alarm:
- Inside of a garage, cleaning supply room, bath room, dusty area or unconditioned space. The alarm’s operation temperature range is 40oF to 100oF.
- Within five feet of a combustion or cooking appliance including a furnace, boiler, water heater, space heater, oven or range.
- Within five feet of a window or exterior door.
- Within three feet of a room with a bathtub, shower, spa or washer/dryer.
- Within one foot of a wireless device.
- Where the alarm would be obstructed by furniture, drapes, etc.
- Within a hazardous area, as defined in the National Electrical Code.
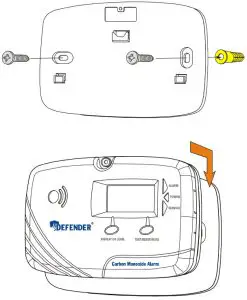
INSTALLATION INSTRUCTIONS
Follow these steps in this order to install the CO alarm:
- Fasten the mounting plate to the wall at eye level, about 5’ off the floor.
 Slide alarm down onto mounting plate.Connection between mounting plate and alarm will automatically turn activation switch ON.
 - Press and hold test button until alarm starts to beep, then release. The alarm should beep 4 times, pause, and then beep 4 times again. ALARM red LED should flash at the same time.
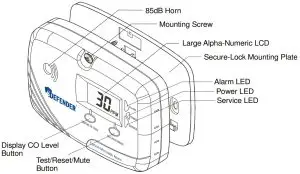
- Secure alarm to mounting plate, with Phillips head screw provided, through the mounting hole on top of alarm.
 Slide alarm down onto mounting plate.Connection between mounting plate and alarm will automatically turn activation switch ON.
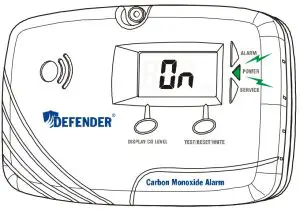

CONDENSED OPERATION INSTRUCTONS
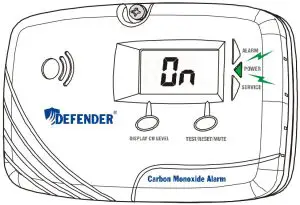
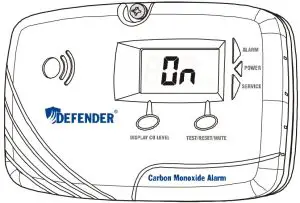
OPERATION: The CO alarm is operational once the activation switch is slid to ON position. If the alarm’s power is active, the POWER green LED will flash once every 60 seconds, and the LCD readout will continuously display ON, or the current CO level if 30 PPM or more is detected.
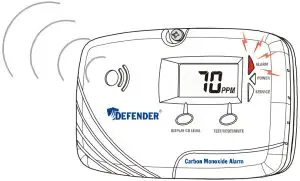
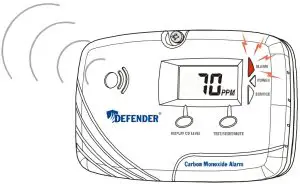
ALARM CONDITION: When the batteries are active, and CO gas is detected at a level and duration specified in Section 3 of the Owner’s Manual, the horn will sound and ALARM red LED will light. The alarm signal will sound 4 short beeps every 6 seconds, and flash the ALARM red LED in sync with the beeping sound. The LCD will also display the current CO level detected. After having alarmed for more than 5 minutes, the alarm signal will change to 4 short beeps every 60 seconds. The alarm signal is either manually or automatically reset. See Section 10 of Owner’s Manual WHAT TO DO WHEN THE ALARM SOUNDS.
- Beeps 4 times every 6 seconds for first 5 minutes
- Beeps 4 times per minute after 5 minutes
TEST/RESET/MUTE BUTTON:
The TEST/RESET/MUTE button is used to check the alarm for proper operation, and to temporarily mute horn for 5 minutes when alarm is activated, for 24 hours during the first week of a “Low Battery Voltage” signal ( ![]() ) activation, or for 60 hours during the first month of a sensor “End-of-Life” signal (
) activation, or for 60 hours during the first month of a sensor “End-of-Life” signal ( ![]() ) activation. The LCD will display the current CO level detected when alarm is being tested, or
) activation. The LCD will display the current CO level detected when alarm is being tested, or ![]() when an alarm signal is muted. See Section 9 of Owner’s Manual TEST AND MUTE ALARM for detailed instructions to test the alarm and mute the audible horn.
when an alarm signal is muted. See Section 9 of Owner’s Manual TEST AND MUTE ALARM for detailed instructions to test the alarm and mute the audible horn.
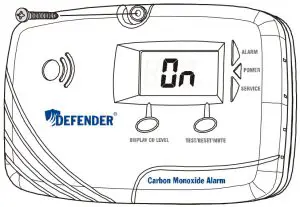
LCD DISPLAY FUNCTION: When alarm is operating normally, the LCD will display ON or the current CO level if 30 PPM or more is detected. The LCD will display after ten years of operation to alert you that it is time to replace the alarm.
- Continuously Displays “On” (below 30 PPM)
- Auto. Displays 30 – 999 PPM (e.g. 30 PPM detected)
- Displays “End” When Expires (ten years after activation)


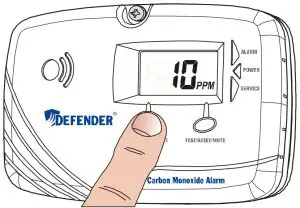
DISPLAY CO LEVEL BUTTON: To manually display the current and highest CO level detected as low as 10 PPM, press the DISPLAY CO LEVEL button once. The LCD will display the recorded data in the following order:
- The current CO level detected within the last minute from 10 to 999 PPM.
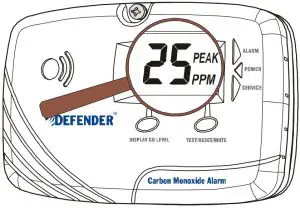
- The highest CO level detected within last 30 days from 10 to 999 PPM.
- The total length of time the highest CO level was detected, within 10% of the peak, from 1 to 999 minutes.
- Current CO Level (e.g. 10 PPM detected within last minute)
- Highest CO Level (e.g. peak of 25 PPM detected within last 30 days)
- Duration of Peak CO Level (e.g. peak detected for 60 minutes)

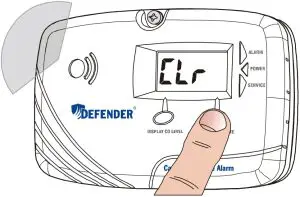
Each reading will appear for five seconds. To erase the record in memory, press the Display CO Level button, and while the readings are being displayed, press the TEST/RESET/MUTE button. The alarm will burst a long beep, and display ![]()
 report this ad
IMPORTANT! Read all instructions of the complete Owner’s Manual before installation and operation of this CO alarm, including important messages, information about carbon monoxide, alarm functions and operation, how to test and mute alarm, what to do when alarm sounds, limitations of CO alarms, good safety habits, sensor end-of-life and alarm service, description of audible and visual signals, and limited warranty.
[xyz-ips snippet=”download-snippet”]