deflong Multifunctional Gas Detector

Customer service email: [email protected]
Thank you for using our products, please be sure to read this manual first when you are ready to use this product, read this manual and follow the instructions provided so that you can be able to fully enjoy the products and services provided by our company while avoiding unnecessary behavioral damage or other accidents.
I. Product introduction
portable voice type multi-gas detector is a safety devicethat can continuously detect the concentration of leaking gas. It adopts advanced integrated circuit technology, embedded computer control, high-quality imported gas sensors, with excellent sensitivity and repeatability. It uses a dot matrix LCD display to support the Chinese-English interface and Chinese-English voice prompt so that users can quickly understand the product and use and maintain it simple. High-strength engineering plastics, good seismic resistance, high strength, high-grade atmospheric appearance and dust-proof, waterproof and explosion-proof function, etc.
The detector is widely used in petroleum, chemical industry, environmental protection, metallurgy, refining, gas, biochemical medicine, agriculture, fire protection, Archaeology, and other industries and places that need safety monitoring for toxicity and harmfulness, explosion prevention. The detector can effectively predict the concentration of dangerous gases and alarm, so as to ensure the safety of workers and production equipment.
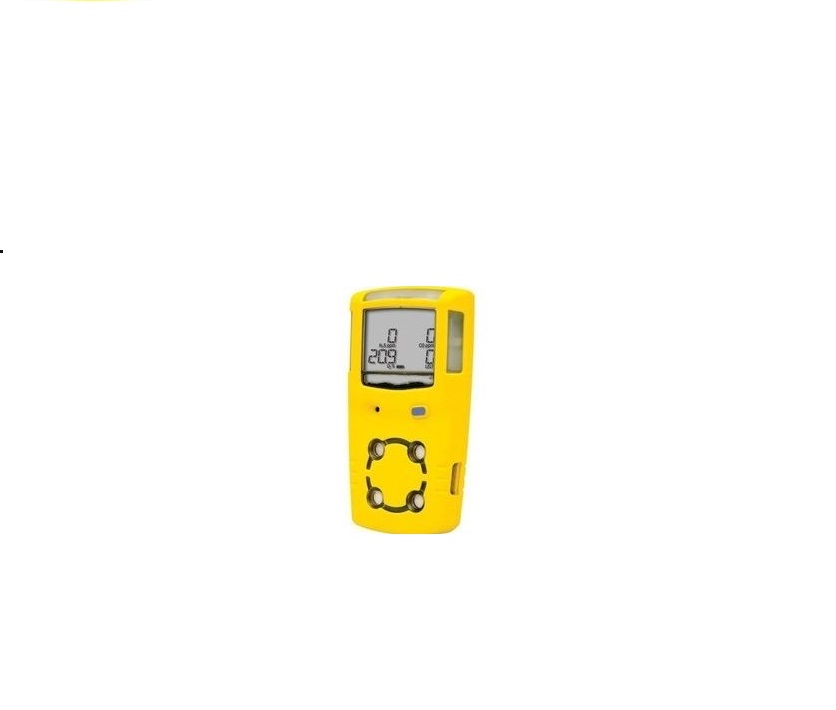
II. Structure introduction
2.1 Structure

2.2 Working principle
Electrochemical and catalytic combustion
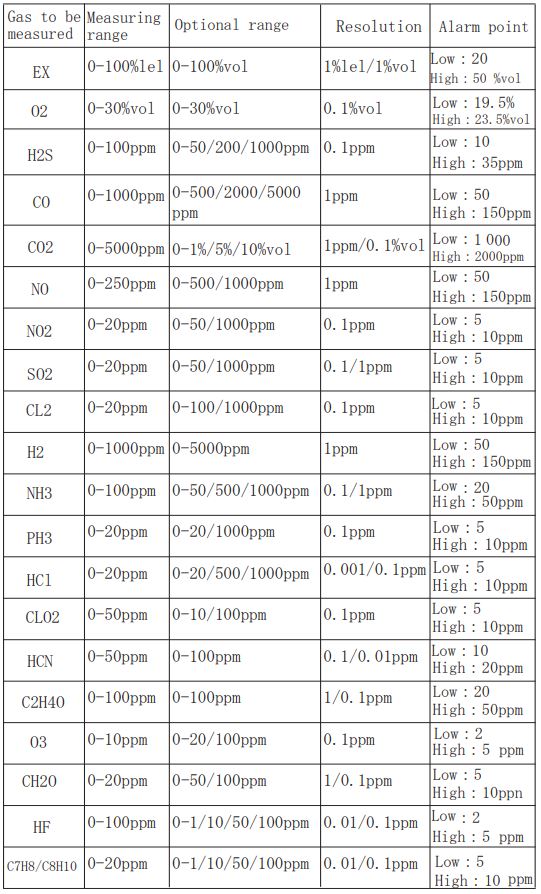
III. Technical Parameter

IV. Function and operation
4.1 Turn on, Turn off, Charging
4.1a Turn on
When the detector is off, press and hold the middle power button for about 3 seconds, release the button when the LCD screen displays the software version interface, and the indicator boot welcome page, and you can hear the voice prompt “Welcome use multi-function voice gas detector”
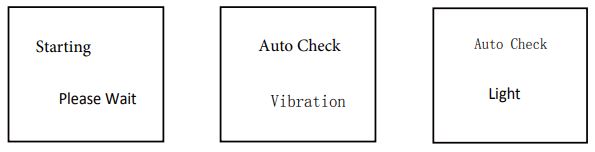
Keep the air around the detector clean on the page waiting to be turned on. During the startup process, the detector will perform a vibration and light self-test, please pay attention to observe whether it is normal. The above status is normal, indicating that the sound, display, light, and vibration self-test pass
After the boot is completed, the normal gas main surface can be displayed, and the real-time gas concentration can be seen. Press the left button to view the system status information.

4.1b Turn off
Keep the air around the detector clean on the page waiting to be turned on. During the startup process, the detector will perform a vibration and light self-test, please pay attention to observe whether it is normal. The above status is normal, indicating that the sound, display, light, and vibration self-test pass

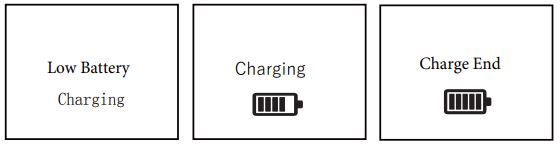
4.1c ChargingThe USB charging cable is plugged in when the detector is in shutdown mode, the current power will be displayed on the screen, when there is only one grid left, the LCD will pop up a low battery page every 60 seconds, and there has a voice indicating”Low battery, please charge”. When the battery is less than 1 grid, the detector will automatically shut down to prevent data loss inside the detector and unpredictable damage caused by the insufficient voltage on the internal sensitive components of the instrument.
4.2 Function setting
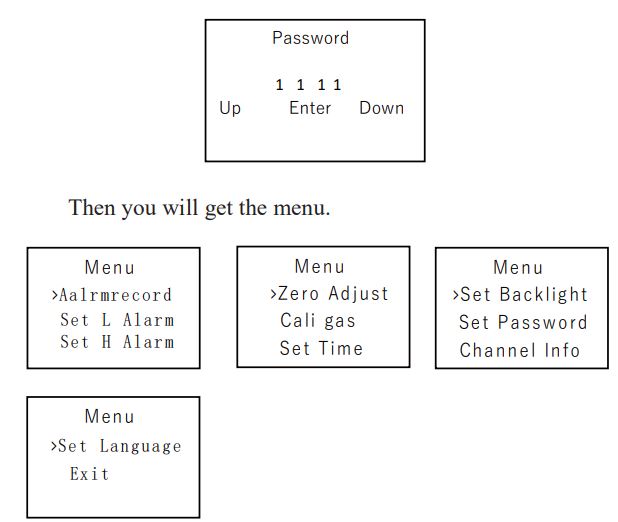
The menu of the detector contains as follows Alarm Record, Set Low Alarm, Set High Alarm, Zero Adjust, Calibrate Gas, Set Time, Set Backlight, Set Password, Channel Info, Set Language, Exit. At the detecting interface, press the Right key, then input the password, default password is 1111
4.3 Alarm Record
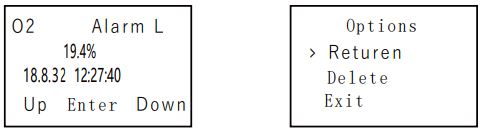
Under the menu list choose the Alarm Record, press the power key then you can find the alarm record data; View the data by press the Up or Down key; Press the power key, switch to the options page, clear all records by selecting “delete”, or select “return”: return to the record query page; “exit”: return to the main menu.
4.4 Set Low Alarm
Under the menu list choose the Set L Alarm, press power key then you can enter the setting interface; you can select the channels of combustible gas, oxygen, hydrogen sulfide, and carbon monoxide by up and down keys; after selecting the channels you need to set, press the power key to enter the page of setting low alarm concentration; The alarm concentration can be adjusted according to the Up and Down, and after the Yes key is pressed, the alarm is saved.

4.5. Set High Alarm
Under the menu list choose the Set H Alarm, press power key then you can enter the setting interface; you can select the channels of combustible gas, oxygen, hydrogen sulfide, and carbon monoxide by up and down keys; after selecting the channels you need to set, press the power key to enter the page of setting high alarm concentration; The alarm concentration can be adjusted according to the Up and Down, and after the power key is pressed, the alarm is saved.

4.6. Zero Adjust
Under the menu list choose the Zero Adjust, press power key then you can enter the setting interface; you can select the channels of combustible gas, oxygen, hydrogen sulfide, and carbon monoxide by up and down keys; after selecting the channels you need to set, press the power key to enter the page of zero adjust interface. The data is your gas concentration, after the Yes key is pressed, the alarm is saved.
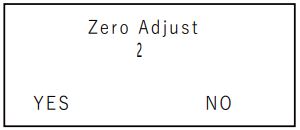
Warning: You must do this in the clean air O2 must adjust in the N2 gas environment, ensure there is no detected gas in the air. Or the detect value will be wrong
4.7. Cali Gas
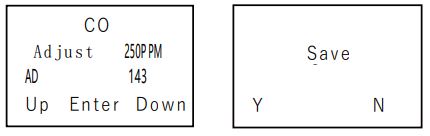
Under the menu list choose the Zero Adjust, press power key then you can enter the setting interface; you can select the channels of combustible gas, oxygen, hydrogen sulfide, and carbon monoxide by up and down keys; after selecting the channels you need to set, press the power key to enter the page of calibration. During this operation, the user needs to place the gas with the same concentration of the detector and the calibration value in the sealed gas tank. The calibration value can be adjusted by increasing or reducing the calibration value to make it consistent with the gas in the gas tank. By observing the real-time display of AD value, judge the change of gas in the box at this time; when the gas concentration stabilizes, press the confirmation key to save.
Warning: Nonprofessional personnel is strictly prohibited from carrying out this operation, otherwise all consequences will be borne by themselves. The tester has been calibrated uniformly when it is out of the factory. If the user wants to recalibrate, please follow the steps strictly, first set the zero point, then re-calibrate the settings. If the user fails to operate this setting, please contact the manufacturer back in time for calibration.
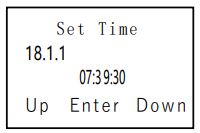
4.8. Set Time
Under the menu list choose the Set Time, press the power key then you can enter the setting interface; Modify the date by press the Up or Down key. After modified press the save is ok.
4.9. Set Backlight
Under the menu list choose the Set Backlight, press the power key then you can enter the setting interface; Modify the type by press the Up or Down key. After modified press the save is ok. Auto: the light will keep for 30 seconds; Normally on: the light will always be working.

4.10. Set Password
Under the menu list choose the Set Password, press the power key then you can enter the setting interface; Before modifying the password, you need to validate the password first, then you can change it.The default password is 1111
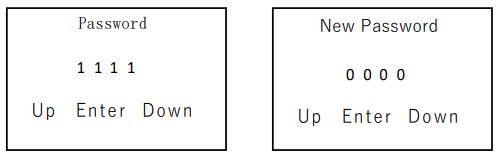
Attention: please save the password properly. Once lost, it can only be returned to the manufacturer to resume the factory settings.
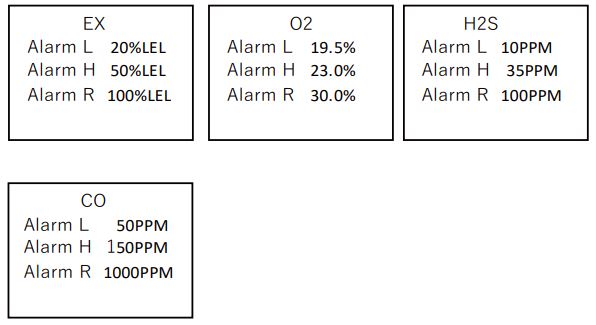
4.11. Channel Info
Under the menu list choose the Channel info, press the power key then you can enter the info interface; By pressing the Up or Down to choose the gas type, will display the gas name, low alarm, high alarm, detecting range.

4.12. Language
Under the menu list choose the Set Language, press the power key then you can enter the setting interface;

V. Use
5.1. When the detector is turned on, the LCD screen is in the standby state of displaying four concentrations of EX gas, O2, H2S, and CO in real-time.
5.2 EX alarmWhen the concentration of EX gas is detected to be higher than the low alarm value set by the system, the detector will broadcast the voice “Please note that the concentration of EX gas exceeds the standard” and continue to simulate the alarm sound; the alarm lamp above the detector and the internal vibration motor will be turned on simultaneously; When the alarm value is low, the voice, light, and vibration alarm states disappear.
5.3 O2 alarmWhen the concentration of O2 is detected to be lower than the low alarm value set by the system, the detector will broadcast the alarm signal “Please note that the concentration of oxygen is too low”, which is higher than the high alarm threshold set by the system. The detector will broadcast the alarm signal “Please note that the concentration of oxygen exceeds the standard” and always simulate the alarm sound; the alarm light on the detector will voice the alarm signal. When the concentration of O2 gas is monitored by the detector and restored to the normal value, the alarm state of voice, light, and vibration disappears.
Note: O2 concentration in normal air is 20.9%. Users can adjust the value of low and high alarms according to actual needs.
5.4 H2S alarmWhen the concentration of H2S gas is detected to be higher than the low alarm value set by the system, the detector will broadcast the voice “Please note that the concentration of H2S gas exceeds the standard” and continue to simulate the alarm sound; the alarm lamp above the detector and the internal vibration motor will be turned on simultaneously; When the alarm value is low, the voice, light, and vibration alarm states disappear.
5.5 CO alarmWhen the concentration of CO gas is detected to be higher than the low alarm value set by the system, the detector will broadcast the voice “Please note that the concentration of CO gas exceeds the standard” and continue to simulate the alarm sound; the alarm lamp above the detector and the internal vibration motor will be turned on simultaneously; When the alarm value is low, the voice, light, and vibration alarm states disappear.
5.6 Alarm data storageAfter the detector triggers the alarm when the detection alarm gas restores to the normal threshold set, the detector will save the current alarm information to the internal storage of the detector, and according to the user set low concentration alarm threshold, high concentration alarm threshold can be divided into low and high alarm. The user can search through the alarm in the menu.
 NoteThe alarm voice support Chinese or English, as same as the language you choose.
Warning 1. The detector only alarm when it is detecting;2. Do not charging detectors at the gas monitoring site to avoid fire or explosion caused by sparks during the plugging process.3. Try not to charge the detector on startup, so as not to affect charging speed.4 The detector has the function of intelligent tracking zero points. Please turn on under the condition of clean air.
VI. Notes
- Prevent the detector from falling down or being subjected to severe vibration.
- In the presence of high concentration gas, the detector may not be used normally.
- Please strictly operate and use according to the instruction manual, otherwise, it may cause the test result to be inaccurate or damage the detector.
- This product should not be stored or used in environments containing corrosive substances (such as chlorine of relatively high concentration) or in other harsh environments, including too high or too low temperature, high humidity, electromagnetic field, and strong sunlight exposure
- If there is dirt on the surface of the instrument after long-term use, please gently wipe it with a clean soft cloth dipped in water. Do not use corrosive solvents and hard materials to wipe the surface of the machine. Otherwise, it may lead to scratches or damage on the surface of the instrument.
- In order to ensure the accuracy of detection, the detector should be calibrated regularly, and the verification period should not exceed 1 year.
- Please unload the lithium batteries and sensors of the discardedportable gas detector and send them to the designated location or return them to our company. Do not throw them into the garbage can at will
- Any failure or failure to be described in this manual should be contacted with our company for settlement.
- In the explosive gas environment, the battery pack can not bedismantled or replaced, nor can the battery pack be charged. In the explosive gas environment, peripheral plug-in devices without explosion-proof certification can not be used, nor can sensors be replaced.
- This product has obtained explosion-proof certification. Users are not allowed to change or change the components or structures affecting explosion-proof performance without permission.
VII. Common faults and Solutions


VIII. Storage
The detector should be stored in the ventilation room with ambient temperature -10 to 55 and humidity <85%. Avoid direct sunlight, and air can not contain harmful gases or impurities that are corrosive to the detector.
IX. Package
Packing box —1Portable gas detector— 1Charger —1USB line — 1Manual —1mask —1
X. A appendix – Sensor Selection Table
[xyz-ips snippet=”download-snippet”]