DELL MS3220 Laser Wired Mouse
Notes, Cautions, and Warnings
NOTE: A NOTE indicates important information that helps you make better use of your computer.
CAUTION: A CAUTION indicates potential damage to hardware or loss of data if instructions are not followed.
![]() WARNING: A WARNING indicates a potential for property damage, personal injury, or death.
WARNING: A WARNING indicates a potential for property damage, personal injury, or death.
© 2020 Dell Inc. or its subsidiaries. All rights reserved. Dell, EMC, and other trademarks are trademarks of Dell Inc. or its subsidiaries. Other trademarks may be trademarks of their respective owners.
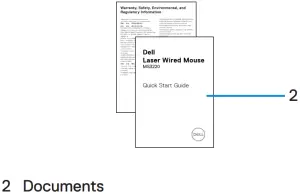
What’s in the box

Features
Top and side view
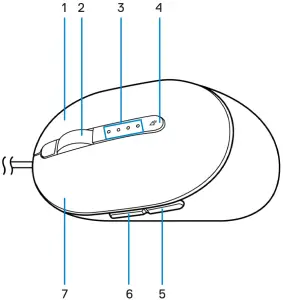
- Right button
- Scroll wheel
- DPI indicators
- DPI adjustment button
- Backward button
- Forward button
- Left button
Bottom view
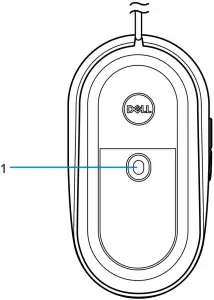
- Laser sensor
Dell Peripheral Manager
Dell Peripheral Manager software enables you to perform the following:
- Assign program shortcuts to device programmable buttons or keys through the Action tab.
- View device information such as firmware version and battery status through the Info tab.
- Upgrade the latest firmware updates on your devices.
- Pair additional devices through the RF USB dongle or directly to your computer through Bluetooth. For more information, see Dell Peripheral Manager User’s Guide on the product page at www.dell.com/support.
Setting up your mouse
Connecting the mouse
Connect the mouse USB cable to an available USB A port on your laptop or desktop.
Adjusting the DPI
Press the DPI adjustment button repeatedly to toggle between mouse tracking resolutions.
DPI setting is indicated by the number of DPI indicator lights that are illuminated. The default four DPI settings and their indicator lights are as follows:
Specifications
General
| Model number | MS3220 |
| Connection type | Wired USB 2.0 |
| Operating system |
|
Electrical
| Operating voltage | DC 5 V, 0.1 A |
Physical characteristics
| Weight (with cable) | < 120 g (< 0.26 lb.) |
| Dimensions | |
| Length | 142 mm (5.59 in.) |
| Width | 91 mm (3.58 in.) |
| Height | 46.5 mm (1.83 in.) |
Environmental
| Temperature | |
| Operating | -10°C to 50°C (14°F to 122°F) |
| Storage | -40°C to 65°C (-40°F to 149°C) |
| Storage humidity | 95% maximum relative humidity; non-condensing |
Troubleshooting
| Problems | Possible solutions |
| Mouse is not functioning |
|
| Resolving cursor issues |
|
| Resolving mouse button issues |
|
| Solving a slow moving cursor |
|
Statutory Information
Warranty
Limited warranty and return policies
Dell-branded products carry a three-year limited hardware warranty. If purchased together with Dell system, it will follow the system warranty.
For U.S. customers:
This purchase and your use of this product are subject to Dell’s end user agreement, which you can find at Dell.com/terms. This document contains a binding arbitration clause.
For European, Middle Eastern and African customers:
Dell-branded products that are sold and used are subject to applicable national consumer legal rights, the terms of any retailer sale agreement that you have entered into (which will apply between you and the retailer) and Dell’s end user contract terms. Dell may also provide an additional hardware warranty full details of the Dell end user contract and warranty terms can be found by going to Dell.com/terms, selecting your country from the list at the bottom of the “home” page and then clicking the “terms and conditions” link for the end user terms or the “support” link for the warranty terms.
For non-U.S. customers:
Dell-branded products that are sold and used are subject to applicable national consumer legal rights, the terms of any retailer sale agreement that you have entered into (which will apply between you and the retailer) and Dell’s warranty terms. Dell may also provide an additional hardware warranty full details of Dell’s warranty terms can be found by going to www.Dell.com, selecting your country from the list at the bottom of the “home” page and then clicking the “terms and conditions” link or the “support” link for the warranty terms.
report this ad
References
[xyz-ips snippet=”download-snippet”]