![]() EC9155
EC9155 COFFEE MAKERInstructions for use
Before using the appliance, always read the safety warnings.This appliance shall not be used by children.Keep the appliance and its cord out of reach of children.
DESCRIPTION
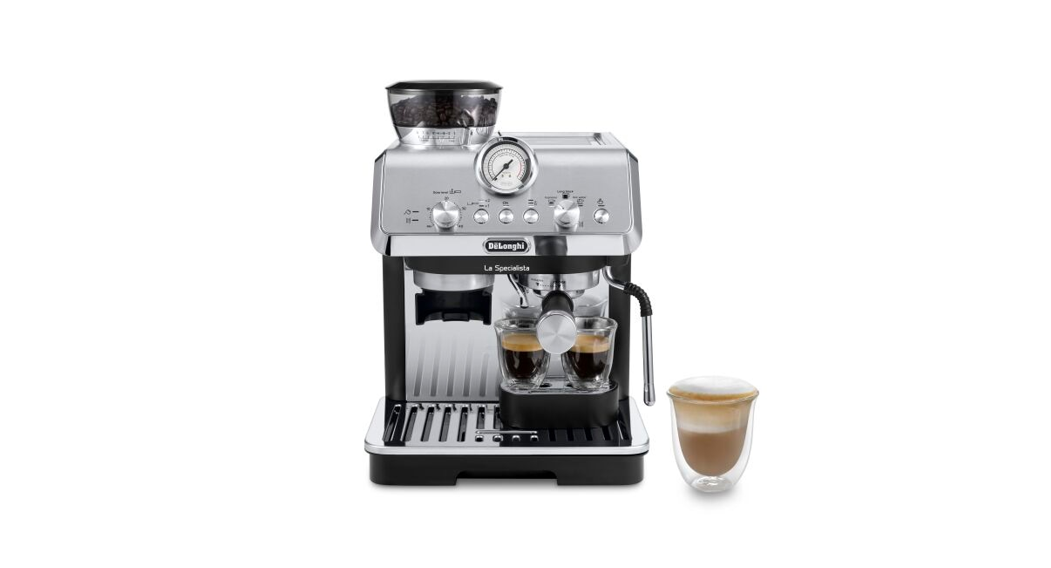
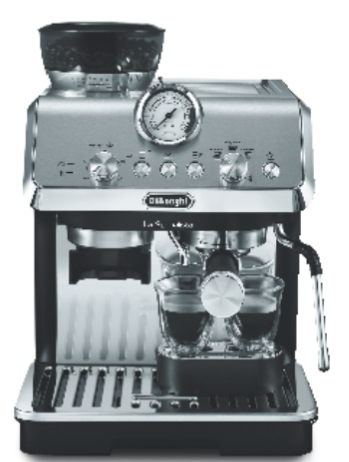
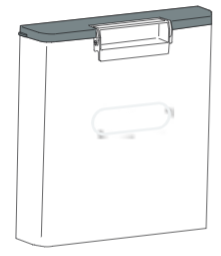
1.1 Description of appliance – A
| A1. Main switchA2. Grinding level selector (fine to coarse)A3. Beans containerA4. Beans container lidA5. Accessory holder lidA6. Water tank lidA7. Water tankA8. Power cordA9. Steam wand | A10. Coffee outletA11. Hot water spoutA12. Portafilter holderA13. Coffee grinder outletA14. Small cup grille supportA15. Small cup grilleA16. Mug or cup trayA17. Mug or cup tray supportA18. Water level indicatorA19. Drip tray |
1.2 Description of the control panel – B
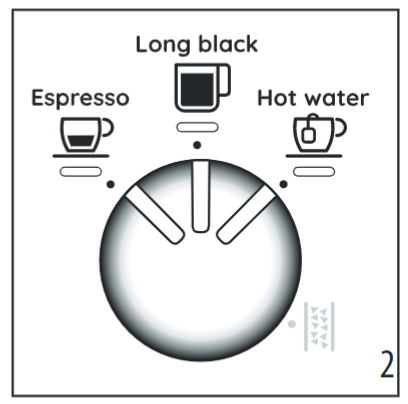
| B1. Pressure gaugeB2. No water lightB3. Descale lightB4. Coffee dose dialB5. 1 or 2-cups selection buttonB6. OK button: to deliver the beverage/confirm | B7. Coffee Temperature buttonB8. Mode selector dial:• Espresso• Long Black• Hot water• DescalingB9. Steam button: to deliver steam |
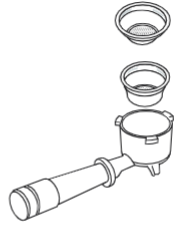
1.3 Description of accessories – C
| C1. PortafilterC2. Dosing&Tamping GuideC3. 1-cup coffee filterC4. 2-cups coffee filterC5. “Water hardness test “ indicator paperC6. Descaler | C7. Softballs (* some models only)C8. Milk pitcherC9. Cleaning brushC10. Cleaning needle for steam nozzleC11. TamperC12. Tamping Mat (* some models only) |
1.4 Recommended optional cleaning accessoriesVisit Delonghi.com for more information.
![]() CleanerEAN: 8004399333307
CleanerEAN: 8004399333307
EXPLANATION OF LIGHTS
|
LIGHTS |
EXPLANATION OF LIGHTS |
OPERATION |
| All the lights flash briefly | Turning the machine on | Self-diagnosis |
 |
The appliance is being turned on for the first time and the water circuit must be filled | Proceed as described in the Quickstart guide. |
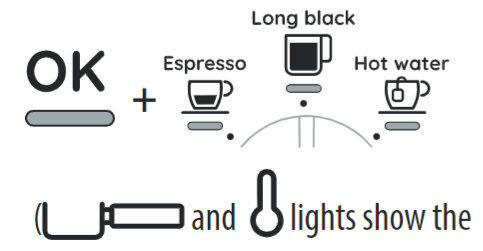
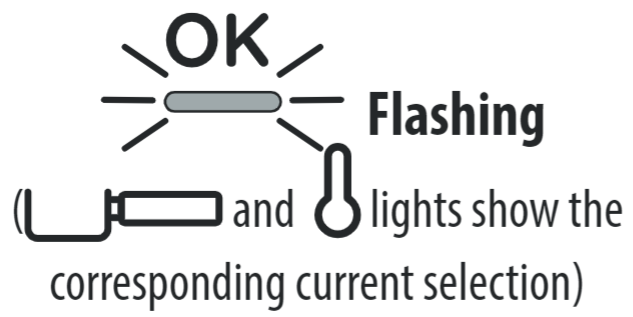
corresponding current selection) |
The machine is ready to use | Prepare the machine, select the desired beverage and press OK to start delivery |
 |
The machine is setting for ready to use | The machine is setting for ready to use |
 |
Insufficient water in the tank (A7) or water tank not inserted correctly | Fill the tank or extract the tank and put it back correctly |
 |
You are trying to deliver a beverage but the water tank (A7) is empty | Fill the tank |
| The grinding is too fine and the coffee is
delivered too slowly or not at all |
Extract the portafilter (C1) and repeat the operations to make the coffee, bearing in mind the instruction is given in the quick start guide relative to the grinding section | |
| The filter (C3) or (C4) is blocked | Clean as described in section “5. Cleaning and maintenance”. | |
| The tank (A7) has been inserted incorrectly and the valves on the bottom are not open | Press the tank down lightly to open the valves on the bottom | |
| Scale in the water circuit | Descale as described in section “9. Descaling” | |
 |
1-dose beverage is selected | All the process (from grinding to delivery) is set for preparing 1 cup |
 |
2-doses beverages are selected | All the process (from grinding to delivery) is set for preparing 2 cups |
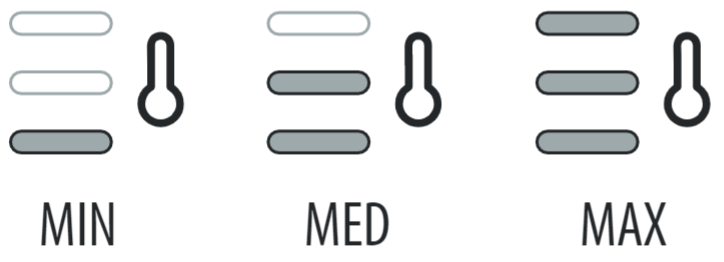 |
Choose 1 of the 3 temperatures available | See Quick Guide for tips. |
 |
General alarm | Contact Customer Service |
 |
The steam function is selected and running | In a few seconds, the appliance starts steam delivery |
 |
Descaling must be performed | Descale the appliance as described in section “9. Descaling” |
 |
Descaling is selected | Press OK (B6) to run the descaling cycle or turn the selection knot to the beverage desired |
 Flashing – colored orange Flashing – colored orange |
Descaling is performing: the machine is delivering the descaling solution | Proceed to complete the descaling cycle (see “9. Descaling”) |
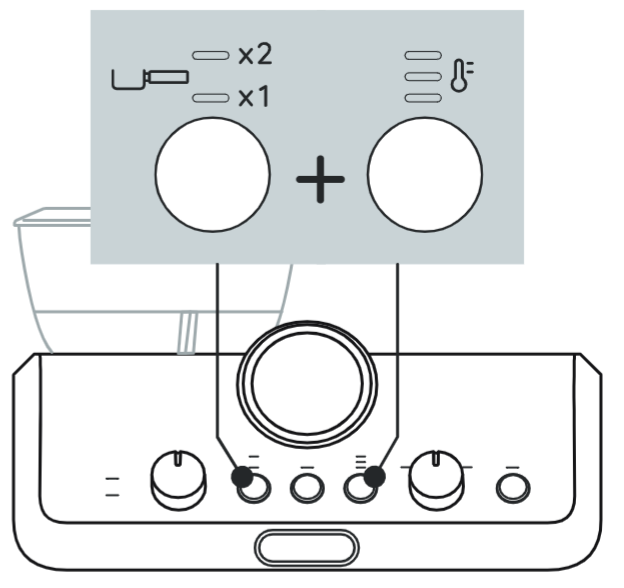
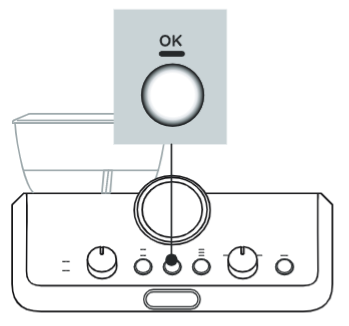
Enter the setting menuPress both buttons (B5) and (B7) for 3 seconds to enter the setting menu
 Reset to default valuesKeep pressed steam button (B9) for 3 seconds
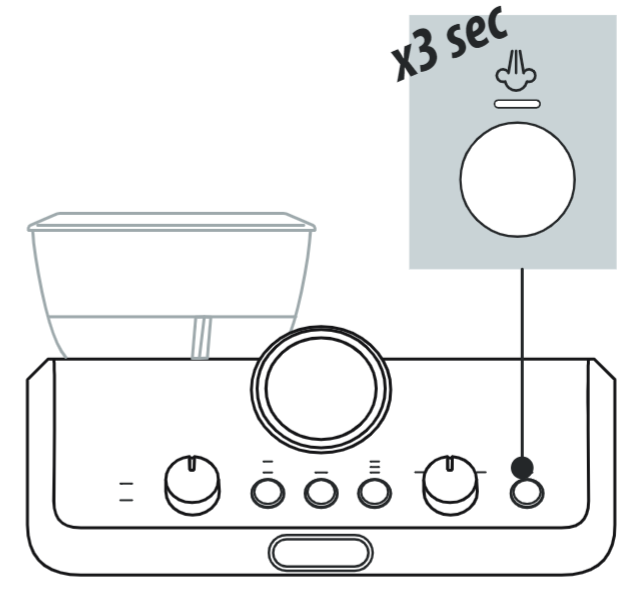
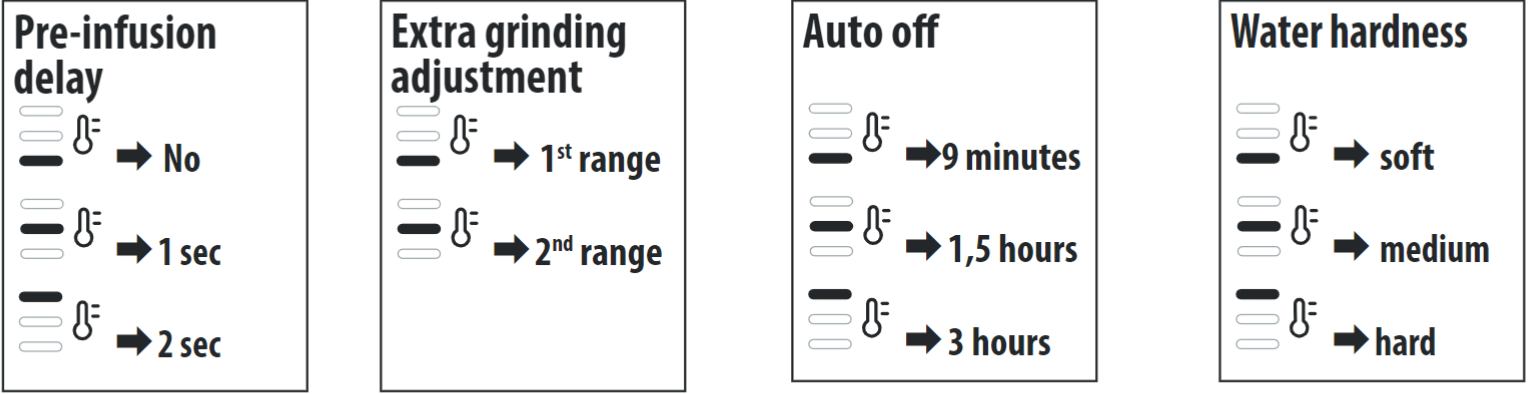
Select the settingTurn the knob (B8) to select the position corresponding to the function to set
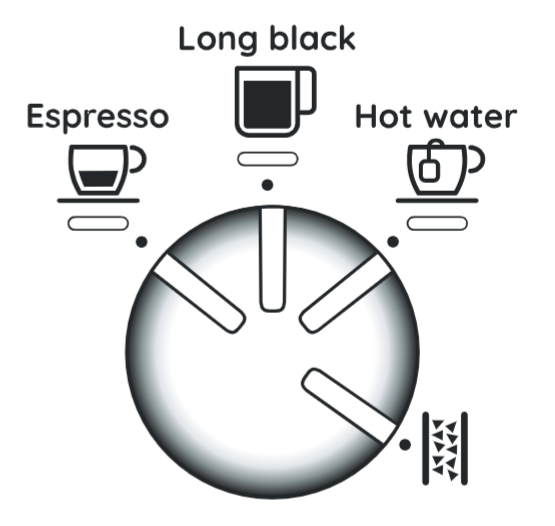
 |
Press the temperature button: the light corresponding to the current setting flashes. Press the temperature button again to select: Press the temperature button again to select: |
 |
 Please note:The appliance automatically exits the menù setting after 30 seconds of inactivity
CUSTOMISING THE QUANTITY OF BEVERAGES
 |
 |
 |
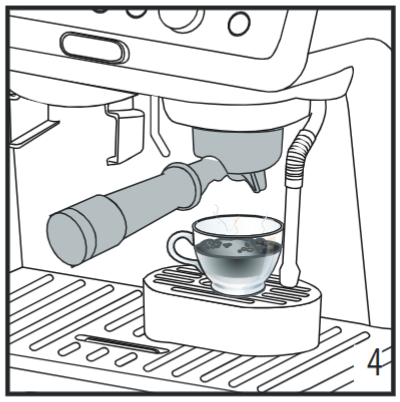 |
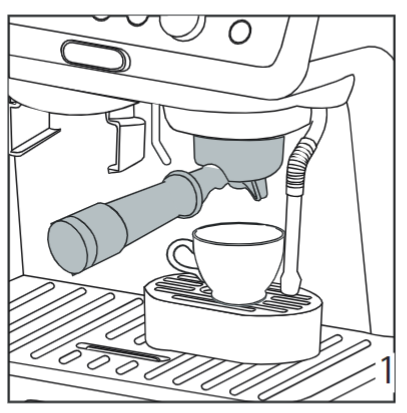
| 1. Prepare the appliance to deliver the beverage you want to make. Prepare the coffee dose and attach the portafilter (C1) to the coffee outlet (A10). | 2. Turn the dial (B8) to select the drink to be programmed. | 3. Keep pressed the OKbutton (B6) until the desired quantity in the cup is reached. | 4. Once released the button, the quantity is programmed. |
Please note:
- You can program beverages quantities, but not steam.
- Programming changes the quantity of the beverages, but not the amount of coffee ground.
- “
X2” beverages can be programmed separately.
| Coffee Recipe | Default quantity |
Programmable quantity |
Espresso |
35 ml | from 25 to 90 ml |
Espresso |
70 ml | from 50 to 180 ml |
Long block |
100 ml |
|
Long block |
200 ml |
|
| Hot water
|
250 ml | from 65 to 300m1 |

CLEANING AND MAINTENANCE
Important!
- Do not use solvents, abrasive detergents, or alcohol to clean the coffee machine.
- Do not use metal objects to remove encrustations or coffee deposits as they could scratch metal or plastic surfaces.
- If the appliance is not used for more than a week, before using it again, we recommend you perform a rinse cycle.
Danger!
- While cleaning, never immerse the coffee maker in water. It is an electrical appliance.
- Before cleaning the outside of the appliance, turn it off, unplug from the mains socket and allow it to cool.
 |
 |
 |
 |
 |
|
 |
✕ |
✓ |
✕ |
✕ |
✕ |
|
✕ |
✕ |
✕ |
✕ |
||
 |
✓ |
✕ |
✕ |
✓ |
✕ |
 |
✕ |
✓ |
✓ |
✕ |
✓ |
 |
✕ |
✓ |
✓ |
✕ |
✓ |
CLEANING THE GRINDER
- Clean the attachment area with a brush;
- Use the brush (C9) to clean the coffee funnel.

WATER HARDNESS
7.1 Water hardnessThe![]() descale light (B3) comes on after a period of time established according to water hardness. The machine can also be programmed according to the actual hardness of the water supply in the various regions, in which case descaling may be required less frequently.
descale light (B3) comes on after a period of time established according to water hardness. The machine can also be programmed according to the actual hardness of the water supply in the various regions, in which case descaling may be required less frequently.
 |
 |
|
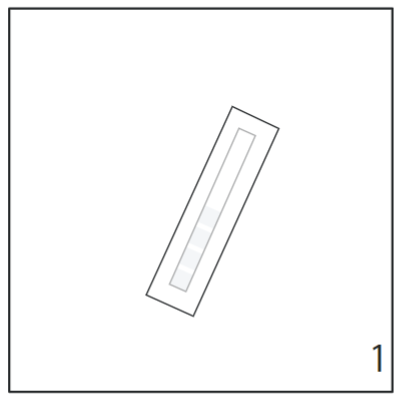
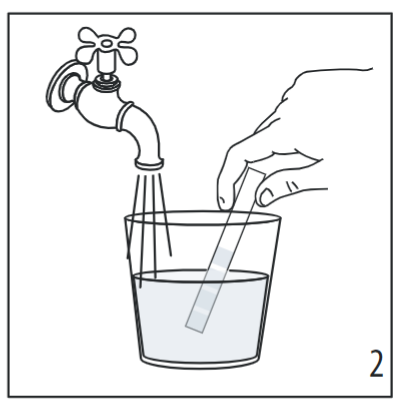
| 1. Remove the “TOTAL HARDNESS TEST” indicator paper (C5) from its pack. | 2. Immerse the paper completely in a glass of water for one second. | 3. Remove the paper from the water and shake lightly. |
4. Set the appliance as indicated in section “3. Menù settings”.
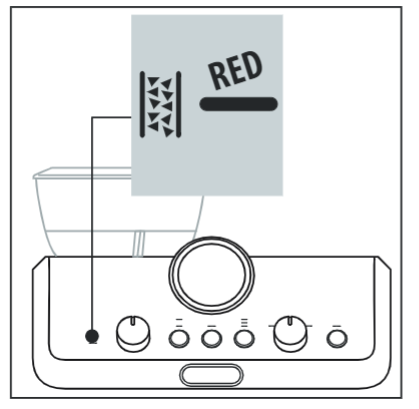
After about a minute, 1, 2, 3, or 4 red squares form, depending on the hardness of the water. Each square corresponds to one level.
| Total Hardness Test result | Button | Level |
 |
 |
1 soft water |
 |
 |
2 medium water |
  |
 |
3 hard or very hard water |
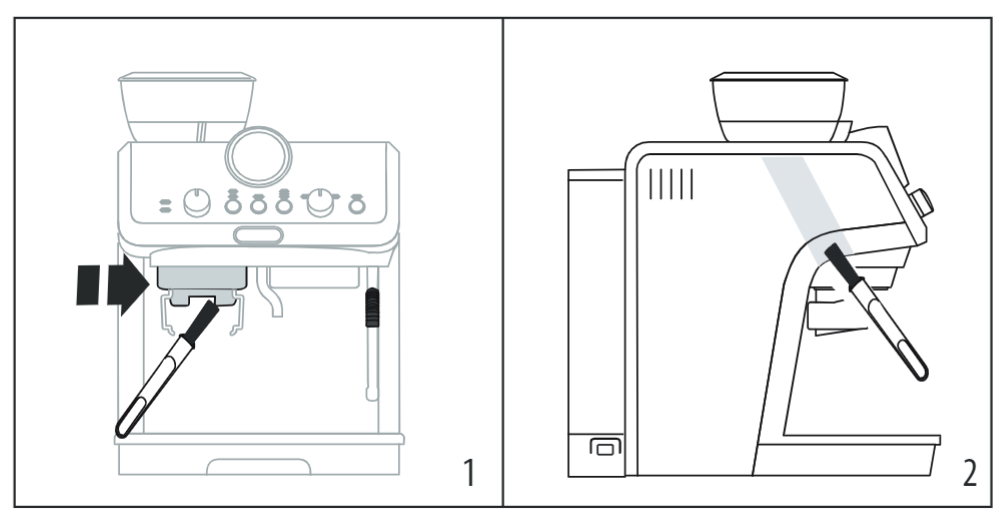
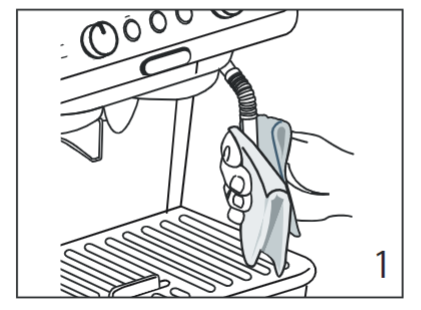
CLEANING THE STEAM NOZZLE
 |
 |
 |
| 1. After every use, remove with a soft damp clothany milk residues from the steam wand (A9) and the nozzle. | 2. Use the steam for deeper cleaning. | 3. To maintain the better usability of the nozzle, when clogged, use the Cleaning Tool (C10) for opening the hole. |
DESCALING

12. Please note
- Before use, read the instructions and the labeling on the descaler pack.
- It is important to use De’Longhi descaler only. Using an unsuitable descaler and/or performing descaling incorrectly may result in faults not covered by the manufacturer’s guarantee.
- Descalers could damage delicate surfaces. If the product is accidentally spilled, dry immediately.
 |
 |
 |
| When the |
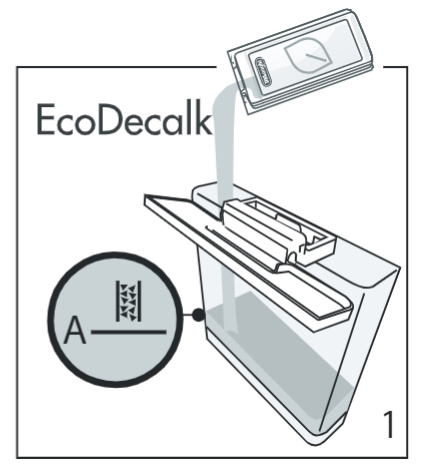
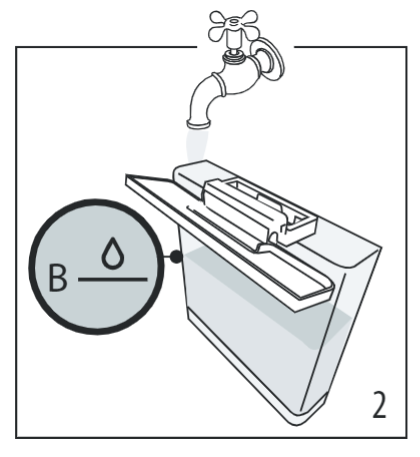
1. (IF PRESENT, REMOVE THE WATER SOFTENER DEVICE). Pour the descaler into tank A7 up to the level ones |
2. Add water (1 liter) up to level |
 |
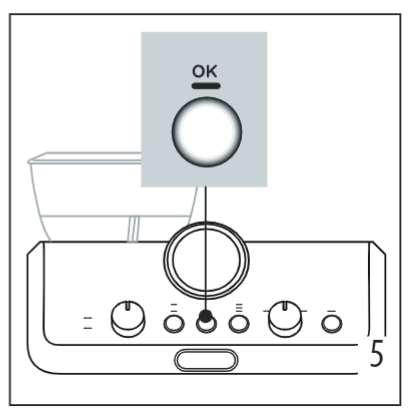 |
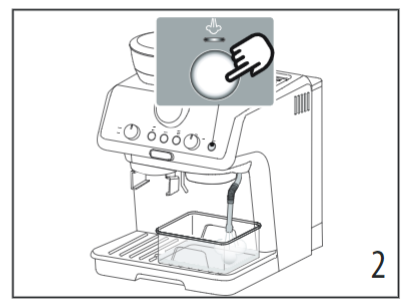
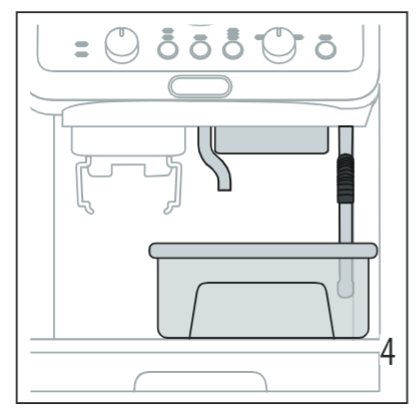
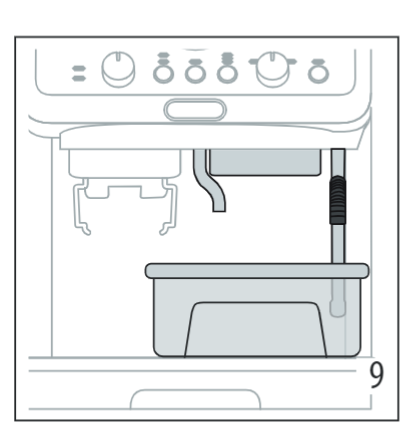
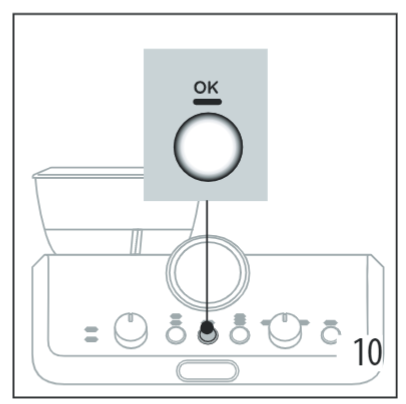
| 4. Make sure the portafilter is not attached and position a recipient under the coffee outlet (A10), hot water spout (A11), and steam wand (A9). | 5. Keep pressed for at least 3 seconds the OK button: the OK light begins to flash; descaling starts. |
Please note
- In case you start the descaling cycle by mistake, you can press the OK button for 10 seconds; the rinsing cycle can not be stopped (from step 9).
6. The descaling program starts and the descaler liquid comes out of the steam wand and coffee outlet. The descaling program removes limescale deposits from inside theappliance by automatically performing a series of rinses and pauses until the tank is empty.Delivery stops and the OK light turns to white. This indicates that it is necessary to proceed with rinsing: see next page.
 |
 |
 |
 |
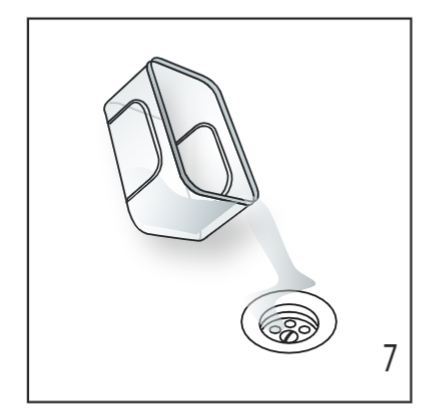
| 7. Empty the recipient used to collect the descaler solution and replace it empty. | 8. Remove the water tank, empty any residues of descaler solution, rinsewith running water and fill with fresh water up to the MAX level. Put the tank back in its housing. | 9. Position a recipient under the coffee outlet, hot water spout, andsteam wand. | 10. Press the OK button: rinsing starts. |
11. When rinsing is complete, delivery stops and the appliance prepares to be used again:12. Empty the recipients used to collect the rinse water.
 |
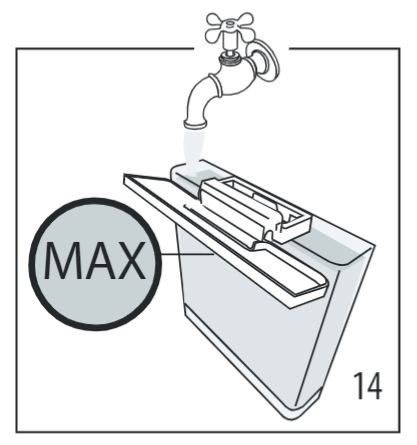 |
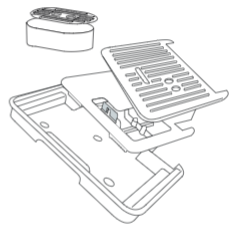
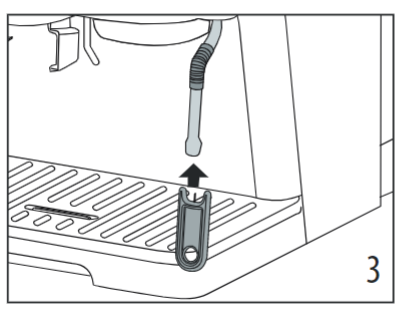
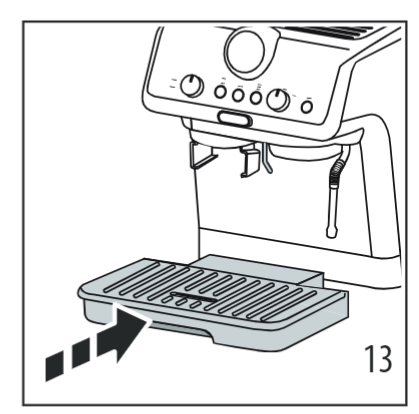
| 13. Extract and empty the drip tray (A19), then put it back in the appliance. | 14. Empty, rinse, then fill the water tank with fresh water and replace it. |
Now the appliance is ready to use.
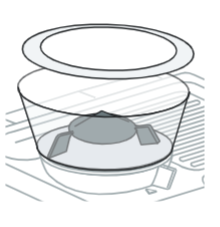
USING THE SOFTBALLS (*SOME MODELS ONLY)
Softball is an innovative system that extends the life of the machine, without altering the sensory properties of the water, guaranteeing consistently creamy and aromaticcoffee.
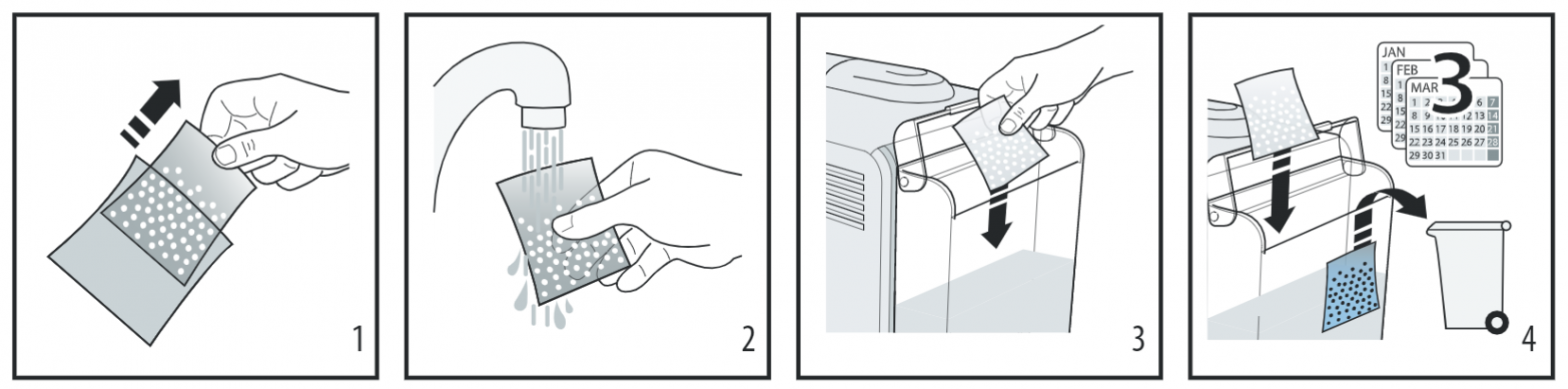 |
|||
| 1. Extract the Softballs bagfrom the packaging. | 2. Rinse with tap water theSoftballs bag. | 3. Deep the bag into thewater tank (A7). | 4. Change the Softballsevery 3 months. |
TROUBLESHOOTING
|
PROBLEM |
CAUSE |
SOLUTION |
| There is water in the drip tray (A19) | It is normal: due to the internal water circuits operations | Regularly empty and clean the drip tray |
| No espresso coffee is delivered | No water in the tank (A7) | Fill the tank |
| Only the OK light (B6) is on to indicate that the coffee or steam circuit is empty | Press the button corresponding to the OK light to fill the circuit | |
| The coffee filter (C3) or (C4) is blocked | Rinse the filters under abundant running water. | |
| Coffee grind too fine or too much coffee | Adjust coffee dose and grinding (refer to Quick Guide) | |
| The tank (A7) has been inserted incorrectly and the valves on the bottom is not open | Press the tank down lightly to open the valves on the bottom | |
| Scale in the water circuit | Descale as described in section “9. Descaling” | |
| The portafilter (Cl) cannot be attached to the appliance | The ground coffee has not been pressed or is too much | Repeat grinding with new settings. Reduce the powder quantity: check if the filter (single or double filter) is the same size as the selector of grinding quantity (2x (BS) selected or not) |
| The espresso coffee drips from the edges of the portafilter (Cl) rather than the holes | The portafilter is inserted incorrectly | Attach the portafilter correctly and rotate firmly as far as it will go |
| The espresso boiler gasket has lost elasticity or is dirty | Have the espresso boiler gasket replaced by Customer Services | |
| The coffee filter is clogged |
|
|
| The coffee crema is too light (delivered from the spout too fast) | The appliance settings need reviewing | Refer to Quick Guide for suggestions |
| The coffee crema is too dark (delivered from the spout too slowly) | The appliance settings need reviewing | Refer to Quick Guide for suggestions |
| At the end of descaling, the appliance requests a further rinse | During the rinse cycle, the water tank (A7) has not been filled to the MAX level | Complete the rinse cycle from point (8) of section”9. Descaling” |
| The appliance does not grind the coffee | There is a foreign matter that cannot be ground in the coffee grinder | Turn the grinder selector (A2) to 8, vacuum all the beans and parties in the beans container (A3). If the problem persists, address it to Customer Service Centre. |
| If you want to change the type of coffee | You must remove all the beans present in the machine |
|
| After grinding, the coffee filter is empty | The coffee grinder funnel is clogged | See section “6. Cleaning the grinder”. |
| After grinding, the ground coffee in the filter does not reach the “perfect dose” | The number of ground coffee needs adjusting | Adjust the quantity of coffee with the dial (B4). If the dial is already in the max. position, select the second range of grinding adjustment (see “3. Menù settings”- “Extra grinding adjustment”). |
| Over time the burrs wear down | Address to a Customer Service Centre to change burrs. |
References
[xyz-ips snippet=”download-snippet”]