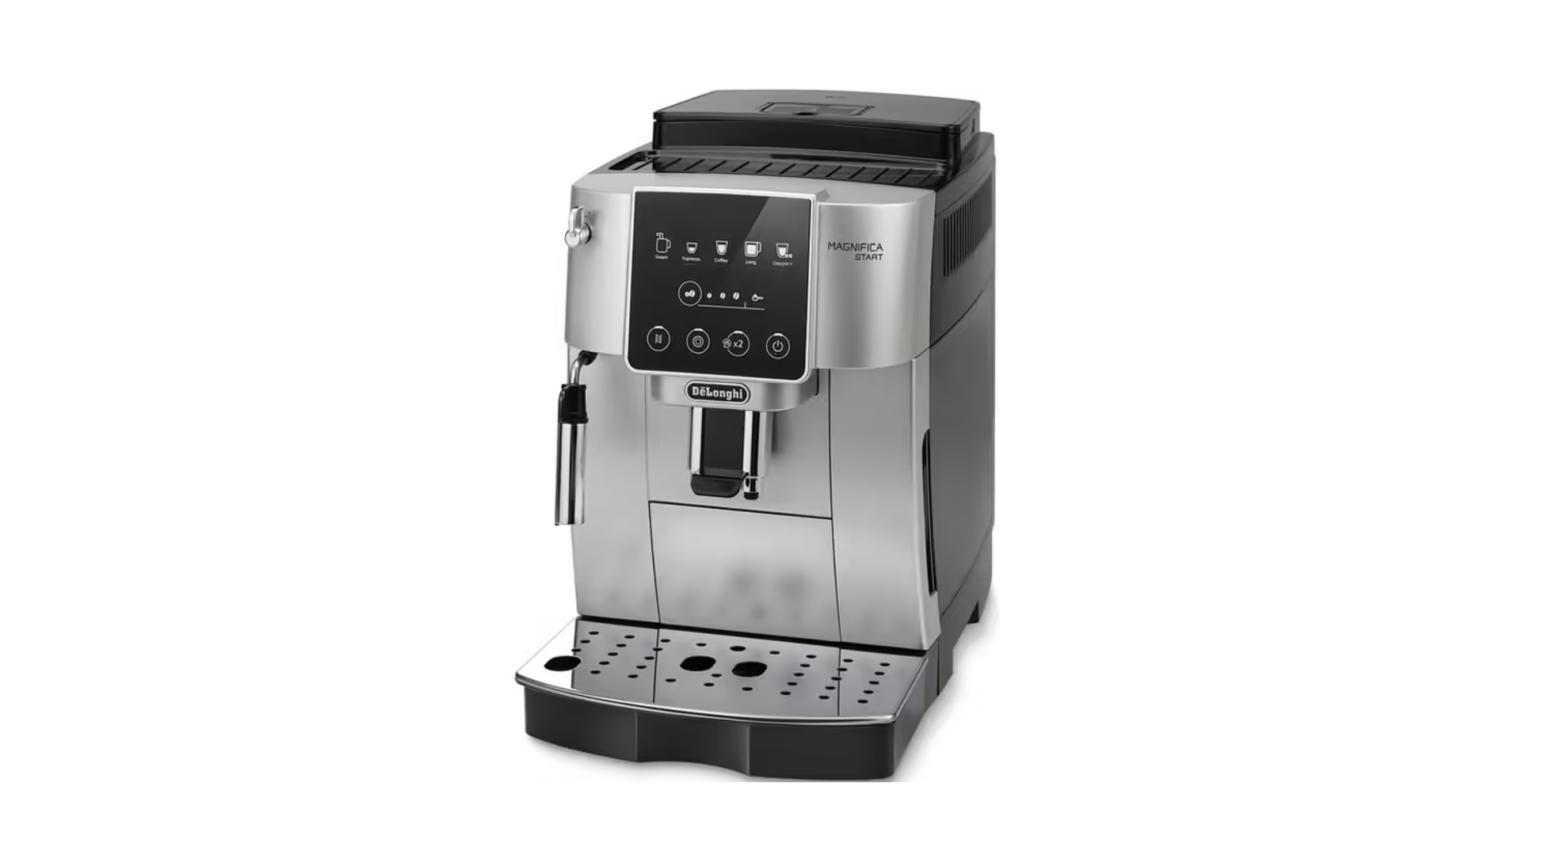
ECAM 22X.2Y Bean To Cup Espresso And Cappuccino Machine
ECAM22X.2Y – 22X.3YBEAN TO CUP ESPRESSO AND CAPPUCCINO MACHINE Instructions for Use
How to Choose the Right Coffee Machine or the Right Coffee Maker?
AA2A1290 A19A18 A17A156 A15 A14A13
A1
A3
A4
A5 A6
A10 A11
A7 A8 A9
A122 http://101coffeemachines.info
BB10 B12 B9 B11 B13
B8* 1 2 3 4 5
B6
B7
B5
B4
B3
B2
B1
C*C1 C2
Decalcificante per macchine da caffè Descaler for coffee machinesDétartrant pour machines à café Entkalker für KaffeemaschinenDe’Longhi Appliances s.r.l. Via L. Seitz, 47 31100 Treviso – ITALYTel. +39 0422 4131 5413218631/04.15
C3
50°C
3 http://101coffeemachines.info
CONTENTS
Before using the appliance for the first time, be
1. INTRODUCTION………………………………… 41.1 Letters in brackets ……………………………..4 1.2 Troubleshooting and repairs………………..42. DESCRIPTION ………………………………….. 42.1 Description of the appliance – A …………..4 2.2 Description of control panel – B ……………5 2.3 Description of accessories – C* …………….5
sure to read the safety warnings.1. INTRODUCTION Take a few minutes to read these Instructions for Use. This will avoid all risks and damage to the appliance. The LEDs and indicator lights on the panel will help you interact with the machine and use the various functions correctly:
3. SETTING UP THE APPLIANCE ……………….. 5
Off
—
4. MEASURING WATER HARDNESS …………… 6 5. TURNING THE APPLIANCE ON………………. 6 6. TURNING THE APPLIANCE OFF …………….. 6
P e r m a n e n t l y Function
alight
available
7. MAKING COFFEE DRINKS ……………………. 77.1 Makingcoffee using coffee beans …………7
Blinking
Function underway
7.2 Making 2 cups of coffee ……………………..7
7.3 Making coffee using pre-ground coffee…7 7.4 General indications for making coffee-baseddrinks ……………………………………………… 8
Blinking rapidly
User action required
7.5 Varying the coffee intensity ………………..8
7.6 Rinsing …………………………………………..8
The same symbols are also used in the Quick Guide provided
7.7 Tips for a hotter coffee………………………..8
with the product.
7.8 Adjusting the coffee mill …………………….8 7.9 Customising the quantity in the cup ……..88. MAKING CAPPUCCINO ……………………….. 9
1.1 Letters in brackets The letters in brackets refer to the description of the appliance on pages 2- 3.
8.1 What milk to use ……………………………….9 8.2 Making cappuccino ……………………………9 8.3 Clean the steam/hot water spout after use99. DELIVERING HOT WATER ……………………. 9
1.2 Troubleshooting and repairs In the event of problems, first try and resolve them by reading the information given in sections “16. Explanation of lights” and “17. Troubleshooting”.
10. WATER SOFTENER FILTER …………………..10
If this does not resolve the problem or further information is
10.1 Replacing the filter…………………………..10
required, consult the customer services department by calling
10.2 Removing the filter ………………………….10
the number given on the “Customer Service” sheet attached.
11. TIPS FOR ENERGY SAVING…………………..1112. SETTINGS MENU ………………………………1112.1 Reset default values …………………………14
If your country is not among those listed on the sheet, call the number given in the guarantee. If repairs are required, contact De’Longhi customer services only. The addresses are given in the guarantee certificate provided with the machine.
14. CLEANING THE INFUSER …………………….16 15. DESCALING …………………………………….16 16. EXPLANATION OF LIGHTS……………………18
2. DESCRIPTION2.1 Description of the appliance – A A1. Beans container lid
17. TROUBLESHOOTING …………………………20 A2. Coffee mill adjustment dial
18. TECHNICAL DATA………………………………21
A3. Beans container A4. Pre-ground coffee funnel
A5. Infuser door
A6. Removable infuser
A7. Power cord
A8. Water tank lid
4
How to Choose the Right Coffee Machine or the Right Coffee Maker?
A9. Water tank A10. Coffee grounds container A11. Drip tray A12. Drip tray water level indicator A13. Cup grille A14. Condensate tray A15. Coffee spouts (adjustable height) A16. Steam/hot water spout A17. Cappuccino maker (removable) A18. Steam/Hot water connection nozzle (removable) A19. Steam/Hot water dial A20. Cup shelf2.2 Description of control panel – B B1. ON/standby button with built-in Led B2. X2 button with built-in Led (if pressed and held for 5 sec-onds, activates rinsing of the coffee circuit) B3. Settings menu button with built-in Led B4. Descale button with built-in Led B5. Intensity or Pre-ground selection button B6. Intensity selection Led B7. Pre-ground selection Led B8. Different numbers and types of drinks, according tomodel. B9. Indicator permanently alight: filter must be replacedIndicator flashing: filter replacement in progress B10. Indicator permanently alight: insufficient water in thetank (A9) Indicator flashing: tank not in position B11. General alarm indicator B12. Indicator permanently alight: grounds container (A10) needs emptying Indicator flashing: grounds container not in position B13. Indicator permanently alight: machine must be descaled Indicator flashing: descaling in progress2.3 Description of accessories – C* (number and type differ according to model)C1. “Total Hardness Test” indicator paper C2. Pre-ground coffee measure C3. Descaler
· The first time the machine is used, the water circuit will be empty and the appliance could be very noisy.The noise becomes less as the circuit fills.· Make sure that the steam dial (A19) stays in the 0 position until completion of the first start-up cycle (fig. 1).
1 1. Connect the appliance to the mains supply (fig. 2).
1 2345
2
3
2. The indicator (B10) will light up on the control panel (B) (fig. 3): remove the water tank (A9) (fig. 4), fill up to the MAX level with fresh water (fig. 5), then reposition in the appliance.
3. SETTING UP THE APPLIANCE Please note:
4
5
· When using the machine for the first time, all removable accessories making contact with water or milk should be rinsed with hot water.· Possible traces of coffee in the mill are the result of operating tests performed on the appliance before sale, proof of the meticulous care and attention we invest in
3. The Led (B3) on the control panel will flash rapidly. 4. Position a container under the coffee spout (A15) (fig. 6).
5. Press the
button(B3) (fig. 7): the internal water
circuits start to fill and the appliance will release hot water
from the coffee spout.
our products.
5
How to Choose the Right Coffee Machine or the Right Coffee Maker?
1 2345
depending on the hardness of the water. Each square corresponds to one level.
Total Hardness Test
Hardness
1 Low
2 Medium
6
7
The machine is now ready for use. Please note: · When using the machine for the first time, 4-5 coffeeswill need to be made before it starts giving satisfactory results. · When rinsing the steam circuit, it is best to release hot water for a few seconds by turning the steam/hot water dial (A19) to the I position.
3 Medium/High4 HighSee instructions in section “12. Settings menu” to set the machine.5. TURNING THE APPLIANCE ON Please note: Make sure that the steam/hot water dial (A19) is closed, in the 0 position (fig. 1).
4. MEASURING WATER HARDNESS Setting the water hardness as soon as possible will enable the machine to optimize the frequency of descaling. This means that the descale indicator (B13) will light up as necessary according to the actual hardness of the local water supply. Pro-ceed as follows: 1. If a total hardness test indicator paper (C1) is suppliedwith the model of machine in question, remove it from its wrapper. 2. Immerse the paper completely in a glass of water for about one second (fig. 8).
Danger of scalding! During the rinse, a little hot water flows from the coffee spouts (A15). Take care to avoid contact with splashes of water. To avoid the need for frequent emptying of the drip tray (A11), place a container under the spouts to collect the rinse water.· To switch the appliance on, press the button (B1): the Led of button lights up and the drinks indicator Leds flash on the control panel (B) to show that the machine is warming up.During this step, the machine performs a rinse cycle. Besides heating up the boiler, this also serves to circulate hot water through the internal circuits so they too are brought up to temperature. The appliance is ready for use when the drinks and intensity Leds remain permanently alight.
6. TURNING THE APPLIANCE OFF
Whenever the coffee machine is turned off after being used to
make coffee, it performs an automatic rinse cycle.
Danger of scalding!
During the rinse, a little hot water flows from the coffee spouts
8
9
3. Remove the paper from the water and shake lightly (fig. 9). After about a minute, 1, 2, 3, or 4 red squares appear,
(A15). Take care to avoid contact with splashes of water. To avoid the need for frequent emptying of the drip tray (A11), place a container under the spouts to collect the rinse water. · To switch the appliance off, , press the button (B1);
· the drinks indicator Leds on the control panel will now
flash: the appliance performs a rinse cycle, if envisaged,
and then switches off (stand-by).
Please note:
If the appliance is not going to be used for some time, unplug
it from the mains socket:
6
How to Choose the Right Coffee Machine or the Right Coffee Maker?
· first turn the appliance off by pressing the · unplug the power cord from the socket.7. MAKING COFFEE DRINKS
button;
7.1 Makingcoffee using coffee beans Important! Do not use green, caramelised or candied coffee beans as they could stick to the coffee mill and make it unusable.1. Fill the container (A3) with coffee beans (fig. 10);
7.2 Making 2 cups of coffee 1. Place the cups under the coffee spouts (A15); 2. Lower the spouts as near as possible to the cups: thismakes a creamier coffee;
3. Press the lights up;
button (B2): the corresponding Led
4. Press the
button (B8);
5. Preparation begins and the Led corresponding to the Espresso button flashes on the control panel (B).
7.3 Making coffee using pre-ground coffee
10
11
2. Place a cup under the coffee spouts (A15) (fig. 11); 3. Lower the spouts as near as possible to the cup: thismakes a creamier coffee (fig. 11); 4. Select the required coffee drink:
Drink D e f a u l t Programmable quantity (*) q u a n t i t y (ml)(ml)
40
from 20 to 80
Important! · Never add pre-ground coffee when the machine is off or itcould spread through the inside of the machine and dirty it. This could damage the machine. · Never use more than 1 level measure (C2), as this could soil the inside of the machine or block the funnel (A4). Please note: When using pre-ground coffee, only one cup can be made at a time.1. Press the button (B5) repeatedly until the Led lights up (B7).2. Make sure the funnel is not blocked, then add one level measure of pre-ground coffee (fig. 12).
180
from 100 to 240
160
from 115 to 250
Espresso: 40 Water: 110120
Espresso: from 20 to 180 Water: from 50 to 300from 80 to 180
(*) Numbers and types of drinks differ according to model.5. Preparation begins and the Led corresponding to the selection flashes on the control panel (B).
1233. Place a cup under the coffee spouts (A15) (fig. 11); 4. Select the required drink (B8);5. Preparation begins and the Led corresponding to the selection flashes on the control panel (B).Important!· Making Long coffee: halfway through preparation, when the Led (B7) starts flashing, add another level measure of pre-ground coffee and press the Long button again.
7 http://101coffeemachines.info
· It is not possible to make a pre-ground coffee.
Doppio+ coffee using
7.4 General indications for making coffeebased drinks· Indicator lights may appear on the control panel (B) during use. Their meaning is given in section”16. Explanation of lights”.· For hotter coffee, see section “7.7 Tips for a hotter coffee”. · If the coffee is delivered a drop at a time, too weak andnot creamy enough or too cold, read the tips in section “17. Troubleshooting”. · To customise the drinks according to personal taste, see sections “7.5 Varying the coffee intensity” and “7.9 Customising the quantity in the cup”. Please note: In energy saving mode, a few seconds may elapse before the first coffee is delivered as the appliance must heat up again.
7.5 Varying the coffee intensity
1. Press the
button (B5) repeatedly until the Leds
relative to the desired intensity light up (B6):
Please note: · If the appliance is not used for more than 3- 4 days, whenswitched on again, we strongly recommend performing 2/3 rinses before use; · It is normal for the grounds container (A10) to contain water following a rinse cycle.7.7 Tips for a hotter coffee To make a hotter coffee, proceed as follows: · run a rinse cycle (see section “7.6 Rinsing “); · warm the cups by rinsing them first using the hot waterfunction; · increase the coffee temperature (see section “12. Settingsmenu”).7.8 Adjusting the coffee mill The coffee mill does not require any adjustment, at least initially, as it has been factory set to ensure that coffee is prepared correctly. To make an adjustment while the coffee mill is in operation, turn the dial (A2) as follows:If the coffee is delivered too Turn one click towards “7” slowly, or not at all.This adjustment will not take effect until at least 2 cups of coffee have been delivered.
MildMediumStrong2. Select the desired coffee drink. Please note: · When the next coffee is made, the machine will show thelast intensity setting selected. · In the event of power failure, the machine will revert tothe medium default setting.7.6 Rinsing Use this function to deliver hot water from the coffee spouts to clean and heat the appliance’s internal circuit. 1. Place a container of at least 100ml capacity under the cof-fee spouts (A15) (fig. 6).2. To perform the rinse cycle, simply press the button (B2) and hold for about 5 seconds. The cycle will star and stop automatically (to terminate the cycle sooner, press the same button a second time).
For a fuller bodied creamier Turn one click towards “1” coffeeThis adjustment will not take effect until at least 2 cups of coffee have been delivered.Please note: The adjustment dial must be turned only when the coffee mill is in operation during the initial step of coffee preparation.7.9 Customising the quantity in the cup 1. Press the button relative to the drink being programmedand hold for a few seconds: when the Led corresponding to the selection starts flashing rapidly, the machine is in programming mode. Delivery begins; 2. Once the cup is filled to the desired level, press the drink button again. Delivery ceases and the quantity is stored in the memory. Please note: To cancel the current setting, press a button corresponding to another drink
8 http://101coffeemachines.info
8. MAKING CAPPUCCINO8.1 What milk to use The quality of the froth will vary depending on:· the temperature of the dairy or vegetable milk used (for best results, always use dairy or vegetable milk straight from the fridge: 5 °C);· the type of dairy or vegetable milk; · the brand used; · ingredients and nutritional value.8.2 Making cappuccino 1. Fill a container with about 100 ml of milk for each cappuc-cino to be prepared (13) . When choosing the size of the container, bear in mind that the milk doubles or triples in volume.ml
Danger of scalding! When cleaning the steam/hot water spout, a little hot water will be released. Take care to avoid contact with splashes of water. 1. Release a little water by turning the steam/hot water dial(A19) to the I position. Then shut off the flow by returning the dial to the 0 position. 2. Wait a few minutes for the spout to cool down. Turn the cappuccino maker (A17) anti-clockwise and pull down to remove (fig. 15).
15
16
3. Pull the nozzle (A18) downwards (fig. 16). 4. Make sure the two holes arrowed in fig. 17 are notclogged. If necessary, clean using a toothpick.
13
14
2. Immerse the cappuccino maker (A17) in the milk container.3. Press the button: Steam (B8). 4. Wait until the Led relative to the Steam button startsflashing rapidly: now turn the steam/hot water dial (A19) to the I position (fig. 14). 5. After a few seconds, steam is delivered from the cappuccino maker, giving the milk a creamy frothy appearance and making it more voluminous. For a creamier froth, rotate the container with slow movements in an upward direction. 6. Once the froth is as required, shut off the steam by turning the dial to the 0 position. 7. Prepare the coffee in a large cup. 8. Add the frothed milk to the coffee. The cappuccino is ready. Sweeten to taste and, if desired, sprinkle the froth with a little cocoa powder.8.3 Clean the steam/hot water spout after use Clean the steam/hot water spout (A16)every time it is used, to prevent the build-up of milk deposits and prevent it from clogging.
175. Reinsert the nozzle and reconnect the cappuccino maker to the nozzle, pushing upwards and turning clockwise until the two engage.9. DELIVERING HOT WATER Danger of scalding! Never leave the machine unattended when hot water is being released. The tube of the steam/hot water spout (A16) heats up when in use. 1. Position a container under the steam/hot water spout (asclose as possible to avoid splashes). 2. Turn the steam/hot water dial (A19) to the I position (fig.14). 3. To shut off the flow of hot water manually, turn thesteam/hot water dial to the 0 position.
9 http://101coffeemachines.info
Please note: In energy saving mode, a few seconds may elapse before hot water emerges as the appliance must heat up.10. WATER SOFTENER FILTER To ensure the performance of the machine remains constant over time, we recommend using a De’Longhi water softener filter. For more information, visit the www.delonghi.com website.EAN: 8004399327252To use the filter correctly, follow the instructions below. 1. Remove the filter from the packaging and turn the dateindicator to view the next two months (fig. 18);0,5 L
18
19
2. To activate the filter, run tap water through the hole in the centre of the filter until water comes out of the openings at the side for more than a minute (fig. 19);3. Remove the tank from the machine and fill with water; insert the filter in the water tank, immersing it completely for about ten seconds, while tilting it and applying light pressure so that the air bubbles are able to escape (fig. 20);
20
21
4. Insert the filter in the relative housing and press fully home (fig. 21);5. Closethe tank with the lid, then reposition the tank in the machine;6. Place an empty container of at least 0.5 litres capacity under the steam/hot water spout (fig. 22).
0,5 L227. See instructions in section “12. Settings menu” for installation of the filter;8. The Led relative to the Steam button starts flashing rapidly: turn the steam/hot water dial (A19) to the I position (fig. 12);9. The appliance delivers hot water, then stops automatically; 10. The Led relative to the Steam button starts flashingrapidly: turn the steam/hot water dial to the O position; 11. The filter is now active and the machine can be used. Please note:If the Led relative to the button (B4) flashes rapidly, press the button. This will cause the internal circuits of the machine to start filling up, expelling the air bubbles that have been formed and allowing the installation to proceed.10.1 Replacing the filter Replace the filter when the indicator (B9) lights up. 1. Remove the water tank and the spent filter; 2. Follow the operations described in the previous section toactivate the filter; 3. See instructions in section “12. Settings menu” to set themachine and repeat steps 8 to 11 of the preceding section. Please note: After two months (see date indicator) or when the appliance has not been used for 3 weeks,the filter should be replaced even if the message has not yet been displayed.10.2 Removing the filterTo continue using the appliance without the filter, it must be removed, and the appliance notified of its removal. 1. Remove the water tank and the spent filter; 2. See instructions in section “12. Settings menu” to set themachine. Please note: After two months (see date indicator) or when the appliance has not been used for 3 weeks, the filter should be replaced even if the message has not yet been displayed.
10 http://101coffeemachines.info
11. TIPS FOR ENERGY SAVING · Set auto-off to 15 minutes (see “12. Settings menu”); · Enable Energy Saving (see “12. Settings menu”); · Always carry out the descaling cycle when prompted bythe machine.12. SETTINGS MENU When in the menu, use the active buttons to select the corresponding functions:
Coffee temperatureEnergy saving Selection of settings
(*)1 2345
Auto-off Water hardness
Water softener filter Beep
(*) Drinks differ according to model1. Access the menu:
Access to settings menu
1 2345x 5 sec
Press and hold the button for a few seconds: the settings buttons light up. Proceed by pressing the button corresponding to the setting to be adjusted.
11 http://101coffeemachines.info
2. Adjust the machine settings:
Water softener filter1 2345
Press the intensity button repeatedly until the Leds relative to the desired setting light up
FILTER IN PLACE
FILTER REMOVED
Beep1 2345
Press the intensity button repeatedly until the Leds ON relative to the desired setting light upOFF
Coffee temperature1
Press the intensity button repeatedly until the Leds relative to the desired setting light up
LOW MEDIUM
1 2345
HIGH
Energy saving21 2345
Press the intensity button repeatedly until the Leds ON relative to the desired setting light upOFF
Confirm selection1 2345Confirm selection1 2345Confirm selection11 2345Confirm selection21 2345
12 http://101coffeemachines.info
Water hardness31 2345Auto-off41 2345
Press the intensity button repeatedly until the Led corresponding to the required level lights up
LEVEL 1 LEVEL 2
LEVEL 3
LEVEL 4
Press the intensity button repeatedly until the Led corresponding to the required time setting lights up
15 MINUTES 30 MINUTES 1 HOUR
3 HOURS
Confirm selection31 2345Confirm selection41 2345
3. Exit the menu:1 2345
Press the button: The machine is ready for use again.Please note: The machine exits the settings menu automatically if there is no activity for 30 seconds.
13 http://101coffeemachines.info
12.1 Reset default valuesMake sure the machine is in stand-by (off, but connected to the mains power supply).
Press the buttons corresponding to drinks 1, 2 and and hold for 5 seconds. All the settings and drink quantities are reset to the default values.
12
x 5 sec
1 2345
The machine emits a long beep and all the lights flash to con-
firm the reset
BEEP
13. CLEANING THE MACHINE Important! · Do not use solvents, abrasive detergents or alcohol to clean the coffee machine. With De’Longhi superautomatic coffee machines,no chemical products are required for cleaning purposes. · Do not use metal objects to remove encrustations or coffee deposits as they could scratch metal or plastic surfaces.
50°C
14 http://101coffeemachines.info
Component Grounds container (A10)Drip tray components
Frequency
Procedure
When the indicator (B12) lights up, · the grounds container must be emptied: · the machine cannot now make coffee.·
Remove the drip tray (A11), empty and clean. Empty the grounds container and clean thoroughly to remove all residues that may have collected on the bottom. Check the condensate tray (A14) (red) and empty if necessary.
The appliance cannot be used to make coffee again until the grounds container has been cleaned. Even if not full, the empty grounds container message is displayed 72 hours after the first coffee has been prepared. For the 72 hours to be calculated correctly, the machine must never be disconnected from the mains power supply.
The drip tray is fitted with a float indicator, coloured red (A14), showing the level of water it contains. Before the indicator starts to project from the cup tray (A13), the drip tray must be emptied and cleaned
· Remove the drip tray and coffee grounds container; · Remove the cup tray and drip tray grille, thenempty the drip tray and the grounds container and wash all components; · Check the condensate tray, coloured red, and empty if necessary; · Put the drip tray complete with grille and grounds container back in the appliance. When removing the drip tray, the grounds container must always be emptied, even if it has not filled up appreciably.
Inside of the machine
Check regularly (about once a month) that the inside of the appliance (accessible after removing the drip tray) is not dirty.
Switch the machine off and disconnect from the power supply. Never immerse the machine in water. · Remove coffee deposits with a brush and sponge; · Remove all residues with a vacuum cleaner
Coffee spouts (A15)
Clean the coffee spouts regularly (once a · month)·
Clean the coffee spouts regularly with a sponge or cloth; Check that the holes in the coffee spout are not blocked. If necessary, remove coffee deposits with a toothpick.
15 http://101coffeemachines.info
14. CLEANING THE INFUSER Important! The infuser (A6) cannot be removed while the machine is on.1. Press the button (B1)to turn the machine off; 2. Remove the water tank (A9); 3. Open the infuser door, positioned on the right hand side(fig. 23);PUSH PUSH
10. Close the infuser door; 11. Put the water tank back.
15. DESCALING
· Before use, read the instructions and the labelling on the descaler pack.· Use De’Longhi descaler only. Using unsuitable descaler and/or performing descaling incorrectly may result in faults not covered by the manufacturer’s guarantee.· Descaler can cause damage to delicate surfaces. If the product is accidentally spilt, dry immediately.
To descale
Descaler De’Longhi descaler
Container Recommended capacity: 2 l
Time
~30min
23
24
4. Press the two coloured release buttons inwards (fig. 24), at the same time pulling the infuser outwards;5. Soak the infuser in water for about 5 minutes, then rinse under the tap;Important! RINSE WITH WATER ONLY NO DETERGENTS – NO DISHWASHER 6. Do not use detergents when cleaning the infuser, as theycould damage it. 7. Use the brush to remove any coffee residues left in theinfuser housing, visible through the infuser door; 8. After cleaning, replace the infuser by sliding it onto theinternal support, then push the PUSH symbol fully in until it clicks into place; Please note: If the infuser proves difficult to insert, adapt it (before insertion) to the right position by pressing the two levers (fig. 25).
PUSH
25
26
9. Once inserted, make sure the two coloured buttons have snapped out (fig. 26);
Important: If the water softener filter is installed, it must be removed before adding the descaler solution. Thereafter, reinstate the filter at the start of step 3Descale the machine when the indicator (B13) lights up on the control panel. Please note: · Once the descaling cycle has begun, it cannot be inter-rupted and must be completed with the entire rinse cycle. With this in mind, make sure there is sufficient descaler. Proceed as follows:Step 1: Descaling action1. Press the button (B4) and hold for at least 5 seconds, until the relative Led starts flashing rapidly. The mild intensity Led lights up to indicate that step 1 of the descale cycle is in progress;2. Empty the drip tray (A11) and the grounds container (A10) and reposition them; empty the water tank completely (A9) and remove the softener filter (if installed);3. Pour the descaler into the tank, filling to level A (which corresponds to a 100ml pack) marked on the side (front) of the tank (fig. 27); next, add water (one litre) up to level B (fig. 28); finally, reposition the water tank in the machine;
16 http://101coffeemachines.info
B
B
B
A
A
A
27
28
4. Position an empty container of at least 2 litres capacity under the coffee spout (A15) and under the cappuccino maker (A17) (fig. 29).
2 L295. – Press the button to start the descale cycle. 6. After a few seconds, the Led relative to the will flashrapidly to indicate that the steam/hot water dial (A19) should be turned to the I position (fig. 13). 7. For ten minutes or so, the machine alternates automatically between pausing and delivering liquid from the steam/hot water spout and the coffee spout. When the first step of the descaling cycle has been completed, the low water level indicator (B10) will light up.Step 2: First rinse8. Empty the container used to collect the descaler solution. Remove and empty the water tank, rinse under running water, then fill with fresh water up to the MAX level (fig. 30) and reposition in the machine; reposition the container under the spouts;
309. Press the button (which blinks rapidly) to start the rinse: the medium intensity Led blinks to indicate that step 2 of the descale cycle is in progress;10. The machine proceeds automatically with the rinse: the Led relative to steam blinks rapidly indicating that the steam/hot water dial (A19) must be turned to the 0 position (fig. 1);11. After ten seconds or so, when the Led relative to steam flashes rapidly, turn the steam/hot water dial to the I position (fig. 14): the rinse fluid will flow from the coffee and steam/hot water spouts;When the second step of the descaling cycle has been completed, the low water level indicator (B10) will light up.Step 3: Second rinse12. Empty the container used to collect the water from the first rinse. Remove and empty the water tank, then fill with fresh water up to the MAX level (fig. 30) and reinstate the softener filter, if in use; return the tank to the machine and reposition the container under the spouts;13. Press the button (which blinks rapidly) to start the rinse: the strong intensity Led blinks to indicate that step 3 of the descale cycle is in progress; the rinse fluid will flow from the steam/hot water spout;Step 4: Completion of descale procedure14. When the Led relative to the pre-ground function lights up, the descale cycle has been correctly terminated: the Led relative to steam flashes to indicate that the steam dial must be turned to the 0 position.15. The indicators of the grounds container (B12) and low water level(B10) light up. Empty the grounds container and the drip tray, in which part of the rinse water will have been collected; finally, refill the water tank.16. Reposition all components in the machine. The machine is ready for use.
17 http://101coffeemachines.info
Please note: · After descaling, it is normal for the grounds container tocontain water. · If the water tank has not been filled to the MAX levelafter descaling, the appliance prompts for a third rinse to ensure that the descaler solution has been completely eliminated from the machine’s internal circuits.
16. EXPLANATION OF LIGHTS
Indicator/Led
Meaning
The drink Leds flash
The machine is warming up: wait
The Leds for the drinks and The machine is ready for
the relative settings are per- use: select the desired drink
manently alight
and relative options
Replace the filter (see section “10. Water softener filter”).
Indicator/Led1 2345 1 2345
1 2345
Insufficient water in the tank (A9): fill the tank.
1 2345
1 2345
1 2345
The water tank (A9) is missing, or is not positioned correctly: insert the tank correctly.
1 2345
Meaning General alarm: the inside of the machine is very dirty. Clean the machine thoroughly. If the message is still displayed after cleaning, contact De’Longhi Customer Services.The infuser (A6) has not been replaced after cleaning: insert the infuser as described in section “14. Cleaning the infuser”.No coffee beans: fill the beans container (A3), then press any button to reset the alarm.The beans are too finely ground, so that the coffee is delivered too slowly or not at all. Adjust the coffee mill (A2) (section “7.8 Adjusting the coffee mill”).
18 http://101coffeemachines.info
Indicator/Led1 2345
MeaningToo much coffee has been used. Select a milder taste or reduce the quantity of pre-ground coffee.
Indicator/Led1 2345
MeaningThe grounds container needs emptying (A10).
1 2345
A selection has been made using pre-ground coffee without putting the coffee in the relative funnel (A4).
1 2345
The coffee is delivered too slowly or a drop at a time.. The coffee is ground too finely. Use coffee for espresso machines.
1 2345
The water circuit is empty. Press the “Steam” button.
1 2345
The grounds container (A10) is missing, or not inserted correctly: insert the drip tray complete with grounds container and press fully home
1 2345
Descaling needs to be carries out (see section “15. Descaling “).
1 2345
Descaling has been interrupted. Complete the cycle, restarting from the step indicated by the intensity selection Leds.
19 http://101coffeemachines.info
17. TROUBLESHOOTING Below is a list of some of the possible malfunctions. If the problem cannot be resolved as described, contact customer services.
PROBLEM
POSSIBLE CAUSE
REMEDY
The appliance does not come on.
It is not plugged into the mains socket. Plug into the mains socket.
The coffee is not hot.
The cups were not preheated.
Warm the cups by rinsing them with hot water (Please note: the hot water function can be used).
The internal circuits of the appliance have Before making coffee, press the butcooled down because 2-3 minutes have ton (B2) and hold for a few seconds to elapsed since the last coffee was made. run a rinse cycle and warm the internalcircuits.
Coffee temperature setting too low.
Set a hotter coffee temperature in the settings menu (see “12. Settings menu”).
The machine must be descaled
Carry out the descale procedure. Next, check the water hardness (“4. Measuring water hardness”) and make sure the machine setting matches the local water supply hardness (“12. Settings menu”).
The coffee is weak or not creamy enough. The coffee is ground too coarsely.
Adjust the grinding level (“7.8 Adjusting the coffee mill”). The effect is not visible until at least 2 coffees have been made.
The coffee is unsuitable.
Use coffee for espresso machines.
Coffee not fresh.
The coffee pack has been opened for too long and has lost its taste.
The coffee is delivered too slowly or a The coffee is ground too finely. drop at a time.
Adjust the grinding level (“7.8 Adjusting the coffee mill”). The effect is not visible until at least 2 coffees have been made.
The machine does not make coffee
Impurities have been detected in the in- Wait until the machine is ready for use
ternal circuits
again, and proceed to select the required
drink. Contact customer services if the
problem persists.
Coffee does not come out of one or both The coffee nozzles are blocked. spouts.
Clean the nozzles with a cloth. Any encrusted deposits can be removed with a toothpick, if necessary.
The coffee delivered is watery.
The pre-ground coffee funnel is clogged. Open the door and clean the funnel with the help of a brush.
20 http://101coffeemachines.info
PROBLEM The infuser cannot be extracted.
POSSIBLE CAUSE The machine has not been turned off.
REMEDY Turn the machine off by pressing thebutton.
On completion of the descale cycle, the During the two rinse cycles, the water Restart the descaling procedure from “Step
machine calls for a further rinse
tank has not been filled to the MAX level 3:
Second rinse”.
The milk has big bubbles
The milk is not cold enough, or is not Use skimmed or semi-skimmed milk at
semi-skimmed or skimmed.
refrigerator temperature (about 5° C). If
the result is not as desired, try changing
the brand of milk.
Cappuccino maker dirty.
Remove the components and clean them thoroughly.
Vegetable drinks have been used.
The effect varies widely depending on the nutritional properties of the drinks.
The cup tray on top of the machine is hot A number of drinks have been prepared in rapid succession
The machine emits noises or small puffs The machine is ready for use, or has re- This is part of normal operation. To limit
of steam while not in use
cently been turned off, and condensate is the phenomenon, empty the drip tray.
dripping into the hot vaporiser.
18. TECHNICAL DATA
Voltage:
220-240 V~ 50-60 Hz max. 10 A
Power:
1450 W
Pressure:
1.5 MPa (15 bars)
Water tank capacity:
1.8l
Size LxDxH:
240x440x350 mm
Cord length:
1250 mm
Weight (varies according to model):
8.8 kg
Beans container capacity:
250g
De’Longhi reserves the right to modify the technical specification and styling of its products at any moment, without compromising their functionality and quality.
21 http://101coffeemachines.info
How to Choose the Right Coffee Machine or the Right Coffee Maker?
How to Choose the Right Coffee Machine or the Right Coffee Maker?
57132C7928_00_0522
 report this ad
De’Longhi Appliances via Seitz, 47 31100 Treviso, Italy www.delonghi.com http://101coffeemachines.info
[xyz-ips snippet=”download-snippet”]