DEVANCO Dip Switch Transmitter RADIOEM903 Instructions
Transmitters: Compatibility and Replacement
Replacement Product
| RADIOEM903 |  |
|
Discontinued Products
| RADI0022 (MT3-1000) | 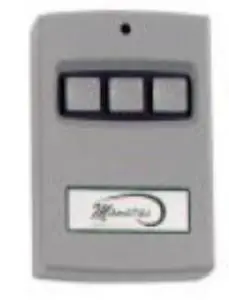
|
|
| RADI0016 (MT2-1000) | 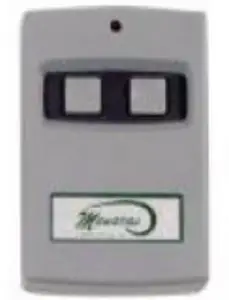 |
|
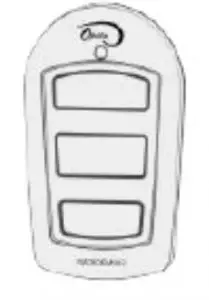
| RADI0027 (MT-1000) |  |
|
Transmitter
- RADIOEM903

- RADIORE901/901 A (RADIORE900/900A)
- RADIORE901B (RADIORE900B)
- RADI0014 (MR-1000)
- RADI0015 (MCX-1000)


Programming Instructions
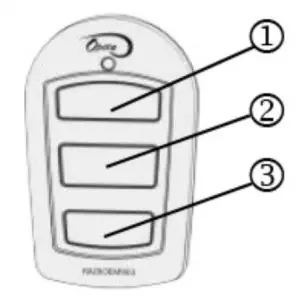
RADIOEM903 Transmitter Initial Configuration: Use it to Control 1, 2 or 3 Doors.
- Press and HOLD Buttons CO and simultaneously for 5 sec.The RED LED will 112 BLINK. You have 15 sec. to complete the configuration or you will need to restart.
- Release Buttons CO and a.
- Press Button CO or O or 3 in order to configure the transmitter to the appropriate number of doors to be controlled by this transmitter. ie: CO for 1-Door. for 2-Doors. 0 for 3-Doors.
- The RED LED will stop blinking. Programming is now complete.
- The remaining buttons will be deactivated. Note: Initial configuration can be repeated as needed (repeat steps 1-5
Replacing RADI0022 (3-Door Transmitter) with new (3-Door Transmitter)
The DIP SWITCH transmitter has 10 switching keys. With the use of a on RADIOEM903 at the same positions as those found on RADI0022.
Coding the Receiver (as reference):
- Dip Switch Keys #1 to #7 = must be at the same ON / OFF positions as the transmitter.
- Dip Switch Keys #8, #9, #10 = coding of the receiver number Oe© (refer below for the receiver number).
Door 1 = Receiver 1 -> Button 1Keys #8 and #10 must be set to ON. Key #9 must be set to OFF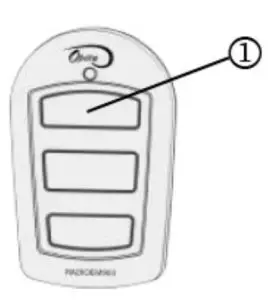
| ON | 1 | 2 | 3 | 4 | 5 | 6 | 7 | 8 | 9 | 10 |
| Must match with transmitter | ■ | ■ | ||||||||
| ■ |
Door 2 = Receiver 2 – Button 2Key #8 must be set to ON. Keys #9 and #10 must be set to OFF
| ON | 1 | 2 | 3 | 4 | 5 | 6 | 7 | 8 | 9 | 10 |
| Must match with transmitter | ■ | |||||||||
| ■ | ■ |
Door 3 = Receiver 3 – Button 3Key #8 and #9 must be set to ON. Keys #10 must be set to OFF
| ON | 1 | 2 | 3 | 4 | 5 | 6 | 7 | 8 | 9 | 10 |
| Must match with transmitter | ■ | ■ | ||||||||
| ■ |
Replacing FtADI0016 (2-Door Transmitter) with new FtADIOEM903 (3-Door Transmitter):
The DIP SWITCH transmitter has 10 switching keys. With the use of a screwdriver or a pen, place the dip switch keys on RADIOEM903 at the same positions as those found on RADI0016. Use buttons 1 and 2 to operate the 2 doors.
Coding the Receiver (as reference):
- Dip Switch Keys #1 to #7 and #9 = must be at the same ON / OFF positions as the transmitter.
- Dip Switch Keys #8 and #10 = coding of the receiver number 1,2 (refer below for the receiver number).
Door 1 = Receiver 1 -> Button 1Keys #8 and #10 must be set to ON.
| ON | 1 | 2 | 3 | 4 | 5 | 6 | 7 | 8 | 9 | 10 |
| Must match with transmitter | ■ | ■ | ||||||||
Door 2 = Receiver 2 – Button 2Key #8 must be set to ON. Keys #10 must be set to OFF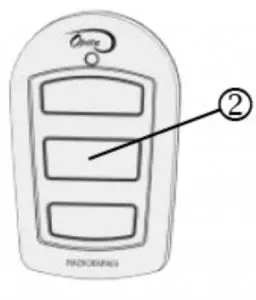
| ON | 1 | 2 | 3 | 4 | 5 | 6 | 7 | 8 | 9 | 10 |
| Must match with transmitter | ■ | |||||||||
| ■ |
Replacing RADI0027 (1-Door Transmitter) with new RADIOEM903 (3-Door Transmitter):The DIP SWITCH transmitter has 10 switching keys. With the use of a screwdriver or a pen, place the dip switch keys on RADIOEM903 at the same positions as those found on RADI0027. Use button CD to operate the door.
Coding the Receiver (as reference):
Dip Switch Keys #1 to #10 = must be at the same ON / OFF positions as the transmitter.Door 1 = Receiver —> Button 1
| ON | 1 | 2 | 3 | 4 | 5 | 6 | 7 | 8 | 9 | 10 |
| Must match with transmitter
|
Pairing RADIOEM903 Transmitter to RADIORE901 Receiver:
- Make sure the dip switch keys inside the RADIOEM903 transmitter are set, refer to the Programming Instructions on p.1
- Press the LEARN button on the RADIORE901 receiver. The RED LED will BLINK. You have 15 sec. to complete the configuration or you will need to restart.
- Press the desired Button (0 or or 3) on the transmitter that you wish to pair to the RADIORE901 receiver
- The RED LED will stop blinking. The RADIORE901 has now been paired with the transmitter
- Only one transmitter needs to be matched per receiver. The other transmitters with the same dip switch configuration will pair automatically.
HOW TO ORDER REPAIR PARTSDEVANCO CANADA 19192 HAY ROAD, UNIT Q SUMMERSTOWN, ON KOC 2E0TOLL FREE: 855-931-3334 www.devancocanada.comWHEN ORDERING REPAIR PARTS PLEASE SUPPLY THE FOLLOWING INFORMATION:✓ PART NUMBER✓ DESCRIPTION✓ MODEL NUMBER
[xyz-ips snippet=”download-snippet”]