![]()
Outdoor Digital YardStake TimeInstruction ManualHOYS22A
Thank you for your purchase.Please contact us if you have any problem.Email: [email protected]Please attach your User Name or Order ID so that we can assist you better.
Warning: To reduce the risk of fire, electric shock, or personal injury, please strictly follow the instructions.
- Do not connect any devices which exceed the maximum ratings of the timer.
- Do not immerse in water.
- Children are not allowed to use the timer without supervision.
- Do not disassemble or repair the product, but only by authorized service personnel.
- Always unplug and store indoors when not in use.
- To prevent children’s suffocation and choking, keep them away from packaging materials.
Installation

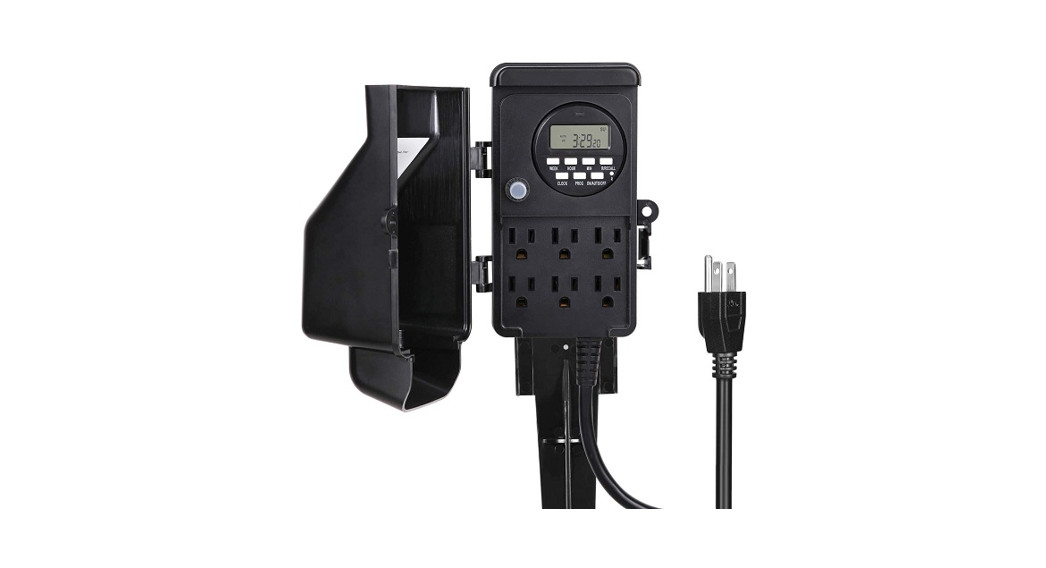
Align four tabs on stake with four holes on the back of the timer. Push tabs down, then up, until they lock into place. Shown as FigureTips: If the ground is too hard to insert the stake, digging a hole that matches the stake with a hard object will be perfect.
Product Layout
Before initial use, plug the timer in for at least 30 minutes to charge the internal battery. After the screen displays, the unit is ready for programming.
- ResetBefore programming, all settings should be reset. The reset hole which is identified by “R” is just located below the “R/RECALL” button. Use a paper clip or ballpoint pen to stick it. See Figure 1.

- Set the Current Timea. Keep the “CLOCK” button pressed the entire setting operation.b. Press the “HOUR” button to set hours.c. Press the “MIN” button to set minutes.d. Press the “WEEK” button to select the correct day of the week.e. Release the “CLOCK” button. The time will be set.
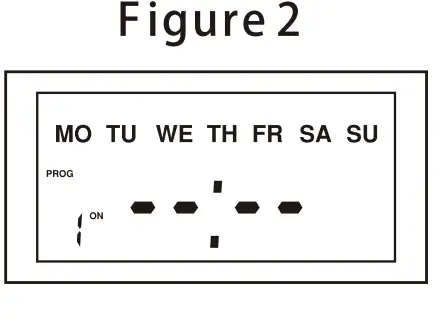
- ON/OFF Program Settinga. Press the “PROG” button once , Figure 2 will appear. There are a total of 20 ON/OFF settings.b. Press the “HOUR” or “MIN” buttons to set ON time.c. Press the “WEEK” button to select the day(s).
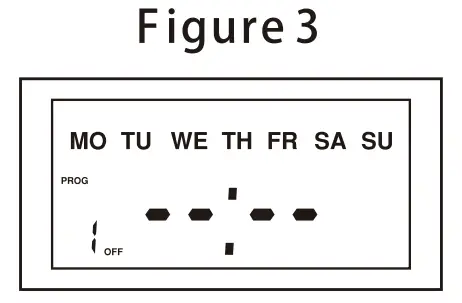
•MO,TU,WE,TH,FR,SA,SU• WE• SA• SA,SU• MO, WE,FR• MO, TU, WE• MO • TH• TU• SU•MO,TU,WE,TH,FR,SA• TU, TH,SA• FR• MO,TU,WE,TH,FR d. Press the “PROG” button to save and proceed to the “1 OFF ” setting. See Figure 3
e. Repeat steps a-e to set ON/OFF times. Press the “PROG” button again will advance to the other 19 ON/OFF settings.Note: Timer should operate in the “AUTO ON” or “AUTO OFF” mode. See the “Switching Mode Indication” section. - Reset Buttona. Press the “PROG” button to select the ON/OFF setting that needs to be changed.b. Press the ” R/RECALL” button to reset the current ON/OFF setting (See Figure 4) without having to scroll through all the hours.
- Switching Mode Indication The actual mode is shown on the display as “ON”, “AUTO ON”, “OFF”, or “AUTO OFF” together with the time of day. Press the “ON/AUTO/OFF” button to adjust to the desired setting mode.
- Manual Override Setting As independent programming, it is possible at any given time to advance to the next switching command by constantly pressing the “MANUAL” button, as shown below:ON = Always ON;OFF = Always OFF;AUTO ON = Timer is ON currently and the ON/OFF program is activated.AUTO OFF = Timer is OFF currently and the ON/OFF program is activated.
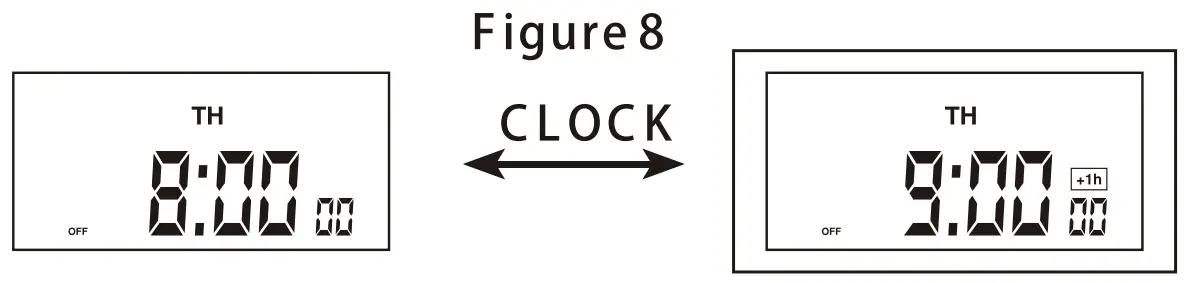
- Daylight Saving Time (DST)Press and hold the “CLOCK” button for 3 seconds to advance to the current time 1 hour, “+1 h” icon will appear on the display. Press and hold the “CLOCK” button for 3 seconds again to decrease 1 hour and the “+1 h” icon will disappear. See Figure 8.
- Power Back-up Feature In the event of a power failure, the timer will retain its settings for an estimated 3 months if the power backup is fully charged.

 b. Press the “HOUR” or “MIN” buttons to set ON time.c. Press the “WEEK” button to select the day(s).
 e. Repeat steps a-e to set ON/OFF times. Press the “PROG” button again will advance to the other 19 ON/OFF settings.Note: Timer should operate in the “AUTO ON” or “AUTO OFF” mode. See the “Switching Mode Indication” section.
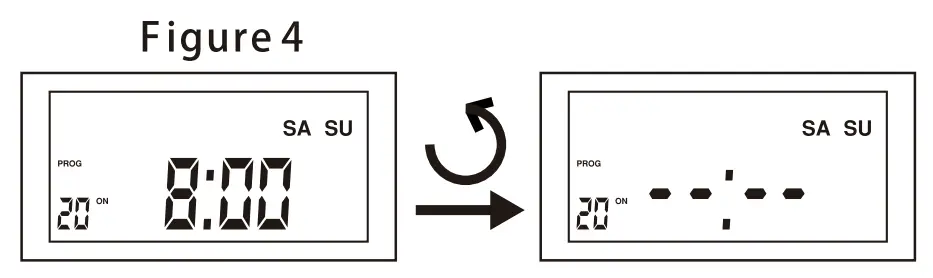
 ON = Always ON;OFF = Always OFF;AUTO ON = Timer is ON currently and the ON/OFF program is activated.AUTO OFF = Timer is OFF currently and the ON/OFF program is activated.
Caution
- Risk of Fire. Not for permanent installation. Use only with outdoor equipment, Christmas-tree, or other seasonal decorative-lighting products having a total of 15 Ampere maximum. Do not install or use this product for more than a 90-day period.
- If using Christmas tree or decorative – lighting products that are not marked with an ampere rating, connect no more than 140 screw-base lamps (C7 or C9) or 12 strings with midget (push-in) lamps to this cord set.
- Cord sets shall be plugged into a GFCI – protected receptacle.
- If using an outdoor-use cord set for an extended period of time (greater than 90 days) please consider hard-wiring a permanent outdoor-use receptacle rated for year-round use in the area that power is needed. Please contact a licensed electrician for proper installation of permanent wiring.
- After completion of installation, the connector shall be maintained a minimum of 6 inches above the ground.
Specifications
 report this ad
Input Voltage: 120VAC 60Hz Cord: SJTW 14/3CMax. Current: 15A Resistive 1000W Tungsten 1 HPOne Year Limited WarrantyDewenwils warrants this product to be free from defects in material and workmanship for a period of one year from the date of purchase. Warranty is void if the damage is caused by misuse or improper installation. Please contact us if you have any questions.E-mail: [email protected]Our dedicated customer service team will get back to you within 24 hours.
[xyz-ips snippet=”download-snippet”]