![]()
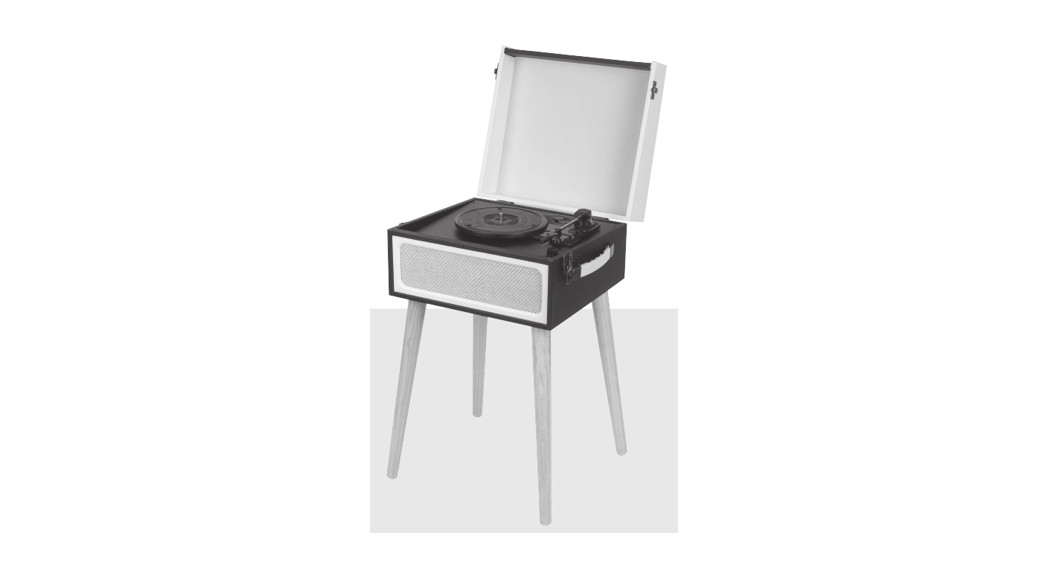
FreestandingRetra Turntable
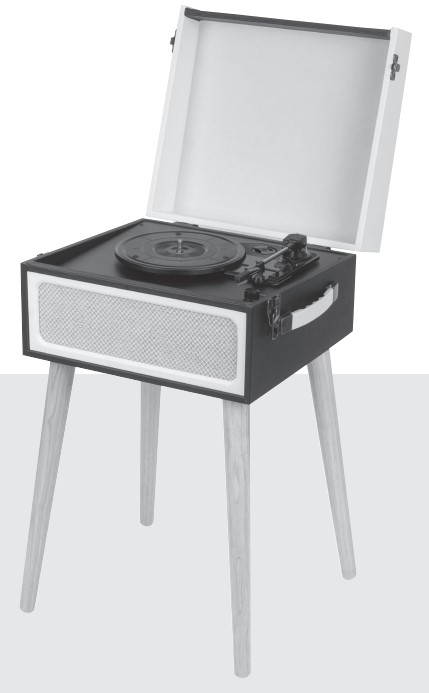
Model: GE4112
Instruction Manual
GENERAL SAFETY INSTRUCTIONS:
Read this manual thoroughly before first use and keep it in a safe place for future reference, along with the completed warranty card, purchase receipt and carton. The safety precautions enclosed herein reduce the risk of fire, electric shock and injury when correctly odhered to.Follow all instructions and take notice of all warnings to reduce the risk of fire or electric shock.
 DANGER! CAUTION! This symbol alerts you that there is dangerous voltage inside. To prevent electric shock, do not open the enclosure.
 IMPORTANT! This symbol alerts you to read and observe important warnings and instructions on the unit or in this manual.
Electrical safety and cord handling
- To prevent contact with high voltage components inside, do not attempt to open the equipment.
- Before installing this equipment, make sure your outlet voltage corresponds to the voltage stated on the appliance rating label.
- When connecting the equipment, align the plug properly and insert it fully to prevent electric shock.
- Only use this equipment with the cord and plug supplied, and do not overload the power outlet.
- If the power cord is damaged, do not use the equipment. The cord must be replaced by the manufacturer or similarly qualified personnel in order to avoid a hazard. Contact the after sales support line for advice.
CAUTION!To reduce the risk of fire or electric shock, do not expose this equipment, the cord or plug to rain or moisture; do not use it anywhere near water or where water splashes or drips; do not touch the plug with wet hands. In the event that water or other liquids enter the device, unplug it immediately and clean and dry it as best as possible. Then have it checked for damage by a qualified technician, or contact the after sales support line.
GENERAL SAFETY INSTRUCTIONS:
- Do not repair the unit yourself. Only hove it serviced by qualified personnel. Contact the after sales support line for advice.
- Unplug the unit from the power outlet after use to avoid possible damage during electrical storms, or when the equipment will be unattended or unused for a long period of time.
- Do not let the cord hang over the edge of a table or counter, or touch any hot surface. Do not allow anything to rest on or roll over the power cord, and run any cords so that no one steps on or trips over them.
- Do not run the cord near heat-producing appliances such as radiators, stoves or irons. Excessive heat could melt insulation and expose live wires.
- Always grasp the plug, not the cord, when disconnecting the unit. Pulling the cord can damage the internal wires and may cause a fire.
- Do not install the unit in an inclined position. It is designed to be operated in a horizontal position only.
Installation
- When installing the unit, make sure to place it.
- Away from heat sources, radiators or other products that produce heat.
- Away from areas with high temperatures, high humidity or direct sunlight.
- Away from excess dirt and dust.
- Away from open windows and any place where water may get into the unit and damage it.
- Make sure there is free circulation of air around the unit. Do not place it on a thick carpet, bed or any place where ventilation holes are obstructed. Leave at least 10cm clearance around the unit.
- Make sure the mains socket is readily accessible at all times.
GENERAL SAFETY INSTRUCTIONS:
Usage conditions and restrictions
- Openings on the cabinet are provided for ventilation and to protect the unit from overheating. To ensure proper operation, do not cover them with things such as newspapers, tablecloths, curtains etc.
- Do not place heavy objects on top of the equipment or step on it.
- Do not place objects filled with water (such as vases) or any naked flame sources (such as lit candles, incense sticks or cigarettes) on top of the unit.
- The equipment is not intended for use by persons (including children) with reduced physical, sensory or mental capabilities, or lack of experience and knowledge, unless they have been given supervision or instruction concerning use of the equipment by a person responsible for their safety.
- Young children should be supervised to ensure they do not play with the equipment. Close supervision is always necessary when an appliance is used by or near children.
- Unplug the unit from the power outlet before cleaning. Clean the unit only with a dry, clean cloth. Do not use liquid or aerosol cleaners.
- We assume no liability for any damage caused by noncompliance with these instructions or any other improper use or mishandling of the equipment. ranslassomaan
Condensation
The unit may suffer from condensation in the following situations:
- When you take the unit directly from a cold to a warm place, and vice versa
- When you use the unit in a room where you just turned on a heater, or where cold air from an air conditioner is directed on to the unit.
- When you use the unit in hot and humid surrounds just after having moved it from an air conditioned room.
- When the room is steamy or damp.
- If condensation exists, the unit will not operate properly. Remove the disc, plug the power cord into the wall socket, turn on the unit and leave it for two to three hours. After that time, the unit will have warmed up and any moisture will have evaporated. Keeping the unit connected to the wall socket will keep moisture condensation problems to a minimum.
PARTS LIST
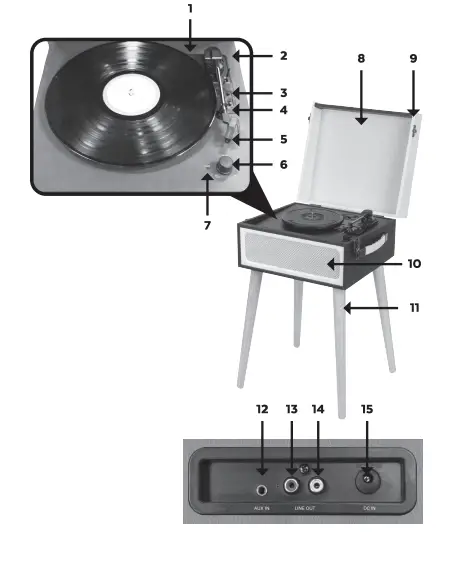
| 1 45 RPM adapter (use this when playing 45rpm records with cutout center) | 9 Lock latch |
| 2 Tone arm lift lever | 10 Speakers |
| 3 Auto stop switch control | 11 Detachable legs |
| 4 Speed selection (choose from three speeds: 33, 45, 78 rpm) | 12 AUX in |
| 5 Cartridge | 13 Line out R channel |
| 6 Power switch / Volume control | 14 Line out L channel |
| 7 LED power indicator | 15 DC power jack |
| 8 Dust cover |
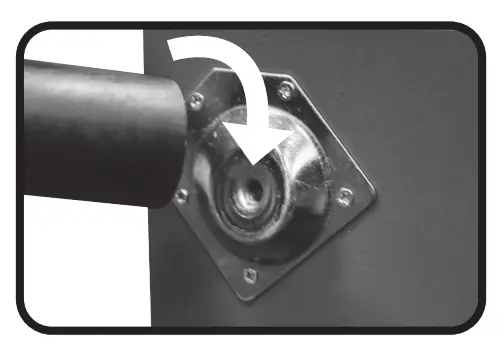
INITIAL SETUP:
Attaching the LegsThe turntable comes with its own legs so it can stand alone. Alternatively, the legs can be removed and it can sit on an existing table or shelf. To attach the legs to the turntable, screw each individual leg to the metal plate on the rear of the unit. See diagram below for more details.NOTE: If placing the turntable on a surface, attach the included rubber feet.
AC PowerEnsure that the mains voltage of your home corresponds to the operating voltage of the adapter. Connect the power adapter to the wall outlet. Connect the DC connector to the “DC IN” jack on the rear of the unit.
INITIAL SETUP:
Bluetooth and USB/SD encoding system
This function part allows user play music from inserted USB flash drive or SD card or Blue tooth or Aux in function. Insert USB/SD When playing old vinyl, just long press (about 3 seconds) MODE then it starts to record with GREEN flash light till press ![]() the Ca key to stop it.
the Ca key to stop it.
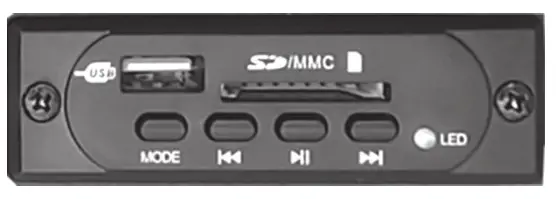
Play previous music 144 Play next music ►► MODE Short press to select among USB/SD,BT, and recording FILE stored in USB/SD On play mode: short press to start or pause the playing, Long press it to delete the current music recorded from outer sound source. On record mode, press it to stop recording. HI
| Play previous music | |
| Play next music | |
|
MODE |
Short press to select among USB/SD,BT, and recording FILE stored in USB/SD |
| On play mode: short press to start or pause the playing, Long press it to delete the current music recorded from outer sound source. On record mode, press it to stop recording. |
Bluetooth ControlWhen the tone arm set to the rest position, Bluetooth function will start automatically. Then need to press the mode key to circle between USB/SD and BT.
Amplifier Connection (if required)
You can listen to your new turntable using the built-in speakers, or you may wish to connect it to your existing Hi-Fi system. Connect the “line out” RCA ports to the “line input” on your mixer or amplifier using an RCA cable (not supplied)
- Red plug into the right channel input
- White plug into left channel input
INSTRUCTIONS:
Playing a record
- Open the latches on the side of the unit, then lift up the lid and be sure to secure the arm support.
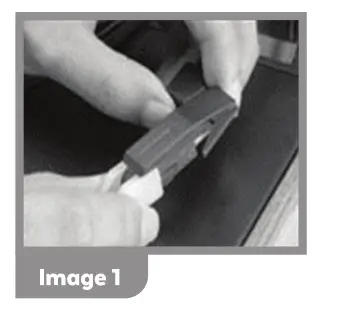
- Remove the protective cover from the stylus cartridge. (See image 1.)

- Place a record on the turntable. If required, place the 45 RPM adaptor on the record spindle.
- Choose the desired playing speed (33, 45 or 78 rpm) by using the speed selection switch.
- Turn on the rotary power switch (note that this also controls volume).
- Release the tone arm lock. (See image 2.)
- Raise the arm using the cue lever and move the arm away from its holder. This will prompt the turntable to start spinning automatically.
- Use the cue lever to slowly place the stylus down onto the record’s groove.

If the AUTO STOP switch is set to ON, the record will stop automatically. If it is set to OFF, the record will not stop automatically.NOTE: If your record stops before the last track finishes, set the AUTO STOP switch to OFF. Your record will now play to the end, but you will have to stop the turntable rotation manually.
Auto Stop
- When a record finishes playing, it can be controlled by the auto-stop ON/OFF switch.
- Lift up the tone arm and put it on the rest when finished.
- Replace the protective cap on the stylus and close the tone arm lock.
- Turn off the power at the mains.
INSTRUCTIONS:
Maintenance – Replacing the Stylus
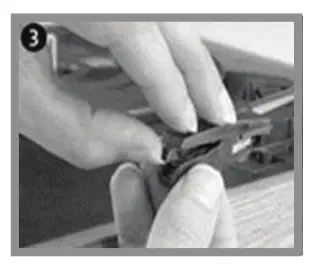
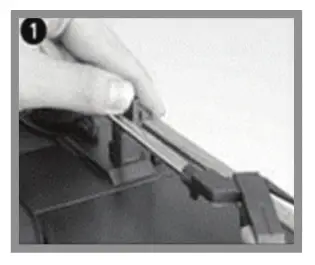 Step 1: Push the arm lock to release the tone-orm.
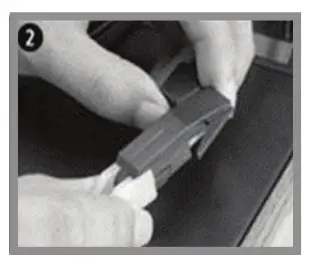 Step 2: Take off the cap of the cartridge to expose the needle
 Step 3: Toke off the cap of the cartridge to expose the needle
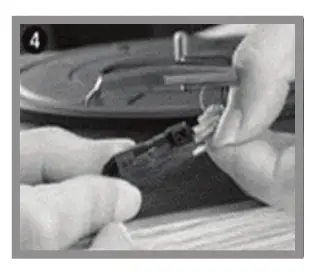 Step 4: Gently pull the audio-lines from the cortridge, taking care to pull from the terminal connector and not the wire itself.
Maintenance – Installing a new Stylus CartridgeNOTE: Please take extreme care whilst performing this operation to avoid damaging the tone arm and audio wires
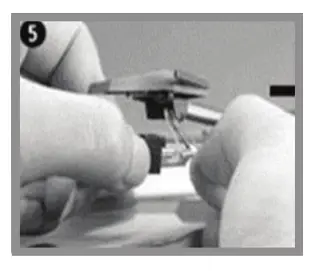 Step 5: Carefully insert the audio-lines.
 Step 6: Make sure the audio-lines are not touching each other.
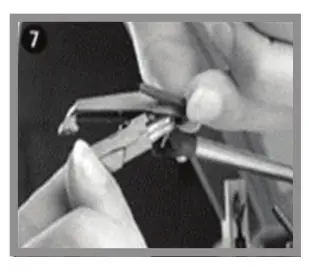 Step 7: Carefully slide the cartridge into the cartridge holder.
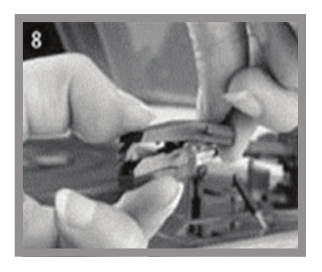 Step 8: Gently clip the cartridge into the cartridge holder.
TransportingWhen transporting your record player do not forget to:
- Place the protective cap on the stylus
- Put the rest clip into the pick-up arm
CleaningWe advise you to clean your records with an anti-static cloth in order to enjoy optimum playback quality and to help make them last. For the same reason, your stylus should be replaced periodically (approximately every 250 hours of total playback time). Dust the stylus from time to time using a very soft brush dipped in alcohol (brushing from back to front of the cartridge).
TROUBLESHOOTING
|
Issues |
Solutions |
| The unit will not power ON. | Make sure the unit’s power cord is connected to an appropriate electrical outlet and the wall socket is switched ON. |
| There is NO sound. | Rotate the POWER/VOLUME knob clockwise to increase the volume. |
| The vinyl record will not play. | Make sure you have selected the correct speed (331/3, 45 or 78 RPM). |
| Make sure the power adapter is correctly plugged in. | |
| Nothing will play via the AUX OUT connection. | Make sure the cable is firmly connected and check that your external device is clean and undamaged. |
| There is no sound via the Stereo RCA port. | Make sure the cable is firmly connected to the turntable and to your amplifier or other device. |
| Check the volume on your amplifier or other device. |
SPECIFICATIONS:
| AC Adapter: | Input: AC100-240V – 50/60Hz 0 3A |
| Max Output: 5V-1A | |
| Power Supply: | 5V-1A |
| Speakers: | 2 x 3W Stereo Speakers |
| RPM: | Supports playback speeds 33.33/45/78 |
| Record Size Supported: | 7″ = 17.7cm10″ = 25.5cm SP 12″ = 30cm LP |
| Output: | AUX OUT / Headphones (3.5mm) Stereo RCA |
Distributed by:Electus Distribution Pty. Ltd.320 Victoria Pd, Pydolmere NSW 2116 Australiawww.electusdistribution.com.ouMade in China
[xyz-ips snippet=”download-snippet”]