
 Electronic Water Timer
 User Instructions
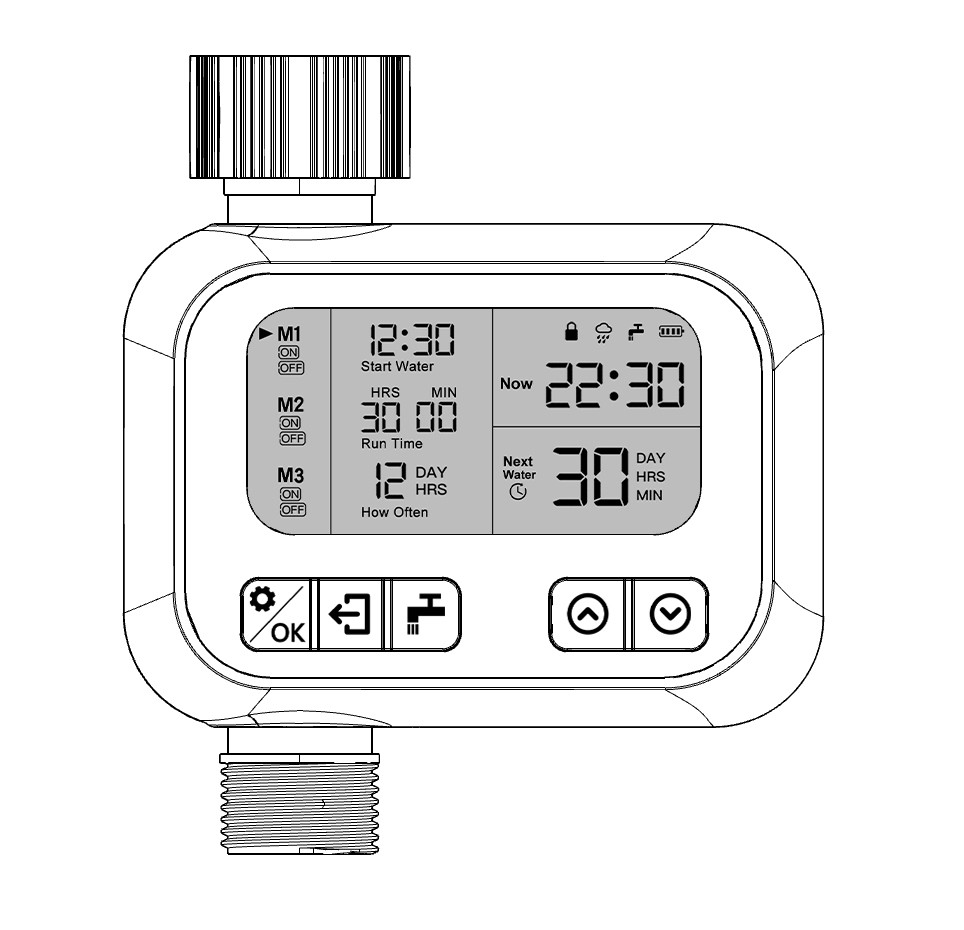
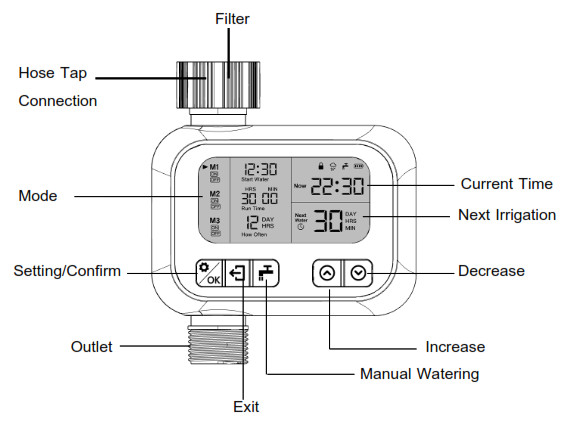
Timer Features
Pressure operating range: 2.9psi -116psiFor outdoor use with cold water only![]() Use this button to select mode and save
Use this button to select mode and save![]() Use this button to select OFF mode
Use this button to select OFF mode![]() Press to manual watering∧ ∨ Use these buttons to adjust time and modeTemperature operating range: 40.1 ℉-113 ℉Not for use with appliances
Press to manual watering∧ ∨ Use these buttons to adjust time and modeTemperature operating range: 40.1 ℉-113 ℉Not for use with appliances
Important, please read!
![]() When expecting freezing temperatures, timers should be removed from the hose faucet and stored indoors to avoid potential freeze damage.
When expecting freezing temperatures, timers should be removed from the hose faucet and stored indoors to avoid potential freeze damage.
 Filter traps dirt particles, prolonging the life of the timer. Clean filter regularly and replace if worn.
Support
If you have any questions about our product, please feel free to contact us via We will follow up and respond within 24 hours. [email protected]
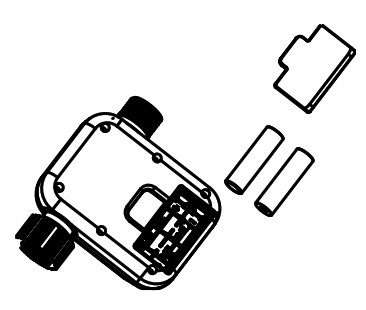
Battery Installation & Assembly
- Remove the tray on the back of the timer by sliding or pulling it out.
- Insert two AA (1.5V) alkaline batteries (not included).
NOTE: Do not use your timer when the air temperature is below 40 ℉(4.5℃). When storing your timer, be sure it is in a dry place and protected from frost.
We recommend replacing batteries when the indicator reaches![]() .
.
SET CLOCK: Set Current Time and Day
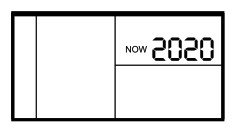
1.SET YEARS:
- Long press the
 button for 3-5 seconds until the screen will display 2020.
 - Press∧ or ∨ buttons to choose the year.
- Press the button twice to save changes and move to SET MONTH AND DAY.
2.SET MONTH AND DAY
- After finishing the SET YEARS, double click the button, the month will flash on the screen.
- Press the∧ or ∨ buttons to select the month, and then press the button until day flash, and use the ∧ or ∨ buttons to select a day.
- Press the button twice to save changes and move to SET CURRENT TIME.

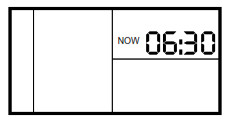
3.SET CURRENT TIME
- After finishing the SET MONTH AND DAY, double click the button, the current time will flash on the screen.
- Press the ∧ or ∨ buttons to select the hour, and then press the button until the minutes flash, press the ∧ or ∨ button to select minutes.
- Press the button twice to save the setting.
SELECT MODE:
How to choose a mode?
- Press the button until the M1 flashes on the screen.
- Press the ∧ or ∨ button to select the mode.
- Press the button to save the setting and move to START WATER.
NoteM1: The setting range is 1-23H.M2: The setting range is 1-25D.M3: The”M3″ can choose a week and the setting range is 1-23H.Only one mode can be selected at a time.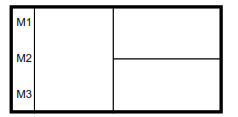
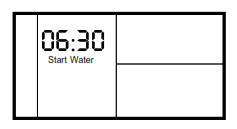
START WATER:
What day do you want to water?
- Press the button until the “M” flash on the screen, choose an appropriate Press the or buttons to select the time, and then press the button mode and press the button until the start time flash on the display.
- Press the∧ or ∨ buttons to select the time, and then press the button to save and move to select the minutes.
- Press the ∧ or ∨buttons to select the minutes.
- Press the button twice to save and move to SET RUN WATER.
SET RUN WATER:
Set the length of each watering cycle1. After finishing setting the START WATER, press the button twice and ![]() press the ∧ or ∨button to select hours.2. Press the
press the ∧ or ∨button to select hours.2. Press the![]() button to save settings and move to HOW OFTEN.
button to save settings and move to HOW OFTEN.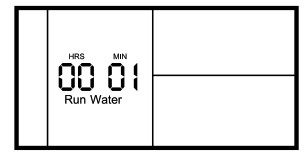
HOW OFTEN :
How often does it cycle?After finishing the SET RUN WATER, press the![]() button twice to set OK HOW OFTEN, use the ∧ or ∨ button to set your watering frequency.
button twice to set OK HOW OFTEN, use the ∧ or ∨ button to set your watering frequency.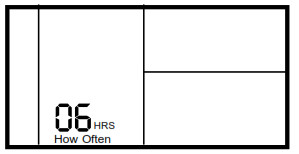
MANUAL WATERING:
Fill a bucket, clean the car or wash the dogTo use a hose or other watering tools, simply press the![]() button, then use the ∧ or ∨ button, select the length of time you wish to water. Double click the
button, then use the ∧ or ∨ button, select the length of time you wish to water. Double click the ![]() button, the value will open, and then automatically close when the select time is reached. To quit the manual function, press the
button, the value will open, and then automatically close when the select time is reached. To quit the manual function, press the![]() button again.
button again.
RAIN DELAY:
If there is rain in the forecast, you can temporarily suspend your watering program for up 25 days using the RAIN DELAY feature. Hold and press the![]() and
and![]() button for 4-6 seconds until the rain icon appears on the screen, now press the ∧ or ∨button to set the duration of the delay. Once the delay time is selected, press the button to save changes. All other functions are on hold during the rain delay including MANUAL WATERING and OFF. To cancel the rain delay, press the
button for 4-6 seconds until the rain icon appears on the screen, now press the ∧ or ∨button to set the duration of the delay. Once the delay time is selected, press the button to save changes. All other functions are on hold during the rain delay including MANUAL WATERING and OFF. To cancel the rain delay, press the ![]() and
and![]() button until the rain icon disappear.
button until the rain icon disappear.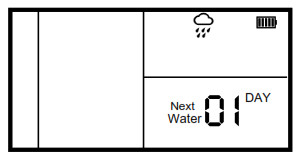
CHILDREN LOCK:
Long Press the∧ and ∨ button at the same time until the lock icon appears on the screen. If you want to close the CHILDREN LOCK, please press the ∧ and ∨at the same time.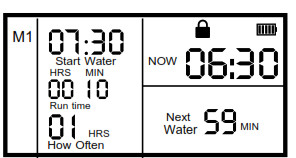
OFF MODE:
To stop watering indefinitely, press the ![]() button until the screen display OFF.The timer will not water while in this mode. The screen will display the current time. To start watering automatically again, press the
button until the screen display OFF.The timer will not water while in this mode. The screen will display the current time. To start watering automatically again, press the ![]() button until the OFF disappears. The program will begin watering at the next previously scheduled start water time.
button until the OFF disappears. The program will begin watering at the next previously scheduled start water time. 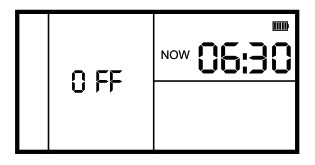
USEFUL TIPS
Open Value During InstallationShaking during transportation can cause the valve to be open.If this occurs, water may run continuously through the valve during installation.
- Turn off the timer.
- Remove the batteries and wait for the screen to go blank, reinsert the batteries.
- Turn the water back on.Note: Remove the batteries will erase any existing watering schedules.
Cleaning Your TimerPlease clean your timer periodically. Debris or sediments commonly found in water can build up in your timer. Turn off the water. Remove the timer from the faucet and check that the filter washer is clear. If you notice any debris, remove the filter washer and clean it out with water.
Season StorageA freezing temperature can cause water in the timer to freeze and expand, damaging the water.
- At the end of the season or when there is frost in the forecast, turn off the water and remove your timer from the faucet.
- Remove the batteries.
- Be sure to store the timer indoors, away from freezing temperatures.
Tips for Battery Life
- Make sure to use new alkaline batteries.
- Do not use rechargeable batteries.
- Remove the batteries at the end of the season before storing them.
- Batteries should last about one season. A schedule with more frequent watering times can cause the
QA
1. Q: The LCD screen does not display anything when the batteries are installed.A: The two batteries loaded are new 1.5V AA alkaline batteries, make sure the batteries are properly placed in the battery box.2. Q: Water does not come on at the preset time.Check if:-Clock should be set to the correct time.-Start time is set to desired the time.-Rain Delay is on.-OFF mode is on.-The batteries are low.-The faucet is turned off.3. Q: The hose tap connection/outlet leaks.-The O-ring is connected correctly to the hose tap.-The connection outlet or water pipe is broken.-The faucet and water pipe have a different threads.If necessary, please use an appropriate adapter or PTFE tape.
[xyz-ips snippet=”download-snippet”]