![]()
INSTRUCTION MANUAL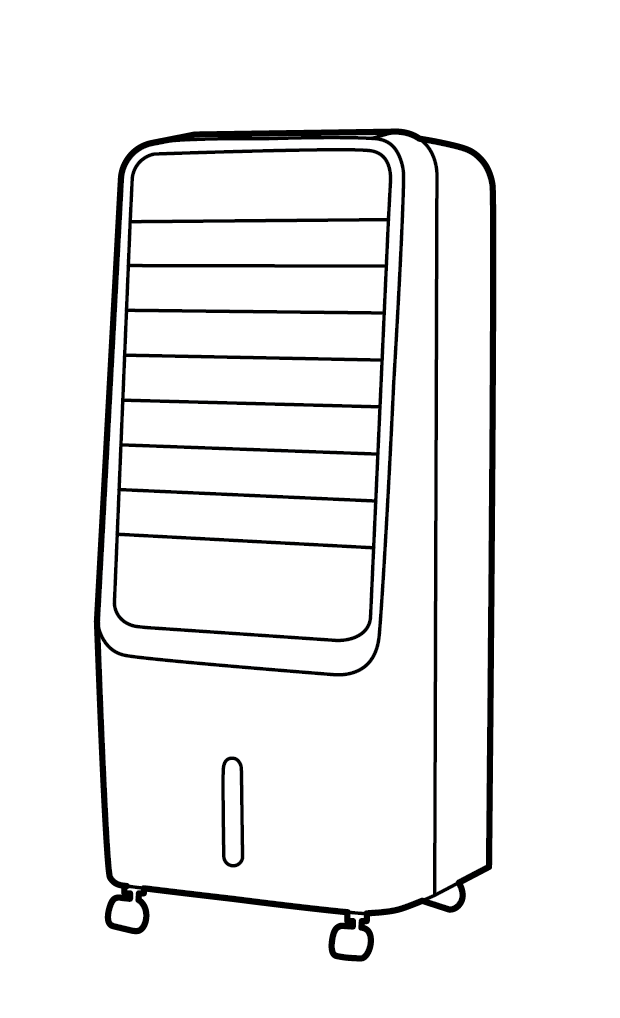
7L Evaporative CoolerModel: DCEVP7
For domestic household use only.
 IMPORTANTTHESE INSTRUCTIONS SHOULD BE READ CAREFULLY AND RETAINED FORFUTURE REFERENCE. Note also the information presented on the appliance
CAUTION: FAILURE TO FOLLOW THESE INSTRUCTIONS MAY CAUSE INJURY AND/OR DAMAGE AND MAY INVALIDATE YOUR WARRANTY
Please read the operating instructions carefully before using your evaporative cooler for the first time and keep them in a safe place.WARNING – This appliance must not be used in a bathroom.WARNING – Do not use this appliance in the immediate surroundings of a bath, a shower, or a swimming pool.
- Never immerse the appliance in water or other liquids.
- Operate this unit only on a firm, flat surface to avoid the risk of water leakage.Ensure that the unit is kept upright at all times.
- Do not place on soft, unstable or non-horizontal/angled surfaces.
- Never operate the appliance if a cable or connector has been damaged, after appliance malfunction or if the appliance was dropped or is otherwise damaged.
- If the mains lead is damaged it must only be replaced by the manufacturer’s service agent or a similarly qualified person in order to avoid a hazard.
- Please ask a professional service agent to repair the product. Improper repair may cause danger to users.
- Disconnect the appliance from mains power whenever it is not in use, before relocating it, and before cleaning.
- Operate the appliance only at the voltage specified on the rating label.
- Only connect the unit to a properly installed and easily accessible socket so that you can quickly disconnect the plug if necessary.
- Do not connect this product to the mains using an extension lead.
- This evaporative cooler is only intended for INDOOR RESIDENTIAL applications.This evaporative cooler should not be used for commercial or industrial or leisure applications or in small enclosed spaces.
- Never use the mains lead as a carrying strap or pulling lead.
- To avoid a fire or electrocution hazard, NEVER put the cord near heat registers, radiators, stoves, or heaters.
- DO NOT cover cord with carpeting, throw rugs, runners, or similar coverings.
- DO NOT route cord under furniture or appliances. Take care to position the cord away from traffic areas and where it will not be a tripping hazard.
- DO NOT use the unit near windows or where water collects. Rain and water collection may lead to a risk of fire or electric shock.
- Only operate this appliance with a minimum of 50cm clearance all around i.e. away from walls, furniture, and overhanging objects such as curtains or a shelf.
- This appliance is not intended for use by persons (including children) with reduced physical, sensory or mental capabilities, or lack of experience and knowledge unless they have been given supervision or instruction concerning the use of the appliance by a person responsible for their safety.
- Children should be supervised to ensure they do not play with the appliance.
- To prevent spillage, empty the water tank before lifting or relocating the appliance.
- WARNING: To avoid the danger of suffocation please remove all packaging materials particularly plastic and EPS and keep these away from vulnerable people, children, and babies.
- NEVER drop or insert any object or fingers into any openings.
- Do not use the appliance in locations where paint, petrol, or other flammable liquids are used or stored.
- Do not use bug sprays or other flammable cleansers/vapor sprays on or around the unit.
- Always switch off the unit and take the plug out of the socket:
- If you are not using the unit
- Before you clean or carry out maintenance on the unit
- If a fault occurs
- In the event of an electrical storm.
- Avoid electromagnetic interference. Keep the unit at least 1 meter away from electrical appliances such as televisions & radios.
WARNING – KEEP BATTERIES OUT OF REACH OF CHILDREN
- Swallowing may lead to serious injury in as little as 2 hours or death, due to chemical burns and potential perforation of the esophagus.
- If you suspect your child has swallowed or inserted a button battery immediately call the 24-hour Poisons Information Centre on 13 11 26 (in Australia) or 0800 764 766 (in New Zealand) for fast, expert advice.
- Examine devices and make sure the battery compartment is correctly secured, e.g. that the screw or other mechanical fastener is tightened. Do not use if the compartment is not secure.
- Dispose of used button batteries immediately and safely. Flat batteries can still be dangerous.
![]()
 |
Exposed to the weather outdoors |
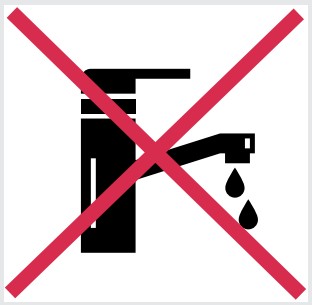 |
Near water |
 |
If the power cable wires are frayed or cut |
 |
Where small children may be left unattended |
 |
If an extension lead may become overloaded |
 |
Where the power cable may be damaged |
 |
On a slope or uneven surface |
 |
Where there is a risk of fire or close to a naked flame |
 |
Where it may be damaged by chemicals |
 |
Where there is a risk of interference by foreign objects |
 |
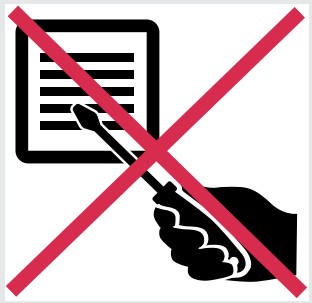
This product is not made for DIY repair |
 |
If there is a risk of water falling on the unit |
Specification
|
Model no. |
DCEVP7 |
| Colour | White/Black |
| Power supply | 220-240V~, 50Hz |
| Rated power | 110W |
| Speed settings | 4 |
| Modes | 4 (natural, normal, sleep & smart) |
| Turbo airspeed | 10m/s |
| Water tank capacity | 7L |
| Remote control | Y |
| Timer | 0-8 hours |
| Swing function | Y |
| Controls | Button with LED display |
| Max. room size | 30m² |
| Water consumption | 1.2L/h (high speed) |
| Weight (net) | 8kg |
| Dimensions (w x d x h) | 346 x 314 x 824mm |
- For greater precision, please always refer to the rating label placed on the product.
Parts
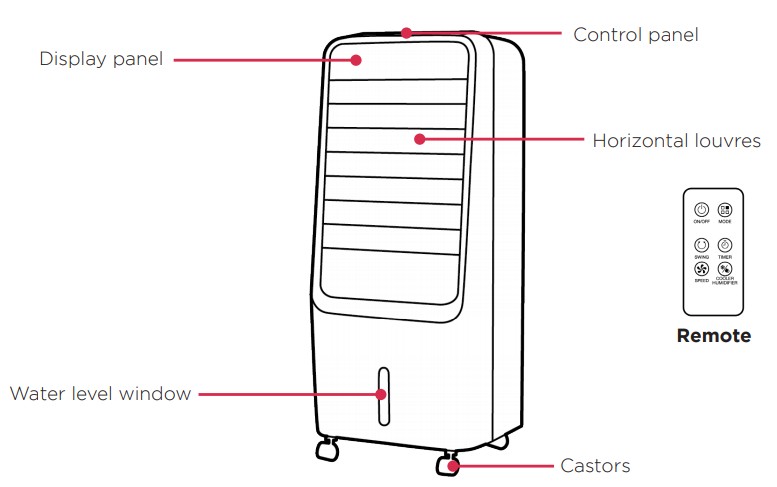

Display & Control Panels
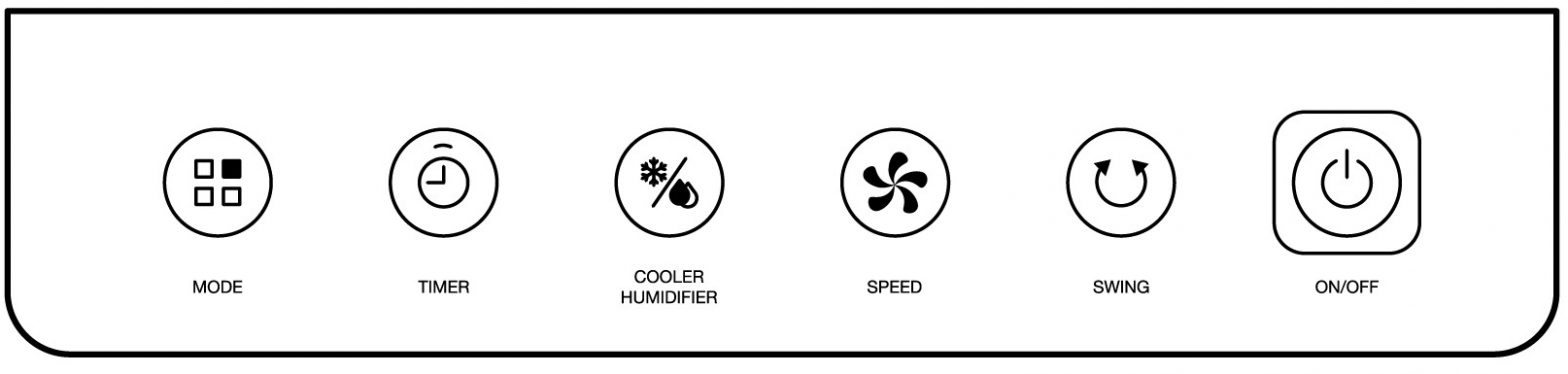
Control Panel
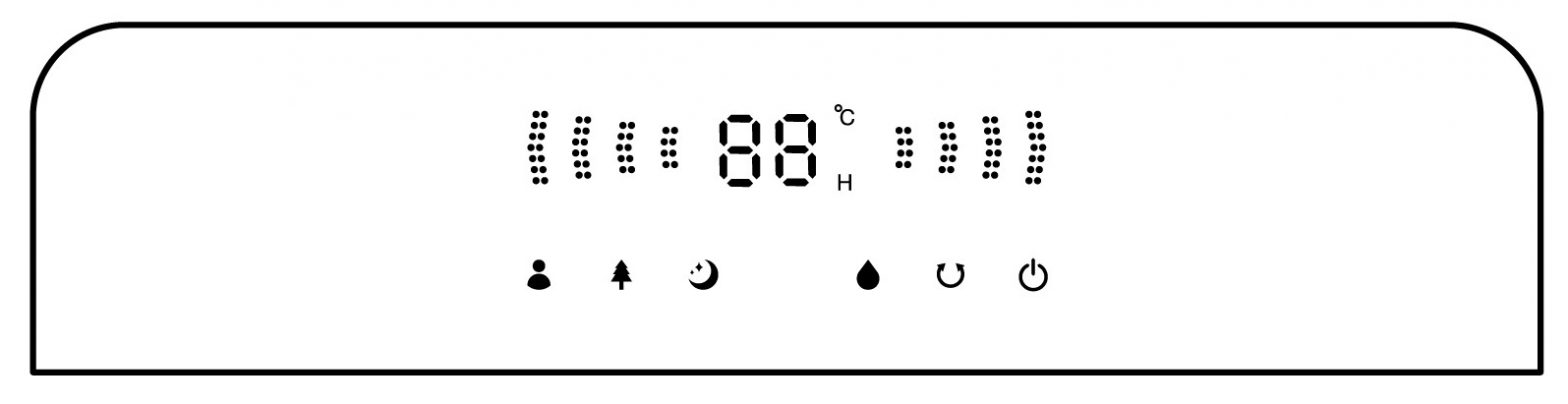
Display Panel
Remote Control
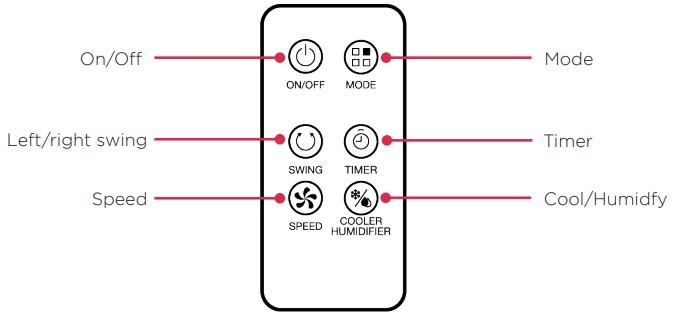
Functions
Note: The buzzer beeps twice when the power supply is first turned on. The unit is on ‘standby’ until the On/Off button is pressed.The horizontal louvers need to be opened manually by hand.
ON/OFFPress the ON/OFF button to turn the unit ON. The default settings when first turned on are; medium fan speed, normal mode, and no timer.To turn the unit OFF press this button again. It may take a few seconds to power off completely.
FAN SPEEDThe FAN SPEED can be selected in the following sequence: quiet > low > medium > high. The selected fan speed LED indicator light will illuminate accordingly.
COOL / HUMIDIFYPress this button once to turn on the COOL / HUMIDIFY function, the pump will start and the COOL / HUMIDIFY LED will illuminate. Press this button again to turn off the cooling function, and to use as a fan only.
LEFT / RIGHT SWINGPress this button to turn on the SWING function, the louvers will move left to right and the SWING LED indicator light will illuminate. Press the button again to turn off the swing function.
TIMERThe TIMER can be set in 1-hour increments up to the maximum timer of 8 hours. The set time will be indicated on the display panel before switching back to the ambient room temperature.
MODEThe default mode after turning “On” is normal. Press this button to select modes in this sequence: normal > smart > natural > sleep. The MODE indicator light will illuminate accordingly.NOTE: Natural and sleep modes are unavailable if the quiet fan speed is selected.Normal: Constant wind speed.
Functions
Smart: During smart mode, the fan speed can’t be adjusted. Instead, the fan speed is automatically chosen & adjusted based on temperature changes in the room.When the smart mode is selected the LED indicator will start to flash and begin operation according to the conditions below:
- When the ambient room temperature is below 25 degrees, the unit will operate at low fan speed.
- If the ambient room temperature is above 25-29 degrees, the unit will operate at medium fan speed
- When the ambient room temperature is above 29 degrees, the unit will operate at high fan speed.
Note: The fan speed indicator won’t appear on the display during the smart mode.Natural: Changing wind speeds (the indicator lights only show the initial wind speed when the speed changes and other changes are not indicated).
Sleep: In natural sleep mode, the wind speed LED changes with the 30-minute cycle change, but does not indicate the change of natural wind.High: 30 minutes high-speed natural wind > 30 minutes medium level natural wind > low-level natural wind (until turned off).Medium: 30 minutes medium level natural wind > low-level natural wind (until turned off).Low: Low-level natural wind (until turned off).
Other Functions
Environmental protection function:If no operation is detected within 60 seconds, all LED’s dim to a semi-bright light.When the operation is detected, the LEDs enter full brightness immediately.
Water level protection function:When the cooling function is first turned on, the water pump works for 50 seconds.If the low water is detected, then the pump will stop working and a buzzer alarm sounds for 10 seconds.
Air dry functionIf the honeycomb filter needs to be dried after using the cooler/humidifier function (e.g. before packing the unit away), press and hold the “fan speed” button on the panel for 3 seconds to activate the air dry function.When the air-dry function is activated, the fan speed turns to high speed automatically and runs for 20 minutes. During ‘Air dry’, other functions are turned off and can not be used. The high fan speed indicator will illuminate and flash for the 20-minute duration.If the “On/Off” button is pressed before the 20 minutes are complete, the remaining ‘Air dry’ time won’t be saved, and you’ll need to start again.Power failure memory function:
- If there is a power failure during operation, when power resumes, the unit will automatically turn back on and beep ten times. After 30 seconds the unit will resume the last settings it was operating in.Note: the previous function will be restored (except if in sleep mode).
- To speed up the process, press the “On” button within 30 seconds of the power being restored, and it will operate immediately.Prevent long time useThe unit turns off automatically after continuously working for 15 hours. This function can prevent the unit from running for long periods, especially if the user forgets to turn the unit “Off”.Uninterrupted memory function:When hen the power is restored after a power outage, a beep will sound 10 times (1 time per second) without display and action. After 30 seconds, the unit will restore to the previous settings.Note: the previous function will be restored (except if in sleep mode).If the power button is pressed during the 30 second waiting time, the previous state will be restored immediately.The timer countdown should also be memorized and an error of no more than 5 min is permitted for each power outage (off-time duration is neglected).
Operation & Set Up
- Remove the unit from its packaging
- To begin using the COOL/HUMIDFY function, open and remove the water tank located at the back of the unit and fill to the MAX fill line.
- For extra cooling power, place an ice pack (supplied) into the water tank.
- Open the hoizontal louvres.
- Plug into a power supply and press the ON/OFF button to start the appliance.
- The unit will operate initially on a continual basis. If a set period of operation is required, please follow the TIMER instructions on page 8.
- Select the desired fan FAN SPEED by pressing the FAN SPEED button. Refer to page 8 for different settings.
- Select the operation MODE as required, by pressing the MODE button. Refer to pages 8 & 9 for different settings.
- Press the LEFT / RIGHT swing function as required.
- To switch the unit off at any time, press the OFF button.
Precautions
- Do not overfill the water tank (check the MAX fill line).
- Only fill the water tank half full, when using the ice packs.
- Use only cold, clean filtered water.
- The unit is equipped with a number of safety devices, including water shortage protection, tank removal protection & power failure protection.
- Do not allow the same water to sit in the machine for a prolonged period.
- It is recommended that any water left in the machine for 3 days or more be removed and replaced with clean water.
- The control panel must not come in contact with water or any other liquids.
Using the Remote Control
- Open the battery cover of the remote control, and insert a 3V CR2032 battery.
- Please point to the receiver when using the remote control.
- If the battery voltage is low, please open the battery cover as per the diagram and replace it with a new battery (CR2032). Then replace the battery cover.
Cleaning
Your unit is designed to remove dirt and other atmospheric impurities by drawing air through the air filter. DO NOT block the air filter, as this will impair the efficiency of the unit. Pushing the unit up against a wall or operating it in close proximity to long window drapes will also impair the unit’s airflow and efficiency.
Rear Air Filter
- This is easily accessible by removing the rear screen and filter.
- In a smoky or dusty environment, this filter will become grey in color after one to two months.
- Disconnect the unit from the main supply. Gently wash the filter in mild, soapy water, dry, and replace. Be sure to re-fit the rear screen securely. No special tools are required for this.
Water TankThe water tank should be cleaned regularly. If not cleaned, deposits may build up affecting the efficiency of the unit. Cleaning the tank with mild soapy water once every 6 months is recommended. To do this, following the steps below:
- Disconnect the appliance from the main supply.
- Completely remove the water tank from the unit.
- Remove any deposits or dirt from the tank with a mild, soapy detergent and cloth.
- Flush the tank with clean water.
- Reverse the procedure and make sure the tank lock is in place.
Outside Cabinet
- Turn the unit OFF and disconnect the appliance from the power supply.
- Remove any dust build-up with a soft brush.
- Wipe the surface of the unit with a soft damp cloth. A mild detergent can be used for any stubborn marks.Do not use abrasive sponges, scouring pads, or a stiff brush to clean the
IMPORTANTThe control panel and other parts must not come into contact with water or any other liquids.
StorageIf not using the unit for an extended period of time. After cleaning please:
- Turn the unit off, unplug, and take care of the mains lead & plug.
- Cover the unit and store it upright in a location where it will not receive direct sunlight.NB- Prolonged exposure to direct sunlight will discolor the enclosure.
Maintenance
If the unit fails to operate efficiently, is broken or other problems arise, unplug and do not operate. Ask for advice by calling your local after-sales service agent or the Customer Care Centre on 1300 556 816 (AU) / 0800 666 2824 (NZ).
Warranty
Please refer to the warranty card in the box for warranty information. For any troubleshooting advice, please contact the relative Customer Care Centre below.
Glen Dimplex Australia Pty Ltd1340 Ferntree Gully Road,Scoresby 3179, Victoria,AustraliaPh: 1300 556 816
Glen Dimplex New Zealand Ltd38 Harris Road, East Tamaki,Auckland 2013New ZealandPh: 0800 666 2824
![]() Recycling: Do not dispose of electrical appliances as unsorted municipal waste. Use separate collection facilities. Contact your local government for information regarding the collection systems available. If electrical appliances are disposed of in landfills or dumps, hazardous substances can leak into the groundwater, polluting the food chain and damaging health and well-being.
Recycling: Do not dispose of electrical appliances as unsorted municipal waste. Use separate collection facilities. Contact your local government for information regarding the collection systems available. If electrical appliances are disposed of in landfills or dumps, hazardous substances can leak into the groundwater, polluting the food chain and damaging health and well-being.
![]()
Customer Care: 1300 556 816[email protected]www.dimplex.com.auSupplied by Glen Dimplex Australia1340 Ferntree Gully Road, Scoresby, Victoria, 3179
© Glen Dimplex Australia. All rights reserved. Material contained in this publication may not be reproduced in whole or in part, without prior permission in writing of Glen Dimplex Australia.
References
[xyz-ips snippet=”download-snippet”]