DMP ADEMCO Interface Module 738A Installation Guide
Installation Guide
DESCRIPTIONThe 738A Ademco Interface Module allows you to interface Ademco 5881 wireless receivers with the XR150/XR550 Series and XT30/XT50 Series panels.See “Compatibility” for specific firmware levels. The module provides up to 32 supervised, programmable zones of Ademco wireless transmitters.The module supports the Armed, Alarm, and Ready to Arm status LEDs on an Ademco 5804BD. This requires connecting an Ademco 5800TM to an XT30/XT50 panel.
Compatibility
- XR150/XR550 Series panels
- XT30/XT50 Series panels with firmware Version 101 or higher
- For a list of compatible Ademco devices, refer to Compatibility”.
What is Included?
- One 738A Ademco Interface Module
- Two Model 300 4‑Wire Harnesses
- Hardware Pack
1. MOUNT THE MODULE
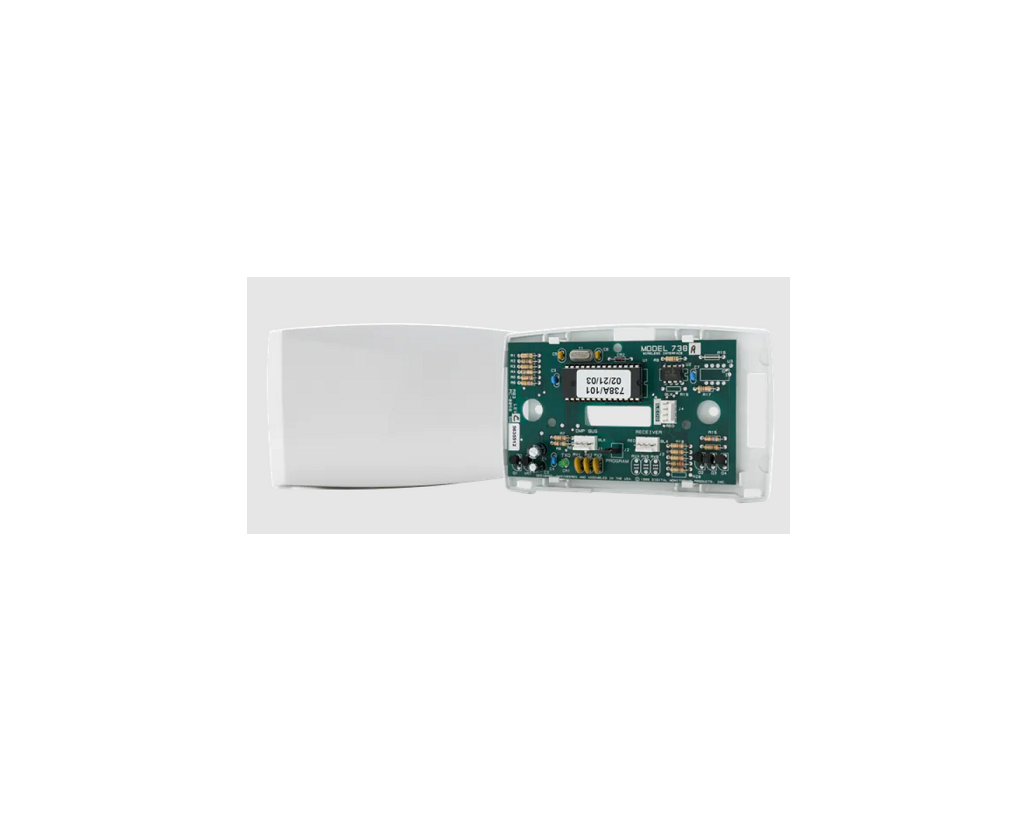
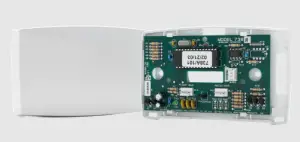
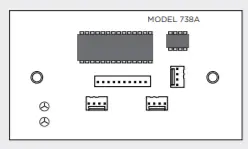
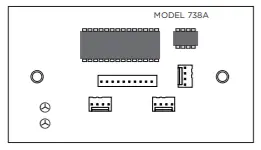 Figure 1: 738A Interface Module
The 738A comes in a high‑impact plastic housing that you can mount directly to a wall, backboard, or other flat surface. For easy installation, the back of the housing contains multiple holes that allow you to mount the module on a single‑gang switch box or ring. The module can also be mounted in a DMP enclosure using the standard 3‑hole mounting pattern. Refer to Figure 2 and Figure 3 as needed during installation.
- Hold the plastic standoffs against the inside of the enclosure side wall.
- Insert the included Phillips head screws from the outside of the enclosure into the standoffs. Tighten the screws.Figure 2: Mounting Hole Locations Figure 3: Standoff Installation
- Carefully snap the module onto the standoffs.
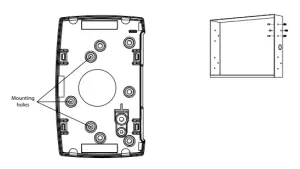 Figure 2: Mounting Hole Locations Figure 3: Standoff Installation
2. WIRE THE MODULE
After properly mounting the module, follow the instructions to wire the module to the panel. Refer to Figure 4 for wiring details.
- For Keypad Bus operation, connect a Model 300 4‑wire harness from the DMP BUS header to the Keypad Bus. For LX‑Bus operation, connect a Model 300 4‑wire harness from the DMP BUS header to the LX‑Bus.
- Connect the provided Model 300 4‑wire harness from the RECEIVER header to the Ademco wireless receiver and 5800TM transmitter harness. The maximum distance between the Ademco wireless receiver and module is 3 feet.
- When programming, connect a Model 330 dual‑ended programming cable from the PROG header to any DMP keypad.
- Place the provided jumper across the PROGRAM header to enter the 738A programming mode. When you’re done programming, remove the jumper from the PROGRAM header and place it on one pin for future use. Figure 4: 738A Wiring
3.PROGRAM THE MODULE
Programming Options
Use this section for reference when programming the module.
INIT ALL? NO YESINITIALIZATIONSelect YES to reset all programming options to the factory default. Select NO to maintain all programming options at their current settings.
BUS: *KYPD LXPANEL BUS TYPESelect the type of connection from the panel to the module. Choose either Keypad Bus or LX‑Bus connection. Press the CMD key to accept the selection. An asterisk displays to the left of the bus type selected.
HOUSE ID: 01HOUSE IDSelect a number from 01 to 31 for the House ID. Enter a leading zero for numbers less than ten. The factory default is 01. The same House ID number must be programmed into any 5804BD Wireless Key transmitters to receive Armed, Alarm, and Ready to Arm status. Refer to the Ademco 5804BD Installation Instructions toenter the House ID.
ZONE? TEST ADDZONE TEST OR ADDSelect ADD to program new zones into the system or select TEST to perform a zone test on existing zones. When performing a Zone Test, the 5881 receiver signal gain is reduced by 50%. When adding new zones to the system, select TEST to perform the Zone Test.
TRIPS END
ZONE TEST TRIPS COUNTERWhen TEST is selected, the Zone Test Trips Counter displays the number of times any programmed zone trips (alarm/short) during the Zone Test. The keypad buzzersounds for 1 second each time a programmed zone trips. Select END to stop the zone test and display any failed zones.Note: When the keypad is removed from the module, the 5881 receiver signal gain automatically returns to 100%.
ZONE: XX – FAILZONE TEST FAILThe zone number of any zone that failed to trip at least once during the test displays for four seconds and the buzzer sounds for one second. The next failedzone displays. Press CMD to advance to the next failed zone.
ZONE NO:ZONE NUMBERAfter selecting ADD, enter a wireless transmitter zone number to be programmed into the module at the Zone Number option. This zone number must correspond toa zone number programmed into the panel. Press CMD to accept the zone number. When the module is connected to the Keypad Bus and any wireless input zones fora particular address are programmed (Ex: 11‑14 = Addr 1), the module responds to polls for this address. Other devices, such as keypads, cannot use this address. Formore information about addressing the module, refer to Table 1 and Table 2.
2 738A INSTALLATION GUIDE | DIGITAL MONITORING PRODUCTS
Table 1: Keypad Bus Addresses
| PANEL ADDRESS | ZONE NUMBERS | |
| XT30/XT50 SERIES | XR150/XR550 SERIES | |
| 1 | 11 to 14 | 11 to 14 |
| 2 | 21 to 24 | 21 to 24 |
| 3 | 31 to 34 | 31 to 34 |
| 4 | 41 to 44 | 41 to 44 |
| 5 | 51 to 54 | 51 to 54 |
| 6 | 61 to 64 | 61 to 64 |
| 7 | 71 to 74 | 71 to 74 |
| 8 | 81 to 84 | 81 to 84 |
Table 2: LX-Bus Addresses
|
738A ADDRESS |
XR150/XR550 SERIES LX‑BUS | ||||
| PANEL ZONE RANGE | |||||
| LX‑BUS 1 | LX‑BUS 2 | LX‑BUS 3 | LX‑BUS 4 | LX‑BUS 5 | |
| 1 | 501 | 601 | 701 | 801 | 901 |
| 2 | 502 | 602 | 702 | 802 | 902 |
| 3 | 503 | 603 | 703 | 803 | 903 |
| … | … | … | … | … | … |
| 16 | 516 | 616 | 716 | 816 | 916 |
| 17 | 517 | 617 | 717 | 817 | 917 |
| 18 | 518 | 618 | 718 | 818 | 918 |
| … | … | … | … | … | … |
| 32 | 532 | 632 | 732 | 832 | 932 |
*UN RF UR BRTRANSMITTER TYPEEnter a transmitter type by pressing the select key that corresponds to the type of transmitter used. An asterisk appears to the left of the transmitter type chosen. Default is UN. Press the CMD key to accept the selection. Refer to the installation instructions provided with the Ademco transmitter for additional information.RF = Supervised Transmitter BR = Button Transmitter.
When a transmitter reed switch, contact, or button is in a faulted condition, the corresponding panel zone is SHORTED. When the transmitter tamper is in a faulted condition, the corresponding panel zone is OPEN.
LEARN ID? NO YESTRANSMIT NOWTRANSMITTER IDENTIFICATION NUMBERSelect YES to enter Learn ID programming. The keypad displays TRANSMIT NOW. For the module to learn the transmitter identification number, the transmitter input (reed switch or contact) must be activated (tripped) and restored. The first activation beeps the program keypad once. Within four to eight seconds after the first activation the transmitter input must be tripped and restored a second time. The keypad beeps twice. The keypad displays the “learned” transmitter identification number (ID). To accept this number, press the CMD key.
ID: _ _ _ _ _ _ _Select NO to manually enter the transmitter identification number. At ID: _ _ _ _ _ _ _, enter the seven‑digit transmitter number printed under the bar code on the label attached to your Ademco transmitter. Press CMD to accept the number.Note: When programming a 5804BD, you must manually enter the Transmitter ID Number.
INPUT NO: _
TRANSMITTER INPUT NUMBEREnter a number (1 to 4) to identify the transmitter input zone. When the transmitter ID is “learned,” the keypad displays the zone input number. Refer to the Ademco transmitter installation instructions for zone input information. Default is 1. Press the CMD key to accept the number. The display returns to ZONE NO for programming the next transmitter
ALREADY ZONE: XX
TRANSMITTER ALREADY LEARNEDThis display indicates the transmitter has previously been learned as a zone and continuously displays until the Back Arrow or CMD key is pressed. Pressing the Back Arrow key returns programming to TRANSMIT NOW to allow a different transmitter to be learned. Pressing the CMD key returns programming to ZONE NO.
Exit ProgrammingRemove the jumper from the PROGRAM header to exit 738A programming mode. Place the jumper over one pin for future use. Remove the Model 330 cable and the DMP keypad from the PROG header. After exiting the programming mode, all zone states report to the panel as normal. Always test and verify all zones for proper communication.
738A INSTALLATION GUIDE | DIGITAL MONITORING PRODUCTS
ADDITIONAL INFORMATIONWiring SpecificationsThe maximum wire distance between the Ademco™ wireless receiver and the module is 3 feet. Refer to the following LX‑Bus and Keypad bus wiring specifications.DMP recommends using 18 or 22 AWG for all LX‑Bus and Keypad Bus connections. The maximum wire distance between any module and the DMP Keypad Bus or LX‑Bus circuit is 1,000 feet. To increase the wiring distance, install an auxiliary power supply, such as a DMP Model 505‑12. Maximum voltage drop between a panel or auxiliary power supply and any device is 2.0 VDC. If the voltage at any device is less than the required level, add an auxiliary power supply at the end of the circuit.To maintain auxiliary power integrity when using 22‑gauge wire on Keypad Bus circuits, do not exceed 500 feet. When using 18‑gauge wire, do not exceed 1,000 feet. Maximum distance for any bus circuit is 2,500 feet regardless of wire gauge. Each 2,500 foot bus circuit supports a maximum of 40 LX‑Bus devices.For additional information refer to the LX‑Bus/Keypad Bus Wiring Application Note (LT‑2031) and the 710 Bus Splitter/ Repeater Module Installation Guide (LT‑0310).
Keypad and LX‑Bus Connection
For simple installation, the module connects to the panel 4‑wire keypad data bus. The module can also connect to the on‑board LX‑Bus of an XR150/XR550 Series panel.XR150/XR550 Series Connect the module directly to the Keypad Bus or the LX‑Bus (LX500‑LX900) connectors on the panel.Note: When programming module zones on the LX‑Bus select NO at the Wireless option in the Zone Information section of panel programming.
738A LED Operation
- The green LED on the module indicates data transmission to the panel.On— There are no transmitters programmed.
- Off—The module is not being programmed or it is not responding to the panel.
- Flashing—The module is transmitting data to the panel or it is being programmed.
Table 3: LED and Sounder Operation
| LED | LED CONDITION | SOUNDER | SYSTEM STATUS |
|
Red |
ON Steady |
2 Beeps | Armed Away |
| 3 Beeps | Armed Stay or Instant | ||
|
Flashing |
Pulsing | Fire Alarm | |
| Steady | Armed, Burglary Alarm | ||
|
Green |
ON Steady | 1 Beep | Disarmed, Ready to Arm |
| Flashing | Silent | Disarmed, Not Ready to Arm |
4 738A INSTALLATION GUIDE | DIGITAL MONITORING PRODUCTS
ADEMCO COMPATIBILITY
Compatible Ademco Wireless Transmitters and Receivers Table 4 and Table 5 list current Ademco transmitters and receivers that have been tested by DMP and are compatiblewith the module. Other Ademco products have not been evaluated by DMP. The 738A module has not been tested byUL. The module supports up to 32 wireless zones. The module can deliver all 32 zones to a DMP panel regardless of the number of zones assigned by the Ademco wireless receiver model number. For example, a Model 5881ENL 8‑Zone Receiver delivers 32 wireless zones to the module.
Table 4: Ademco Receivers
| RECEIVER MODEL NUMBER | XT30/XT50 SERIES AND XR150/XR550 SERIES |
| 5881ENL 8‑Zone Receiver | 32 Zones |
| 5881ENM 16 Zone Receiver | 32 Zones |
| 5881ENH 64‑Zone Receiver | 32 Zones |
| Note: Dip switches on the 5881 series receiver must be set to zero. |
Table 5: Ademco Transmitters
| SUPERVISED | ADEMCO TYPE | UNSUPERVISED | ADEMCO TYPE |
| 5802MN Miniature Panic Button | BR or UR | 5802 Panic Button | BR |
| 5816 Window/Door | RF | 5803 3‑Button | BR |
| 5817 3‑Zone | RF | 5804 4‑Button | BR |
| 5890 Motion Detector | RF | 5804BD 4‑Button * | BR |
| * Note: For use with XT30/XT50 Series panels. | * Note: For use with XT30/XT50 Series panels. |
Ademco 5800TM Transmitter Module
The 738A supports the Armed, Alarm, and Ready to Arm status LEDs on an Ademco 5804BD. This requires connecting an Ademco 5800TM to an XT30/XT50 panel. When a 5800TM is connected as shown in Figure 4. the panel Armed, Alarm, and Ready to Arm status displays on the Ademco 5804BD Wireless Key LED and sounder. Table 3 describes the LED and sounder operation. Refer to the Ademco 5804BD Installation Instructions for proper button operation.
Use 5804BD buttons A and C to send a panic signal to the DMP panel. Press the A and C buttons at the same time for two seconds to send a Zone 19 Panic signal to the central station receiver. The zone name information sent to the receiver contains the first address number that the module is answering.Note: For use with XT30/XT50 panels. When programming the 5804BD into the panel, you must manually enter the transmitter ID number in ZONE INFORMATION.
738A INSTALLATION GUIDE | DIGITAL MONITORING PRODUCTS
FCC INFORMATION
This device complies with Part 15 of the FCC Rules. Operation is subject to the following two conditions:
- This device may not cause harmful interference, and
- this device must accept any interference received, including interference that may cause undesired operation.The antenna used for this transmitter must be installed to provide a separation distance of at least 20 cm (7.874 in.) from all persons. It must not be located or operated in conjunction with any other antenna or transmitter. Changes or modifications made by the user and not expressly approved by the party responsible for compliance couldvoid the user’s authority to operate the equipment.Note: This equipment has been tested and found to comply with the limits for a Class B digital device, pursuant to part 15 of the FCC Rules. These limits are designed to provide reasonable protection against harmful interference in a residential installation. This equipment generates, uses and can radiate radio frequency energy and, if not installed and used in accordance with the instructions, may cause harmful interference to radio communications. However, there is no guarantee that interference will not occur in a particular installation. If this equipment does cause harmful interference to radio or television reception, which can be determined by turning the equipment off and on, the user is encouraged to try to correct the interference by one or more of the
following measures:
- Reorient or relocate the receiving antenna.
- Increase the separation between the equipment and receiver.
- Connect the equipment into an outlet on a circuit different from that to which the receiver is connected.
- Consult the dealer or an experienced radio/TV technician for help.
738A ADEMCO INTERFACE MODULE
SpecificationsPrimary Power 12 VDCCurrent Draw 75 mADimensions 5.50” W x 3.00” H x 0.75” D13.97 cm W x 7.62 cm x H x 1.91 cm D
AccessoriesModel 300 4‑Wire Harness
Compatibility
XR150/XR550 Series panelsXT30/XT50 Series panels with firmware Version 101 or higher
Certifications
report this adFCC Part 15
Read More About This Manual & Download PDF:
References
[xyz-ips snippet=”download-snippet”]