![]()
V-4061DB VIDEO DOORBELLInstallation Guide
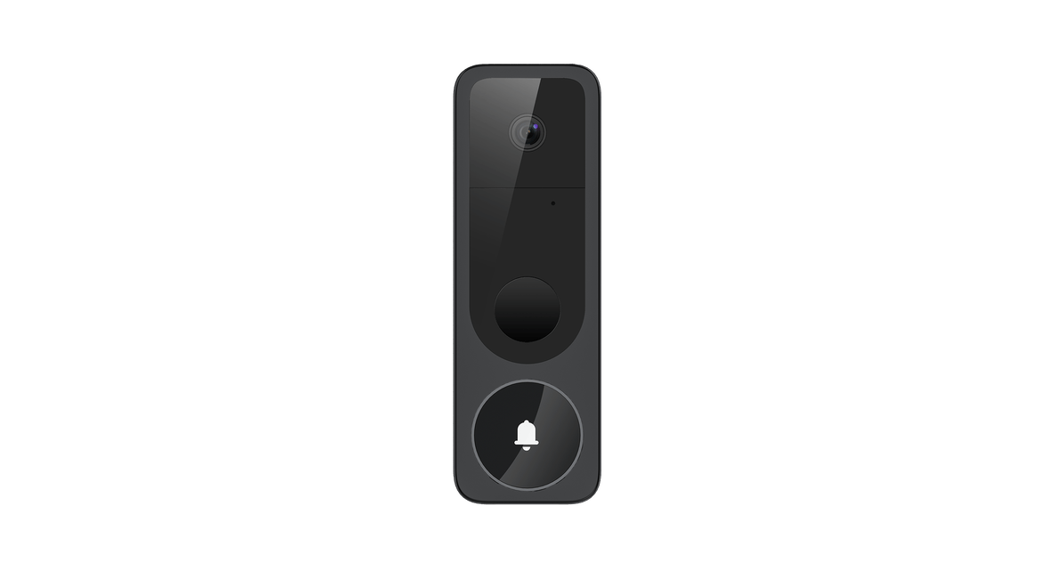
 Figure 1: V-4061DB
DESCRIPTIONThe V-4061DB is a Wi-Fi enabled video doorbell capable of of recording and storing video clips that are viewable on the Virtual Keypad™ App.
The V-4061DB provides 16 GB of storage on a pre-installed SD card for local recording.
Compatibility
- Virtual KeypadTM App 6.33.4 or higher for iOS and Version 6.37.0 for Android devices
What is Included?
- V-4061DB Video Doorbell
- Pre-installed 16 GB SD card
- 4 different color faceplate options
- Power Kit
- Fuse and Screw Pack
- Vertical, Horizontal, and Flat Wedges
- Weather Gasket
- Reversible Screwdriver
- Phillips Head
- Security Screw Bit
PREPARING VIDEO DOORBELL FOR INSTALLATION
- The V-4061DB can be installed in place of a functional, wired, 16-24VAC mechanical doorbell system, or with a 1624V wired transformer.
- Once you have confirmed that the existing doorbell works, shut off doorbell’s power at the breaker.

INSTALLING THE VIDEO DOORBELL
Replacing Existing Doorbell
- Remove the existing doorbell from the wall, leaving the existing wiring exposed.
- Remove the security screws securing the faceplate to the doorbell, then carefully remove the faceplate. Note: The included screwdriver has a reversible head. The star bit is used to remove the security screws from the doorbell faceplate, and the Phillips-head bit is used for installing the screws on the back of the doorbell.
- Hold the doorbell flat against the wall where the old doorbell was and mark the screw hole locations.
- Drill the holes using the marks you made as a guide.
- In the screw hardware pack, locate the screw used to tighten down the wires and loosely attach these screws to the back of the doorbell. It does not matter which wire is connected to which screw. Note: If you are using a 16-24V plug-in transformer to power the doorbell, be sure to attach the included fuse to either wire during installation. The fuse is not needed if the doorbell is being connected to a standard 16-24V mechanical doorbell chime.
- Use the included screws to secure the doorbell to the wall.
INSTALLING THE POWER KIT
If you are not installing the doorbell with an existing mechanical chime, skip to section 4.
- With the breaker supplying power to the mechanical chime still off, remove the cover from the mechanical chime.
- Loosen the TRANS terminal and connect the existing chime wire to the power kit wire using the included wire nut.
- Loosen the FRONT terminal and connect the existing chime wire to the power kit wire using the included wire nut.
- Connect the wire harness to the TRANS terminal and tighten it down.
- Connect the other wire harness to the FRONT terminal and tighten it down.
- Insert the white wire connector into the power kit.
- Mount the power kit within the mechanical chime housing using the adhesive backing and replace the cover.
- Turn on the breaker to the part of the home where the video doorbell and mechanical chime are installed.

ENABLE THE VIDEO DOORBELL IN DEALER ADMIN
- Log in to dealer.securecomwireless.com.
- Select the appropriate system for the V-4061DB Video Doorbell.
- On the System Information screen under Add-On Features, check the Video Doorbell box. This will allow the doorbell to sync with the Virtual Keypad App.
CONNECT VIDEO DOORBELL TO WI-FI USING VIRTUAL KEYPAD APP
The video doorbell requires a 2.4 GHz Wi-Fi signal.
- Ensure that you know the Wi-Fi SSID and password that you wish to connect the doorbell to.
- Log into the Virtual Keypad app and go to the Doorbell tab.
- Tap Set Up Doorbell.
- Tap Scan Doorbell and scan the QR code located underneath the faceplate on the front of the doorbell.
- When the QR code is confirmed, press Configure Wi-Fi.
- Enter the SSID and password for the Wi-Fi network that the doorbell is connecting to and press Continue.
- Use your device to connect to the doorbell’s Wi-Fi network.For Andriod Users:Virtual Keypad will attempt to automatically connect to the doorbell’s Wi-Fi network and configure the Wi-Fi information for you. This may take a few seconds.For iOS Users:Copy the doorbell’s Wi-Fi password, then navigate to the Wi-Fi settings on your phone. The doorbell will transmit an SSID for your phone to use. The SID will be HAP followed by the doorbell’s serial number. For example, if the doorbell serial number is “12345678” then the SSID that the doorbell transmits would be “HAP_12345678.” Paste the password to connect to the doorbell’s WiFi network.Note: The password will be “AP” followed by the verification code. For example, if the verification code is “ABCDEF”, then the password would be “APABCDEF.”
- Navigate back to the Virtual Keypad app. Press Continue. When the network pairing has been confirmed the doorbell will announce that it is connected to Wi-Fi.
- Give the doorbell a name. You will be prompted to select the type of chime the doorbell is using. Select Mechanical Chime when installing the video doorbell with a standard 16-24V mechanical doorbell chime. Select No Chime when installing the video doorbell with a 16-24V plug in transformer. If No Chime is selected, make sure you have installed the included fuse. The V-4061DB is not compatible with digital chimes.
- Press Finish to complete the installation. It could take up to a minute for Virtual Keypad to finsh configuring your doorbell. When it has been successfully configured, Virtual keypad will automatically launch into the live view.
ADDITIONAL INFORMATION
CONNECTING THE DOORBELL TO AN NVRAfter the doorbell has been set up in the Virtual Keypad app and after obtaining the IP address that your router has assigned to the doorbell, follow the NVR manufacturer recommended steps to add a camera to an NVR.
- Choose Manual mode to add a camera.
- Enter the IP address.
- Set the protocol to Hikvision.
- Leave the Management Port at the default 8000, the Channel Port as the default 1, and the Transfer Protocol as the default Auto.
- The username is “admin”. The password is the verification code that is on the back of the doorbell. As an example, if the verification code is ILGWQM then the password would be ILGWQM.
CHANGING SSID OR PASSWORD
- Delete the doorbell from the Virtual Keypad App. To delete a doorbell, tap the Menu icon and select Doorbell. Tap the Edit icon, the tap Delete.
- Remove the doorbell’s cover and hold down the reset button for 25 seconds or until the doorbell audibly states, “doorbell is rebooting.” The doorbell will go through its reboot process and announce when it is ready to be reconfigured.
- Repeat instructions in Connect Video Doorbell to Wi-Fi Using Virtual Keypad App.
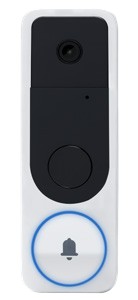
LED COLOR DESCRIPTION Solid Red The doorbell is turning on or rebooting Flashing Red The doorbell is preparing for configuration Quickly Flashing Blue The doorbell is ready to be added using Virtual Keypad Slowly Flashing Blue The doorbell is connected to Wi-Fi Figure 4: LED Color Descriptions
V-4061DB VIDEO DOORBELL
Specifications
| Sensor and Lens: | |
| Image Sensor | 2MP |
| Lens | 2.4mm, F.2.25 |
| Field of View | 170 degrees (Vertical),105 degrees (Horizontal) |
| Video Compression | H.264 |
| Frame Rate | 15 Frames per Second |
| IR Distance | 25 ft |
| Network: | |
| Wireless Compatibility | 2.4 GHz |
| Storage: | |
| On-Board Storage | 16 GB SD card installed (Supports up to 128 GB) |
| Hardware: | |
| Power Required | 16 VAC to 24 VAC |
| Power Consumption | Max 5w |
| Working Temperature | -22 F to 122 F (-30 C to 60 C) |
| Dimensions (HxWxL) | 1.8” W x 5.4” H x 0.82” D |
CompatibilityVirtual Keypad App Version 6.33.4 or higher for iOS devicesVirtual Keypad App Version 6.37.0 for Android devices
Accessories
| V-4061DB-PK | Power Kit |
| V-4061DB-WEDGE | Wedge Kit |
![]()
LT-2524 21183© 2021
INTRUSION · FIRE · ACCESS · NETWORKS2500 North Partnership BoulevardSpringfield, Missouri 65803-8877800-641-4282 | DMP.com
V-4061DB VIDEO DOORBELL | DIGITAL MONITORING PRODUCTS
References
[xyz-ips snippet=”download-snippet”]