Dobot MOOZ-3 Tri Color 3D Printer

About this printer
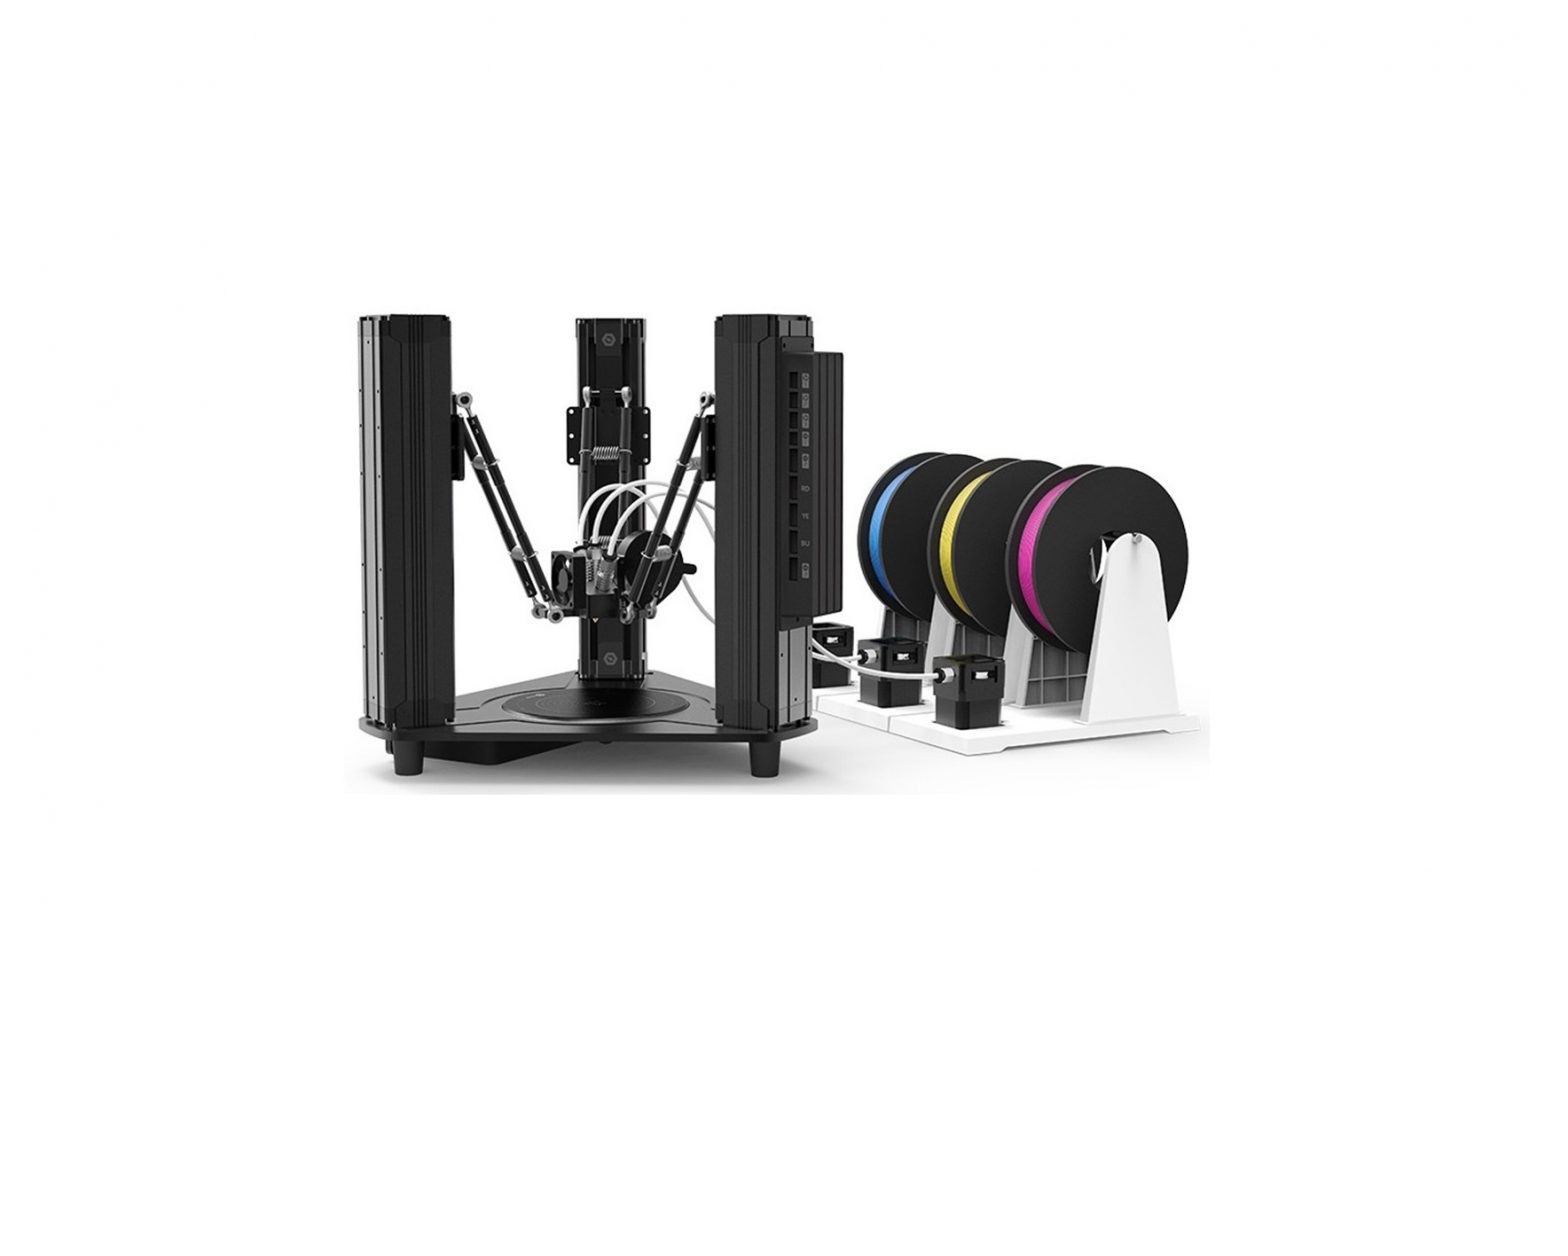
The Dobot MOOZ-3 tri-colour printer is a unique product offering filament mixing capabilities on a small heated bed. The printer comes with 3 colours for the CYM colour space, which can be blended together within the nozzle to achieve a large range of colours; The mixing modes also come in 2 styles:
- Gradient mode, which will mix between 2 colours over a desired length.
- Colour change mode, which will mix and form up to 4 different colours, changing after each length.
We will go over the colour controls later in this document. Firstly, we will look at making sure we get the connections and the zero point levelling correct.
Quick start printing guide
We always recommend reading the manual in entirety before printing, but if you already have and want to get started with printing, have a look at this simple checklist:
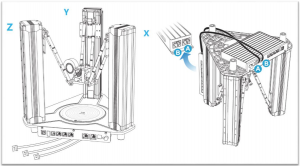
- Set up the printer by assembling and connecting the 3 extruder motor filament mounts as shown, the X tower must connect into the port labelled “X” on the base board.
- Connect up the control and base station according to the diagrams below, with the A-A and B-B leads. Notice that they do cross over.

- Connect up the Nozzle, Heater, and fan connections.Here, the red fan connects to [1], white fan to [2]. The thermocouple connects to [H1] and the heater connects to [H2]. Fan [3] is left blank.
- Once everything is connected properly, turn it on and make sure that it responds to commands as expected.
- Press the “ZERO POINT” button. The nozzle will centre and approach the bed; once it has finished moving, adjust the nozzle so that is some slight friction between the nozzle and the bed, using a sheet of paper between them to test. (the nozzle should press onto the paper and bed and make it slightly harder for the paper to pull out. The paper should still be able to move, however, you should be able to feel the gentle pressure from the nozzle.)
- Press the “3 POINT LEVEL” button and set the 3-point balance with a sheet of paper similar to above. The previous command is to set the height of the printer, where this is now to set the position of the 3 arms so that it prints on an even surface.
- Choose your gradient settings and press save. More information on the gradient settings can be found in the colour settings section of this document.
- Use one of the example models we have online, or follow the instructions on the next page to set up CURA for printing your own model.


Setting up CURA software
It’s important to get the latest version of CURA to get the best software in terms of quality, bug fixes, and otherwise. CURA can be downloaded for free from: https://ultimaker.com/software/ultimaker-cura
In order to get the Dobot MOOZ-3 printer working with CURA, we must add a “new custom printer” to CURA with the following settings:(note the important values highlighted in blue)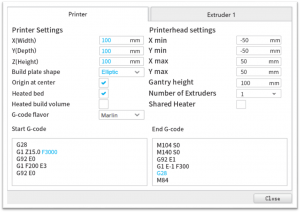
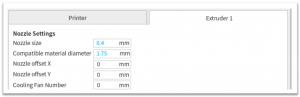
To CURA, this is simply a 1 nozzle printer that prints in the same colour. All the colour mixing options are done by the printer, not by CURA.
How to change the colour settings
Once you have set up the printer and you’re ready to set your colour options, you can press the gradient button to bring up the colour menu:
In this menu you have a few options:
Switch will switch between up to 4 colours; you can press each colour and set the value, and change the bottom value to be the distance that you want to change.
Gradient will fade between two colours over the distance that you specify.
Once you have set your desired parameters, press the middle “save” button to save the parameters. The machine will now print according to these specifications until you either change or reset the machine.The printer will lose colour settings after each turn-off.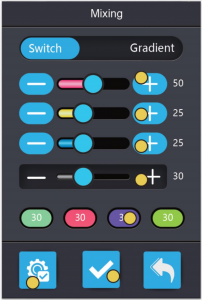
Examples:
To the left we have a model that has been set to switch with the colours:(Magenta, Yellow, Green, Blue) at 5mm distance
To the right, we have a gradient with Yellow to Magenta over a distance of 95mm.
Software Updates:
We do have one software update that might be useful if you find that it is not quite printing in the colours that you expected.
You can find the software update online. To update, simply place the .bin file on a blank, FAT32 usb stick and insert it into the machine while the machine is off.
When you turn on the machine, the firmware should update to the latest version.
Australiawww.jaycar.com.au[email protected]1800 022 888
New Zealandwww.jaycar.co.nz[email protected]0800 452 922

References
[xyz-ips snippet=”download-snippet”]