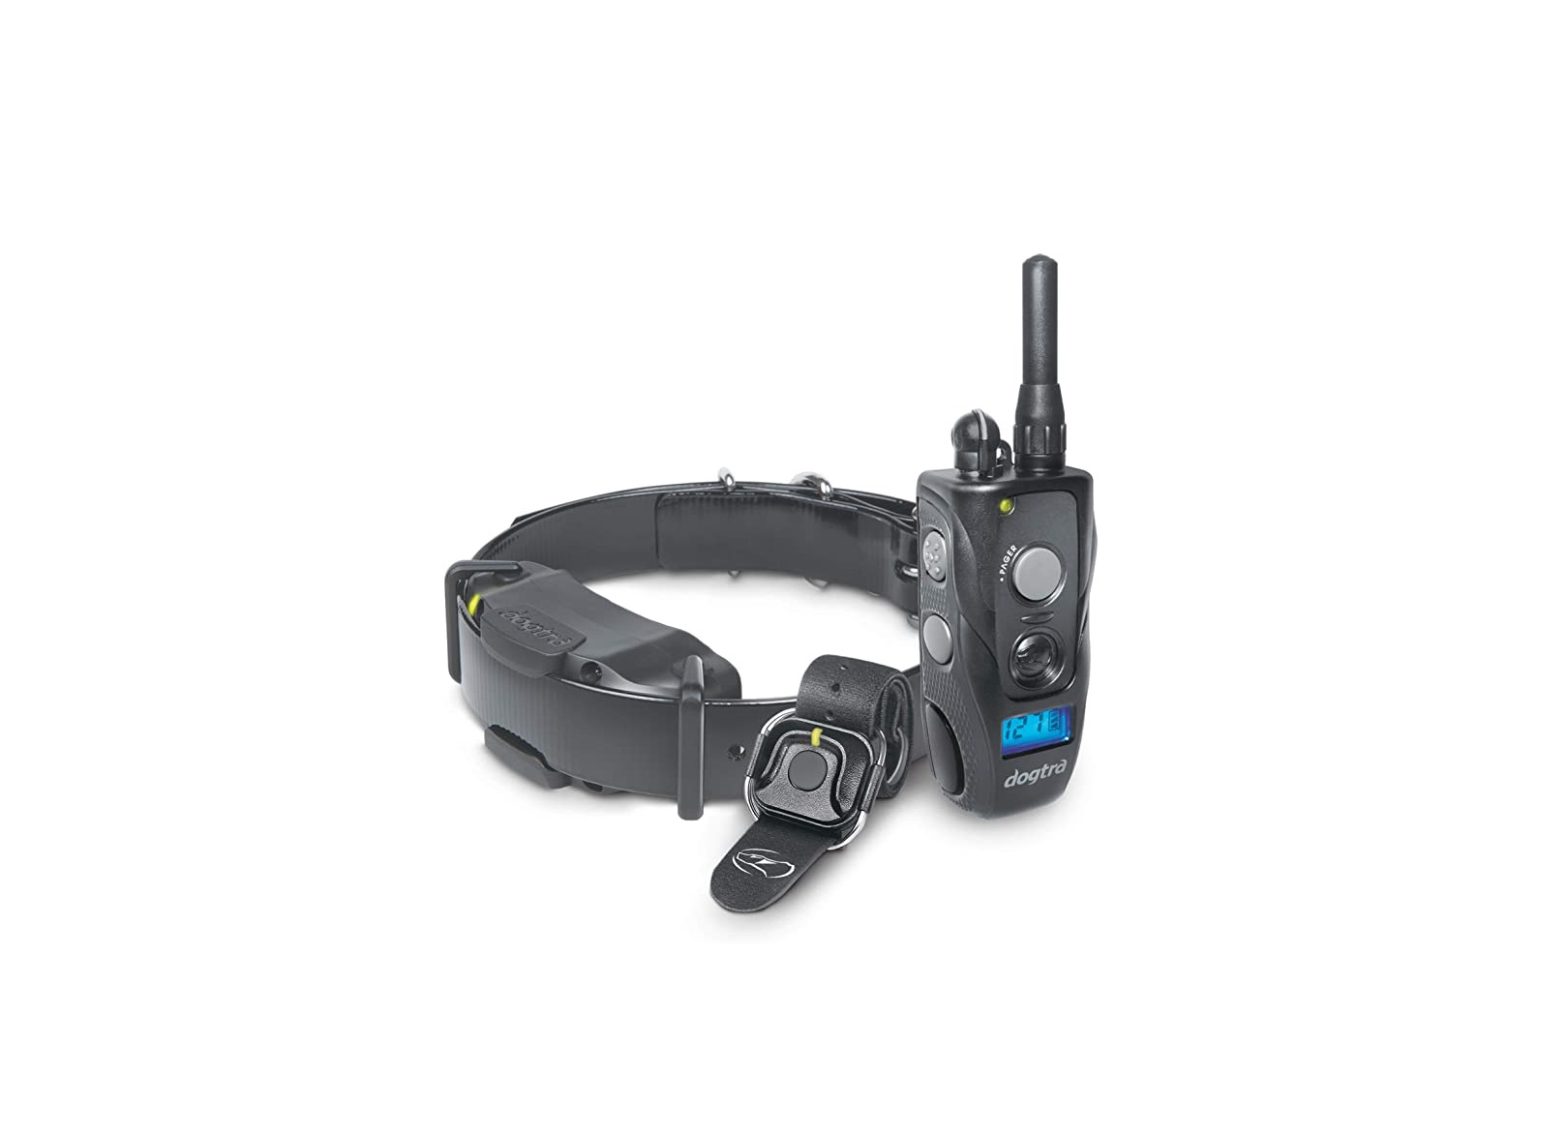
dogtra DGTR0015 HandsFree 1900S Conversion Trainer Kit Owner’s Manual
1900S HANDSFREE TRANSMITTER

Turning the 1900S HANDSFREE On/Off
To turn the handheld transmitter on, hold down the button on the right side of the transmitter until the LCD screen illuminates. To turn the transmitter off, hold down the same button on the right side of the transmitter until the LCD screen shuts off. The 1900S HANDSFREE unit has four buttons on the handheld transmitter (one on the face of the transmitter, two on the left side, and one on the right side).
To turn the receiver on, hold down the on/off button until the LED indicator turns green. To turn the receiver off, hold down the on/off button until the LED indicator turns red.
1900S HANDSFREE Code Setting Guide
Coding the transmitter and receiver:
- Turn the transmitter on by pressing the on/off button and set the Rheostat Dial to 0.
- With the receiver turned off, hold the on/off button on the receiver until the LED light begins to rapidly blink green.
- While the green LED is rapidly blinking on the receiver, press the two side buttons (Nick & Constant) simultaneously on the transmitter. The LED light on the receiver will blink every 4 seconds when coding is complete.
Coding the transmitter and HANDSFREE Remote Controller:
- Begin with the transmitter turned off.
- On the handheld transmitter, hold down the following buttons until you see a rapidly blinking light to code the desired function on the HANDSFREE Remote Controller.
- Constant = Hold down the on/off button and the Constant
- Pager = Hold down the on/off button and the Pager
- Nick = Hold down the on/off button and the Nick
- Once you see the rapidly blinking light, release the buttons.
- Hold down the HANDSFREE Remote Controller button until the rapidly flashing light on the transmitter and controller both show a solid light.
- Release all buttons. To check if the coding is correct, press the button on the HANDSFREE Remote Controller.
ARC HANDSFREE TRANSMITTER

Turning the ARC HANDSFREE On/Off
To turn the handheld transmitter on, hold down the button on the right side of the transmitter until the LCD screen illuminates. To turn the transmitter off, hold down the same button on the right side of the transmitter until the LCD screen shuts off.
To turn the receiver on, place the red dot on the back of the transmitter to the red dot on the receiver, which will show an LED light when turned on. To turn the receiver off, touch the two red dots together momentarily and a red LED light will indicate it is off.
ARC HANDSFREE Code Setting Guide
Coding the transmitter and receiver:
- Turn the transmitter on by pressing the on/off button and set the Rheostat Dial to 0.
- With the receiver turned off, place the red dot on the back of the transmitter to the red dot on the receiver. Hold the two red dots together for about 5 seconds until the green LED blinks rapidly on the receiver.
- While the green LED is rapidly blinking on the receiver, separate the two devices and press the two side buttons (Nick & Constant) simultaneously on the transmitter. The LED light on the receiver will blink every 4 seconds when coding is complete.
Coding the transmitter and HANDSFREE Remote Controller:
- Begin with the transmitter turned off.
- On the handheld transmitter, hold down the following buttons until you see a rapidly blinking light to code the desired function on the HANDSFREE Remote Controller.
- Constant = Hold down the on/off button and the Constant
- Pager = Hold down the on/off button and the Pager
- Nick = Hold down the on/off button and the Nick
- Once you see the rapidly blinking light, release the buttons.
- Hold down the HANDSFREE Remote Controller button until the rapidly flashing light on the transmitter and controller both show a solid light.
- Release all buttons. To check if the coding is correct, press the button on the HANDSFREE Remote Controller.
HANDSFREE Information

The HANDSFREE Remote Controller gives you the freedom to multi-task and have discreet fingertip control. The function (Nick, Constant, or Pager) can be coded to the HANDSFREE Remote Controller for you to operate remotely. You may press the HANDSFREE Remote Controller button instead of having to carry the transmitter in your hand. The HANDSFREE Remote Controller has been tested and can be used in extreme conditions, between -4 °F to 140 °F.
Battery Life
The LED on the HANDSFREE Remote Controller will blink when the button is pressed. Replace the battery in the HANDSFREE Remote Controller when the LED no longer blinks. With normal usage (button held for 12 seconds, 100 times a day), the battery should last 7-10 years.
Range
Depending on where the handheld transmitter is placed, your body can act as a barrier between the HANDSFREE Remote Controller and the transmitter. The handheld transmitter’s antenna should be kept in the open for maximum range. Placing the transmitter in the bottom of a bag or in a cargo pocket where the antenna is covered may reduce the range between the transmitter and the receiver. The HANDSFREE Remote Controller will need to be within 33 feet of the of the transmitter to work.
Changing the HANDSFREE Remote Controller Stimulation Mode
The default setting for the HANDSFREE Remote Controller button is the Constant stimulation.
To change the setting to the Pager or Nick stimulation (or back to Constant stimulation) proceed with the following steps:
- Begin with the transmitter turned off.
- On the handheld transmitter, hold down the following buttons to code the desired function on the HANDSFREE Remote Controller.
- Constant = Hold down the on/off button and the Constant
- Pager = Hold down the on/off button and the Pager
- Nick = Hold down the on/off button and the NickHold down these buttons until you see a rapidly blinking light on the transmitter.
- Once you see the rapidly blinking light, release the buttons.
- Hold down the HANDSFREE Remote Controller button until the rapidly flashing light on the transmitter and controller both show a solid light.
- Release all buttons. The HANDSFREE Remote Controller should now be coded.
HANDSFREE Remote Controller Overview
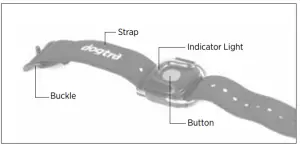
Fastening the HANDSFREE Remote Controller Strap
The HANDSFREE Remote Controller strap can be fastened to your fingers, wrist, palm, or around a gun stock. Follow the fastening instructions below.
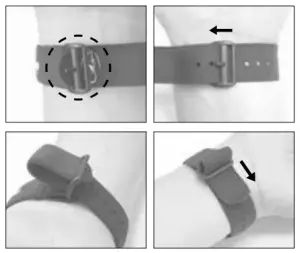
- Wrap the strap around the object you are fastening the strap to. Pull the strap through the lower section of the buckle and use the notch to keep the HANDSFREE Remote Controller securely in place.
- Loop the strap back through the top section of the buckle.
Maximizing the Distance

The HANDSFREE systems have a 3/4-mile range. Depending on the way you use your transmitter, the transmitter range may vary. To get the greatest range, hold the transmitter away from your body and avoid touching the antenna. Keep your unit properly charged for maximum signal strength.
The range on the HANDSFREE Remote Controller is reduced when the handheld transmitter’s antenna is covered or in contact with your body. Refer to the following carrying methods for optimal range
Carry the handheld transmitter with the antenna facing away from you.Do not place the handheld transmitter with the antenna touching your body or facing downwards. WARRANTY AND REPAIR INFORMATION
 WARRANTY AND REPAIR INFORMATION
LIMITED WARRANTY
For Dogtra Products Purchased from Dogtra Authorized Dealers
One-Year Warranty
Except as otherwise provided below, Dogtra warrants to the original retail purchaser (“You”) that its Dogtra products shall be free of defects in materials and workmanship for a period of one (1) year from the date of purchase (“Warranty”). The Warranty covers the cost of repair (parts and labor) or replacement (if repair is not feasible) of a defective Dogtra product during said one-year period. For such repaired or replaced products, the remaining portion of the original warranty period, or ninety (90) days, whichever is longer, shall apply. Dogtra, at its sole discretion, shall determine whether to repair or replace a product covered by the Warranty.
Warranty Conditions
The Warranty is not transferrable and applies to your Dogtra product only if:
- You are the original retail purchaser of the product,
- You bought the product from a Dogtra authorized dealer, and
- You present a receipt or other proof of purchase showing a valid purchase date, the name and address of the authorized dealer, and the purchased product identified by model and/or serial number.
Warranty Exclusions
The Warranty does not cover damage, loss, or deterioration to your Dogtra product caused: by misuse, neglect, abuse, or other improper handling of the product; by failure to follow use or care instructions; by use of the product for other than its intended purpose; by accident or natural forces such as fire or flooding; or by normal wear and tear such as scratches to the product surface.
The Warranty also does not cover Dogtra products that: are purchased from non-authorized dealers; are purchased outside of the United States or Canada; have been damaged during shipment (even if Dogtra paid or arranged for shipping); have been modified or tampered with in any manner; are opened or repaired by anyone other than Dogtra; or have serial numbers that have been altered or defaced.
Sole Warranty
This Warranty is the only warranty offered by Dogtra for its Dogtra products. Other than said Warranty, Dogtra makes no other representations or warranties whatsoever regarding its products, whether oral or in any product manual, on any packaging, on any website, or in any other written material. No dealer of Dogtra products, nor any employee or agent of Dogtra, is authorized to make any additions, changes, or extensions to the Warranty. Dogtra, at its sole discretion and at any time, reserves the right to modify the Warranty.
DISCLAIMER OF OTHER WARRANTIES
THE FOREGOING WARRANTY IS PROVIDED IN LIEU OF ALL OTHER WARRANTIES, WHETHER EXPRESS OR IMPLIED. DOGTRA DISCLAIMS ANY IMPLIED WARRANTIES INCLUDING, BUT NOT LIMITED TO, THE IMPLIED WARRANTIES OF MERCHANTABILITY AND FITNESS FOR A PARTICULAR PURPOSE.
Limitation of Remedies
Dogtra’s liability is limited to the cost of repair or replacement of the Dogtra product under Warranty. Any claim or action to enforce the Warranty must be commenced within thirty (30) days of the Warranty’s expiration for your product. Dogtra will not be liable for any indirect, incidental, special, consequential, or similar damages based on breach of warranty, breach of contract, negligence, strict tort, or any other legal theory related to Dogtra and its products. Damages that Dogtra will not be responsible for include, but are not limited to: loss of income or profits; loss of revenue or savings; loss of use of the product or associated products; cost of any substitute products or services; inconvenience, downtime, or any other time; loss of goodwill; claims of third parties including customers; and damage to property.
Legal Rights May Vary By State or Jurisdiction
The Warranty gives You specific legal rights, and You may also have other rights which vary by state or jurisdiction. Some states or jurisdictions do not allow certain limitations of implied warranties or of incidental or consequential damages or other remedies, so certain of the foregoing limitations may not apply to You.
If any portion of the Warranty is held by a court to be invalid or unenforceable, the remaining portions of the Warranty shall remain in full force and effect and shall in no way be affected or invalidated, and the invalid or unenforceable portion shall be modified so as to most nearly achieve the intent of the Warranty.
Product Registration
Dogtra recommends that customers register their products as soon as possible after purchase. Product registration will facilitate any future warranty service. You may also receive useful information and updates about your existing and future Dogtra products. To register your product, visitwww.dogtra.com/product-registration. If your product is not registered with Dogtra, You will be required to provide a receipt or other proof purchase (as provided above) to qualify for warranty service.
How to Obtain Warranty Service Should your Dogtra product require warranty service, please contact Customer Service by phone or email for a warranty evaluation (see below for contact information). Upon approval of your warranty work, Dogtra will repair or replace (at Dogtra’s election) your product without charge for labor or parts. You are responsible for shipping, including cost, of your product to Dogtra for warranty service. Dogtra will handle shipping, including cost, of the repaired or replaced product back to customers in the USA. Dogtra will not be responsible for shipping, including cost and/or applicable taxes or fees, for products sent to Canada. Such costs, taxes, or fees will be borne by the customer.
To register your product, visit www.dogtra.com/product-registration.
Dogtra Customer Service22912 Lockness Avenue, Torrance, CA 90501(888) 811-9111[email protected]Mon – Fri, 8:00 AM to 4:30 PM (PST)
 report this ad
Send repair units toDogtra Company / Repairs22912 Lockness Avenue,Torrance, CA 90501U.S.A.
References
[xyz-ips snippet=”download-snippet”]