
DogWatch CAT200 Cat Indoor
Boundary Instructions

This protocol is meant to condition the cat without human interaction. Disassociating the person from the process allows the cat to be in control and protects the relationship of the person and the pet.
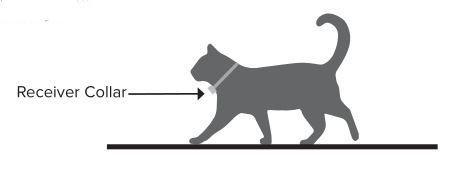
First, Let your cat get comfortable wearing the collar.
If a cat is not used to wearing any type of collar around its neck, we suggest slowly introducing a collar for 2-3 weeks prior to the setting up the system.
Without turning it on, have your cat wear the CatFence receiver collar for a few hours a day. Tighten the collar until you can fit 1 finger between the collar and neck. Make sure the contact points are very close to the skin (use long contact points or trim some neck fur if needed). Some cats need a little extra time to adjust to the collar. If your cat seems uncomfortable, put on the collar for only a few minutes at a time. Take it off, then reward her with treats and petting. Practice this for a few days until your cat becomes comfortable wearing the collar for longer and longer periods.
When your cat is familiar with wearing the collar, set up the system
IMPORTANT! Take off the collar when your cat is not using it. Leaving the collar on for too long can cause skin irritation
Step 1: Setup the System
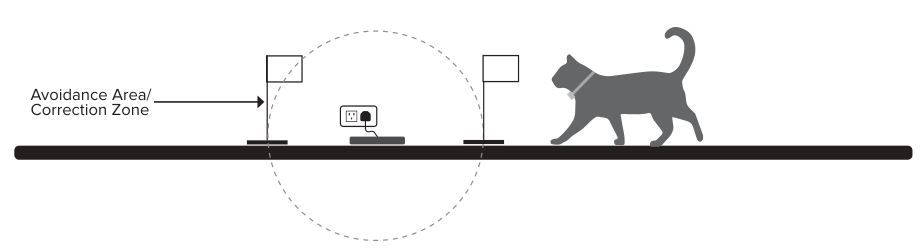
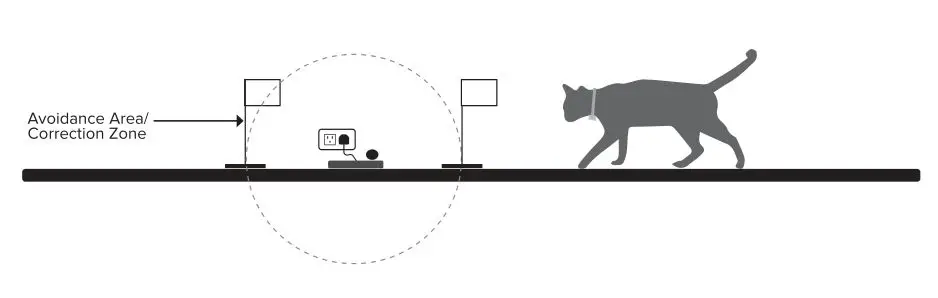
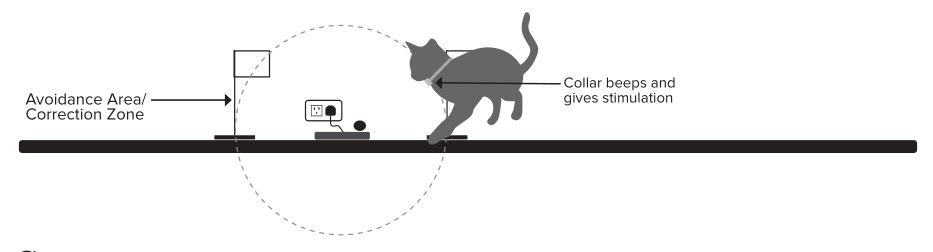
During training, place the unit in a corner – this is so the cat has to move backwards and does not run through the zone. While the cat is not wearing the receiver collar, set up the transmitter in the center of where you want to create an Avoidance Area. Turn on the transmitter.
- Standing at a distance from the transmitter, turn on the receiver collar and set it to its lowest level.
- Hold the multi-tool over the contact posts (or hold the collar by its strap.) Move toward the transmitter (or boundary wire.) When the collar gets to the warning zone, you will hear “beeps” from the receiver.
- Increase or decrease the size of the Avoidance Area by adjusting the Signal Range.
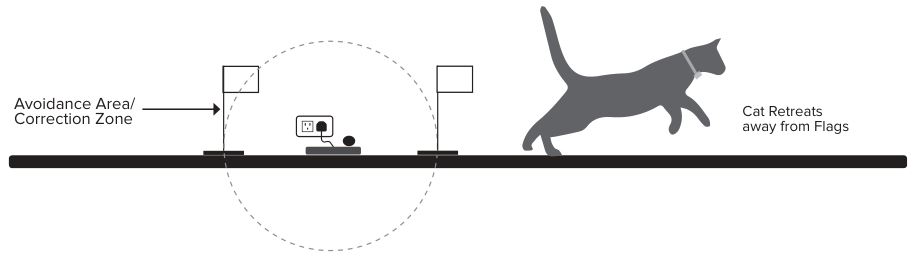
- After adjusting the signal range, mark the Avoidance Area with boundary flags. Place the flags where the warning “beeps” start.REMINDER: When using the transmitter without a boundary wire, the “beeps” will happen in a circle around

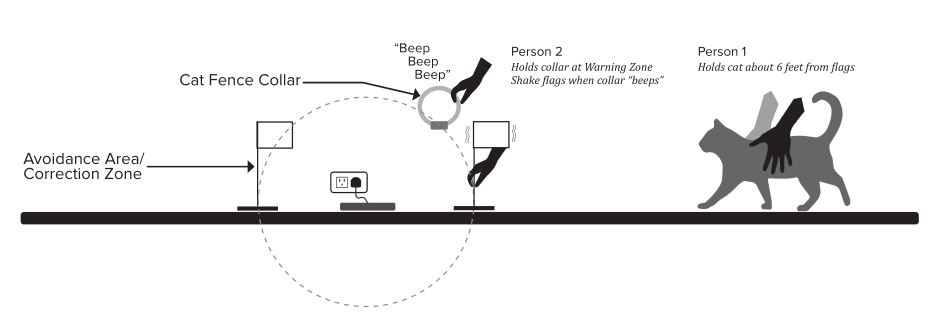
Step 2: Introduce Cat to Flags
The easiest way to do this is with two people. Person 1 holds the cat about 6 feet from the flags. Person 2 holds the collar near the flags to activate the warning “beeps”. While the collar is “beeping”, Person 2 – without verbal cues – gently shakes the flags until the cat seems to associate the flags with the beeps. It is helpful to beep/shake for a few seconds, step away, repeat.
Step 3: Put Collar on Cat
Turn on the receiver collar and make sure it is set to the lowest level. At a safe distance from the Avoidance Area, put the receiver collar on your pet. Always check the collar when you put it on to make sure it hasn’t loosened or become too tight.After training, your cat will probably not attempt to enter the Avoidance Area, even without the collar. However, without the collar, your cat may eventually figure out that there are no beeps and may realize it is safe to enter the area.
Step 4: Lead with Food
Place tempting food (chicken, steak, fish, etc. – not cat food) inside the Avoidance Area.
NOTE: Do not use food that you would normally use as a treat. The cat’s regular food should be placed in its normal location without any proximity to the system and flags. Check with your veterinarian if you have any questions about which foods may be appropriate for your cat.

Step 5: Cat Approaches Avoidance Area
Without encouragement or prompting from you, allow your cat to discover the food inside the avoidance area. When your cat gets close to the flags, it will hear the warning “beeps”.
Step 6: Cat Receives Correction
The warning beeps may be enough to cause your cat to retreat. If he continues past the flags to get the food that has been placed in the Avoidance Area, he will receive a stimulation from the collar. This should startle your cat. NOTE: After the cat reacts – i.e., jumps or retreats quickly – the correction level should remain at that level.
Step 7: Retreat
Upon receiving the stimulation, most cats will be startled and will retreat from the “beeps” and the flags. If the cat does not react, increase the stimulation one level. Give your cat some time to get hungry again and repeat the food trail.
Your cat may continue to test the food trail until it understands that beeps/flags = stimulation. Continue the food trail daily until the cat stops attempting to enter the Avoidance Area. Some cats figure this out quickly; others take longer. It is not unusual for cats to wait until no one is watching (or until everyone is asleep) to test the flags/beeps.
When it is obvious that your cat is no longer interested in entering the Avoidance Area, remove the flags one at a time over several days. If you set up a new Avoidance Area, the cat will probably remember the flags and may avoid the area with little or no training.
As soon as the cat is ignoring the food, move the unit to another area/room to test the cat’s reaction to the flags. When you move the training unit, place the flags around the edge of the signal field. This is the area where the collar starts to beep. You are looking for the cat to be interested in the food but to choose not to enter the flagged area.
[xyz-ips snippet=”download-snippet”]