DOMETIC 3317114 Power Awning Pro Kit User Manual
WARNINGCancer and Reproductive Harm www.P65Warnings.ca.gov
Service Center & Dealer Locations Visit: www.dometic.com/support Read these instructions carefully. These instructions MUST stay with this product.
Explanation of Symbols and Safety Instructions
This manual has safety information and instructions to help you eliminate or reduce the risk of accidents and injuries.
Recognize Safety Information
This is the safety alert symbol . It is used to alert you to potential physical injury hazards. Obey all safety messages that follow this symbol to avoid possible injury or death.
Understand Signal WordsA signal word will identify safety messages and property damage messages, and also will indicate the degree or level of hazard seriousness.
![]() DANGER! Indicates a hazardous situation that, if not avoided, will result in death or serious injury.
DANGER! Indicates a hazardous situation that, if not avoided, will result in death or serious injury.
![]() WARNING Indicates a hazardous situation that, if not avoided, could result in death or serious injury.
WARNING Indicates a hazardous situation that, if not avoided, could result in death or serious injury.
![]() CAUTION Indicates a hazardous situation that, if not avoided, could result in minor or moderate injury.NOTICE: Used to address practices not related to physical injury.
CAUTION Indicates a hazardous situation that, if not avoided, could result in minor or moderate injury.NOTICE: Used to address practices not related to physical injury.
![]() Indicates additional information that is not related to physical injury.
Indicates additional information that is not related to physical injury.
Supplemental Directives
To reduce the risk of accidents and injuries, please observe the following directives before proceeding to install this product:
- Read and follow all safety information and instructions.
- Read and understand these instructions before installing this product.
- The installation must comply with all applicable local or national codes, including the latest edition of the following standards:
U .S .A .
- ANSI/NFPA70, National Electrical Code (NEC)
- ANSI/NFPA 1192, Recreational Vehicles Code
- ANSI Z21.57, Recreational Vehicles Code
Canada
- CSA C22.1, Parts l & ll, Canadian Electrical Code
- CSA Z240 RV Series, Recreational Vehicles
General Safety Messages
![]() WARNING: IMPACT OR CRUSH HAZARD . Failure to obey the following warnings could result in death or serious injury:
WARNING: IMPACT OR CRUSH HAZARD . Failure to obey the following warnings could result in death or serious injury:
- This product should be installed in a controlled environment (inside). Do not install product during windy conditions, or when wind is expected. Otherwise, product could move unpredictably, become unstable, and could detach, bend, or collapse.
- Make sure the awning retract button and the awning extend button operate the awning in the intended direction.
- Keep your hands, arms, head or torso clear of the awning hardware during periods of rain, wind, etc. These conditions may cause the wind sensor to unexpectedly activate and retract the awning.
![]() WARNING: FIRE OR ELECTRICAL SHOCK HAZARD . Failure to obey the following warnings could result in death or serious injury:
WARNING: FIRE OR ELECTRICAL SHOCK HAZARD . Failure to obey the following warnings could result in death or serious injury:
- For all wire connections, use only NEC-approved connectors and terminals that are appropriately sized for the wire gauge.
- Disconnect 120 VAC power from RV. Failure to do so could result in death or serious injury.
Intended Use
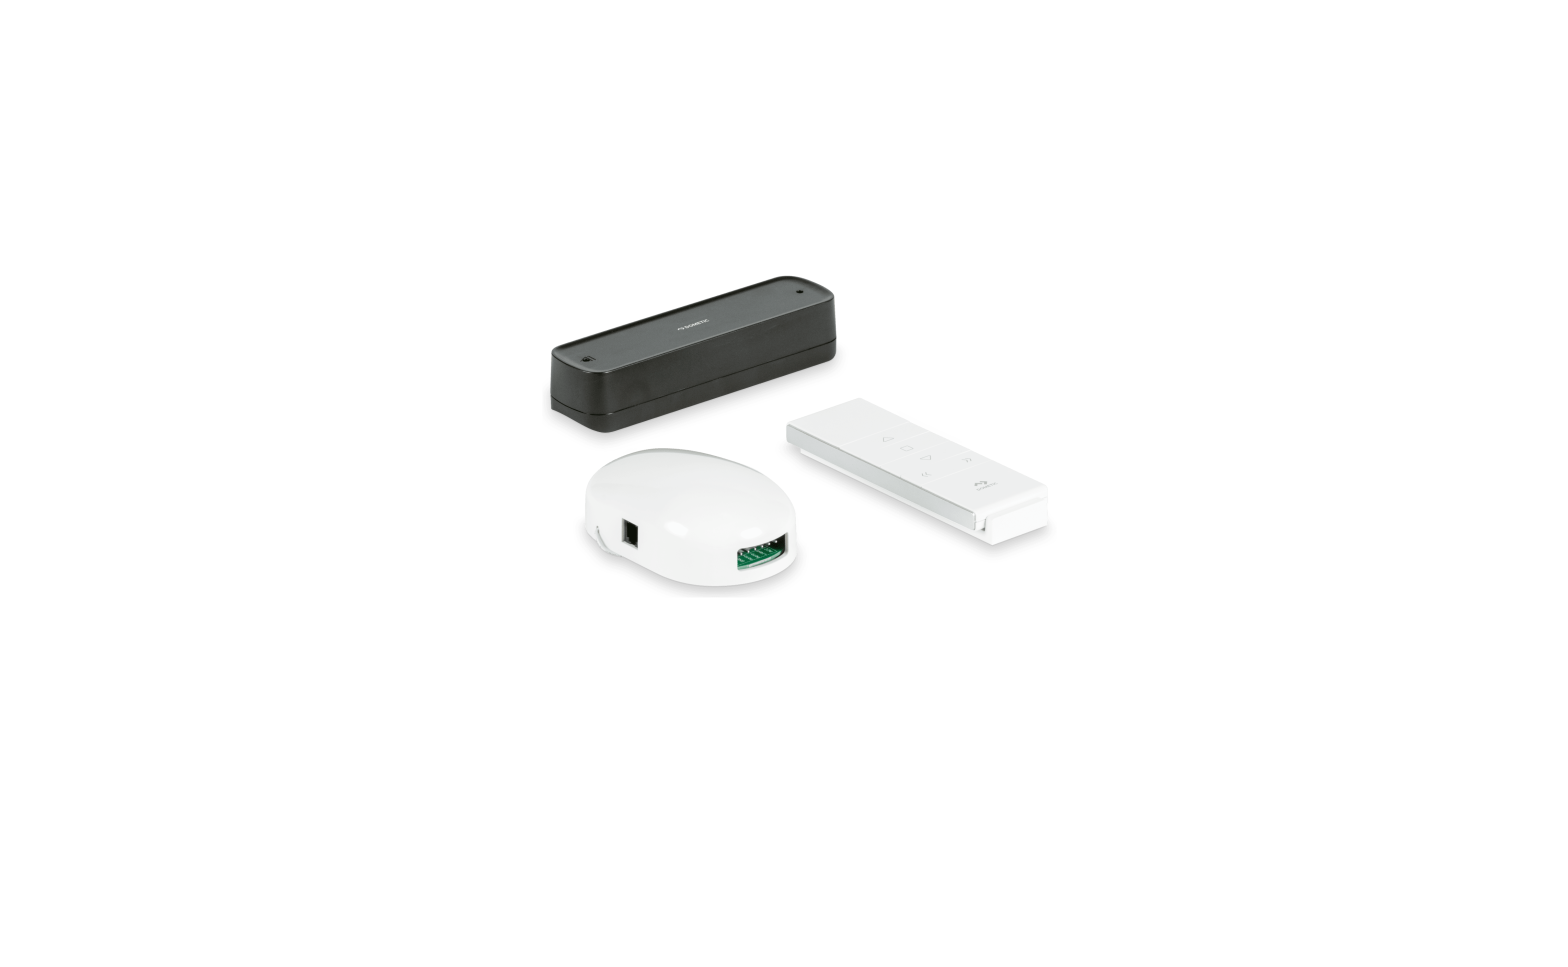
The Wireless Receiver is intended for use in recreational vehicles. Pair devices with the receiver to allow communication between the device and the awning.The manufacturer accepts no liability for damage in the following cases:
- Faulty assembly or connectionDamage to the product resulting from mechanical influences and excess voltage
- Alterations to the product without express permission from the manufacturer
- Use for purposes other than those described in the operating manual
- Dometic Corporation reserves the right to modify appearances and specifications without notice.
General Information
This section describes the awning series compatibility and the recommended tools to install the wireless receiver.
![]() The images used in this document are for reference purposes only. Components and component locations may vary according to specific product models. Measurements may vary ±0.38 in. (10 mm).
The images used in this document are for reference purposes only. Components and component locations may vary according to specific product models. Measurements may vary ±0.38 in. (10 mm).
CompatibilityThe wireless receiver is compatible with the following power awning pro series:
- 9100
- 9200
- 9500
Recommended ToolsThe following are the recommended tools for installation:
|
Recommended Tools |
|
| Phillips Screwdriver |
Flat-Blade Screwdriver |
Specifications
The following are the technical specifications for the wireless receiver.
|
Voltage |
12 V |
| Emission Frequency |
433.92 MHz |
|
Maximum Power Load for Motor |
180 W |
| Maximum Power Load for Light |
30 W |
Receiver Control Range
For the awning remote control to communicate with the wireless receiver, it must be within the specified transmission distance.
![]() Effective transmitting distance may be affected by actual environment.
Effective transmitting distance may be affected by actual environment.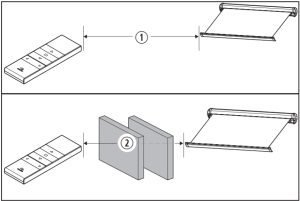 1. Remote Control Transmission Distances
- Unobstructed 656 ft (200 m)
- Concrete Obstruction 115 ft (35 m)
Wiring Diagram
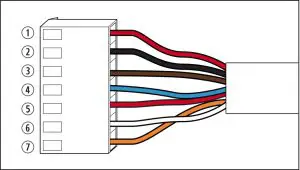 2. Wiring Diagram
- Power+ (Red)
- Power- (Black)
- Motor (Brown)
- Motor (Blue)
- LED+ (Red)
- LED- (White)
- Ignition (Orange)
Installation
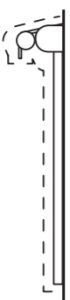
Follow the steps in this section to install the wireless receiver.![]() The receiver shall be installed inside the recreational vehicle.
The receiver shall be installed inside the recreational vehicle.
- Determine the receiver location inside the recreational vehicle and secure the receiver to the wall or cabinet using the installer supplied screws.
 Installing the Receiver
 Installing the Receiver
- Receiver
- Wiring
2. Route the wiring. Make the electrical connections according to the “Wiring Diagram” on page 4.
Pairing the Remote Control
The power awning remote control must be paired with the receiver to communicate. The pairing steps may vary depending on the awning model. Follow the pairing instructions for your awning model.
Pairing the 9200 and 9500 Remote ControlFollow the steps below for the 9200 and 9500 awning series only.![]() Complete each pairing step within four seconds of the previous step to keep the receiver in pairing mode. If the receiver resets, restart the pairing process.
Complete each pairing step within four seconds of the previous step to keep the receiver in pairing mode. If the receiver resets, restart the pairing process.
| Step | Operation | Audible Alert | Awning Movement |
| 1 | 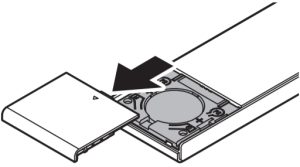
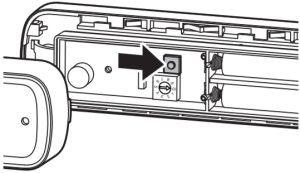
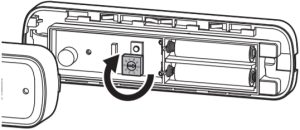
Remove battery cover from back of remote |
None | None |
| 2 | 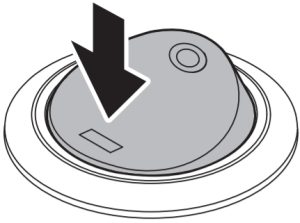
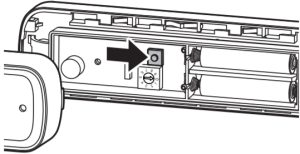
Turn the receiver Power button ON |
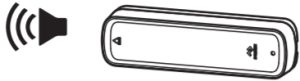
Beep x1 |
None |
| 3 | 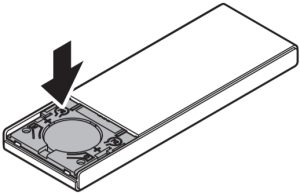
Press Left P2 button two times |
Beep x2 |
None |
| 4 | 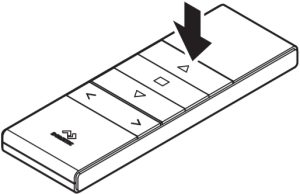
Press Up1 button one time |
Beep x4 |
Awning jogs |
| 5 | Proceed immediately to “Verifying the Remote Control” on page 6. |
For the 9500 power awning, press the Down button at step 4 instead of the Up button.
Pairing the Remote Control
Pairing the 9100 Power Awning Remote ControlFollow the steps below for the 9100 awning series only.![]() Complete each pairing step within four seconds of the previous step to keep the receiver in pairing mode. If the receiver resets, restart the pairing process.
Complete each pairing step within four seconds of the previous step to keep the receiver in pairing mode. If the receiver resets, restart the pairing process.
|
Step |
Operation |
Audible Alert |
Awning Movement |
|
1 |
Remove battery cover from back of remote |
None |
None |
|
2 |
Turn the receiver Power button ON |
Beep x1 |
None |
|
3 |
Press Left P2 button two times |
Beep x2 |
None |
|
4 |
Press Up button one time |
Beep x4 |
Awning jogs |
| 5 |
Press Left P2 button one time |
Beep x1 |
Awning jogs |
| 6 |
Press Up button one time |
Beep x1 |
None |
|
Step |
Operation |
Audible Alert |
Awning Movement |
|
7 |
Press Down button one time |
None |
None |
|
8 |
Press the Left P2 button one time |
Beep x1 |
Awning jogs |
| 9 |
Proceed immediately to “Verifying the Remote Control” on page 6. |
Verifying the Remote Control
After pairing the remote control and the receiver, verify remote control functionality by doing the following:
- Press the Down button. The awning should extend.
- Press the Up button. The awning should retract. If either button does not perform as expected, see “Pairing the Remote Control” on page 5 and restart the pairing process.
- Upon successful verification, proceed to “Pairing the Wind Sensor” on page 6 (if applicable).
Pairing the Wind Sensor
NOTICE: Do not rely on the wind sensor to prevent damage to the awning. The awning should always be closed when unattended or when strong rain, wind, etc. is expected.
The wind sensor is a key component to protect your awning from the wind. This section describes how to pair the wind sensor to the receiver and program the sensitivity level. The information below applies to all compatible power awning pro models.
![]() Complete each pairing step within four seconds of the previous step to keep the receiver in pairing mode. If the receiver resets, restart the pairing process.
Complete each pairing step within four seconds of the previous step to keep the receiver in pairing mode. If the receiver resets, restart the pairing process.
Once programmed, the sensitivity can be adjusted at any time without reprogramming. The sensitivity of the wind sensor can be set from 1 (most sensitive) to 9 (least sensitive). Settings 0 and 5 are for programming only and are not active settings.
![]() For safety purposes, the wind sensor sends a signal to the receiver every 60 minutes to confirm functionality. If for any reason (removal, low battery, etc.) the signal is not received after 60 minutes, the awning will retract automatically.
For safety purposes, the wind sensor sends a signal to the receiver every 60 minutes to confirm functionality. If for any reason (removal, low battery, etc.) the signal is not received after 60 minutes, the awning will retract automatically.
Vehicle Ignition Lock-out
When the vehicle ignition is in the ACC, ON, or START position, the receiver has the ability to retract/lock/cut power to the awning.When the vehicle ignition is in the OFF position, the awning is unlocked and will operate normally.

4 Vehicle Ignition Lock-out
- Ignition ON
- Ignition OFF
| Step | Operation | Audible Alert | Awning Movement |
| 1 |
Remove the front cover of the Wind Sensor |
None | None |
| 2 |
Set Sensor Dial to 0 |
None | None |
| 3 |
Press Remote Left P2 button one time |
Beep x1 |
Awning jogs |
| 4 |
Press Remote Left P2 button one time |
None | None |
| 5 |
Press Sensor Programming button one time |
Sensor Beep x1
Receiver Beep x5 |
Awning jogs |
| 6 |
Set Sensor Dial to 5 |
None | None |
| 7 |
Press Sensor Programming button one time |
Sensor Beep x1 |
Awning retracts |
| 8 |
Set Sensor Dial to desired level |
None | None |

Troubleshooting
| Problem | Possible Cause | Recommended Solution |
| Unable to pair the remote control or wind sensor | The receiver has reset before initiating the next step in the pairing
process. |
Restart the pairing process and complete each step within four seconds of the previous step. |
| Wind sensor keeps beeping; awning automatically retracts every 30 minutes | The wind sensor battery may be low. (The receiver will retract the awning every 30 minutes to protect the awning.) | Replace the wind sensor battery. |
| Awning automatically retracts every 60 minutes | The wind sensor is out of place. (The receiver will retract the awning every 60 minutes to protect the awning.) | Locate the wind sensor and put it back in place. |
![]() Disposal
Disposal
M Place the packaging material in the appropriate recycling waste bins, whenever possible. Consult a local recycling center or specialist dealer for details about how to dispose of the product in accordance with all applicable national and local regulations.
LIMITED WARRANTY
LIMITED WARRANTY AVAILABLE AT WWW.DOMETIC.COM/WARRANTY.
IF YOU HAVE QUESTIONS, OR TO OBTAIN A COPY OF THE LIMITED WARRANTY FREE OF CHARGE, CONTACT:
DOMETIC CORPORATION CUSTOMER SUPPORT CENTER 5155 VERDANT DRIVE ELKHART, INDIANA 46516 1-800-544-4881 OPT 1

Mobile living made easy.
YOUR LOCAL DEALERdometic .com/dealer
dometic .comYOUR LOCAL SUPPORTdometic .com/contact
YOUR LOCAL SALES OFFICEdometic .com/sales-offices
References
[xyz-ips snippet=”download-snippet”]