![]()
WINDOWS & DOORSWINDOWS
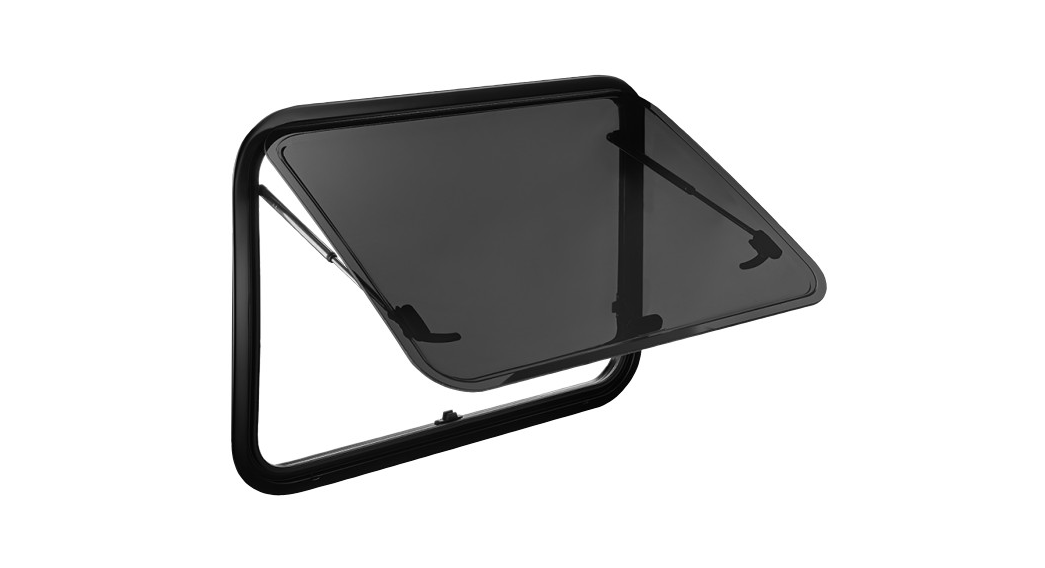
 S7P
S7P
© 2021 Dometic Group. The visual appearance of the contents of this manual is protected by copyright and design law. The underlying technical design and the products contained herein may be protected by design, patent or be patent pending. The trademarks mentioned in this manual belong to Dometic Sweden ABAll rights are reserved.
Please read these instructions carefully and follow all instructions, guidelines, and warnings included in this product manual in order to ensure that you install, use, and maintain the product properly at all times. These instructions MUST stay with this product.By using the product, you hereby confirm that you have read all instructions, guidelines, and warnings carefully and that you understand and agree to abide by the terms and conditions as set forth herein. You agree to use this product only for the intended purpose and application and in accordance with the instructions, guidelines, and warnings as set forth in this product manual as well as in accordance with all applicable laws and regulations. A failure to read and follow the instructions and warnings set forth herein may result in an injury to yourself and others, damage to your product or damage to other property in the vicinity.This product manual, including the instructions, guidelines, and warnings, and related documentation, may be subject to changes and updates.For up-to-date product information, please visit documents.dometic.com, dometic.com.
Explanation of symbols
 WARNING!Safety instruction: Indicates a hazardous situation that, if not avoided, could result in death or serious injury.
 NOTICE!Indicates a situation that, if not avoided, can result in property damage.
 NOTESupplementary information for operating the product.
Safety and installation instructions
Please observe the prescribed safety instructions and stipulations from the vehicle manufacturer and service workshops.
NOTEIf you do not have sufficient technical knowledge for installing the components in vehicles, you should have a specialist install the wall window in your vehicle.
Please note the following:
- If faults or disturbances occur, consult a specialist workshop immediately.
- Before starting your journey, check that the wall window is locked properly.
- Before starting your journey, check the wall window for damage (such as tension cracks in the acrylic glass).
- Do not open the wall window in strong wind or rain.
- Close the wall window if it rains or snows.
- Do not leave the vehicle with the wall window open.
WARNING!Always keep the vent window closed while driving and while on public roads.
Scope of delivery
No. infig.1
Description
Accessories
Available as accessories (not included in the scope of delivery):
DescriptionPleated blindInstallation kit(Fastening bolts 3.5 x 12 mm, securing clips)
Intended use
The S7P wall window is suitable for installing in delivery vans with curved exterior surfaces (radius of 5000 mm). The wall windows are designed as vent windows.The S7P window is designed for a wall thickness of 22 – 43 mm.This product is only suitable for the intended purpose and application in accordance with these instructions.This manual provides information that is necessary for the proper installation and/or operation of the product. Poor installation and/or improper operating or maintenance will result in unsatisfactory performance and a possible failure.The manufacturer accepts no liability for any injury or damage to the product resulting from:
- Incorrect assembly or connection, including excess voltage
- Incorrect maintenance or use of spare parts other than original spare parts provided by the manufacturer
- Alterations to the product without express permission from the manufacturer
- Use for purposes other than those described in this manualDometic reserves the right to change product appearance and product specifications.
Instructions before installation
- Before installation, check the wall thickness of your vehicle. Consult the vehicle manufacturer if you have any questions.You need securing clips (not supplied) to suit the thickness of the wall (see chapter “Preparing the installation” on page 6).
- With sheet metal coverings, the wall thickness must be increased to at least 22 mm by adding a suitable mounting frame (e.g. wooden frame).
- When choosing the installation location, observe the following:– Adjoining components (attachment and reinforcing parts), cables, and cabinets in the vehicle interior must not get damaged when sawing the hole.– Sufficient space needs to be available for installing the inner and outer frames.– Only install the wall window on curved wall surfaces with a radius of 5000 mm.
Pressing out the hole
See fig.2
Preparing the installation
Supplementary to fig.3
- Measure wall thickness W (A)If the wall thickness is less than 22 mm, then you must add to the wall section with a suitable mounting frame (B)
- Determine the type of clip by referring to the following table:
| Wall thickness W | Clip type | Ref. no. |
| 22 – 23 mm | M 1139 | 9.1E+09 |
| 24 – 25 mm | M 1110 | 9.1E+09 |
| 26 – 27 mm | M 1134 | 9.1E+09 |
| 28 – 29 mm | M 1135 | 9.1E+09 |
| 30 – 31 mm | M 1136 | 9.1E+09 |
| 32 – 33 mm | M 1137 | 9.1E+09 |
| 34 – 35 mm | M 1142 | 9.1E+09 |
| 36 – 37 mm | M 1143 | 9.1E+09 |
| 38 – 39 mm | M 1144 | 9.1E+09 |
| 40 – 41 mm | M 1145 | 9.1E+09 |
| 42 – 43 mm | M 1146 | 9.1E+09 |
Installing windows
See fig.4
- Check that the window has sufficient space around it (approx.1 to 2.5 mm) in the wall section.
- Clean the wall section externally in the mounting area.See fig.5
 NOTICE!Observe the sealant manufacturer’s instructions.
 - Seal the window frame with a flexible non-hardening sealing compound (e.g. SikaLastomer-710).
- Determine the number of clips by referring to the following table:
Window size Number of securing clips per side W x H Horizontal Vertical 300 x 450 2 3 – 4 450 x 510 4 3 500 x 300 2 500 x 400 3 510 x 510 3 550 x 600 4 600 x 250 2 600 x 510 3 600 x 550 4 650 x 300 2 650 x 400 3 700 x 350 6 2 700 x 500 3 800 x 400 3 800 x 510 3 900 x 450 3 900 x 500 6 3 900 x 600 4 1000 x 300 2 1000 x 450 3 1000 x 510 3 1000 x 600 4 1100 x 350 2 1100 x 600 4 1200 x 300 2 1200 x 450 8 3 1300 x 510 3 1300 x 600 4 1300 x 700 6 1400 x 600 4 1450 x 550 4 See fig.6
- Glue the mounting frame to the vehicle wall, e.g. with double-sided adhesive tape.
- Insert the window from the outside in the centre of the wall section.
- Press the window slightly so that the packing compound spreads out.
- Fasten the window using the fastening bolts and the appropriate securing clips.
- Assemble the top mounting brackets first.Always attach the mounting brackets from the center of the frame to the outside. NOTEIf a window frame guide rail does not fit evenly against the vehicle wall, then you must use more clips, where required, than are specified in the table.
- Remove the protective film from both sides of the window glass.
- After installing, check the wall window works properly.
Using the window
Using S7P
Opening the window (fig.7)
- Proceed as follows for each rotary bolt:Turn the rotary bolt by 90°.
- Tilt the windowpane outwards to the desired opening angle.
Closing the window (fig.7)
- Close the window slowly.
- Proceed as follows for each rotary bolt:Turn the rotary bolt by 90°.
Cleaning and maintenance
NOTICE! Damage hazardDo not use any sharp or hard objects for cleaning since they may damage the acrylic glass.Only use cleaning agents that are approved by the manufacturer. Acrylic glass polish (ref. no. 9600000128), special polishing cloth (ref. no.9600000130) and acrylic glass cleaning agent (ref. no. 9600000129).
➤ Put talcum powder on the rubber seal.
Warranty
The statutory warranty period applies. If the product is defective, please contact the service partner in your country (see dometic.com/dealer).Our experts will be happy to help you and will discuss the warranty process with you in more detail.
Disposal
➤ Place the packaging material in the appropriate recycling waste bins, wherever possible.➤ Consult a local recycling center or specialist dealer for details about how to dispose of the product in accordance with the applicable disposal regulations.
Technical data
| Window size | Overalldimensions | Sectiondimensions | Clearancedimensions | Weight | Ref. no. |
| W x H | W x H | A x B | W x H | kg | |
| 280 x 380 | 308 x 408 | 280 x 380 | 230 x 330 | 2.9 | 9104116042 |
| 490 x 500 | 518 x 528 | 490 x 500 | 440 x 450 | 4 | 9104116041 |
| 560 x 465 | 588 x 493 | 560 x 465 | 510 x 415 | 4.5 | 9104116040 |
| 700 x 510 | 728 x 538 | 700 x 510 | 650 x 460 | 4.8 | 9104116039 |
| 560 x 465 | 778 x 493 | 750 x 465 | 700 x 415 | 4.8 | 9104116038 |
| 818 x 315 | 843 x 343 | 818 x 315 | 768 x 265 | 4.6 | 9104116037 |
| 960 x 450 | 988 x 478 | 960 x 450 | 910 x 400 | 5.6 | 9104116036 |
| 985 x 465 | 1013 x 493 | 985 x 465 | 935 x 415 | 6.1 | 9104116035 |
![]()
YOUR LOCALDEALERdometic.com/dealer
YOUR LOCALSUPPORTdometic.com/contact
YOUR LOCALSALES OFFICEdometics.com/sales-offices
A complete list of Dometic companies, which comprise the Dometic Group, can be found in the public filings of DOMETIC GROUP AB 15 SE-17154 Solna Sweden4445101861MO1128I022021-07-31
References
[xyz-ips snippet=”download-snippet”]