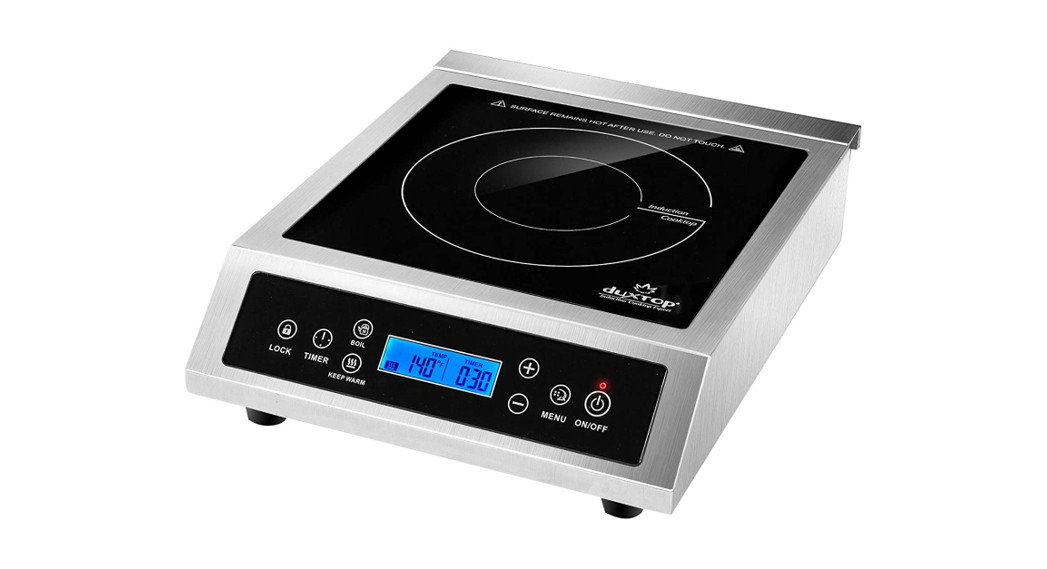
![]() COOKTOP COUNTERTOP BURNER
COOKTOP COUNTERTOP BURNER

User ManualModel: P961LS
Welcome to the Secura Family!Congratulations on being the proud owner of your new Secura product. We believe in manufacturing only the highest quality kitchen, home and personal care products for our customers. We are a U.S.based manufacturer and all our products meet strict standards for manufacturing, safety, and performance.We also believe in providing the best customer service and support in the industry. That is why we offer a two-year warranty on this product that ensures your satisfaction – so you can enjoy it for years to come. If you have questions or need assistance, please email [email protected]. For the fastest response, please include product name and model #, proof of original purchase, complete contact information, and detailed information about the issue, including pictures when applicable.Your feedback and suggestions are also important to us, so, please email them to us at [email protected].The Secura Team
Copyright 2018 Secura, Inc. All rights reserved.The material in this publication is protected under International and Federal Copyright Laws and Treaties, and as such, any unauthorized reprint or use of this material is strictly prohibited.No part of this book may be reproduced or transmitted in any form without the written permission of the author, except for the inclusion of brief quotations in a review.Reproduction or translation of any part of this work without the permission of the copyright holder is against the law.
![]() To reduce the risk of fi re, injury or electrical shock along with extending the life of your cooktop, please read and follow all of the information in this manual before using it and save it for future reference.
To reduce the risk of fi re, injury or electrical shock along with extending the life of your cooktop, please read and follow all of the information in this manual before using it and save it for future reference.
IMPORTANT CAUTIONS, WARNINGS, AND SAFEGUARDS
Read all instructions thoroughly before operating the duxtop®induction cooktop unit to avoid injury to:
- yourself
- others
- property or
- damaging the unit itself
Keep this User Manual as a handy reference.Electrical HazardsObserve the following cautions:DO NOT
- submerse the cooktop unit or electrical cord in liquid, touch the unit with wet hands, or use in a wet outdoor environment
- use if cooktop surface is cracked
- operate if the electrical cord is frayed or if wires are exposed
- let the electrical cord hang over the edge of a table or countertop
- move the unit by pulling on the power cord
Electric shock hazard. Only qualifi ed experts may carry out repair and maintenance work on the cooktop unit. Never disassemble or attempt to repair the cooktop yourself.
Personal SafetyFor your own personal safety and the safety of others:DO NOT
- touch the cooktop surface or cookware bottom immediately after cooking since both will be hot
- move the cooktop unit while cooking or with hot cookware on the cooktop surface
- place any metal objects on the cooktop surface other than authorized metal cookware or an Induction Interface Disk
- place the cooktop on any metal surface as the surface could become hot
- heat unopened cans of food as they could expand and explode
- use in or around fl flammable or explosive environments
- allow children to use, or be near the cooktop while it is in use.
- use the unit to heat or warm the room
CAUTION: This cooktop unit emits an electromagnetic fi eld, therefore people with pacemakers should consult with their physician before using it.
Product & Property DamageTo prevent damage to the cooktop or surrounding area:DO NOT
- heat empty containers on the cooktop surface
- place any metal object other than cookware on the cooktop surface
- place objects weighing more than 65 pounds on the cooktop surface
- block the cool air inlet and fan
- operate cooktop on fl flammable surfaces
- clean a desktop ® induction cooktop in a dishwasher
- use the cooktop unit for anything other than its intended purpose
- place objects affected by a magnet, such as a credit card, radio, television, etc, near the unit while operating the unit share a 120V, 15 amp electrical outlet with other electrical devices
- block the rear and sides of the unit – keep at least 4” from walls for proper ventilation
- place any combustible material such as paper or towels, near or on the cooktop while it is in use.
Warning: Changes or modifi cations to this unit will void the user’s warranty.
![]() To avoid circuit overload, do not operate another electrical appliance on the same outlet or circuit.
To avoid circuit overload, do not operate another electrical appliance on the same outlet or circuit. Always follow basic safety precautions when using any electrical products, especially when children are present.
 CAUTION: HOT SURFACES – This appliance generates heat during use. Proper precautions must be taken to prevent the risk of burns, fires, or another injury to persons or damage to property.
DO NOT IMMERSE IN LIQUIDNE PAS IMMERGERSAVE THESE INSTRUCTIONS
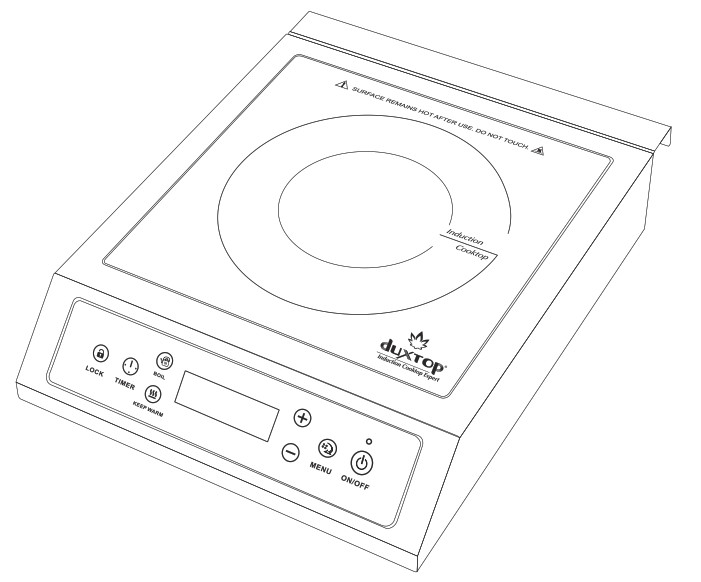
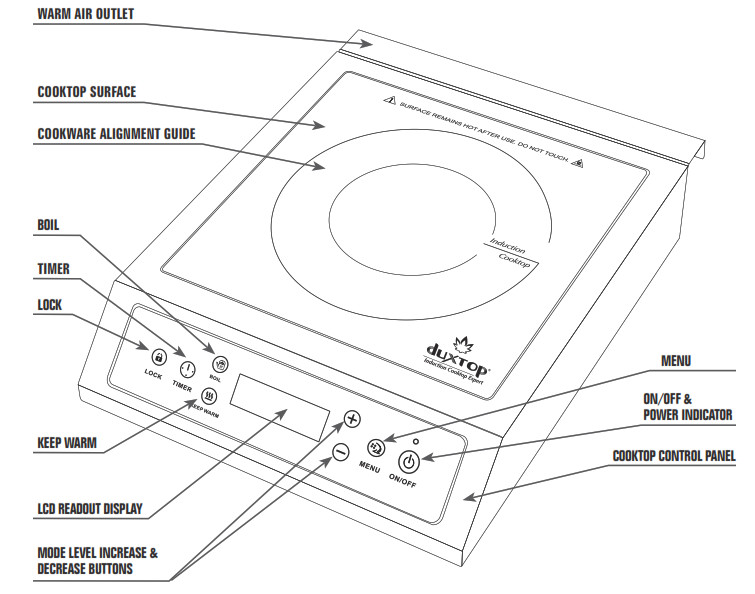
PARTS IDENTIFICATION
SELECTING THE PROPER COOKWARE
Your induction cooktop will not operate without compatible cookware. Read the following information in this section carefully to get the maximum efficiency from your looking unit. The rule of thumb for selecting cookware is, if a magnet sticks to the cookware bottom, the cookware will work on your duxtop ® induction cooktop.The bottom surface of the cookware must
- Be made of ferrous magnetic material. If the cookware bottom is made of material with low ferrous magnetic content the “E0” error code may display, indicating cookware is not suited for induction cooking.
- Have a fl at the bottom surface with a minimum bottom diameter of 5″. The diameter and thickness of the cookware’s magnetic layer need to be large enough to catch the magnetic wave, otherwise, the cooktop may not operate (displays “E0” error code).
- Touch the cooktop or rise no more than 1″ above it.
SUITABLE COOKWARE MATERIAL
- cast iron;
- iron;
- magnetic steel;
- enameled iron,
- stainless steel manufactured with a magnetic bottom
DO NOT use cookware made out of:
- Glass
- Ceramic
- Copper
- Aluminum
- Non-magnetic stainless steel (18/10, 18/8) bottom
OPERATING INSTRUCTIONS
CAUTION: ALWAYS USE A DEDICATED OUTLET. This unit is designed to operate using a 110/120V electrical outlet having a 15 amp capacity. This is a high draw appliance and should not share an outlet or circuit with any other electrical appliance.
- Place the unit on a dry, stable, level and non-combustible, non-metallic surface.
- Allow at least 4 inches of space around the whole cooktop unit for proper ventilation.
- Plug the POWER CORD into a 120V/15 amp electrical socket. The unit will “Beep” and the POWER INDICATOR light will illuminate red.
- Before turning the cooktop on, make sure the ingredients are in the compatible cookware and the cookware is centered on the COOKWARE ALIGNMENT GUIDE.
- Once the cooktop is plugged in, starting the cooking process is a simple two-step process.Press the “ON/OFF” button, the cooktop will cycle “ON”, the COOL AIR FAN will start and the LCD display screen will light showing a series of dashes. Press the “MENU” button, the cooktop will activate at the default power setting of 5.0.
- After cooking is completed, press the “ON/OFF” button to turn the unit off. The LCD screen will turn off, however, “HOT” will display and the COOL AIR FAN will continue to run until the unit has cooled.
- If the cooktop unit does not operate as intended, see the Troubleshooting Guide in section 6.
Operation ModesThis unit offers both Power and Temperature Modes for convenient and efficient cooking along with an automatic 10-hour timer:
| POWER MODE OPERATIONThe Power and Temperature Mode functions work independently of each other. The power level selected directly relates to the amount of wattage or the BTU/HR equivalent, the cooktop generates. To increase the cooking speed, select a higher power level.The default power level setting is 5.0. Press the + or – buttons to adjust power levels from 0.5 to 10. If the “E2” error code is displayed during cooking, the cookware bottom has exceeded 460 degrees F, switch to Temperature Mode at this time. | TEMPERATURE MODE OPERATIONThe Temperature Mode should be used when a specifi c cooking temperature is required. Once the cookware has reached the selected temperature, the unit will cycle to maintain the selected cooking temperature.The default temperature level setting is 300 degrees F. Press the + or – buttons to adjust the temperature setting. Use the Temperature Mode when specific temperatures must be maintained. This model has 20 temperature settings ranging from 100 degrees F-460 degrees F (37.8°C238°C). |
Additional Preset Function Buttons:
- LOCK – The “LOCK” buttons allow you to lock out all the other buttons and is a convenience and safety feature. It is designed to keep the cooking and timer settings from being accidentally changed once they have been set. The “LOCK” features do NOT lock the ON/OFF button, so the cooktop can always be shut off if needed.
- BOIL – If you press the “BOIL” button the unit will switch to POWER MODE level 10 and the timer will automatically set to 10 minutes. When the timer has expired, the unit will “beep” and the cooktop will turn off. If the volume of water has not reached a full boil, please restart the BOIL function.
- KEEP WARM – If you press the “KEEP WARM” button, the unit will switch to TEMPERATURE MODE at 140 degrees F with the timer set for 30 minutes.
| Power Level | Watts | Cooking Level |
| 0.5 | 100 | Simmer-keep warm |
| 1.0 | 180 | Simmer-keep warm |
| 2. | 260 | Simmer-keep warm |
| 2.0 | 340 | Simmer-keep warm |
| 3. | 420 | Low |
| 3.0 | 500 | Low |
| 4. | 580 | Low |
| 4.0 | 660 | Low |
| 5. | 740 | Medium-low |
| 5.0 | 820 | Medium-low |
| 6. | 900 | Medium-low |
| 6.0 | 1000 | Medium-low |
| 7. | 1100 | Medium-high |
| 7.0 | 1200 | Medium-high |
| 8. | 1300 | Medium-high |
| 8.0 | 1400 | Medium-high |
| 9. | 1500 | High |
| 9.0 | 1600 | High |
| 10. | 1700 | High |
| 10 | 1800 | High |
| Temp Setting | Temp (F) | Temp (C) |
| 1 | 100 | 38 |
| 2 | 120 | 49 |
| 3 | 140 | 60 |
| 4 | 160 | 71 |
| 5 | 180 | 82 |
| 6 | 200 | 93 |
| 7 | 220 | 104 |
| 8 | 240 | 116 |
| 9 | 260 | 127 |
| 10 | 280 | 138 |
| 11 | 300 | 149 |
| 12 | 320 | 160 |
| 13 | 340 | 171 |
| 14 | 360 | 182 |
| 15 | 375 | 191 |
| 16 | 390 | 199 |
| 17 | 405 | 207 |
| 18 | 420 | 216 |
| 19 | 440 | 227 |
| 20 | 460 | 238 |
POWER MODE vs. TEMPERATURE MODESwitching between Power Mode and Temperature Mode is accomplished by pressing the “MENU” button.If a specifi c cooking temperature is not required, we suggest using Power mode instead of Temperature mode. To quickly bring a pot of water to boil, use a higher power level setting or simply press the “BOIL” button. For frying or browning food, Temperature mode is preferred because the built-in microprocessor monitors and regulates the cookware temperature to the preset temperature. Frying or browning food under Power mode may overheat the cookware, and in some cases, extremely high temperatures may amage your cookware or cooktop. The desktop(c) induction cooktop has a built-in safety mechanism to detect such situations and the unit can switch to Temperature mode from Power mode automatically when overheating is detected. When this happens it is an indication that Temperature mode may be more suitable for your current cooking task.
Limitations of Temperature Mode:Like all other cooktops with a glass cooktop, the temperature sensor is located underneath the glass top. As a result of that, and that different cookware yields different temperatures, the temperature readout is only an estimate of the actual cooking temperature. It is accurate enough for daily cooking requirements. The temperature in your pan may be different than the setting you have selected. Please test a few times to fi nd the proper temperature setting for your particular cooking task and cookware.10-HOUR AUTOMATIC TIMERThe automatic timer may be used with either the Temperature or Power mode. Press the “TIMER” button to activate the timer. The TIMER portion of the LCD display will activate and 0:00 will appear in the LCD READOUT DISPLAY. The :00 minutes portion of the readout will be blinking, indicating the minutes can be set. Press the + or – button until the desired number of minutes appears. Wait 5 seconds and the 0: hours side of the readout will begin to blink. This indicates you may now set the number of hours for the timer. Press the + or – key to set the number of hours. 5 seconds after you have set the hours portion of the timer, the numbers will stop blinking and timing will start. If you do not enter an amount of time into the AUTOMATIC TIMER within 10 seconds the feature will shut off and the timer will not be set.The + and – buttons can be “tapped” to increase or decrease the minutes/hours by 1 minute/1 hour increments or they can be held down for rapid increase or decrease of time, as necessary.The timer may be reset at any time during operation by pressing the “TIMER” button again. When the timer has expired, the unit will “beep” and the cooktop will turn off.For safety, the cooktop is programmed to turn off after two hours. To operate continuously for more than two hours, please set the timer to the desired length of time.NOTE: The cooktop unit will automatically shut off and “beep” after 1 minute, if either:
- the wrong type of cookware is put on the cooktop
- no cookware is placed on the unit (“E0” will fl ash on the LCD screen) or
- the unit is turned on and the “MENU” button is not pressed
CARE AND MAINTENANCE
The cooktop is easy to maintain. Use a moist cloth with a mild liquid detergent to wipe off grease and stains, and then let dry. Protect the cooktop from dust by covering it when not in use. Things to avoid doing.
DO NOT:
- clean the COOKTOP SURFACE with metal scouring pads, abrasives, or solvents
- immerse cord or cooktop unit in water or other liquids
- keep the unit plugged in while cleaning it
- keep the unit plugged in unless you are actually cooking with it
- store or clean the unit while still hot
- place objects heavier than 65 pounds on the Cooktop SURFACE
- use the unit if the COOKTOP SURFACE or power cord is damaged
- keep the cooktop unit on or near other heat sources
TROUBLESHOOTING GUIDE & CUSTOMER SERVICE
If after reviewing the troubleshooting guide the problem is not resolved, do not attempt to repair the unit yourself. Please contact us at [email protected] for assistance.PROBLEM – After plugging in the power cord, the POWER INDICATOR LlGHT does not illuminate red:
- The plug may be loose in the electrical outlet or |
- The circuit breaker may be inoperative or tripped
PROBLEM -The POWER INDICATOR LIGHT is lit, but the fan is not running, nor is the cookware heating up:
- Press the “MENU” button
- The wrong type of cookware (non-magnetic) is being used
- The pan is not centered on the COOKTOP ALIGNMENT GUIDE correctly
- The COOKTOP SURFACE may be cracked
PROBLEM -The induction cooktop suddenly stops heating during operation and shuts down:
- The cooktop unit shuts down due to the overheating sensor detecting an excessively high surface temperature. The cause may be heating empty cookware or cooking at a high power setting for too long
- A blocked COOL AIR INLET & FAN or WARM AIR OUTLET caused the cooktop to overheat;
- The unit was unplugged while in use
- The fuse or circuit breaker tripped during use
PROBLEM – The Induction cooktop switches from Power mode to Temperature mode automatically:
- This is a safety feature. The unit switches to Temperature mode (140 degrees F) when the cookware is overheated under Power mode. This is most likely to occur when you are frying or sautéing food. These cooking methods involve high heat and need a regulated temperature within a certain range. If the temperature is too low, it may not cook your food properly, if the temperature is too high, it may burn your food. Once in Temperature mode, you can adjust the temperature to the appropriate setting that fi ts your cooking task. For information about when to use Power mode or Temperature mode, please refer to Section 4 – POWER MODE VS. TEMPERATURE MODE in this manual.
Error code guideIf an error code appears in the LCD READOUT DISPLAY, follow the Instructions in the ERROR CODE table (below) to solve the problem:
| ERRORCODE | PROBLEM | REMEDY |
| EO | No cookware is detected, incompatible cookware is detected or cookware is not centered on the COOKWARE ALIGNMENT GUIDE. | If no cookware is on the cooktop, place cookware on the top within 1 minute. If incompatible cookware is detected replace it with proper cookware. Ifthe cookware is misaligned, move it within the COOKWARE ALIGNMENT GUIDE. The unit will shut down automatically after 1 minute if none of these actions are taken. |
| El | Excessive high temperature, cooling fan malfunction, or inadequate ventilation for the cooktop. | Unplug the cord from the electrical outlet. Ensure proper ventilation by making sure the fan is at least 4″ away from any obstruction. Wait 10 minutes for the cooktop and cookware to cool down, and then plug it back into a 120V electrical outlet. Turn the unit back on and listen for the fan to make sure it is running. |
| Cooking surface temperatureexceedslimit mit and the unit shuts 460 degrees F (238down automatically. | E2This is a safety feature to prevent the cooking surface from overheating. It usually happens while using POWER Mode, when the cookware bottom is above 460 degrees F (238 °C). Extremely high temperatures could damage your cookware and cooktop. If E2 error code happens during frying or sautéing while using the POWER Mode, switch to TEMPERATURE Mode. If E2 happens while boiling water, unplug the unit from the electrical outlet, wait 10 minutes for the cooktop and cookware to cool down and reconnect the cord to the outlet. Turn the unit back on, listen for the fan to start and ensure the unit is at least 4″ away from any obstructions. | |
| E3 | Voltage input is too high or too low and the unit shuts down after 1 minute. | Unplug the cord from the electrical outlet. Verify the voltage is 110/120V AC with a voltage tester. If not, switch to a different electrical outlet with the proper voltage level before operating the unit. |
Note: If any of the above remedies fail to solve the problem, please contact [email protected].
COMMONLY ASKED QUESTIONS
What are Induction cooktop advantages?To serious cooks, the most important advantage of induction cooktops is that you can adjust the cooking heat instantly and with great precision. The induction cooktop uses a standard 110/120 volts of electrical power and plugs into a standard household electrical outlet. Because duxtop ® cooktops produce up to 1,800 watts of power, they are almost 50% more powerful than gas stoves and heat up to temperature nearly twice as fast as electric cooking elements, yet they do not require the high amperage of 220-volt power not commonly found in household kitchens.Is induction cooking more effi cient than gas?With an 83% energy effi ciency, induction cooking is more effi cient than both electric or gas. While gas-burning cooktops are only 30-35% efficient and cost approximately $1.65 per hour to operate, an induction cooktop costs only $0.12 per hour to operate.How safe is induction cooking? Because there is no open fl ame or hot cooking element, the induction cooktop creates heat only in the cookware. The cooktop surface remains cool except for the heat transferred from the bottom of the cookware to the glass surface (immediately below the cookware).What are the electrical power requirements? Single burner induction units designed for the U.S. market are all capable of operating efficiently on a standard 110/120-volt outlet. It is strongly recommended to dedicate an outlet for each individual unit when being used since each unit will draw about 15 amps, the amperage of most common household electrical outlets.What type of cookware can I use? The general rule of thumb is, if a magnet sticks to it, it will work with the duxtop ® cooktop. Cookware made from cast iron, iron, enameled steel or iron, or magnetic stainless steel work very well. desktop ® offers a large selection of Whole-clad Tri-ply Induction Ready Premium Cookware™.How is induction cooking different than electric cooking?Induction units place the electrical energy directly into the cookware without using energy towards a heating element. Regular electric cooking elements use energy to heat the heating element and then through conduction, the heat is transferred to the cooking pan.Induction cooking heating is very rapid and responsive to temperature control changes making them even faster and more efficlient than gas cooking. Resistance-type heating elements are very inefficlient and are slow to respond.Is it easy to use? The rapid heating of the cookware makes all kinds of cooking fast and easy, especially when warming, sautéing, frying, and boiling pasta. Cleaning a duxtop ® induction cooktop unit is easy. With no open flame or heating element, food does not burn on so you can just wipe the cooktop surface clean with a damp towel.
SPECIFICATIONS
| Model | P961LS |
| Power Source | 120V/60Hz 15 amp circuit |
| Output | 100-1800 watts |
| Power Levels | 0.5-10 |
| Temperature Range | 100°F- 460°F (37.8°C-238°C) |
| Weight | 13 lbs. 201 oz. |
| Dimensions | 12.9″X16.5″X4″ |
| Cord Length | 5 ft. |
![]() FCCREQUIREMENTSNOTE: This equipment has been tested and found to comply with the limits for consumer ISM equipment, pursuant to Part 18 of the FCC Rules. These limits are designed to provide reasonable protection against harmful interference with communication equipment. The induction cooktop unit generates, uses, and can radiate radio frequency energy. If not installed and used in accordance with the user manual, the cooktop may cause harmful interference to radio communications.If this equipment does cause harmful interference to radio or television reception, which can be determined by turning the cooktop on and off, the user is encouraged to try tocorrect the interference by trying one or more of the following measures:
FCCREQUIREMENTSNOTE: This equipment has been tested and found to comply with the limits for consumer ISM equipment, pursuant to Part 18 of the FCC Rules. These limits are designed to provide reasonable protection against harmful interference with communication equipment. The induction cooktop unit generates, uses, and can radiate radio frequency energy. If not installed and used in accordance with the user manual, the cooktop may cause harmful interference to radio communications.If this equipment does cause harmful interference to radio or television reception, which can be determined by turning the cooktop on and off, the user is encouraged to try tocorrect the interference by trying one or more of the following measures:
- Move or reorient the affected equipment’s antenna
- Increase the distance between the cooktop and the affected piece of equipment
- Connect to an outlet on a different circuit from the cooktop
- Consult your dealer or qualifi ed radio/TV technician for advice
DISPOSAL
 When this appliance has reached the end of its life, please dispose of the unit properly.This and other electrical appliances contain valuable materials that can be recycled.Electronic waste may be harmful to our environment if not disposed of properly.We ask that you follow your governing agency’s rules and regulations when disposing of electronic appliances. Please fi nd an authorized recycling facility near you.
CONTACT
If you have any questions or concerns not addressed in this user manual, please contact our Customer Service Department at 888-792-2360 or email us at [email protected].Please read the operating instructions before using this product.Please keep the original box and packaging materials in the event that service is required.
Manufacturer’s Limited Warranty
The Manufacturer of this product warrants to the original purchaser of this product that this product will be free from defects in material and workmanship under normal use and service for 2 years from date of purchase. The manufacturer will, at its option, repair or replace with a new or refurbished product. The Manufacturer reserves the right, before having any obligation under this limited warranty, to inspect the product, and all costs of shipping the product for inspection and warranty service shall be borne solely by the purchaser.For the fastest processing of a warranty claim, the Purchaser should e-mail [email protected] and include the product name and model #, proof oforiginal purchase, complete contact information, and detailed information about the issue, including pictures when applicable.The manufacturer’s limited warranty is valid only in accordance with the following conditions:
- The product is purchased directly from the manufacturer or an authorized reseller or distributor.
- Only the original purchaser is covered by this warranty. This warranty is not transferable.
- This warranty does not cover normal wear and tear or damage caused by misuse, abuse, negligence, accident, acts of nature, or unauthorized modification or repair.
- Purchaser must present acceptable proof of purchase for the product.
- This warranty gives you specific legal rights, and you may also have other rights which vary from state to state.
Secura, Inc.[email protected]Lake Forest, California
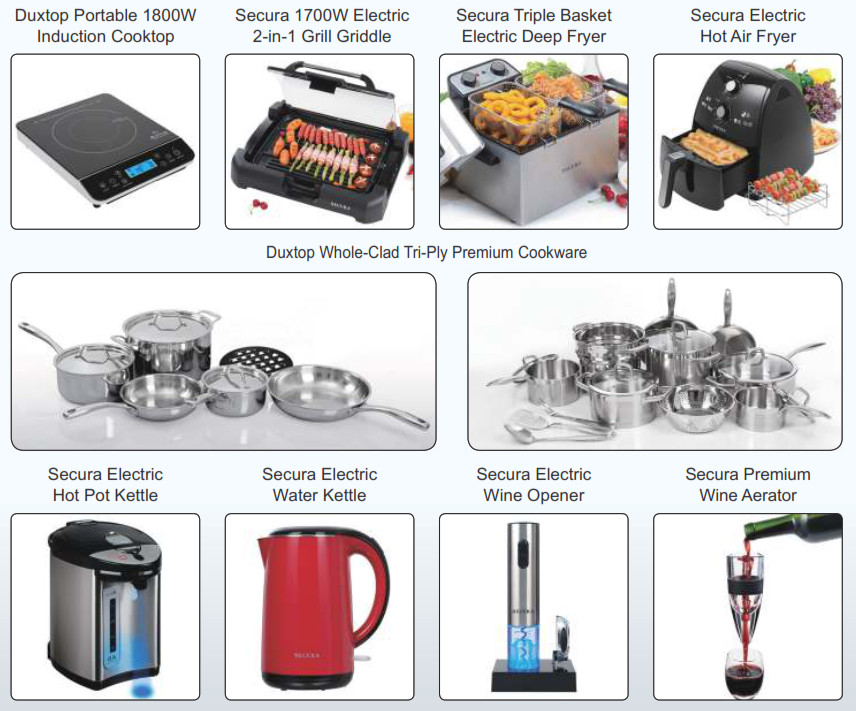
 Secura Bestsellers
Secura, Inc.888-792-2360[email protected]www.thesecura.comLake Forest, California
For the fastest processing of a warranty claim, the owner should e-mail [email protected] and include the product name and model #, proof of original purchase, complete contact information, and detailed information about the issue, including pictures when applicable.
All information is current at the time of printing.NA-EN-110118
References
[xyz-ips snippet=”download-snippet”]