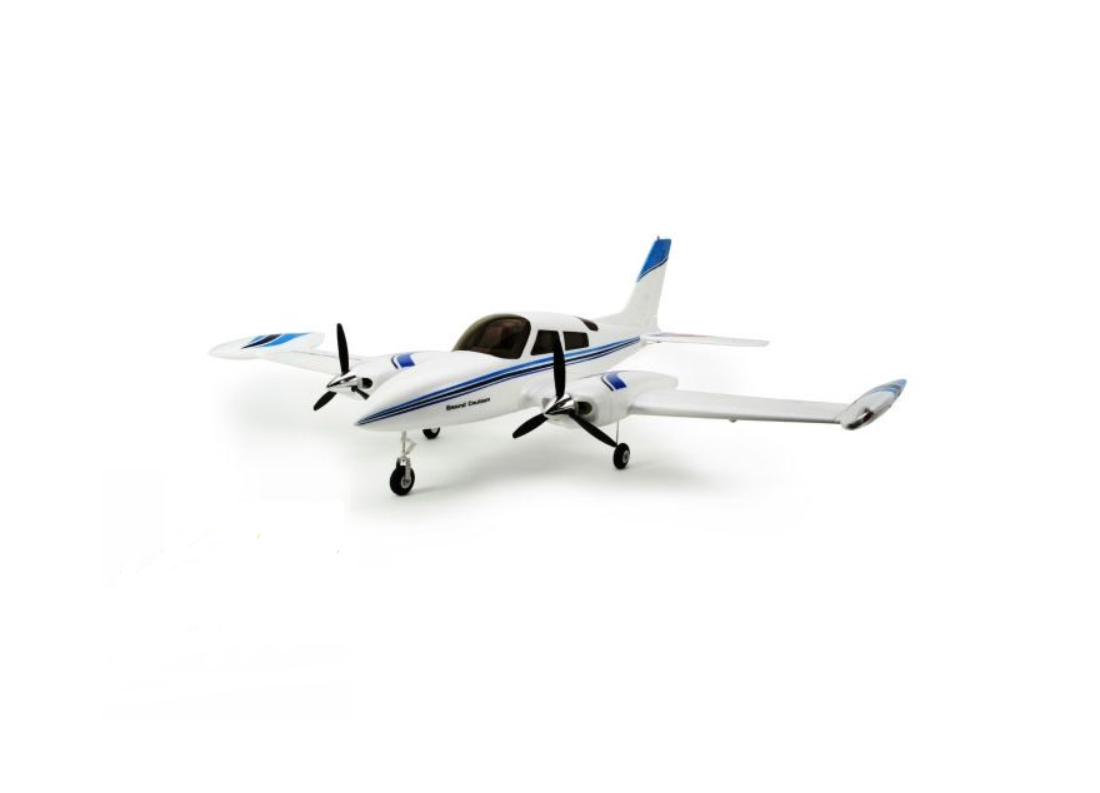
Dynam Grand Cruiser Instruction Manual

Specification
- Wingspan: 1280mm
- Fuselage Lenglh: 1100mm
- Wing loading: 58g/dm2
- Flying weight: 1200g
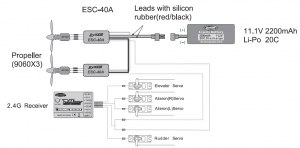
- Battery: I 1.1 v 2200mAh 2DC Li-Po
- ESC: 40AX2
- Motor: KV:3300 , 2pcs
- Sarvo: 9gX4
SAFETY PRECAUTIONS This radio control model is not a toy!
 SAFETY PRECAUTIONS This radio control model is not a toy!
- First-time builders should seek advice from people having building experience in order to assemble the model correctly and to produce its performance to full extent.
- Assemble this kit only in places out of children’s reach!
- Take enough safety precautions prior to operating this model. You are responsible for this model’s assembly and safe operation!
- Always keep this instruction manual ready at hand for quick reference, even after completing the assembly.
Safety Precautions
- Never fly the Airplane where there are crowds of people ,power lines overhead, automobiles or near highways. give yourself plenty of room for flying, as the plane can travel at a high rate of speed. Remember you are responsible for the safety of others.
- Do not fly in strong winds.
- Do not attempt to catch the Airplane while flying.
- Children under the age of 16 should not have admission to the transmitter for the plane.
- Never leave this system unattended, with the batteries in the unit and around children. Injury can result by children turning on the transmitter or the plane.
- Keep away from the propeller at all times. The system can automatically start when the batteries are plugged in, regardless if the transmitter is in the on or off position. The propeller can cause injury!
- Before flying, always remember to turn on the transmitter first, before plugging in the battery pack. Stay clear of propeller.
- Always turn the speed controller all the way down and the switch on “OFF” .(left control stick in the down position) before starting; otherwise the propeller will start on full power when you plug the battery into the plane.
- After running the motor, disconnect the battery first before turning off the transmitter, otherwise the propeller may start at full power.
- Never leave the charger or battery near wet areas.
- Completely discharging a Li-poly battery can result in permanent damage to the cells of the battery. Therefore you must always remember to disconnect the battery after using the plane.
BEFORE YOU BEGIN
- Read through the manual before you begin, so you will have an overall idea of what to do.
- Check all parts. If you find any defective or missing parts contact your local dealer. Please DRY FIT and check for defects for all parts that will require CA or Epoxy for final assembly. Any parts you find to be defective after the gluing process may be difficult to remove for warranty replacement. The manufacturer will replace any defective parts, but will be difficult to extend to the good parts that are good before bluing to defective parts during assembly.
- Symbols used throughout this instruction manual comprise of following:
 Apply epoxy glue
![]() Pliers
Pliers![]() Assemble left and right IL…!J sides the same way.
Assemble left and right IL…!J sides the same way.![]() Ensure smooth non-binding movement while assembling.
Ensure smooth non-binding movement while assembling. Pay close attention here!
 Cut off shaded portion
RTF INCLUDING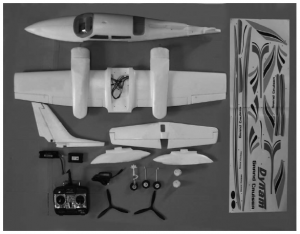
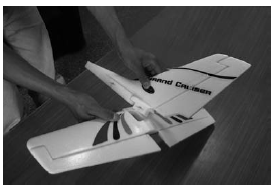
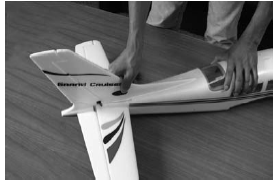
Assembly
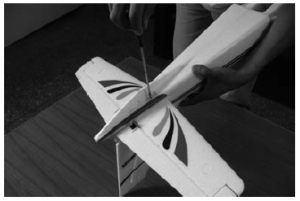
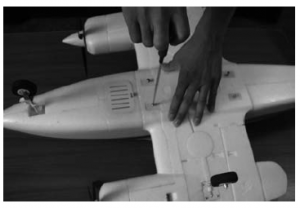
- As shown, Insert the flat end of the vertical tail groove
- As shown, Installed in the fuselage.
- As shown, Lock screws vertical tail and horizontal tail.
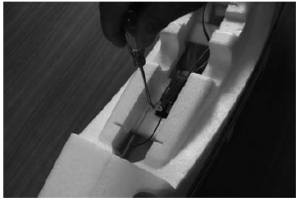
- As shown.The rudder rod penetration quick connector, tighten with a screwdriver.
- The elevator rod penetration quick connector, tighten with a screwdriver.
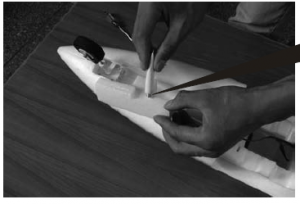
- As shown,lnsert one end of steering rod Z-map in the marked plastic parts.Assembly
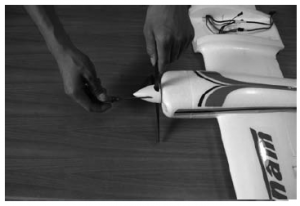
- As shown, Fixed front wheel steering with PA2.5X6mm.
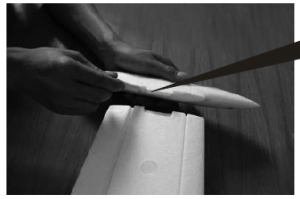
- As shown, Coated foam to fill in the blank block and the body fit.
- As shown, Front wheel into quick connector to the rod fastened with a screwdriver.
- As shown, Coated foam around the wing tip to wing in the bonding.
Assembly
- Icon to install clover by propeller.
- As shown in the installation of the propeller fairing.Assembly
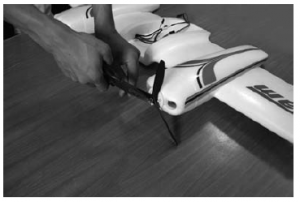
- After installing the landing gear by Icon.
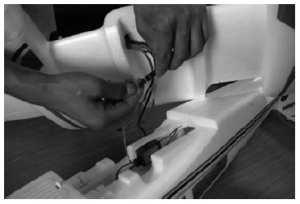
- As shown, Aileron cable with Y-cable.
- As shown,The power transfer signal cable into the receiver channel THR.
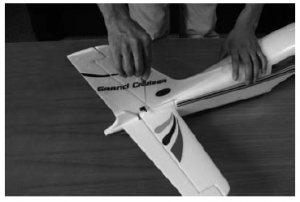
- As shown, Fixed-wing screw with M3X35mm.
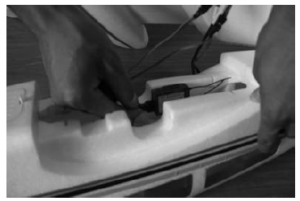
- As shown.Body antenna installation.
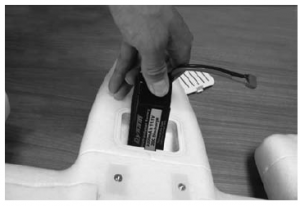
- Installing the Battery position.

 Assembly
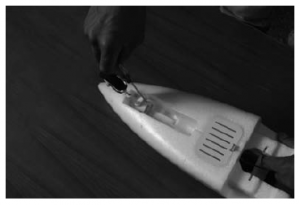
 Assembly
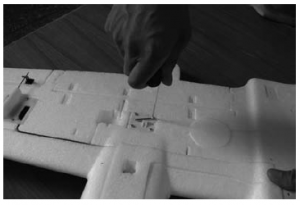

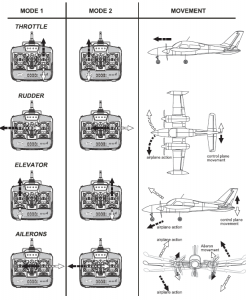
STICK OPERATION
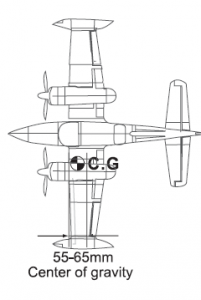
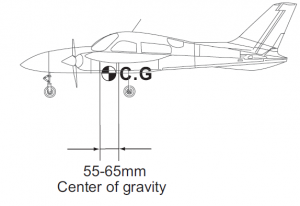
CG And Receiver Assembling
The ideal C.G. position is 55~65mm behind the leading edge measured at where the wing meets the fuselage. In order to obtain the C.G.specified, add weight to the fuselage or move the battery position. Check the C.G. before flying.
SUGGEST CONTROL THROW SETTING

Decal
Battery Warning And Charging
Lithium-polymer batteries are a revolutionary new rechargeable battery technology for electric R/C flight, offering a variety of significant advantages over NiCd, NiMH and LiIonbatteries. It is very important to have a good understanding of the operating characteristics of Li-Po batteries especially their exact rated voltage. Always read the specifications printed on the label of your Li-Po battery prior to use, and read this instruction sheet in its entirety.
WARNING! Lithium-Polymer batteries (Li-Po) are entirely different than NiCd and NiMH batteries and must be handled differently as well!! Failure to follow thesecare and handling instructions can quickly result in severe, permanent damage to the batteries and its surroundings and even start a FIRE!
- You must charge the Li-Po battery pack in a safe area away from flammable materials.
- Never charge the battery unattended. When charging the battery you should always remain in constant observation to monitor the charging process and react to potential problems that may occur.
- After flight, the battery cool down to ambient temperature before charging.
- Wire lead shorts can cause fire! If you accidentally short the wires, the battery must be placed in a safe area for observation for approximately 15 minutes.
- In the event of a crash, you must quickly and safely disconnect and remove the battery from observation , then place it in a safe, open area away from flammable materials to observe it for at least 15 minutes.
- Store the battery at room temperature for best results.
- Do not over-discharge the battery. Discharging the battery too low can cause damage to the pack resulting in reduced performance and duration.
Battery Warning And Charging
The charger requires up to 1.5 Amps of 10-15 Volt DC input power that can be supplied from a small 12V gel cell or car battery.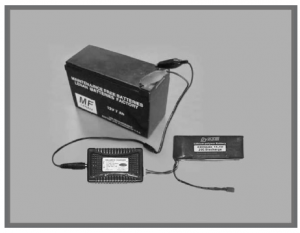 Input power for the charger can also be supplied through the use of an AC to DC adapter/power supply for convenient charging anywhere an AC outlet is available. Werecommend the optional AC to 12V DC, 1.5 Amp Power Supply. NEVER attempt to power the charger from an AC outlet without the use of a proper AC to DCadapter/power supply.
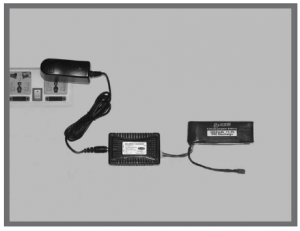
Battery Warning And Charging
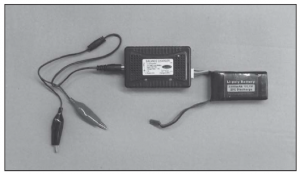
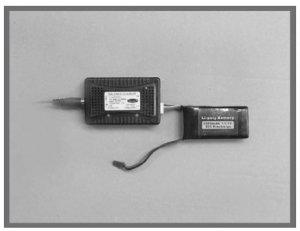
Once you have connected the charger to a power source,The red LED will turn on. Connect the Li-Po battery pack to the charger.When the park is full charged.The green LED will turn on.
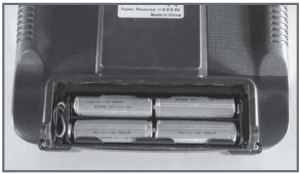
Install the Transmitter Batteries
Install 8 new “AA” batteries in the included transmitter. Check the power level of the batteries and operation of the transmitter by switching the power switch on (upward). The status LEDs at the top of the transmitter will indicate the power level of the batteries. If at any time the status LEDs no longer show green, it will be necessary to replace the batteries with new ones.
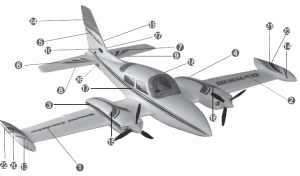
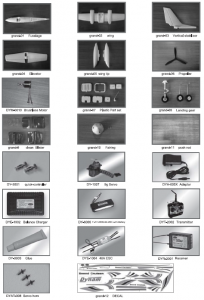
parts List
visit our website www.dyn a m-rc. com
- TEL:+86-769-87566018 • E-mail:
- FAX:+86-769-87555185 • Http:www.dynam-rc.com
- Add:No.C-02 Nanshan Industry Town Yantian Fenggang City Dongguan Guangdong Province
Read More About This Manual & Download PDF:
Dynam Grand Cruiser Instruction Manual – Dynam Grand Cruiser Instruction Manual –
[xyz-ips snippet=”download-snippet”]