
![]()
User manual
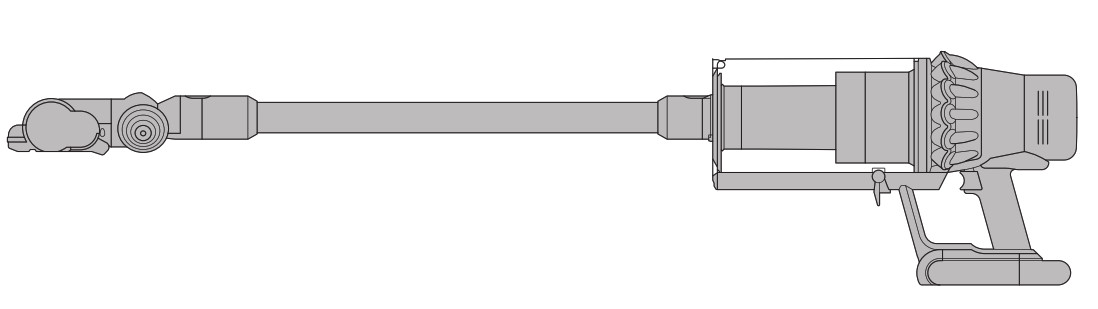
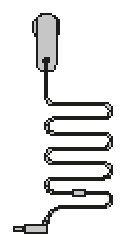
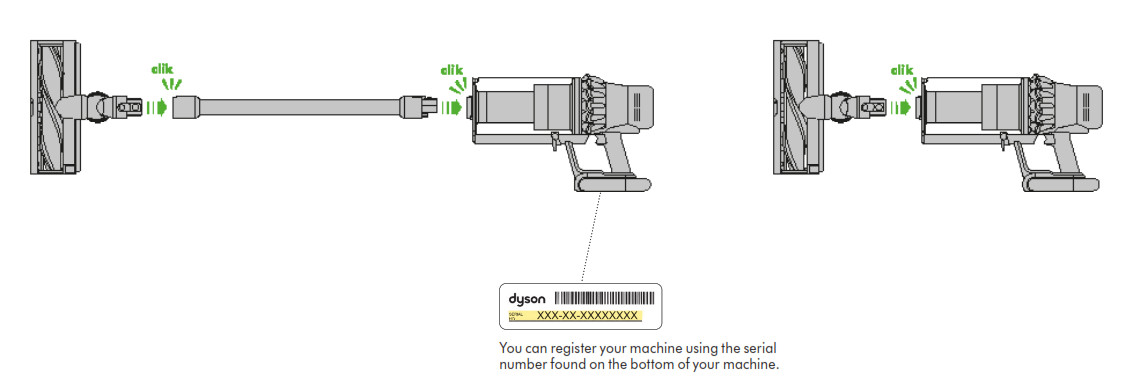
In the box
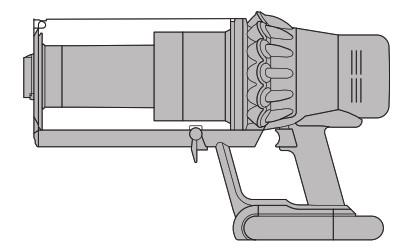 |
Vacuum cleaner main body |
 |
Extra-wide Torque Drive XL cleaner head32cm wide Torque Drive XL cleaner head with Dyson DLS™ (Dynamic Load Sensor) system. Covers more floor with each sweep, for faster room cleaning. |
 |
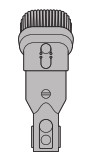
Dock |
 |
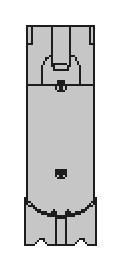
ChargerCharges your vacuum with or without the dock. |
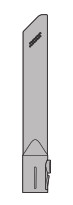
| Wand |
Some tools may not be included.You can buy additional tools at Dyson.com
 |
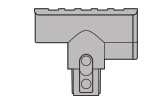
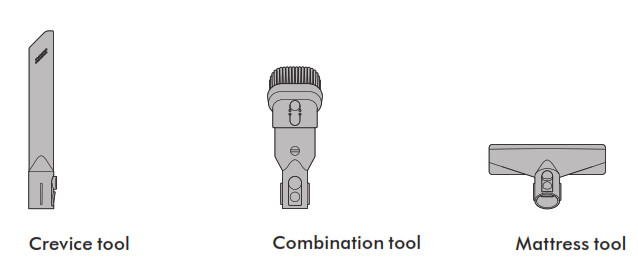
Combination toolTwo tools in one – brush and wide nozzle. For simple switching between tasks. |
 |
Crevice toolDesigned for precise cleaning around edges and narrow gaps. |
 |
Mini motorized toolThe motorized brush bar tackles hair and ground-in dirt in tight spaces, likeyour stairs or car. |
|
Soft roller cleaner headEngineered with soft woven nylon and anti-static carbon fiber, for hard floors. |
 |
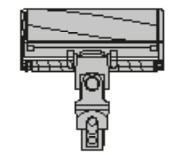
Wand clip |
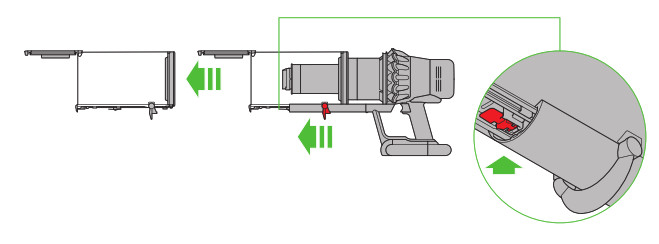
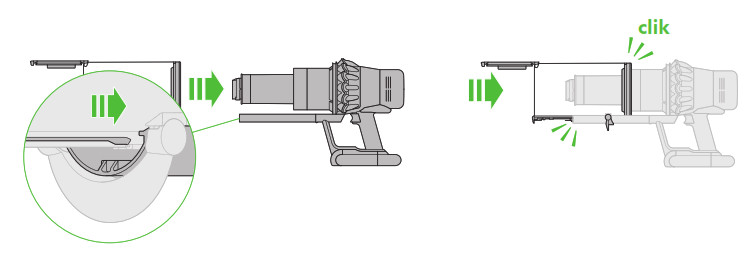
Assembling your machine
Getting started
Fully charge your machine before using it for the first time.
Power modesYour machine has three power modes for different tasks. Change power modes quickly using a single button.

Maximum run time for longer cleans all-around your home.
The optimum balance of power and run time. Attach your Torque Drive XL cleaner head to activate the Auto mode. Dyson DLS™ technology automatically changes motor speed between floor types. 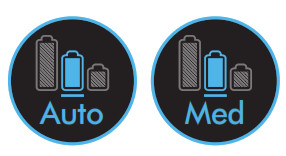 Intensive cleaning for ground-in dirt.
Caring for your floors
Check that the underside of the cleaner head or tool is clean and free from any objects that may cause damage.Before vacuuming your flooring, rugs, and carpets, check the manufacturer’s recommended cleaning instructions.The brush bar on your machine can damage certain carpet types and floors. Some carpets will fuzz if a rotating brush bar is used when vacuuming. If this happens, we recommend vacuuming without the motorized floor tool and consulting with your flooring manufacturer.
The LCD screen

Settings menuControl the settings on your machine using the button.To enter the settings menu, press and hold the button until the menu screen appears. Tap to scroll through the options available.
Change language
To change the language on your screen, press the button and hold until the language list appears. Release the button.Tap the button to scroll through the language list to your preferred language. Press and hold the button until the countdown ends.A green tick will appear on the screen to show your language selection is complete.To cancel your selection, release the button during the countdown.
Change alert settings You can turn the alert motor pulse off. Your motor will no longer pulse but alert information will continue to be displayed on the LCD screen when your machine needs your attention.Turning off Alerts will not turn off the blockage alert pulsing. This is to ensure you clear any blockages, preventing damage to your machine.Tap to scroll through the settings menu. Select the ‘Alerts’ option.Scroll to select on or off. Hold the button until the countdown ends and a tick appears on the screen. To cancel your selection, release the button during the countdown.
Exit settings menuTo exit the settings menu. Tap to scroll through the selection menu. Select ‘Exit menu’.
Run time countdown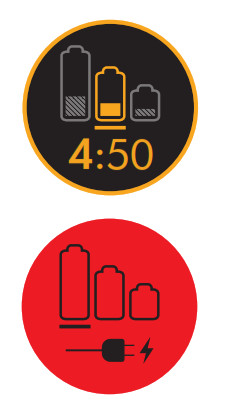
When the battery needs charging, your machine will pulse three times and a low run time icon will appear on the screen.When your battery is empty, a red warning icon will appear on the screen.
Battery health
 To get the best performance and life from your battery, use Eco or Med mode.AlertsWhen the battery needs charging, your machine will pulse three times and a red warning icon will appear on the screen.The alerts you might see are:Filter – the filter isn’t fitted correctly or needs cleaning.Blockage – your machine has a blockage that needs removing.
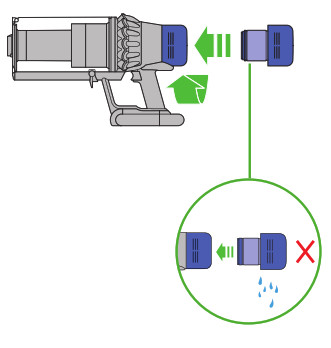
Charging your machine
It’s important to fully charge your new machine before using it for the first time and after every clean. This is because the battery and monitoring system’s algorithm ‘learns’ over time, and fully charging your machine helps it to more accurately calculate and display the remaining run time.

Connect to the charger either directly or in the dock.The blue LEDs on either side of the battery will flash during charging.When the battery is fully charged, both LEDs will light for 5 seconds.Your battery is fully charged when the display shows 100%.Your machine won’t operate if the ambient temperature is below 10°C (50°F). This is designed to protect both the motor and battery.
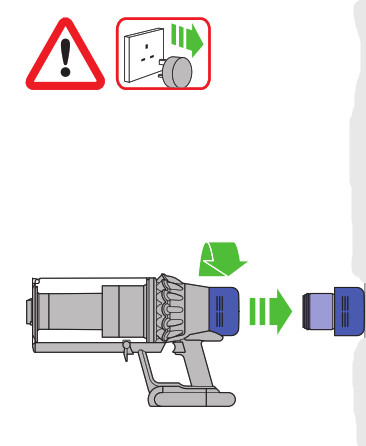
Changing your click-in battery
Where you have additional batteries, we recommend that you alternate the batteries to maintain even performance.
 To remove a batteryHold your hand under the battery to support it.Press the red battery release button and slide the battery off the handle.Place the battery on charge.
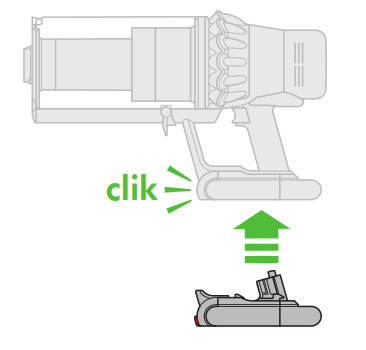
To install a batterySlide the battery onto the handle until it clicks securely in place.
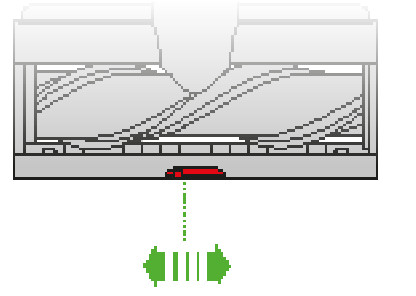
Emptying your bin
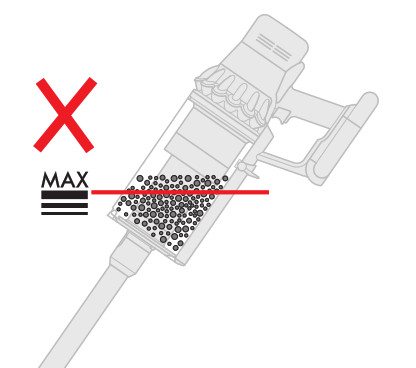
Empty as soon as the dirt reaches the MAX level – don’t overfill. Using the machine when the dirt is above the MAX line may cause the dirt to reach the filter and more frequent maintenance will be required.
Be careful not to pull the power trigger while the clear bin is open for emptying.
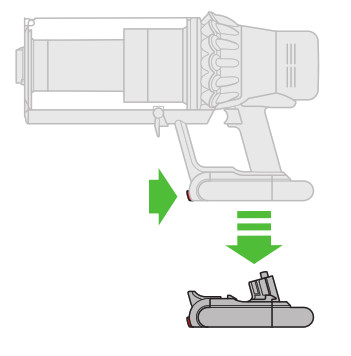
1.
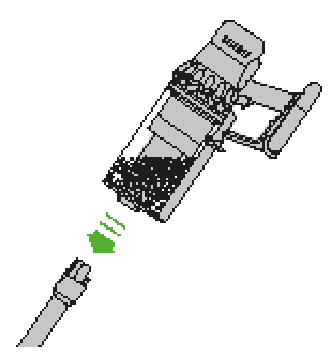 Press the red wand release button and pull the wand away from the bin.
2.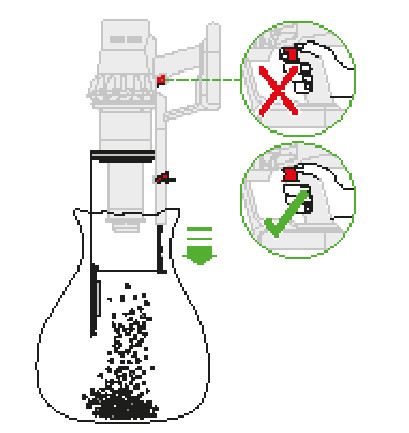 To release the dirt:Hold the machine over the bin in a downwards position.Firmly push the red bin release button. The bin will slide down, cleaning the shroud as it goes and the bin base will open.The bin base won’t open if the red bin release button isn’t pushed down all the way.
 To minimize dust/allergen contact when emptying, cover the clear bin tightly in a dust-proof bag while you empty. Remove the clear bin carefully from the bag. Seal the bag tightly and dispose of it.Be careful not to pull the power trigger while the clear bin is open for emptying. To close the clear bin: Push the bin base upwards until the clear bin and bin base click into place.
Cleaning your bin
 If it is necessary to clean your bin, empty the bin as shown in the ‘Emptying your bin’ section.Press the red button located on the bin runner to release the bin and slide the bin off the runner. Clean the bin with a damp cloth only.Make sure that the bin and seals are completely dry before replacing.
 To refit the bin, insert the spine onto the bin runner.Close the bin by pushing the bin base upwards until the bin and bin base click into place.The bin isn’t dishwasher safe and the use of detergents, polishes or air fresheners to clean the bin isn’t recommended as this may damage your machine.
Washing your filter
To always get the best performance from your machine, it is important to regularly clean the filters and check for blockages.
The LCD display will alert you when the filter unit needs washing. We recommend that you wash your filter at least once a month or when your machine alerts you.
1.
 Remove the filter unit by twisting it anti-clockwise. Gently pull it away from the machine.Tap the filter unit gently, to remove any excess dust and debris before washing it.
2.
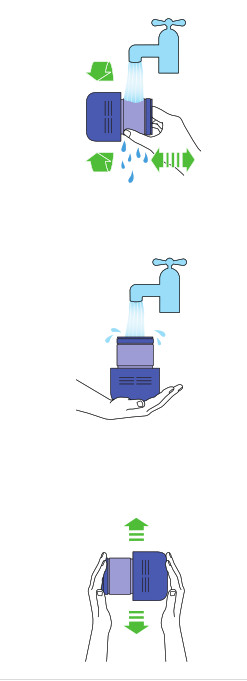 Wash the filter unit in cold water only.Wash the pleated paper element of the filter unit first; hold the filter unit under a cold water tap with the foam element downwards and run cold water over the pleated paper.
3.
 Wash the foam element of the filter unit next; hold the filter unit under a cold water tap with the foam element downwards so that dirty water does not contaminate the pleated paper element. Run cold water over the inside and outside of the foam element and squeeze the foam gently to expel the dirt.Repeat washing both parts of the filter unit until the water runs clear.Gently shake the filter unit to remove any excess water and leave to drain with the foam element end facing up.Leave the filter unit to dry completely in a dry environment with good airflow, for a minimum of 24 hours.
4.
 Check that the filter unit is completely dry.To refit, position the filter unit in place on the main body and twist clockwise until it clicks into place.The filter unit may require more frequent washing if vacuuming fine dust or if used mostly in Boost mode. Don’t put any part of your machine in a dishwasher, washing machine, tumble dryer, oven, microwave, or near a naked flame.
Washing your Torque Drive XL cleaner head
To maintain optimum performance, check and wash your brush bar regularly.Make sure your machine is disconnected from the charger and take care not to touch the trigger.
1.
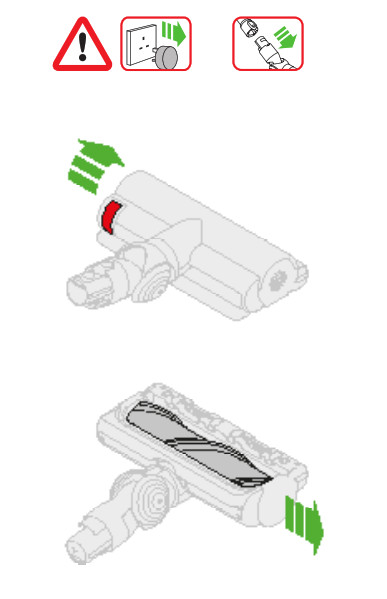 Don’t put your brush bar in a dishwasher, washing machine, tumble dryer, oven, microwave or near a naked flame.Only use cold water to wash your brush bar and don’t use any detergents.Lift the red catch on the cleaner head to release the brush bar.Slide the brush bar out of the cleaner head.Twist the end cap and remove it from the brush bar. Don’t wash the end cap.
2.
 Hold your brush bar under cold tap water and gently rub to remove any lint or dirt.Stand the brush bar upright and leave to dry completely. Make sure your brush bar is completely dry before refitting.
3.
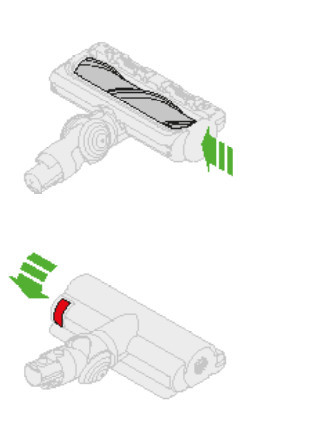 The cleaner head housing is not washable and should only be wiped over with a damp lint-free cloth.
Washing your tools
 Don’t put any part of your machine in a dishwasher or use detergents, polishes or air fresheners.Wash with cold tap water.Make sure your tool is completely dry before using.Your mini-motorized tool is not washable.Wipe over with a damp lint-free cloth.
Using your Torque Drive XL cleaner head
 Your Torque Drive XL cleaner head has a slider control to adjust the suction of the cleaner head.To select the suction required, move the suction control slider on top of the cleaner head.
+Maximum suction for ground-in dust and debris For vacuuming durable floor coverings, hard floors and heavily soiled carpets and rugs.![]() Suction for dust and debrisFor vacuuming lightly-soiled carpets, rugs and hard flooring. For vacuuming large debris such as peanuts or rice.–Suction for deep pile carpets and delicate flooringFor vacuuming deep pile carpets or rugs and flooring where you experience greater resistance. For vacuuming lightly soiled floors, and delicate flooring such as vinyl, parquet, and lino.
Suction for dust and debrisFor vacuuming lightly-soiled carpets, rugs and hard flooring. For vacuuming large debris such as peanuts or rice.–Suction for deep pile carpets and delicate flooringFor vacuuming deep pile carpets or rugs and flooring where you experience greater resistance. For vacuuming lightly soiled floors, and delicate flooring such as vinyl, parquet, and lino.
Looking for blockages
Your machine is fitted with an automatic cut-out.If any part becomes blocked, the machine may automatically cut out.The motor will pulse and the LCD screen will indicate that there is a blockage.Be careful not to pull the power trigger while looking for blockages.Make sure any blockages are clear and all parts are refitted before using your machine.
Beware of sharp objects when checking for blockages.Clearing blockages is not covered by your guarantee.If you can’t clear an obstruction from the cleaner head, you may need to remove the brush bar. Use a coin to unlock the fastener, slide the brush bar out of the cleaner head and remove the obstruction. Replace the brush bar and securely tighten the fastener.Make sure it is fixed firmly before using your machine.Your machine has carbon fiber brushes. Take care if coming into contact with them, as they may cause minor skin irritation. Wash our hands after handling the brushes. 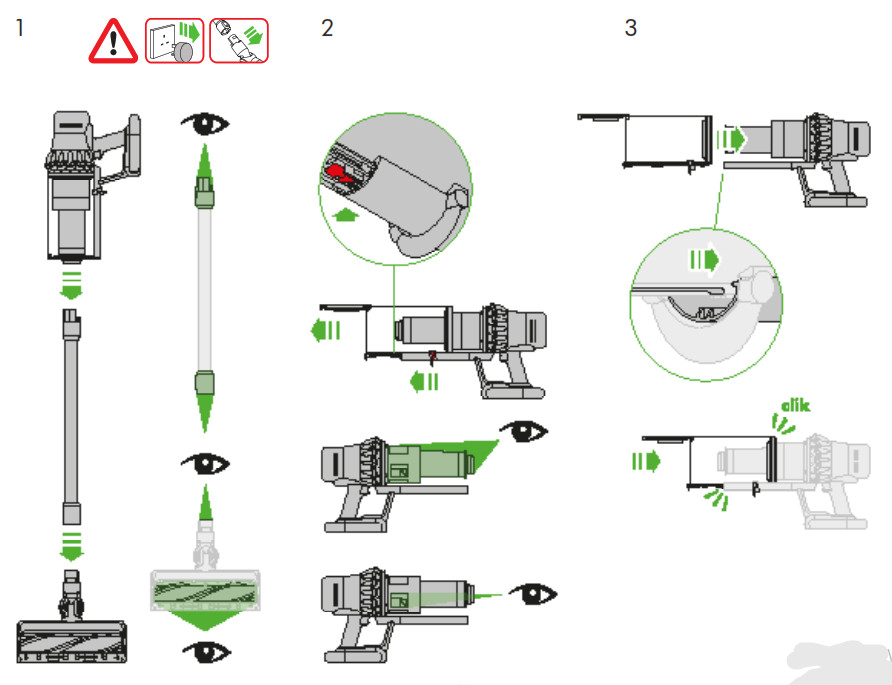
Soft roller cleaner head maintenance – clearing blockages
![]()
References
[xyz-ips snippet=”download-snippet”]