electriQ Ultraslim 800 Watt Wall Mountable Oil Filled Radiator User Manual
SAFETY INSTRUCTIONS
IMPORTANT
- Carefully read the instructions before operating the unit
- This appliance is for indoor use only. · Rating: This unit must be only connected to a 220-240 V / 50 Hz earthed outlet.
- Installation must be in accordance with regulations of the country where the unit is used.
- If you are in any doubt about the suitability of your electrical supply have it checked and, if necessary, modified by a qualified electrician.
- This heater has been tested and is safe to use. However, as with any electrical appliance use it with care.
- Disconnect the power from the unit before dismantling, assembling or cleaning.
- Avoid touching any moving parts within the appliance.
- Never insert fingers, pencils or any other objects though the guard.
- This appliance can be used by Children aged from 8 years and above andpersons with reduced physical, sensory or mental capabilities or lack of experience and knowledge if they have been given supervision or instruction concerning use of the appliance in a safe way and understand the hazards involved.
- Children shall not play with the appliance.
- Cleaning and user maintenance shall not be carried out by children.
- Children aged from 3 years and less than 8 years shall only switch on/off the appliance provided that it has been placed or installed in its intended normal operating position and they have been given supervision or instruction concerning use of the appliance in a safe way and understand the hazards involved.
- Children aged from 3 years and less than 8 years shall not plug in, regulate, or clean the appliance or perform user maintenance.
- Children under 3 years should be kept away unless continuously supervised.
- Some parts of this product can become very hot and cause burns. Particular attention has to be given where children and vulnerable people are present.
- Do not clean the unit by spraying it or immersing it in water. · Never connect the unit to an electrical outlet using an extension cord. If an outlet is not available, one should be installed by a qualified electrician.
- Never operate this appliance if the unit, cord or plug is damaged. Ensure the power cord is not stretched, exposed to sharp object/edges, or routed under the unit.
- Any service other than regular cleaning should be performed by an authorised service representative. Failure to comply could result in a voided warranty.
- Never use the plug as a switch to start and turn off the heater. Use the provided power button located on the control panel.
- Do not use an external timer.
- Do not cover the appliance, or place items close to the unit which may restrict airflow, as this may present a fire risk.
- The heater must not be located immediately below a socket outlet.
- Always place the unit on a dry and stable surface. Do not move or tilt the unit. · Avoid keeping the unit in direct sunlight for a long period of time.
- The heater is designed to be used at temperatures above -20°C. If it is exposed to temperatures below this, it must be allowed to warm above this level before operation.
- Do not attempt to repair, disassemble or modify the appliance. This unit contains no user-serviceable parts.
- Always unplug or disconnect the appliance from the mains power supply when not in use, or when moving or cleaning it. Do not pull the cord to unplug the heater.
- Keep the heater clean. Do not allow any object to enter the ventilation or exhaust opening as this may cause electric shock, fire, or damage to the heater.
- Do not use the appliance for anything other than its intended use. It is designed for domestic indoor use only.
- There may be a trace of odour during the first few minutes of initial use, or after a period of storage. This is normal and will quickly disappear.
- This appliance has hot and arcing or sparking parts inside. Do not use it in areas where gasoline, paint, or any flammable liquids are used or stored.
- This appliance is IP22 rated, and so can be used or installed within a bathroom as long as the appliance and its cables are not within Zones 0-2.
- If used within a bathroom, the circuit must be protected by a suitable RCD to prevent electric shock.
- Do not allow the appliance to be submerged or sprayed with water.
- Never locate this appliance where it may fall into a bathtub or otherwise become exposed to water.
- If the unit is wall-mounted, it must be installed in accordance with current regulations for the area of installation. If unsure, professional advice should be sought.
- WARNING: To reduce the risk of fire or electrical shock, DO NOT use this appliance with any solid-state Speed Control Device or any variable speed controllers.
ENERGY SAVING AND UNIT SAFETY PROTECTION TIPS
- Do not cover or restrict the airflow. Do not use in dusty environment.
INSTALLATION
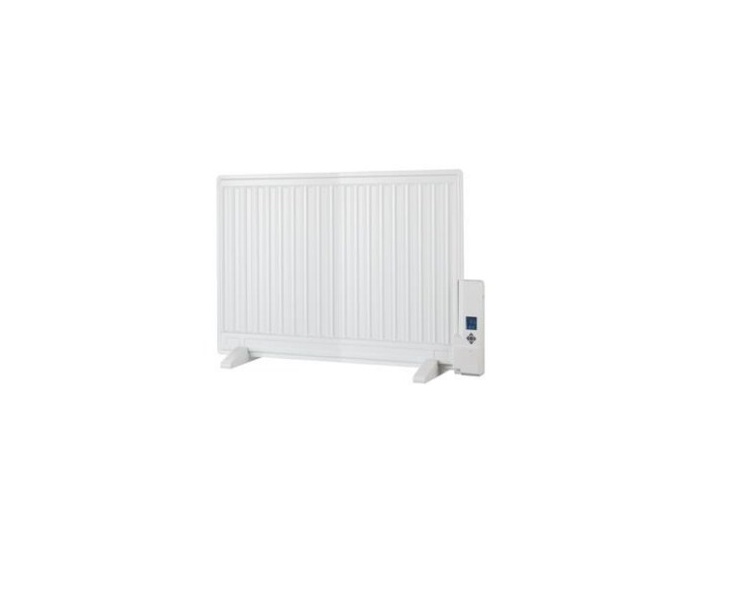
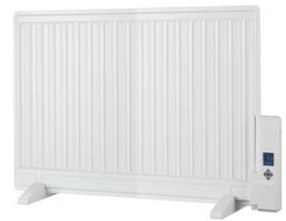
Your electriQ heater comes with the option of wall mounting or freestanding set up.
FREE STANDING
For free standing installation, use the 2 legs provided and gently rest the heater on the legs, guiding the unit into the slots in the middle of the legs. Align the holes on the base of the legs with the holes on the base of the unit and, using the 2 bolts provided, screw in the legs.
WALL MOUNTED
For wall mounted installation, you will need:
- Spirit level
- 4 screws (Supplied)
- 4 wall plugs (Supplied)
- Drill
- Pencil
- Tape measure
Decide on where you are going to mount the heater before starting with the installation. Use one of the two mounting bars and a pencil to mark where you will need to drill on the wall to hang the bar. Use a spirit level to ensure that the holes are in line with each other, and also ensure that there are no pipes or wiring where you are going to be drilling. Measure the length of the heater from top to bottom and then use that measurement to line up the bottom mounting bar with the top. Ensure that both mounting bars are in line each other. Once this is complete, carefully slide the heater onto the mounting bars and hang it on the screws that you have drilled into the wall. Ensure that the heater is secure on the wall.

PRODUCT OVERVIEW
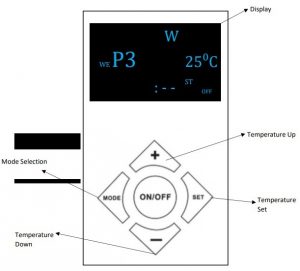
OPERATION
Press the ON/OFF button to start the heater. To adjust the desired temperature, press the SET button and then adjust using the + and buttons.
SETTING THE DAY AND TIME
- Press the SET button 3 times so that the day is flashing and use the + and buttons to adjust
- Press the SET button 4 times so that the hour is flashing and use the + and buttons to adjust
- Press the SET button 5 times to so that the minute is flashing and use the + and buttons to adjust
NOTE: The clock will be reset to default when the unit is powered off.
CHILD LOCK
Press “+” and “” at the same time to enable child lock. In child lock mode the control panel is deactivated. To exit child lock mode, press “+” and “” again at the same time.
OPEN WINDOW FUNCTION
Press ” MODE” for 3 seconds, a buzzer will sound and the open window ![]() symbol will be displayed .Press “MODE” for 3 seconds to deactivate the feature.When this function is activated , the heater will stop working when the room temperature drops by 3 in 1 minute.
symbol will be displayed .Press “MODE” for 3 seconds to deactivate the feature.When this function is activated , the heater will stop working when the room temperature drops by 3 in 1 minute.
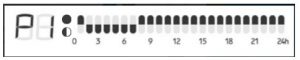
24 HOUR TIMER
The inbuilt timer will allow you to set the unit to turn off after a set period of time. Please note this timer is a one-use timer, and starts operation when programmed.
- While the unit is operating, press the SET button twice to activate the timer. The timer symbol will display on the screen.
- Use the Temperature + and buttons to adjust its duration.
- Once the set time has elapsed, the unit will turn off automatically.
Press the POWER button before the time has elapsed, the timer will be cancelled and the unit will turn off.
7 DAY TIMER
Press “MODE” button to enter the 7-day timer mode then choose between the presets: P1, P2, P3, P4 using the “+”and “-” buttons.![]() : Comfort mode is 22C
: Comfort mode is 22C![]() : ECO mode is 18C
: ECO mode is 18C
P1 TIMER (Monday – Sunday) is a Pre-set program and no adjustment is possible
P2 TIMER:Is preset and cannot be adjusted. The heater will has different settings for weekdays and weekends.(Monday – Friday) Pre set program. (Saturday – Sunday) Pre set program
P3: Monday-Sunday Can be customised. 18-22C
- Press the MODE button 3 times and set the day using the + and buttons.
- Press the MODE button 4 times and set the hour using the + and buttons.
- Press the MODE button 5 times and set the minute using the + and buttons.
Set all days up to Sunday, then set the temperature for each dayP4: ANTI-FROST“P4 Fr” will be displayed on screen and the heater will aiom to keep the temperature between 4°C and 7°C.
TECHNICAL SPECIFICATIONS
| Model no. | EORW800 LED |
| Voltage | 220-240V |
| Frequency | 50hz |
| Max power | 800W |
| IP Rating | IP22 |
| Product Dimensions | 950x65x550mm |
MAINTENANCE
CLEANING AND STORAGEATTENTION: Please shut off the unit and unplug from the mains before cleaning or performing any maintenance.
CLEANING THE SURFACE
- Clean the heater with a duster or a soft wet cloth.Do not use chemical solvents (such as benzene, alcohol or gasoline) as they may cause irreversible damage. Make sure no water enters the control panel or gaps in the casing.
- Do not run the unit until completely dry.
- Place the heater in its original box or cover to protect it from dust when not in use.
- Store it in a cool dry place.
TROUBLESHOOTING
Do not repair or disassemble the unit by yourself, unauthorized repair attempts will invalidate the warranty and may cause bodily harm.
|
Issue |
Possible Reason |
Solution |
| No power |
|
|
| Odour emission from unit |
|
|
| Strong vibrations and noise |
|
|
If the above solutions do not resolve the problem please contact the service centre.
Disposal: Do not dispose this product as unsorted municipal waste. Collection of such waste must be handled separately as special treatment is necessary. Recycling facilities are now available for all customers at which you can deposit your old electrical products. Customers will be able to take any old electrical equipment to participating civic amenity sites run by their local councils. Please remember that this equipment will be further handled during the recycling process, so please be considerate when depositing your equipment. Please contact the local council for details of your local household waste recycling centres.
electriQ UK SUPPORTwww.electriQ.co.uk/supportPlease, for your own convenience, make these simple checks before calling the service line. If the unit still fails to operate call: 0871 620 1057 or complete the online form
- Is the unit plugged into the mains?
- Is the fuse OK?
- Switch the unit off and wait three minutes to see if the issue is resolved. Restart the unit.
Office hours: 9AM – 5PM Monday to Friday www.electriQ.co.ukUnit J6, Lowfields Business Park Lowfields Way, Elland West Yorkshire, HX5 9DA
|
Model Identifier: EORW800LED |
|||||
|
Item |
Symbol | Value | Unit | Item |
Unit |
|
Heat Output |
Type of heat input, for electric storage local space heaters only (select one) |
||||
| Nominal heat output |
Pnom |
0.8 |
kW |
manual heat charge control, with integrated thermostat |
No |
| Minimal heat output |
Pmin |
0.0 |
kW |
manual heat charge control with room and/or outdoor temperature feedback |
No |
| Maximum continuous heat output |
Pmax |
0.8 |
kW |
electronic heat charge control with room and/or outdoor temperature feedback |
No |
|
Auxiliary electricity consumption |
fan assisted heat output |
No |
|||
|
At nominal heat output |
elmax | N/A |
kW |
Type of heat output/room temperature control (select one) | |
| At minimum heat output |
elmin |
N/A |
kW |
single stage heat output and no room temperature control |
No |
| In standby mode |
elSB |
1 |
W |
two or more manual stages, no room temperature control |
No |
| with mechanical thermostat room temperature control |
No |
||||
| with electronic room temperature control |
No |
||||
| with electronic room temperature control plus day timer |
No |
||||
| with electronic room temperature control plus week timer |
Yes |
||||
| Other control options (multiple selections possible) | |||||
| room temperature control with presence detection |
No |
||||
| room temperature control, with open window detection |
Yes |
||||
| with distance control option |
No |
||||
| with adaptive start control |
No |
||||
| with working time limitation |
No |
||||
| with black bulb sensor |
No |
||||
|
Contact Details |
electriQ, Unit J6, Lowfields Business Park, Lowfields Way, Elland, West Yorkshire, HX5 9DA |
References
[xyz-ips snippet=”download-snippet”]