USER MANUALWIRED CONTROLLERIQOOLSMART12HP-WiredCtrl
Read these instructions carefully and keep them safe for future reference.
SAFETY WARNINGS
- Before attempting installation, the Installation Manual must be fully read and understood.
- When choosing a suitable position for installation, consideration should be made to avoid external influences which may damage the unit, shorten its life, or make the unit unsafe. Places to avoid include:1. Areas in the vicinity of flammable gasses.2. Areas where the unit may be splashed by liquids or oils.3. Areas likely to experience extremes of temperature.4. Areas exposed to high levels of electromagnetic radiation.5. Any place with high levels of humidity.
- This unit should be installed by a competent person. If unsure, professional advice should be sought.
- Do not operate this device with wet hands or allow it to come into contact with water. An electric shock or short circuit may occur.
- Do not attempt to modify or repair the unit. This must only be attempted by a qualified engineer under the instruction of the manufacturer.
- Ensure that the power supply is disconnected from the unit before attempting to open the shell.
- Ensure the interconnecting cables are suitably rated for the application and that they are routed in a way to prevent damage during installation and use.
- This unit is only designed for use with the air conditioners listed. Do not attempt installation with any other equipment without confirmation from the manufacturer.
- Ensure that any fixings used to wall mount the unit are suitable for the type of wall.
- Before drilling holes, care should be taken to avoid any hidden pipework or cables. If in doubt professional advice should be sought.
- Maintenance and repair of this product should only be carried out by a qualified professional.
- Keep this manual safe for future reference or for use by a third party.
- The correct use of this product is detailed in this manual. Failure to follow the instructions may result in damage or injury.
- All installation and service carried out on the appliance must conform to the corresponding local standards, laws, and regulations.
- Due to continuous product development, the product may vary slightly from the illustrations provided.
- The length of the supplied cable is 2.5m if this needs to be extended, it must be done so by a qualified engineer or a suitably competent person.
INSTALLATION
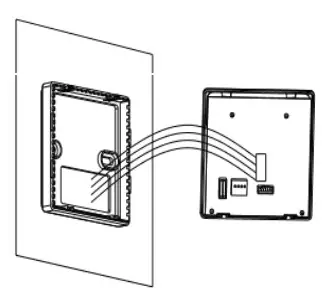
Remove the wired controller from the backing plate using a flat-headed screwdriver in the gap between the backing plate and the controller. Once the two parts are separated, the remainder can be unclipped.
Pass the signal wire through the opening in the rear of the backing plate, ensuring it is positioned so it will not be trapped or damaged during installation. Allow enough cable to pass through for ease of installation and future maintenance.
Connect the signal wire between the wired controller and the air conditioner. The cable with the connector for the controller is fixed to the rear of the air conditioner.
 Use the screws provided (M4x25) to fix the controller backing plate onto the wall, ensuring that it is securely connected before proceeding. Depending on the type of wall, suitable fixings should be purchased.NOTE: Do not overtighten the screws, as this may cause the backing plate to distort or break.
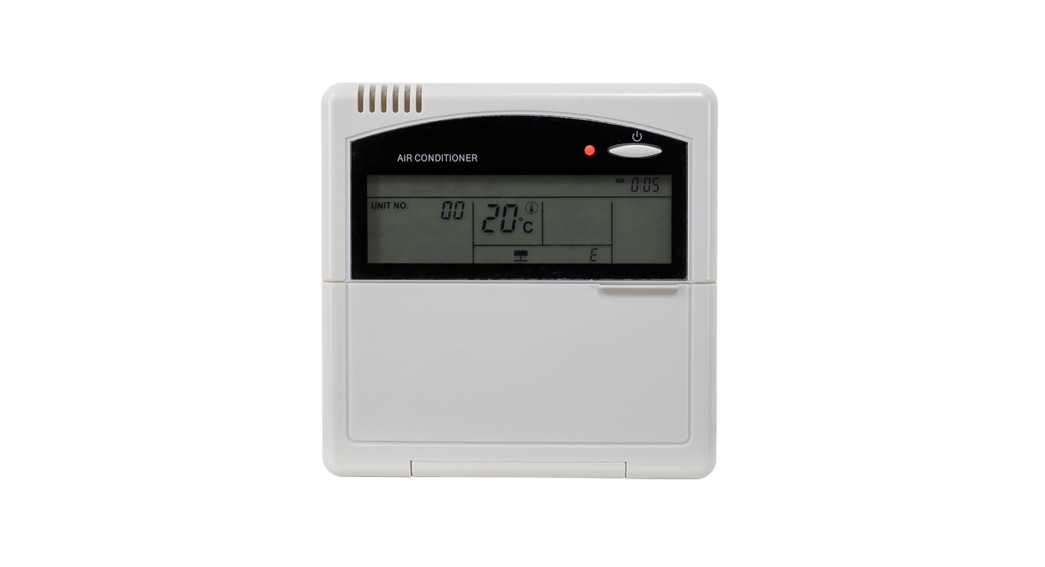
CONTROL PANEL
DISPLAY
OPERATION
POWER BUTTON:Press to turn the air conditioner ON and OFFMODE BUTTON:While the air conditioner is operating press the mode button to change between the 4 modes. The current mode will be shown on the display.
TEMP![]() AND
AND![]() BUTTONSThese buttons are used to increase or decrease the desired room temperature. Both the current temperature and the desired temperature are shown on the display.
BUTTONSThese buttons are used to increase or decrease the desired room temperature. Both the current temperature and the desired temperature are shown on the display.
CLOCK BUTTONPress the clock button to set the current time. Use the TIME and buttons to adjust the time. After a few seconds of being set, the clock will start to operate.
TIMER BUTTONUse to set the desired time for the unit to turn on or off. Please note the time must have been set on the unit before the timer can be used.ON TIMER – The timer will turn on the unit automatically after the time set has elapsed.
- With the unit is standby, press the TIMER button so that the ON TIMER symbol is shown on the display.
- Use the TIME
 and buttons to set the desired start time.
 - Once the set time has elapsed, the unit will turn on automatically with the settings that were operating before the unit was turned off.
OFF TIMER – The timer will turn off the unit automatically at the set time.
- While the unit is running press the TIMER button so that the OFF TIMER symbol is shown on the display.
- Use the TIME and buttons to set the desired stop time.
- Once the set time has elapsed, the unit will turn off.
FAN BUTTONThe fan speed button is only available in cooling, heating, and fan modes. Press the fan speed button to change between the available fan speeds.SWING BUTTON Press the Swing button to activate the swing function on the air conditioner. Press the button again to turn off swing mode.SLEEP BUTTONPress sleep to enter the unit into sleep mode. Sleep mode will operate the same as described in the air conditioner’s manual. The unit will run at the lowest fan speed. To exit sleep mode, press any button.
DISASSEMBLY
Disassembly is the reverse of installation. Make sure that the main power has been disconnected to avoid the risk of injury.Remove the wired controller from the backing plate using a flat head screwdriver in the gap between the backing plate and the controller. Once the two parts are separated, the remainder can be unclipped.Disconnect the signal wires from the rear of the wired controller.Pass the signal wire through the opening in the rear of the backing plate, ensuring they are not damaged during removal.
electriQ UK Support.
 report this ad
Please, for your own convenience, make these simple checks before calling the service line.If the unit still fails to operate call: 0871 620 1057 or complete the online form Office hours: 9 AM – 5 PM Monday to Friday www.electriQ.co.ukUnit J6, Lowfields Business ParkLowfields Way, EllandWest Yorkshire, HX5 9DA
PRODUCT DISPOSAL
Do not dispose of this product as unsorted municipal waste. Collection of such waste must be handled separately as special treatment is necessary.Recycling facilities are now available for all customers at which you can deposit your old electrical products. Customers will be able to take any old electrical equipment to participating civic amenity sites run by their local councils. Please remember that this equipment will be further handled during the recycling process, so please be considerate when depositing your equipment. Please contact the local council for details of your local household waste recycling centers.
References
[xyz-ips snippet=”download-snippet”]