EMERSON Supervisory Controlloer
User Guide

How to Send Emails and SMS Alarm Messages
Logging In
1. Launch a preferred web browser.2. Enter the IP Address of the device.3. The default IP Address is 192.168.0.250 for ETH0 and 192.168.1.250 for ETH1.4. Log into the Supervisory Controller by selecting Login located at the upper right side of the screen and enter your username and password.
How to Go to Network Settings
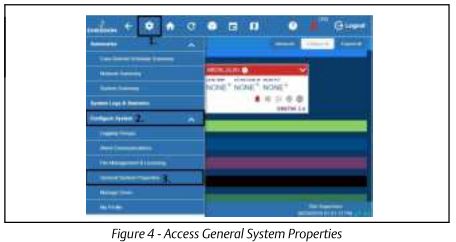
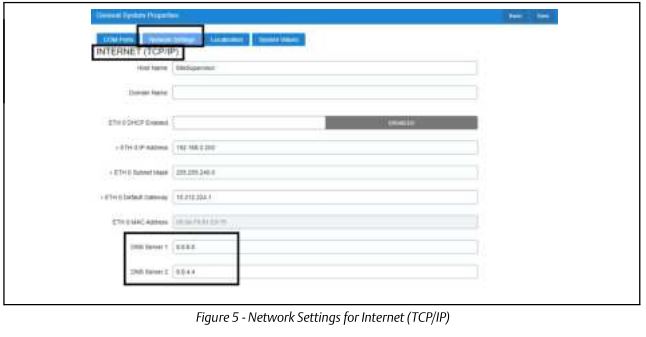
1. Click the Setup (gear) icon.2. Click Configure System.3. Click General System Properties.4. Click Network Settings on the General System Properties page. Click Advanced to see all settings.
If Using Gmail, You Must Set Up a DNS Server:For DNS Server 1 and 2 – A valid DNS server must be supplied to resolve “smtp.gmail.com”
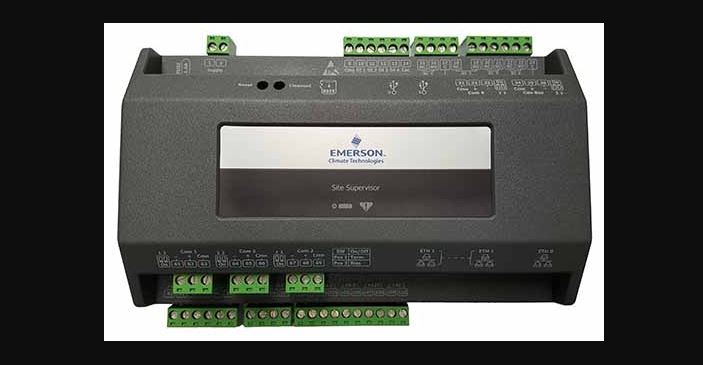
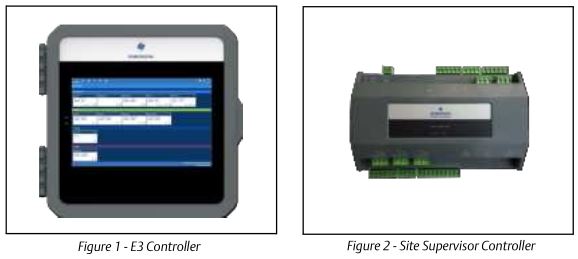
Messaging Setup
Email Messaging Setup1. Scroll down to the bottom of the page to locate the options for email and text messaging: 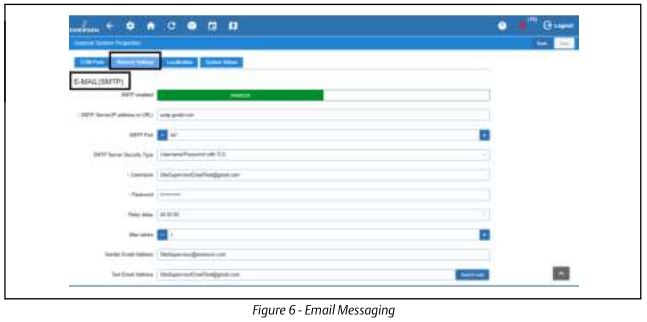 2. Click the gray box to toggle ENABLED for SMTP email messaging. The setup options will appear after enabling. SMTP Server
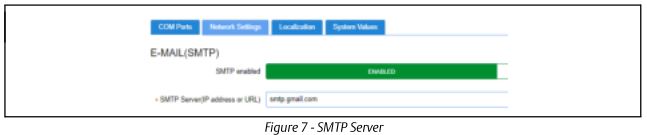
- SMTP Server (Simple Mail Transfer Protocol) is an Internet standard for electronic mail transmission.
- SMTP Server can either be the server name or IP Address.
- Check with your local IT for the availability of SMTP on your local server.
- Example of an SMTP server that is available for public use is smtp.gmail.com.
- When SMTP has been enabled, the Test Email Address option becomes available. Enter the sender’s email addressand click Send E-mail to test and verify that notifications will be received by the correct email.
Default Gmail SMTP Settings
- Gmail SMTP server address: smtp.gmail.com
- Gmail SMTP username: Your full Gmail address (for example, )
- Gmail SMTP password: Your Gmail password
- Gmail SMTP port (TLS): 587 (for port 587, the Authentication type must be Username/Password TLS)
- Gmail SMTP port (SSL): 465
- Gmail SMTP TLS/SSL required: yes IMPORTANT: For Gmail, access from inside the Gmail account must be enabled for less secure applications to receive emails.
Authentication Type
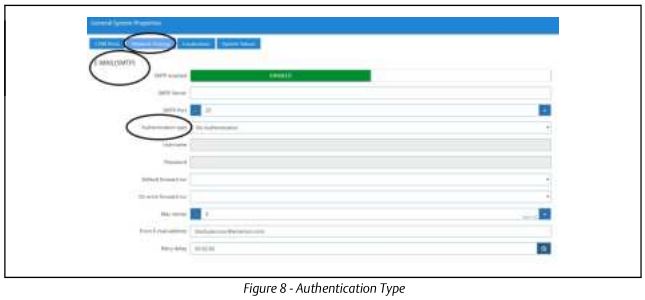
- Check with the local IT server for the Authentication type to access the SMTP server.
- Set the Username (your email address such as Gmail or Yahoo) and Password (your password for that email account).
Complete SMTP Setup – Set Max Retries
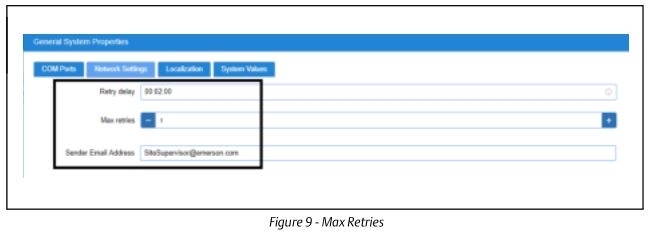
- Retry delay – Leave at default setting of 00:02:00 · Max retries – Set to 1
- Sender Email address – Set the email address the Supervisory Controller will use to send Alarm Communications.Note: The email address used should be a valid user on the SMTP server.
Text Messaging Setup
Enabling SMS Setup
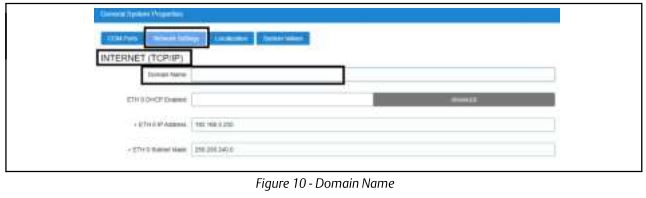
Enter the IP Address or DNS from the ISP in the Domain Name field:
1. Under TEXT MESSAGING (SMS), configure the following:
- SMS enabled – Enables or disables the SMS network setup. SMS support must be ENABLED.
- SMS Max retries – Set the maximum number of retries for SMS Alarm Communications to 1.
- SMS Retry delay – Set the time interval between each retry. Leave at default setting of 00:02:00.
- From SMS address – Leave it blank OR enter the mobile phone number in the format of 3-digit area code and 7-digitphone number with no spaces. For example: 9991234567.

Managing Users
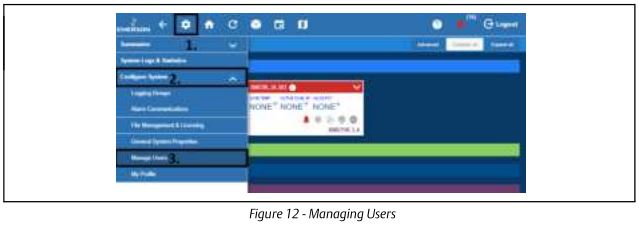
1. Click the Setup (gear) icon.2. Click Configure System.3. Click Manage Users.
View and Edit Users
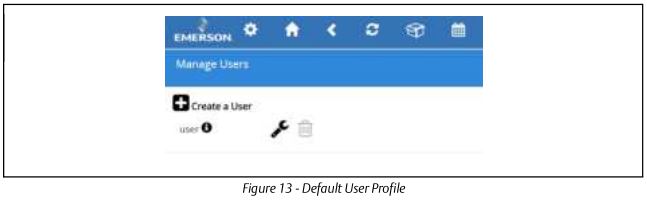
- From here, you can view, edit, or delete users.
- To add a user, click the plus sign and Create a User.
- To edit a user, click the wrench
- To delete a user, check the box on the left side of the user name and click the Delete button.
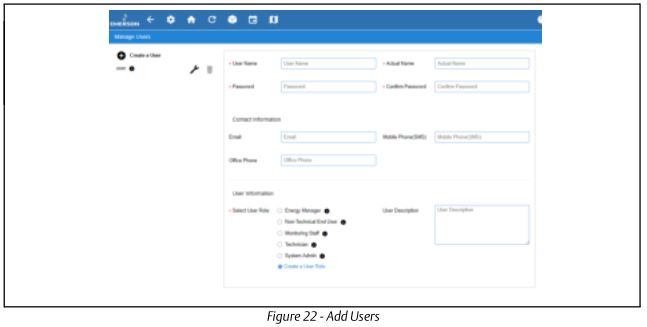
Create New User
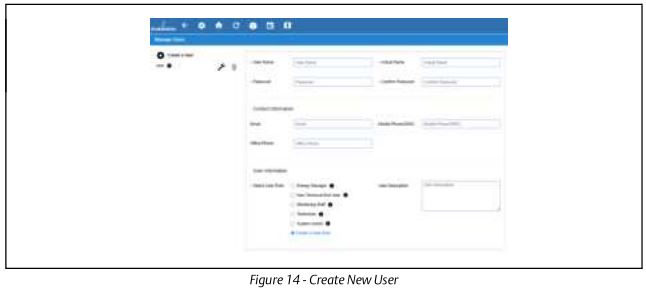
1. Click Create a User.2. The below fields are required:
- User Name
- Actual Name
- Password
- Confirm PasswordNote: The User Name and Password created here can be used to log into the Supervisory Controller.
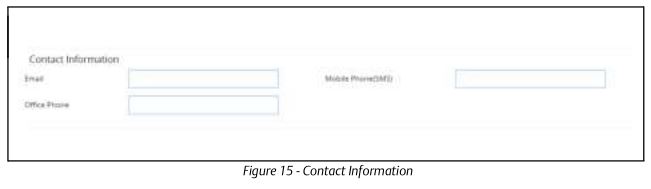
Note: These fields can be left blank if this user will not be receiving Alarm Communications via email or SMS.3. Contact information for the user must be filled out for them to receive Alarm Communications via email or SMS.
- Email (Note to verify the email address is valid to receive emails)
- Mobile Phone (SMS) (Note to verify the mobile phone number is correct and in the following format: _txt_domain (.att.net)
- Office Phone
Below are some examples of SMS addresses for those in the United States:
- T-Mobile:
- Nextel:
- Virgin Mobile:
- U.S. Cellular:
- Cingular:
- Cricket:
- Sprint:
- Verizon:
- Boost Mobile:
- AT&T:
- phonenumber = your 10-digit phone number
Note: For those outside the United States, please contact your local service provider.
Note: The Contact Information fields can be left blank if the user will not be receiving Alarm Communications via email or SMS (Figure 12).
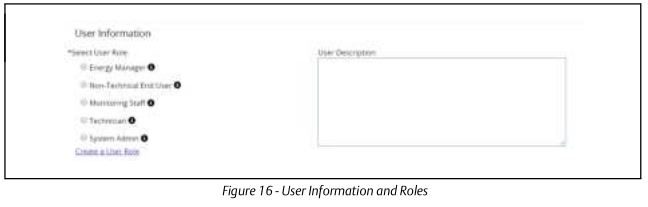
4. The User Information area allows the user’s login access level to be set. Depending on the selected role, the user can View, Control, Configure, or Administer items listed in the action area for that role. To view more details about what each role can do, click the icon next to the role name.5. Click Save.
Alarm Communications
Click the Setup (gear) icon.

6. Select Alarm Communications.

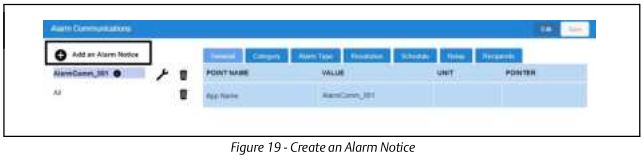
7. Click Add an Alarm Notice to create a new Alarm Notice. Note: It is assumed that role-based user access is already set up at this stage. Otherwise, role-based user access must be configured (Figure 13).
Creating an Alarm Notice
1. Click Edit and enter a unique name for the alarm notice.2. Select the desired options to filter the alarm notice. They can be filtered via Category, Alarm Type, and Resolution:
3. Add Users will list the available users created in Manage Users.4. Click the Recipients tab to see a list of users already set up in the system – from here you can choose the communication type they should receive (email, SMS). If a user has no email or mobile contact information available, Not set will appear next to the user name.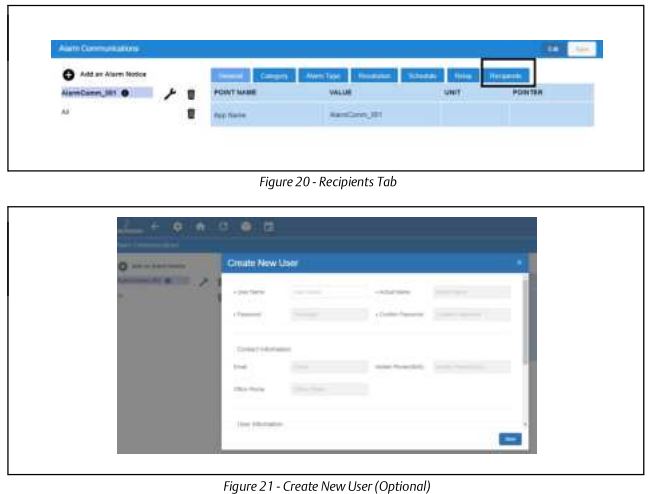
5. If you wish to receive notifications and it has not yet been set up, click Create New User and fill out all of theappropriate fields. Select Email and/or SMS.
Add Users
1. Select the user who will be notified by Alarm Communications. Check the appropriate boxes to enable the email and/or SMS notification.
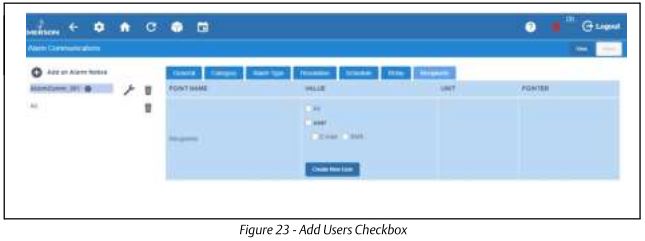
2. Notifications will be sent to the email address and/or mobile phone number provided in the user’s contactinformation.
For more information about Site Supervisor including release notes and the full user manual, scan the QR code.

This document may be photocopied for personal use. Visit our website at http://www.climate.emerson.com/ for the latest technical documentation and updates.Join Emerson Technical Support on Facebook. http://on.fb.me/WUQRnt For Technical Support call 833-409-7505 or email [email protected] The contents of this publication are presented for informational purposes only and they are not to be construed as warranties or guarantees, express or implied, regarding the products or services described herein or their use or applicability. Emerson Retail Solutions, Inc. and/or its affiliates (collectively “Emerson”), reserves the right to modify the designs or specifications of such products at any time without notice. Emerson does not assume responsibility for the selection, use or maintenance of any product. Responsibility for proper selection, use and maintenance of any product remains solely with the purchaser and end-user.
References
[xyz-ips snippet=”download-snippet”]