
Empire Ears Monitor Earphones User Guide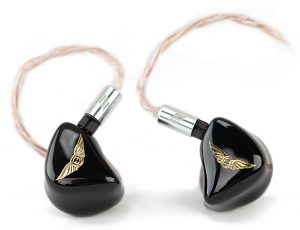
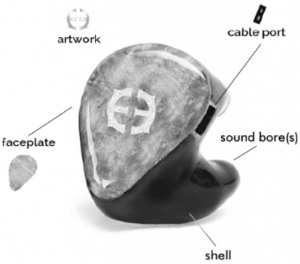
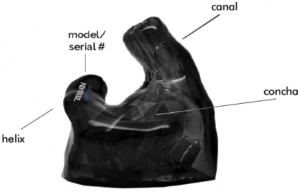
GETTING TO KNOW YOUR IN-EARS
HOW TO WEAR
Warning: Please turn the volume down on source before inserting IEM. Don’t take chances with permanent irreversible hearing loss. Turn it down.Note: Handle IEMS with care. They are breakable
Step 1Turn the CIEM forward, then gently insert it into your ear canal.
Step 2Gently rock in-ear back and forth, until completely snug in the ear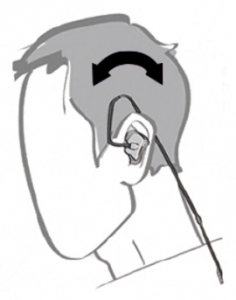
Step 3Secure cable behind ear.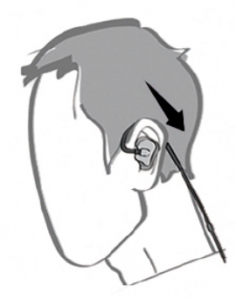
Step 4Cinch cable for best isolation.
For Universal IEMSBefore insertion, be sure to secure tip onto IEM. If using final Audio Type E tips, squeeze tip before insertion into ear.
DO
- Clean after each use. Wax buildup damages drivers and they will need to be replaced. This is not covered under warranty.
- Store in Empire Ears protective case when in-ears are not in use..
- Read full warranty info. The more informed you are, the better you can take care of your in-ears. With proper care your in-ears can last for many years.
DON’T
- Expose device to moisture.
- Remove IEM by pulling on cable.
- Wear IEM if it has micro fractures, as it can break during use.
- Allow IEM to hit hard surfaces, or knock into each other, as this can create micro fractures or break the device.
- Attempt to fix, alter, or disassemble device. Doing so will void all warranties
HOW TO CARE
CLEANINGLocate the sound bores at the end of the canal on your IEM. Using the loop side of cleaning tool, point your IEM downwards, and begin to scoop out any internal debris.
SCRUBBINGDebris will begin to surface and may leave particles in surrounding areas. Use the brush end of the tool to scrub off any remaining debris.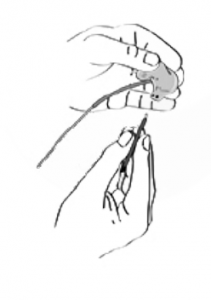
POLISHINGUse only microfiber cloths or nonalcoholic wipes to clean the shell. Never submerge IEM in liquids.”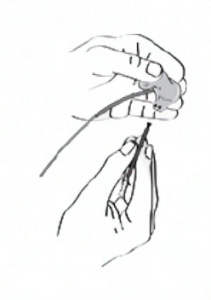
WRAP & STORECinch the cable all the way up, then loosely wrap it around your four fingers. Carefully store your neatly wrapped Empire IEMS inside your carrying case./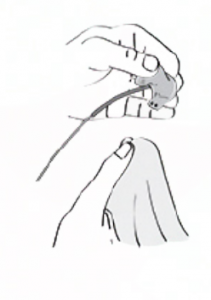
LISTEN RESPONSIBLY
| Sound Pressure Level DB(A) | Permissable Noise Exposure Duration (Per Day) |
| 90 | 8 hrs |
| 95 | 4 hrs |
| 100 | 2 hrs |
| 105 | 1 hrs |
| 110 | 30 min |
| Source | SPL (dBA) |
| Faintest Audible Sound | 0 |
| Whisper | 20 |
| Quiet Residence | 30 |
| Soft Stereo in Residence | 40 |
| Speech Range | 50-70 |
| Cafeteria | 80 |
| Pneumatic Jackhammer | 90 |
| Loud Crowd Noise | 100 |
| Accelerating Motorcycle | 100 |
| Rock Concert | 120 |
| Jet Engine (75 Feet away) | 140 |
ATTACHING & DETACHING CABLE
HOW TO ATTACH
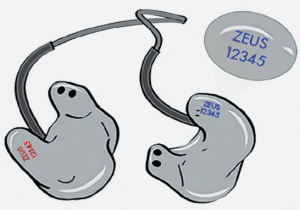
STEP 1Match the right ear with the right cable (red dot).
STEP 2Insert the cable by sliding it until it feels snug. The colored dot on top of the connector should always point upwards. This indicates that the positive and negative are inserted correctly.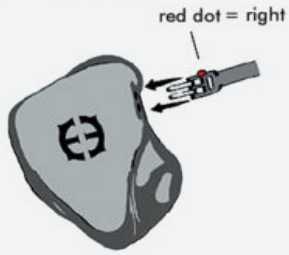
STEP 3Follow same process for left side (blue dot).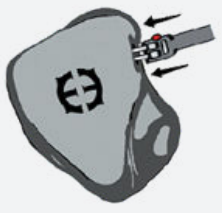
HOW TO DETACH
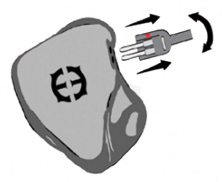
Grasp the base of cable by port and gently pull outward while wiggling back and forth in an up and down motion.
DO NOT attempt to remove by pulling on the cable or you might damage the cable port and device.
All of our custom IEMS use recessed sockets. When using an aftermarketcable, please ensure that it’s designed for a recessive socket. If not, you risk damaging your device, if it doesn’t securely fit.
HOW TO INSTALL TIPSTo install tips, slide your selected tip over the nozzle until it feels snug. To remove, gently twist and pull from nozzle.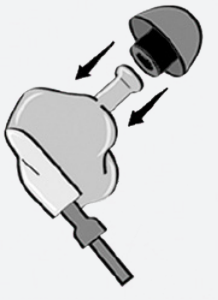
Inserting The final Audio Type E Tip

WARRANTY
UNIVERSAL PRODUCTSDefects Or Workmanship WarrantyEmpire custom products are warranted against material defects and workmanship defects for a period of twenty-four (24) months, and twelve (12) months for universal products, from the original shipping date or manufacture date, whichever is later.
This warranty does not cover:
- Cables and accessories.
- Loss and damage.
- Problems resulting from using aftermarket cables and accessories.
- Abuse, misuse, accidents, improper storage, and usage under conditions which the product is not intended for.
- Problems resulting from any unauthorized repairs or modifications to the product.
- Wax build up or moisture issues.
- Deterioration of product’s color and/or physical condition resulting from normal wear and tear; such deterioration is not considered defect.
- Shipping and handling
Voiding Limited WarrantyTampering with your Empire Ear product, including modifications or disassembly, or attempts to disassemble or repair, by you or any person or company other than our authorized service facility, will automatically void all warranties.
CUSTOM PRODUCTSLimited Manufacturer’s Warranty
Limited Thirty (30) Day Fit Warranty – Custom Products
- At our discretion, Empire Ears will repair or remake custom products with fit problems up to two (2) times within thirty (30) days from the original shipping date or manufacture date, whichever is later, at no additional cost.
- Under this warranty, all fit issue remakes will be remade according to the original purchase color selected ONLY. Color changes will be permitted ONLY if Empire Ears has made a manufacturing error or the color does not match the original purchase order.
- Remake service is not available simply to change the color of your custom in-ears. Therefore, please select your model and colors carefully before making your purchase.
- Fit problem remake requests that arise after the thirty (30) day period will incur a remake fee.
- Warranty does not include shipping and handling fees.
Repair or remake fit problems covered under this warranty include:
- Fit is too tight, tall, low, or deep.
- Loose fit or poor seal.
- The helix area is too thick or wide.
- Uncomfortable or painful to wear.
- Does not sit properly in the ear.
[xyz-ips snippet=”download-snippet”]