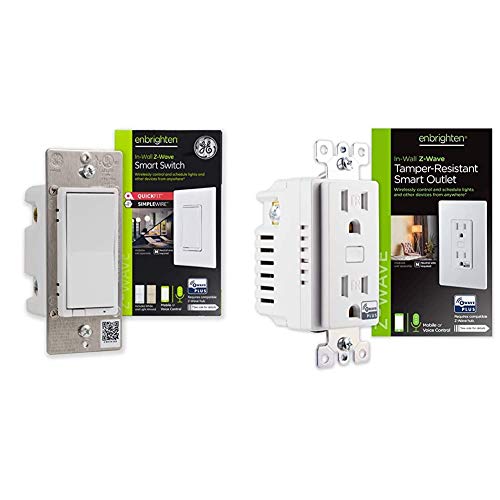
enbrighten 55256 Z-Wave Plus Smart Receptacle Works with Alexa
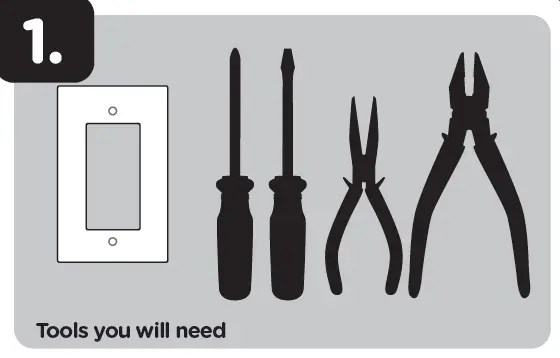
Tools you will Need
IMPORTANT!The device plugged into the Z-Wave controlled smart outlet on this module must not exceed 960W incandescent, 1800W (15A) resistive or 1/2HP motor. The total maximum rating for both outlets combined is 1800W (15A) resistive load.
Getting to know your new Z-Wave device
- One Z-Wave remote controlled outlet.
- One always-ON outlet.
- Remote ON/OFF control via the Z-Wave controller/network.
- Manual ON/OFF control with the manual/program button.
- Blue LED indicates outlet location in a dark room.
- This Z-Wave device has advanced features that allow you to customize your experience. These features can only be adjusted by a Z-Wave enabled controller that supports the Z-Wave configuration command class. See the available configurations parameters at the end of this guide for details.
Overview

- A. Line (Hot)
- B. Neutral
- C. Ground
- D. Always-on outlet
- E. Manual/program button
- F. Z-Wave controlled outlet
Wiring

- Shut off power to the circuit at circuit breaker or fuse box.IMPORTANT! Verify power is OFF to switch box before continuing.
- Remove wallplate.
- Remove the outlet mounting screws.
- Carefully remove the outlet from the outlet box.
- Disconnect the wires from the existing outlet. Label wires according to the previous terminal connections.
- There are three screw terminals on the Z-Wave smart outlet; these are marked:A. LINE (Hot) — Black (connected to power)B. NEUTRAL — WhiteC. GROUND — Green/BareMatch these screw terminals to the wires connected to the existing outlet.
Observe important wiring informationAlways follow the recommended wire strip length (5/8in. or 16mm) and wiring combination when making wiring connections. Consult an electrician with questions or for professional installation.UL specifies the tightening torque for the screws is 14Kgf-cm (12lbf-in).IMPORTANT! The screw terminals in this receptacle are intended to only be used with copper wire. Consult a qualified electrician if you have aluminum wiring.
Wire gauge requirementsUse 14AWG or larger wires suitable for at least 80° C for supplying line (hot), neutral and ground connections.
- Insert Z-Wave controlled outlet into the box being careful not to pinch or crush wires.
- Secure the controlled outlet to the box using the supplied screws.
- Mount the wallplate.
- Reapply power to the circuit at fuse box or circuit breaker and test the system.
Basic operation
The connected device can be turned ON/OFF in two ways:
- Manually from front program button.
- Remotely with a Z-Wave controller
Cycle LED lightThe LED acts as a guide light or status indicator.How to cycle through options: Press program button 10 times quickly.
1. LED is ON when the load is ON (indicates the outlet is ON)(default)2. LED is ON when the load is OFF (guide light in the dark)3. LED is always OFF4. LED is always ON
Adding your device to the Z-Wave network

- Follow the instructions for your Z-Wave certified controller to add a device to the Z-Wave network.
- Once the controller is ready to add your device, press and release the program button.
Please reference the controller/gateway manual for instructions.You have complete control to turn your fixture ON/OFF according to groups, scenes, schedules and interactive automations programmed by your controller.If your Z-Wave certified controller features remote access, you can control your fixture from your mobile devices.If prompted by the controller to enter the S2 security code, refer to the QR code/security number on the side of the box or the QR code label on the product (see Figure 1). Enter the 5-digit PIN code.
To remove and reset the device
1. Follow the instructions for your Z-Wave certified controller to remove a device from the Z-Wave network.2. Once the controller is ready to remove your device, press and release the manual/program button.
To return to factory defaultsPress the button five times, then press and hold the button for at least three seconds. The LED will blink five times to confirm.NOTE: This should only be used in the event your network’s primary controller is missing or otherwise inoperable.NOTE: SmartStart enabled products can be added into a Z-Wave network by scanning the QR code on the product with a controller providing SmartStart inclusion. No further action is required and the SmartStart product will be added automatically within 10 minutes of being switched on in the network vicinity.
Available configuration parametersLED LightParameter No.: 3Length = 1 bytePossible values = 0 (default), 1 or 2Value desciptions
- “0” – LED ON when load is ON, LED OFF when load is OFF
- “1” – LED ON when load is OFF, LED OFF when load is ON
- “2” – LED always OFF
- “3” – LED always ON
Z-WAVE INTEROPERABILITYThis product can be included and operated in any Z-Wave network with other Z-Wave certified devices from other manufacturers and/or other applications. All non-battery operated nodes within the network will act as repeaters regardless of vendor to increase reliability of the network.
This device supports Association Command Class (3 Groups)
• Association Group 1 supports Lifeline, Binary Switch Report and Central Scene Notification• Association Group 2 supports Basic Set and is controlled with the local load• Association Group 3 supports Basic Set and is controlled by double pressing the ON or OFF button• Each Association Group supports 5 total nodes
References
[xyz-ips snippet=”download-snippet”]

