
![]()
![]()
Smart PlugEIX3-1002-PP4QUICKSTART GUIDEv1.2
Thank you for choosing the Energizer, Smart Plug. This quick start guide will help you with setup and installation.
Package Includes:
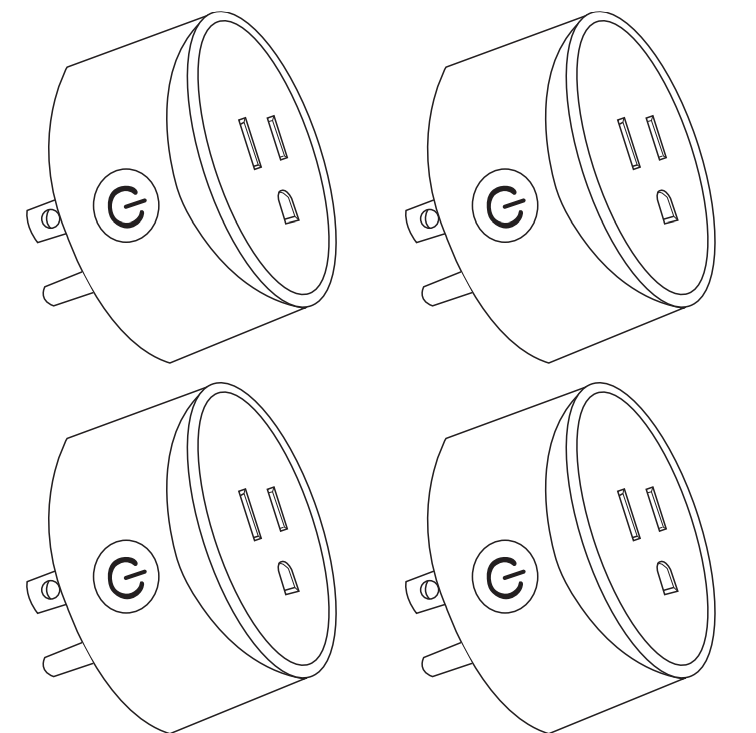
4-Smart Plug1-Quik Start Guide
Note: Energizer® Connect devices only work on a wifi network©2019 Energizer. Energizer and certain graphic designs are trademarks of Energizer Brands, LLC, and related subsidiaries and are used under license by Jem Connected IOT, Inc.All other brand names are trademarks of their respective owners. Neither Jem Connected IOT, Inc. nor Energizer Brands, LLC is affiliated with the respective owners of their trademarks.Apple and the Apple logo are trademarks of Apple Inc., registered in the U.S. and other countries and regions. App Store is a service mark of Apple Inc.Google and Google Play are trademarks of Google LLC. All rights reserved.Amazon Alexa and all related logos are trademarks of Amazon.com, Inc. or its affiliates.
Pair the Smart Plug.
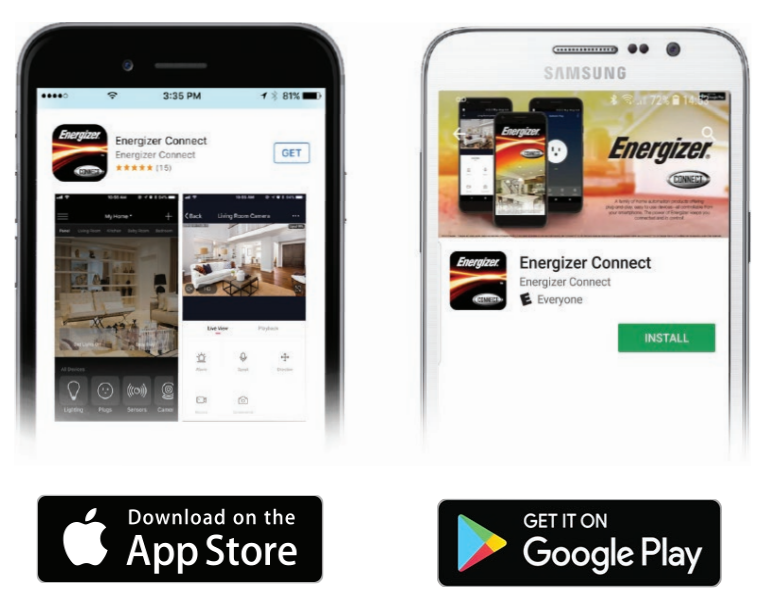
1. Download the Energizer® Connect app from the App Store (for iPhones) or Google Play Store (for Android phones).Before opening the app, make sure your phone is connected to the WiFi network that your Smart Plug will be placed on.
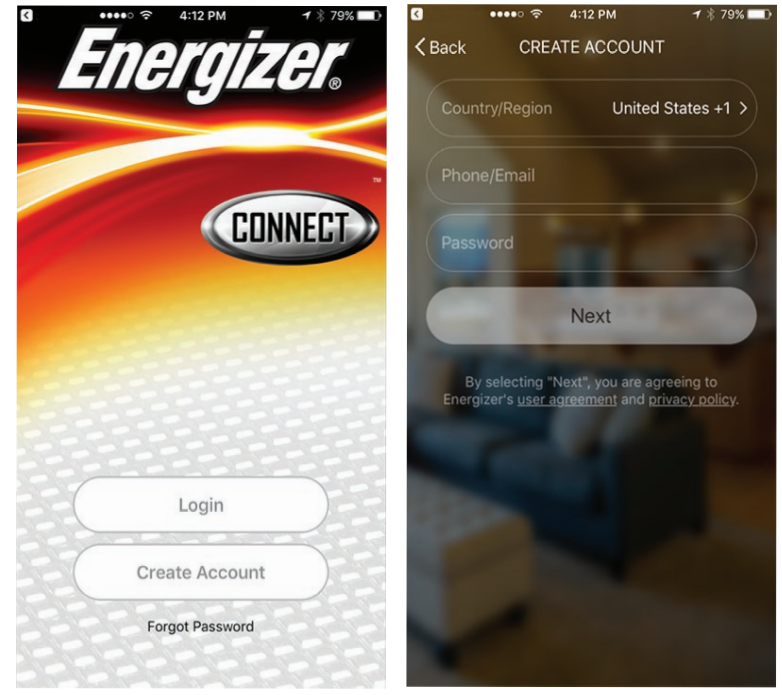
2. Open the app and create an account by following the on-screen instructions.
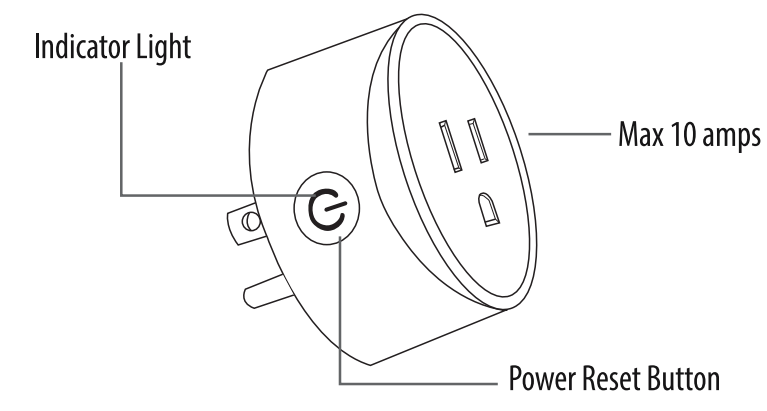
3. Plug the Smart into a Wall Outlet
Note: The Smart Plug is not suitable for appliances that require more than 10 amps. Please check the device’s electrical requirements before plugging in.

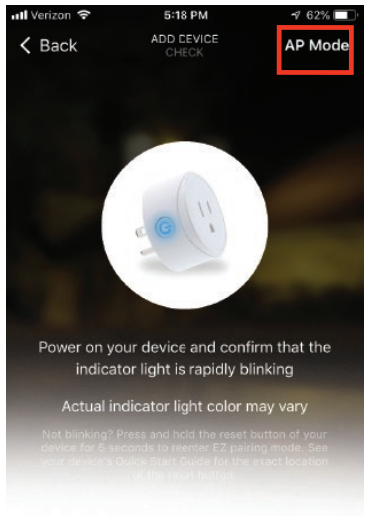
Note: The indicator light on the plug should start blinking rapidly (about 4 times per second) for EZ pairing mode.
| EZ MODE | Rapidly blinking (about 4 times per second) |
| AP MODE | Slowly blinking (about 2 times per second) |
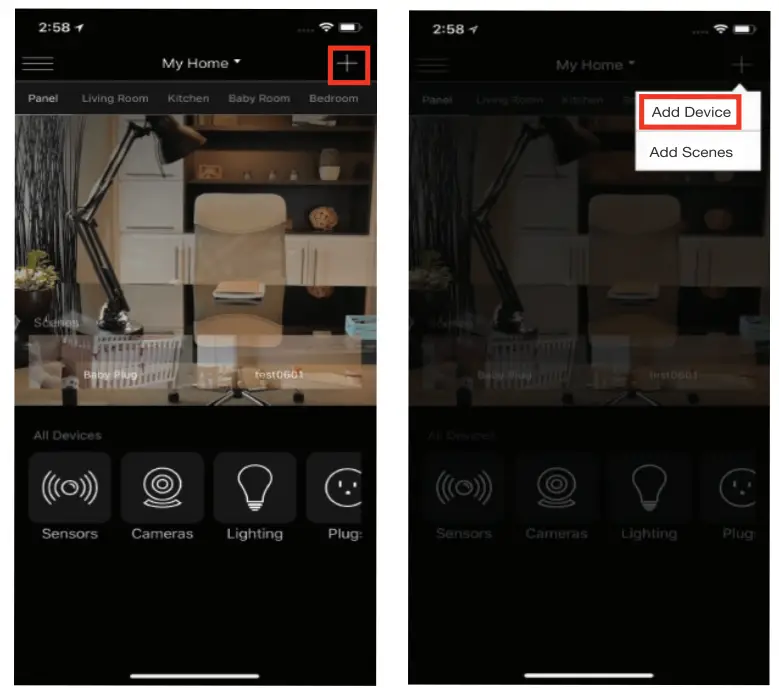
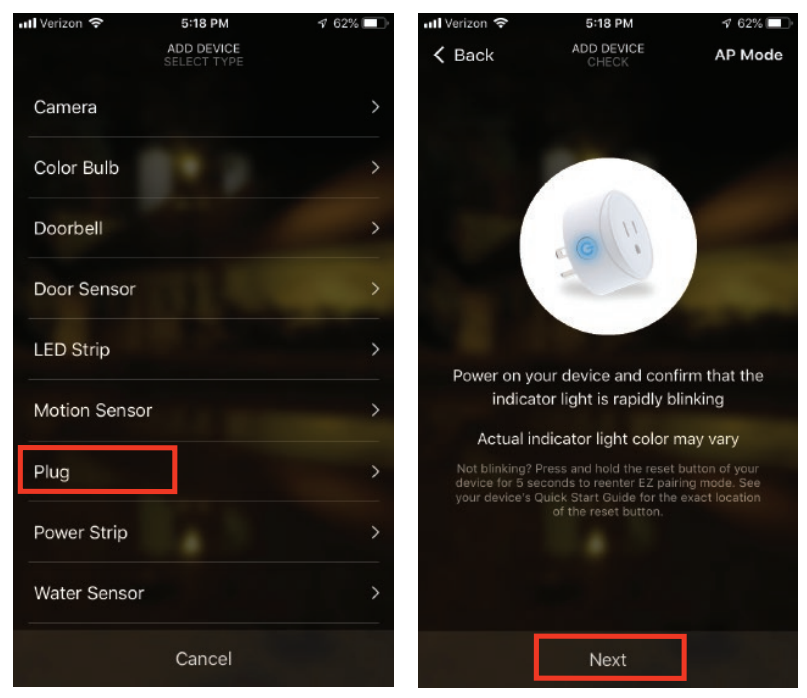
4. After logging in, click”+” on the top right of the screen and select “Add Device”.
5-6. Select”Plug”. Confirm that the indicator light is rapidly blinking, then click next.
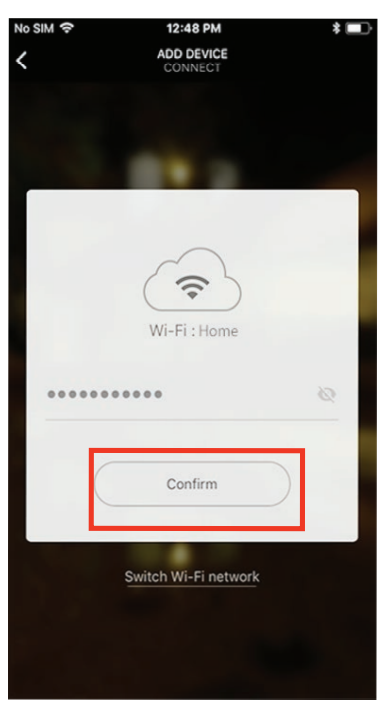
7. Confirm that the network WiFi displayed is your 2.4ghz WiFi network, enter your WiFi password and click confirm.
8. Your Smart Plug will now be connected to the network. Confirm the settings for your device and then Click Finish Device Setup. Now your first plug is set up.

9. Please repeat steps 3-8 to set up each plug individually.Your Energizer® Smart Plug is now ready to use. You can now set schedules, timers and control your Smart Plug remotely. We hope you enjoy using your Energizer® Smart Plug. For frequently asked questions and instruction videos, please visit our website at www.energizerconnect.com.
To enable voice access for your Smart Plug, you will need to link the Energizer®Connect skill with your choice of voice assistant.
Voice Activation for Alexa
Make sure your Alexa device is installed and set up first.
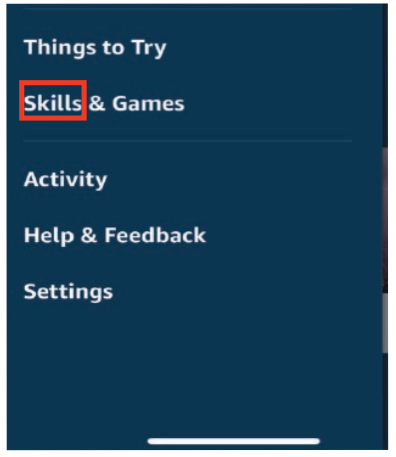
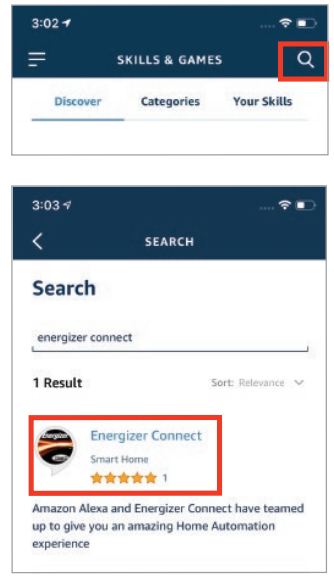
- Open your Alexa app.
- Open the menu to search for Skills.

- Search for & choose Energizer®Connect.
- Authorize your account with the Alexa skill using the username and password from your Energizerjonnect app.
- Using the name you assigned your plug, you can ask Alexa to turn on/off your appliances. Ex:”Alexa, turn on bedroom plug”.
Voice Activation for the Google Assistant
Make sure your Google Assistant device is installed and set up first.
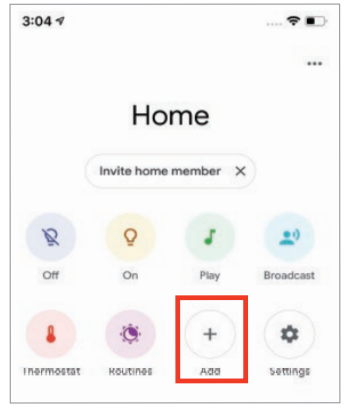
- Open your Google Home app.
- Click the + to add a new device
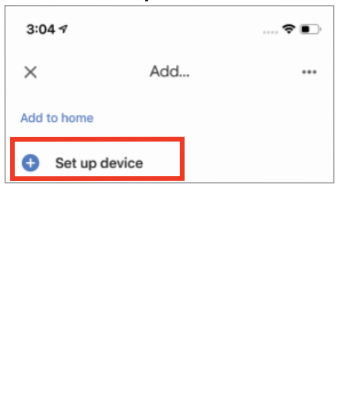
- Click “Set up a device”
- Click”Have something already set up?”
- Search for & choose Energizer® Connect.
- Authorize your account with the Google Assistant skill using the username and password from your EnergizecConnect app.
- Using the name you assigned your plug, you can ask the Google Assistant to turn on/off your appliances. Ex:”Ok Google, turn on bedroom plug”.


Troubleshooting
If you need to reset or troubleshoot your Smart Plug, simply hold down the power/reset button for 5-10 seconds.Pairing Modes:EZ mode: The device’s light is rapidly blinking for an easy, quick pairing setup. AP Mode: Access Point mode is a secondary setup process in which the device’s indicator light is slowly blinking and requires multiple steps for pairing. Follow the on-screen step-by-step instructions.
FCC Compliance
This device complies with Part 15 of the FCC. Operation is subject to the following two conditions: (1) this device may not cause harmful interference, and (2) this device must accept any interference received, including interference that may cause undesired operation. Changes or modifications not expressly approved by the party responsible for compliance could void the user’s authority to operate the equipment. This equipment has been tested and found to comply with the limits for a Class B digital device, pursuant to part 15 of the FCC Rules. These limits are designed to provide reasonable protection against harmful interference in a residential installation. This equipment generates uses and can radiate radio frequency energy and, if not installed and used in accordance with the instructions, may cause harmful interference to radio communications. However, there is no guarantee that interference will not occur in a particular installation. If this equipment does cause harmful interference to radio or television reception, which can be determined by turning the equipment off and on, the user is encouraged to try to correct the interference by one or more of the following measures: —Reorient or relocate the receiving antenna.—Increase the separation between the equipment and receiver.—Connect the equipment into an outlet on a circuit different from that to which the receiver is connected.—Consult the dealer or an experienced radio/TV technician for help.
RF Exposure StatementTo satisfy FCC’s RF exposure requirements, a separation distance of 20 cm or more should be maintained between the antenna of this device and persons during device operation. To ensure compliance, operations closer than this distance is not recommended.
[xyz-ips snippet=”download-snippet”]