![]() How to Configure an EnGenius DuraFonSIP System with ONSIP Sip Service.
How to Configure an EnGenius DuraFonSIP System with ONSIP Sip Service.
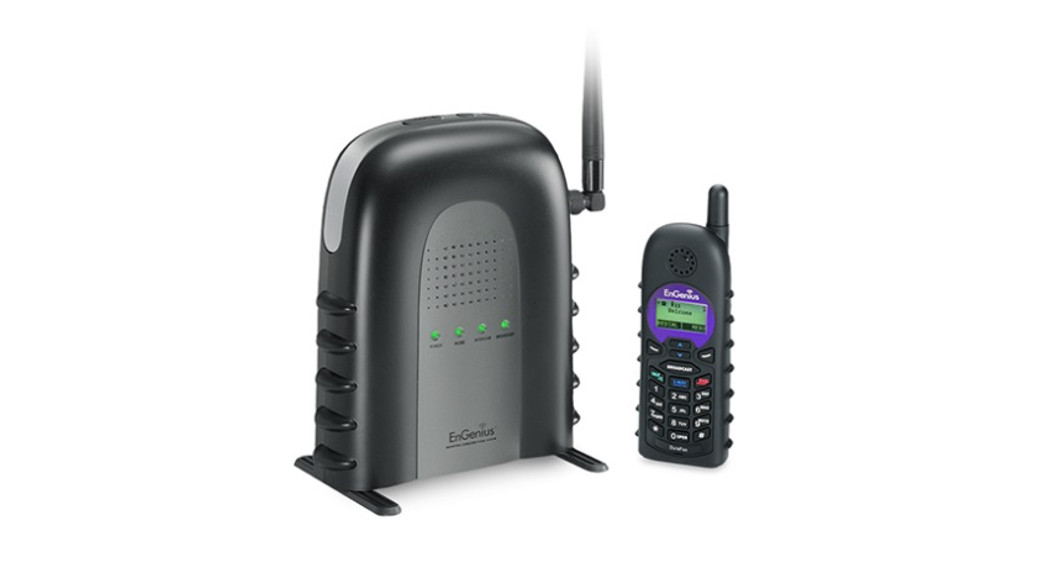
First, you will need the following Hardware Equipment.
- EnGenius DuraFon SIP System

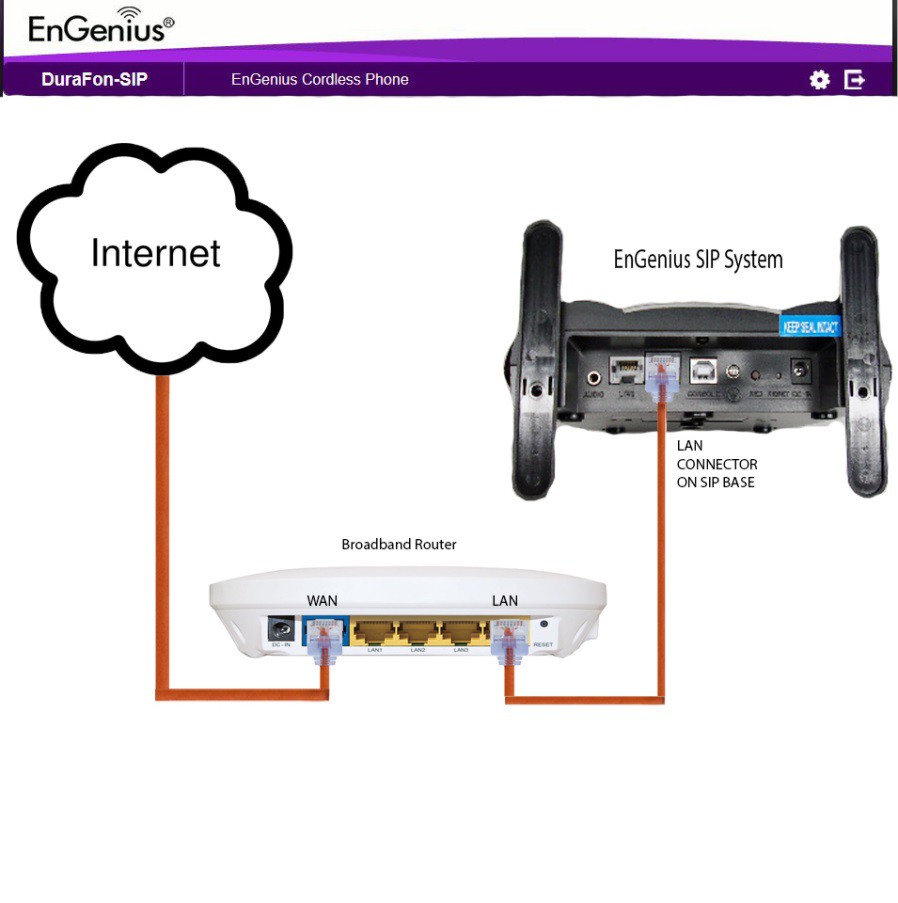
- Broadband Router with Internet AccessOnce everything is set up and connected, you are ready to set up the SIP Service.
Logging into SIP Base unit Gui
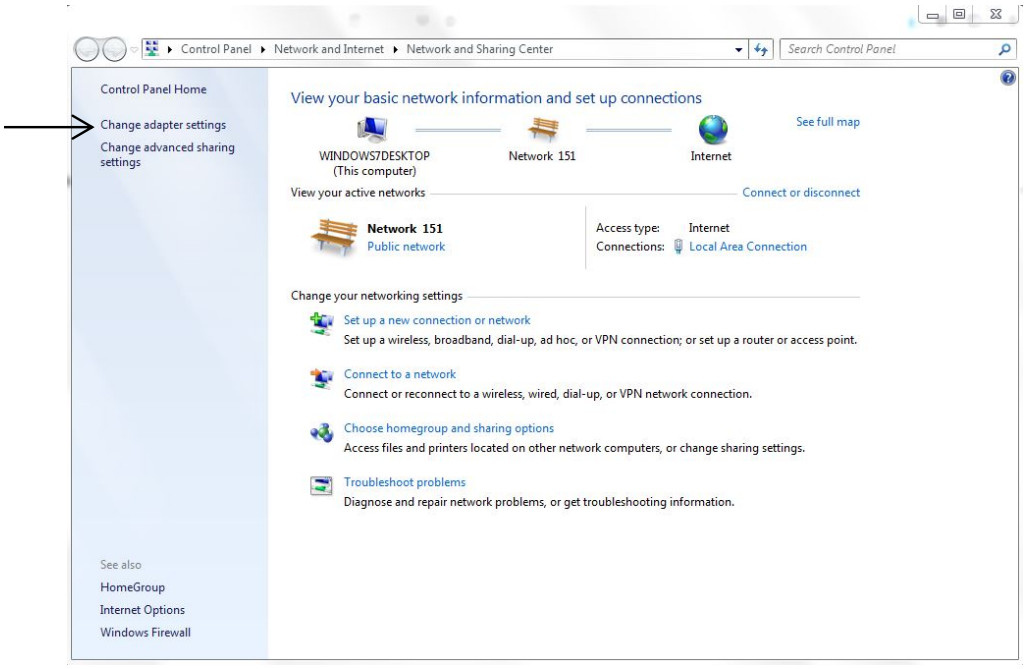
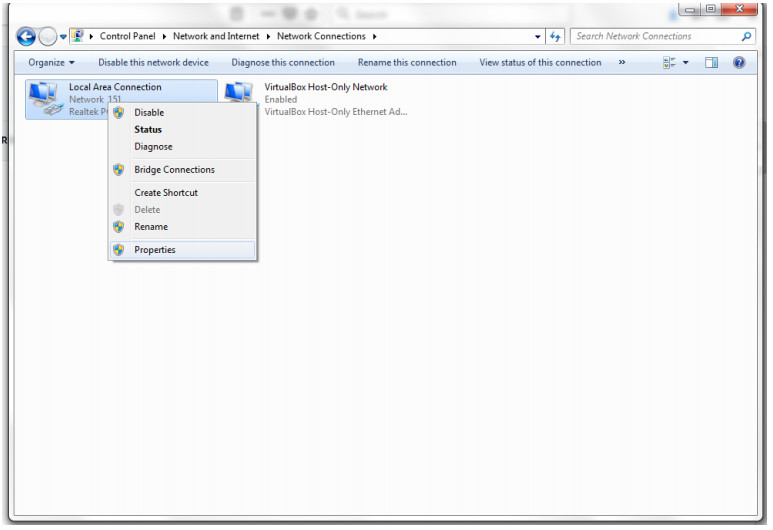
FIRST, you will need to change the LAN settings on the computer that is going to be used to set up the SIP Base Station.
- Go to the Network and Sharing Center and click on “Change adapter settings”
- Right-click on Local Area Connection and go to Properties
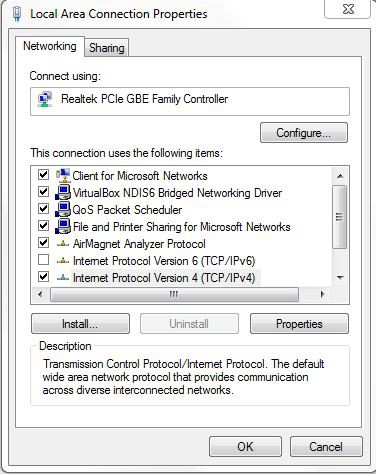
- Select the internet protocol version 4 (TCP/IPv4)
- Select: Use the following IP address (also known as a static IP address)
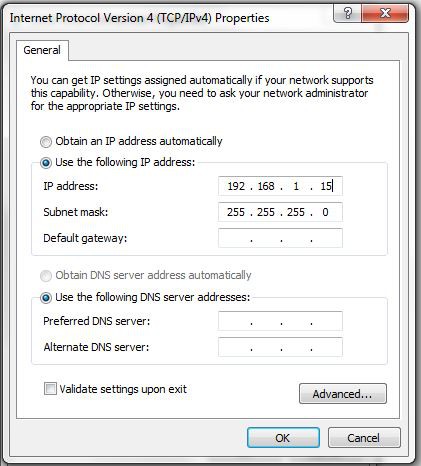
Input: 192.168.1.15 for the IP address and 255.255.255.0 for the subnet mask and press OK.
You are now ready to configure the EnGenius DuraFon SIP System.
Registration of Handsets
Before setting the SIP configuration, the available handset(s) of the DuraFon-SIP must register to the base.
Register Handset:
- Press and hold the register key on the base until the “INTERCOM” LED changes to a flashing status. The base can perform the handset registration while the LED is flashing.
- On the handset, enter “MENU, 7,1” to enter the registration.
- The assigned ID (from 10 to 19) will be displayed on the handset LCD, indicating successful registration.
- Repeat the above steps for all additional handsets.
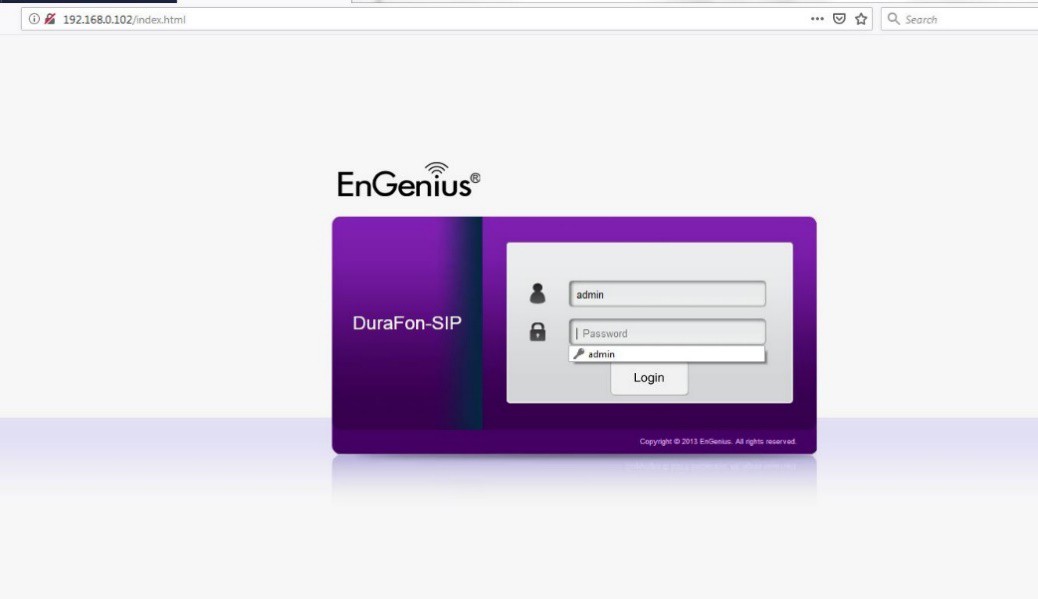
Once you have successfully registered your handsets to the base unit, you can now go ahead and log in to the SIP Base Unit Go to any of your preferred Internet Browser (Internet Explorer/Firefox/Safari/Chrome) and enter the IP Address: 192.168.1.156
Once prompted to the EnGenius DuraFon SIP Log in page type:Username: adminPassword: admin
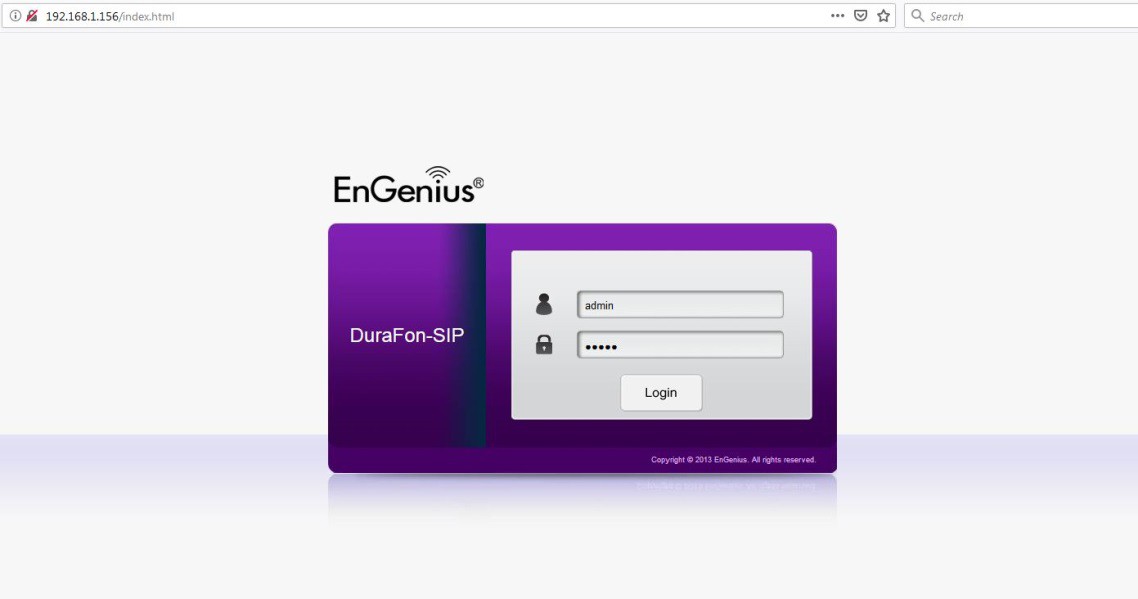 Once you have entered the correct username and password, click the Login button to open the web-based configuration page.

Go to the LAN Tab settings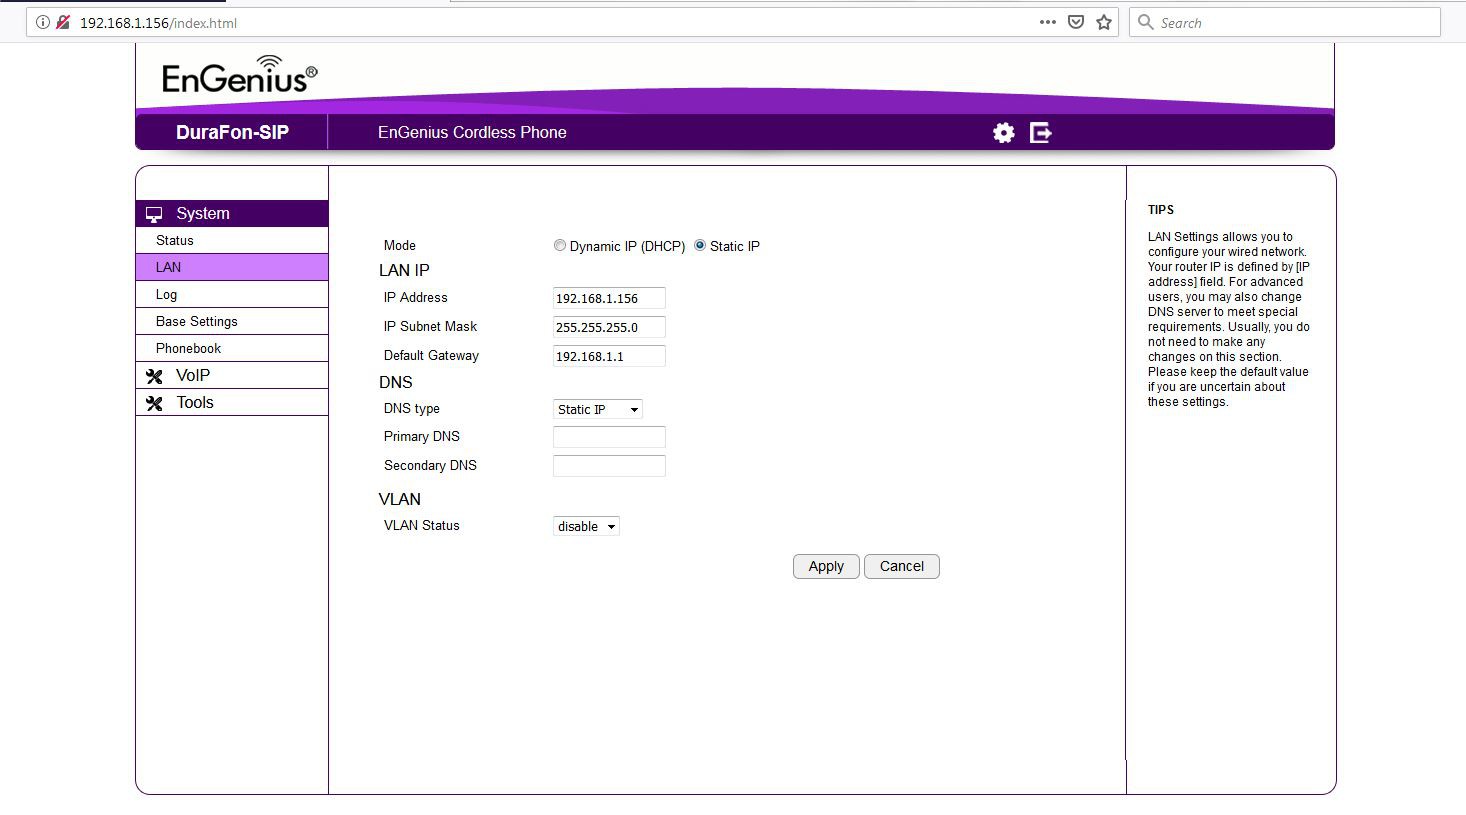 As shown, its default setting is on the Static IP address.It is recommended to set the LAN in DHCP mode
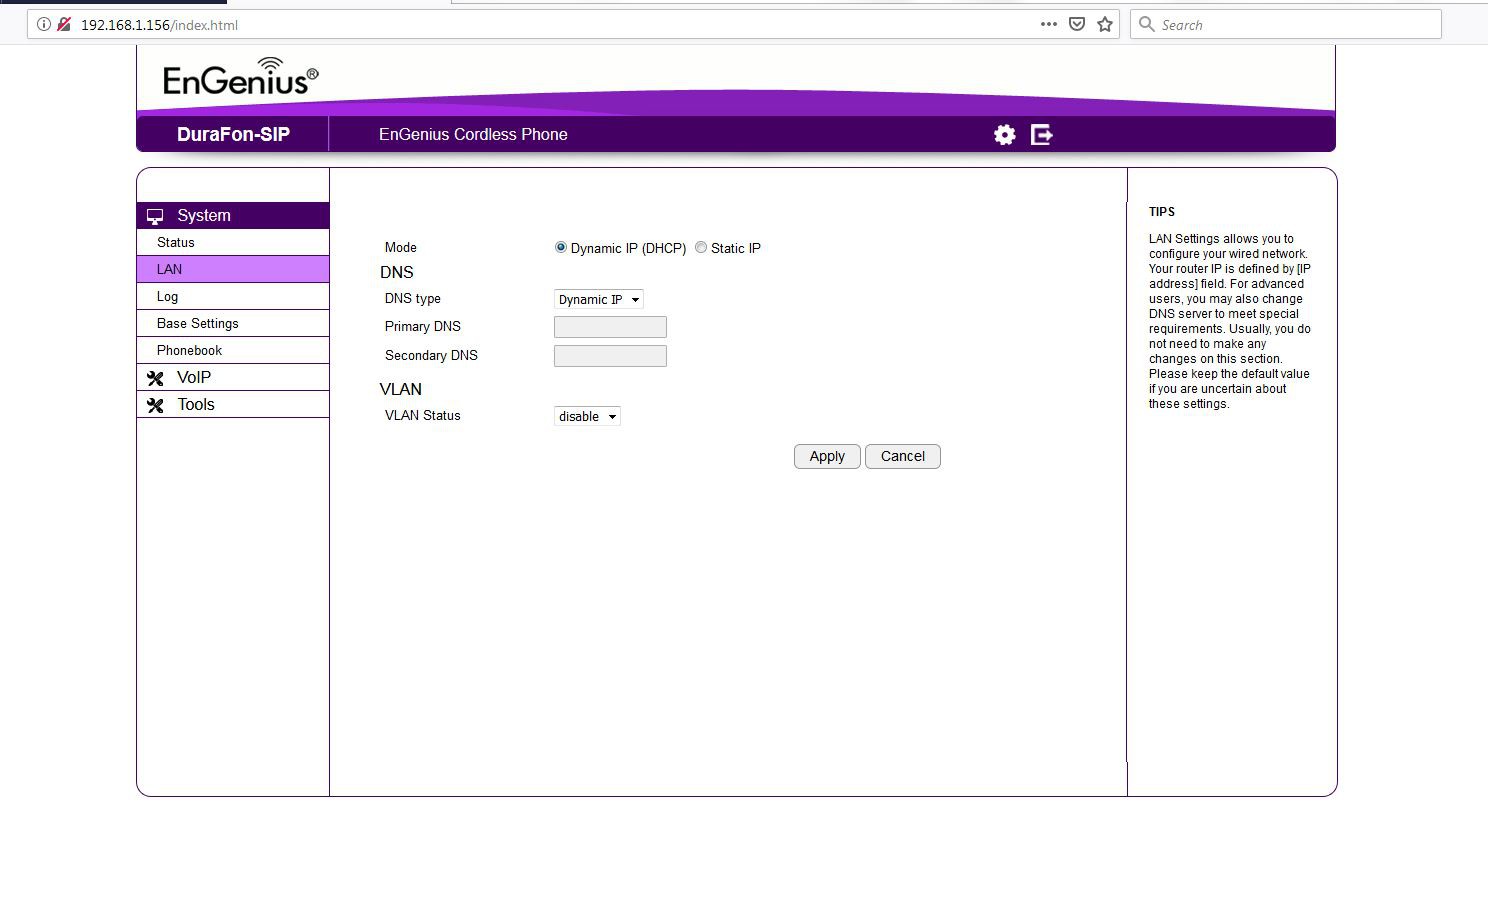 Once you click apply, it will reboot the device for 39 seconds
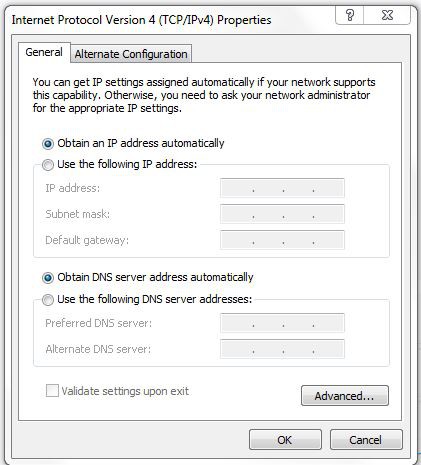
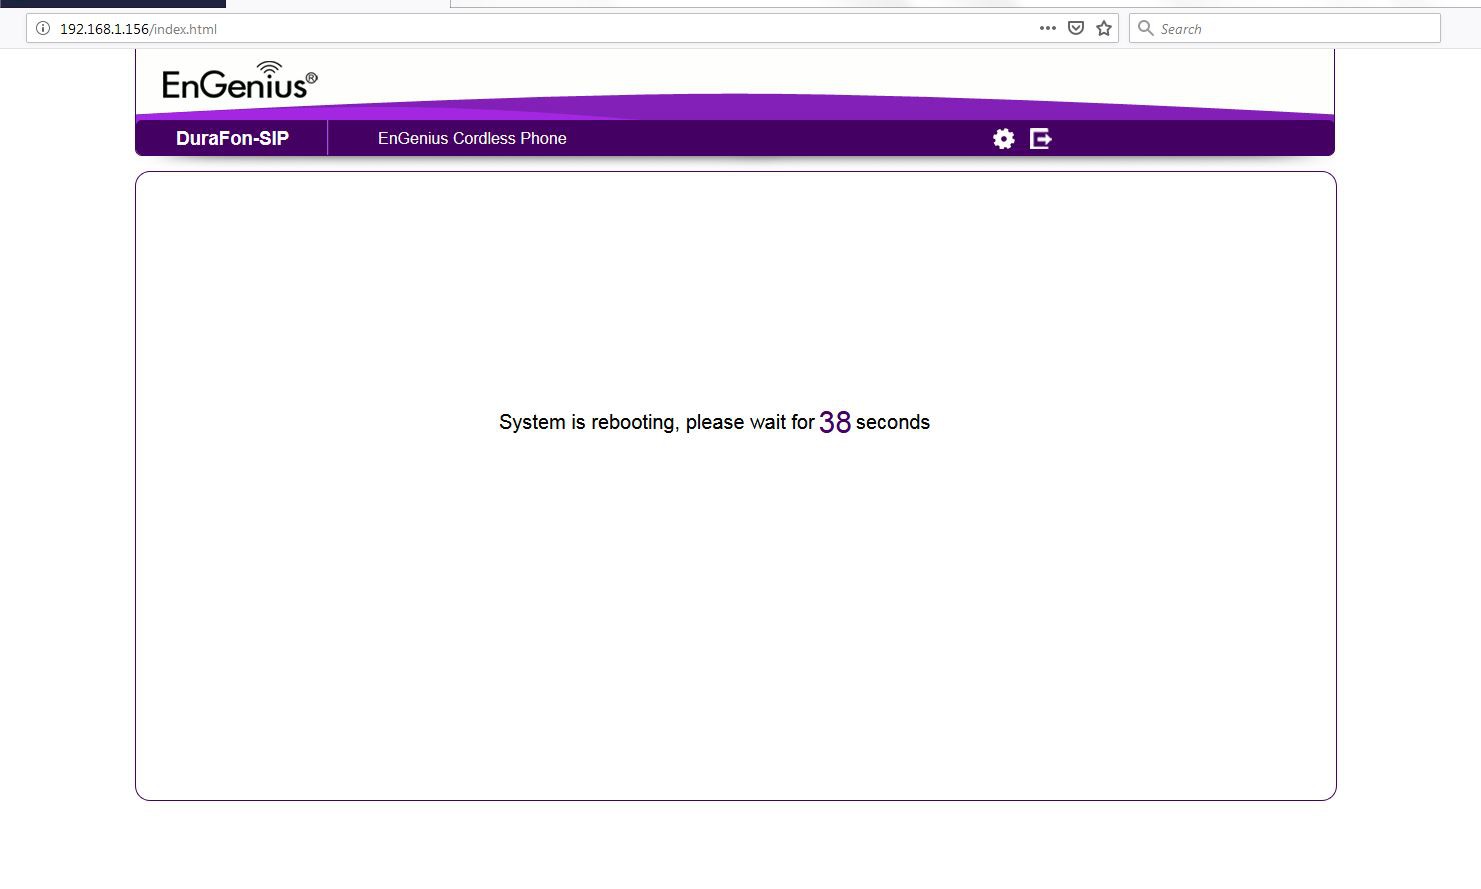 Note: When you change the LAN IP to DHCP, once you click Apply, the change will take effect. You will need to revise your new IP Address from the DHCP Clients on your network.Go back to the TCP/IP properties tab and select– Obtain an IP address automatically– Obtain DNS server address automatically
With this step, you will be able to log in to your EnGenius DuraFon SIP base through DHCP.For demonstration purposes, we have used an example of an EnGenius Router, where it showed us the DHCP Client list and our new DHCP IP address to access the Durafon SIP base unit.
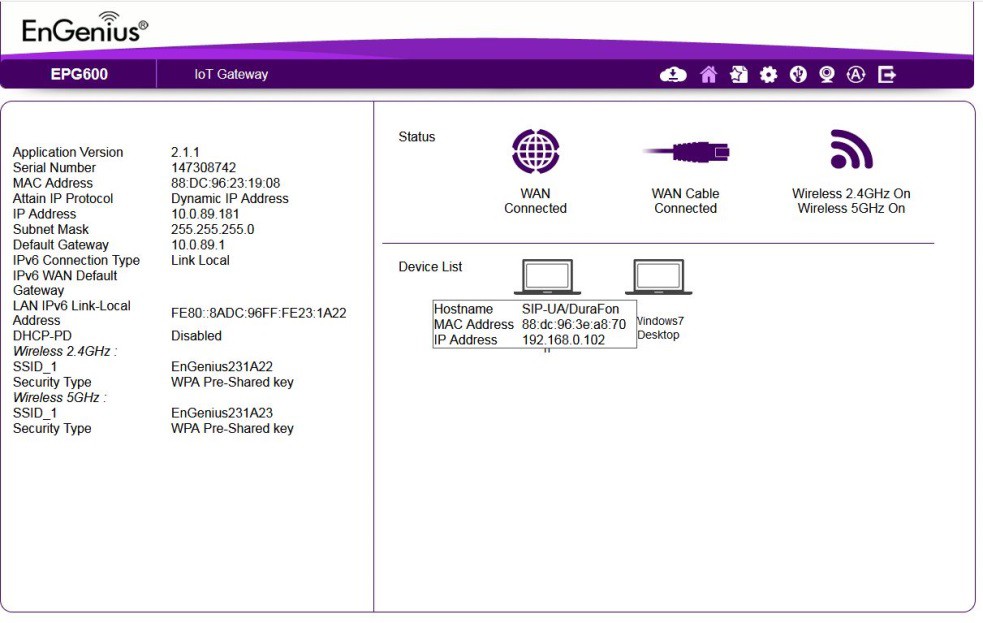 Once obtained the new IP address, we can log in and continue with our setup.
Once you are on the main menu, click on the VoIP Tab and click on the Basic Tab.
 In this section, is where you will need to set up your SIP Account Service information, in this case, we will be using our ONSIP Service. *The key information needed to establish a connection with the OnSip Service are the following:
VoIP Server IP: engenius.onsip.comVoIP Server Port: 5060Local Sip Port: 5060SIP Outbound Proxy: sip.onsip.comSIP Outbound Proxy Port: 5060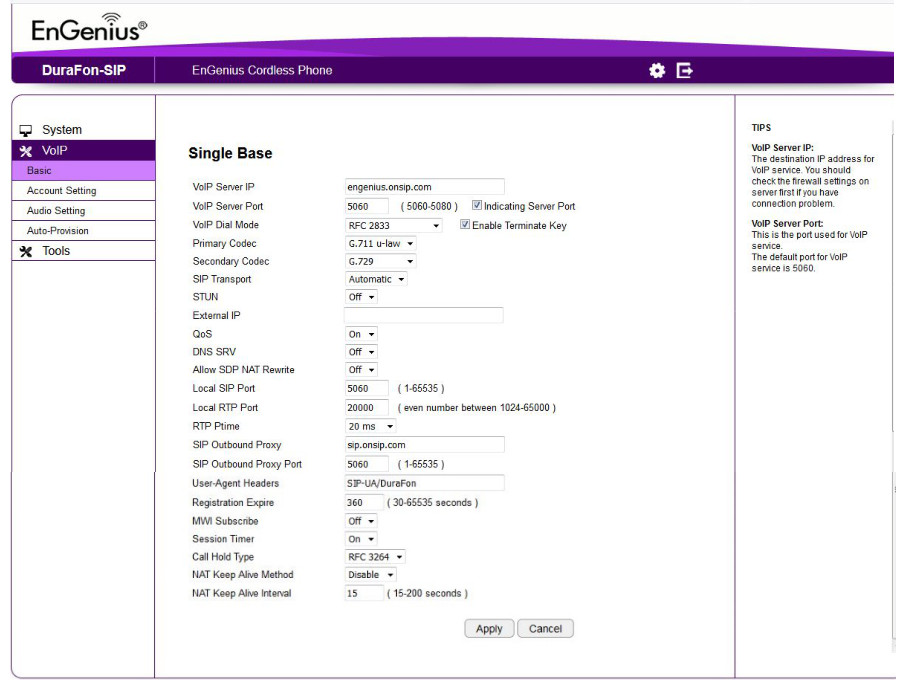
*Everything else stays default, unless requires by the VoIP service providerOnce you have entered the correct information, you can press APPLY.*Please note that the information used in this section is for demonstration purposes, you will need to have a SIP Account Service Provider (In this case we used OnSIP Hosted PBX) or a SIP server to set this up.
Now Go to the Account Setting Tab.
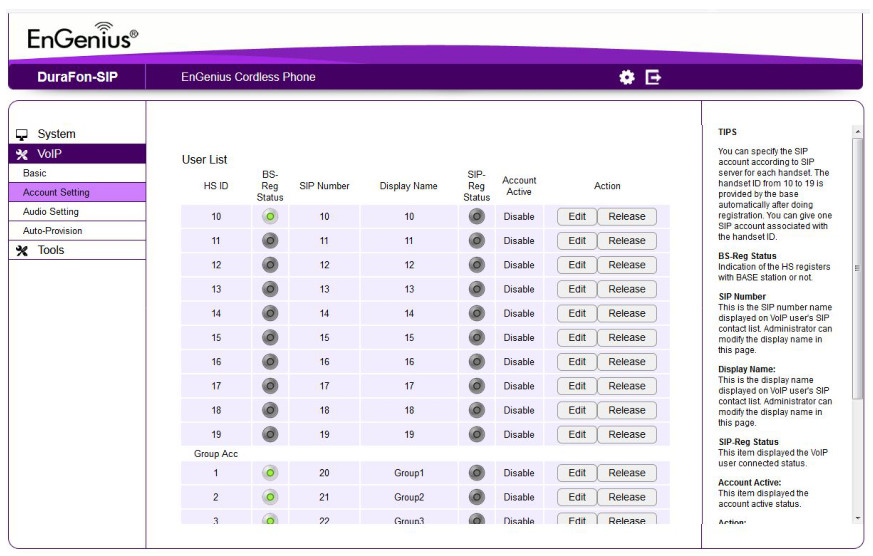
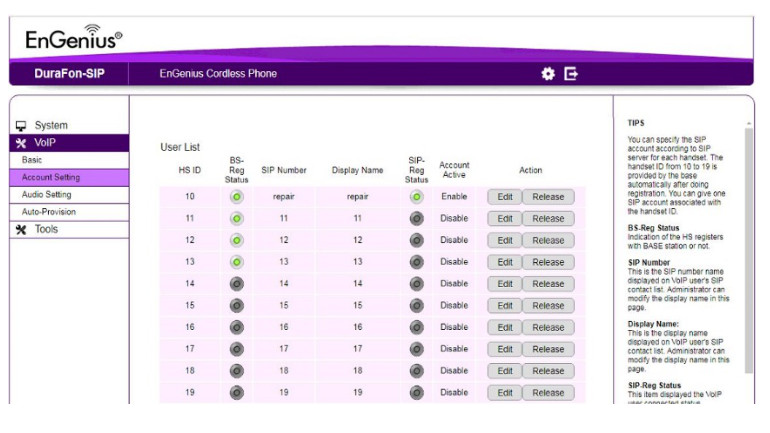
In this section, is where your SIP Account Users (Extensions) will need to be registered.Up to 10 Sip Accounts can be registered on an EnGenius DuraFon SIP Base Unit.*By default, all accounts are disabled, as you add accounts, you will need to enable them as you go.
Please follow the following steps to add SIP Accounts.
- Press the edit tab under the “Action menu”.
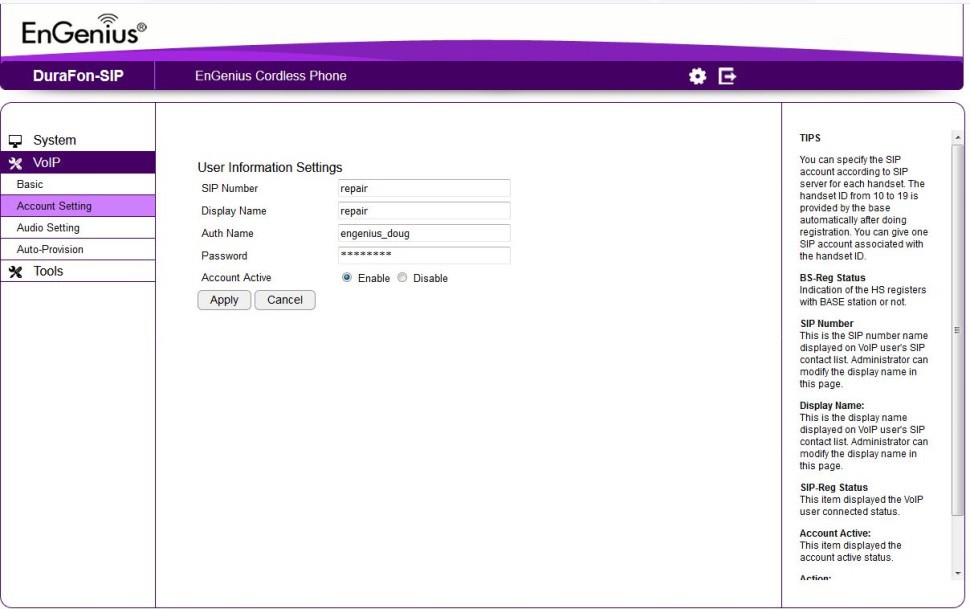
- Once you are in the user information settings, the fields that need to be filled are the following”
.
- SIP Number: In this field, you will type in your “Username” given by the On Sip service provider.
- Display Name: In this field, you can input any name you wish; this will be like the caller id name it will show on the recipient’s phone screen.
- Auth Name: In this field, is where you input the Auth Username given by the SIP Provider.
- Password: In this field, you will input the password supplied by the SIP Service, In this case the SIP PASSWORD on your OnSIP Account.
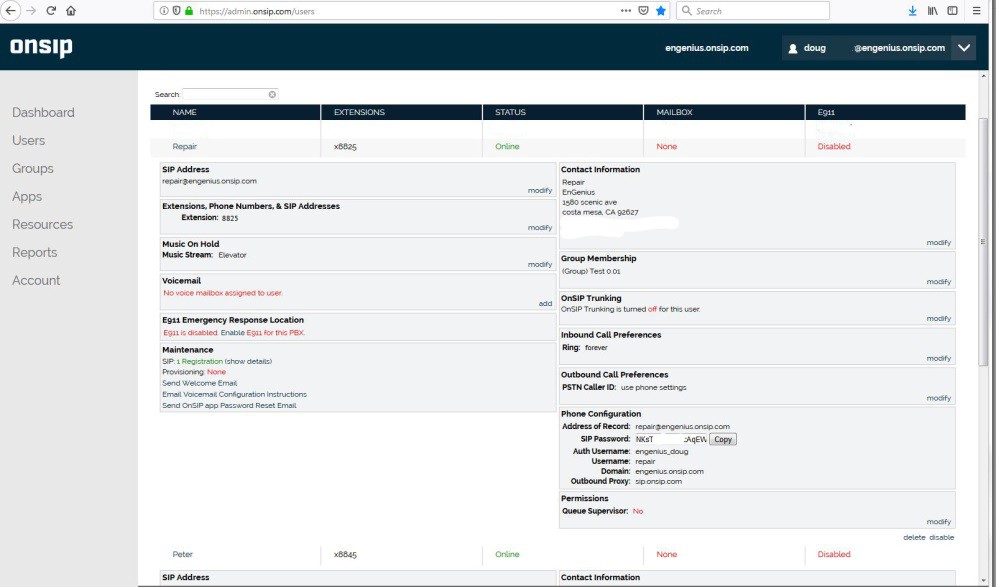
I the window below, it shows the OnSIP account information setting.
Once you have inputted the correct Login information press Apply If you successfully inputted the information, you should get a green light on “SIP- Reg Status”. This indicates that the account is active.
 Scroll Down and Press “APPLY” to save all changes.
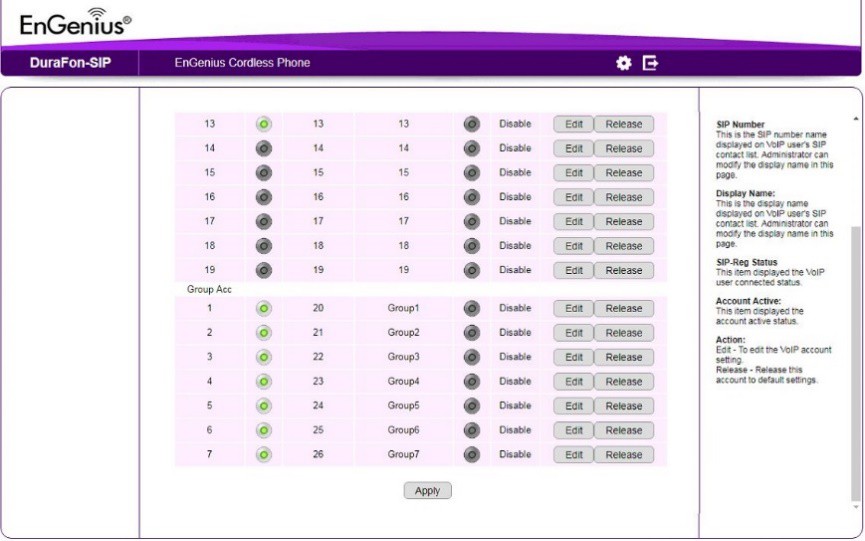
You have successfully registered a SIP account, if you need to add more Sip Accounts extensions, follow the steps.
References
[xyz-ips snippet=”download-snippet”]