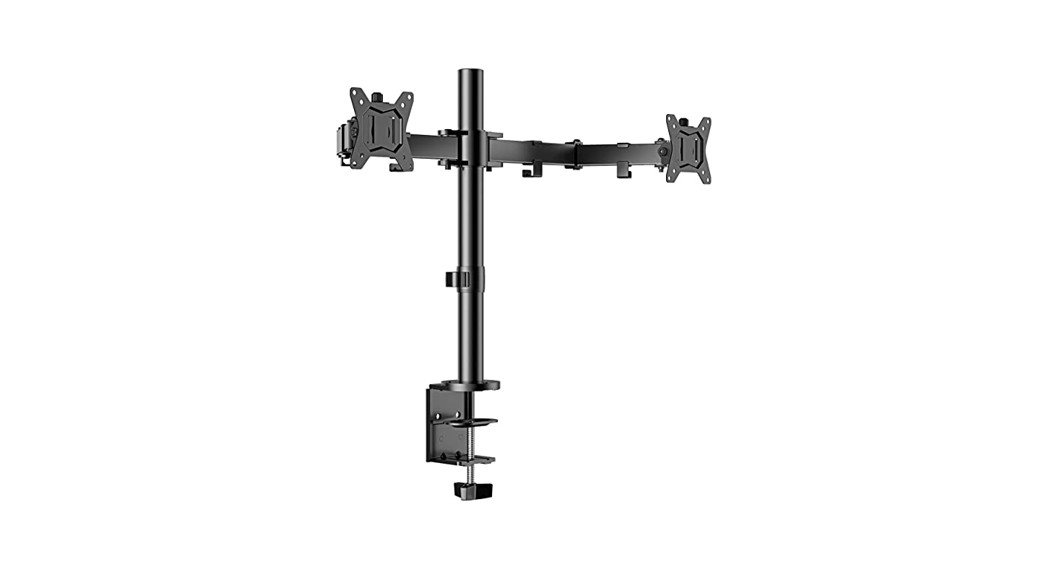
![]() Monitor TableStand Instruction Manualv1.0
Monitor TableStand Instruction Manualv1.0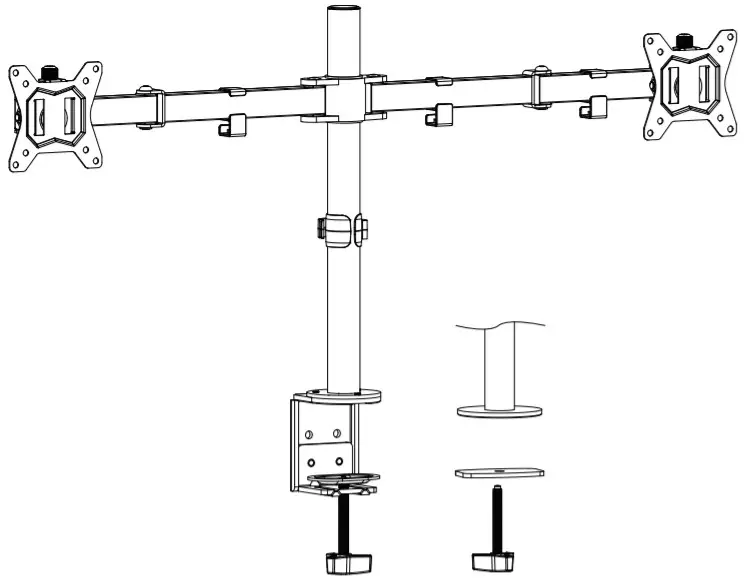 Model:EGCM1
Thank you for choosing this Ergear product! At Gear, we strive to provide you with the best quality products and services in the industry. Should youhave any issues, please don’t hesitate to contact us at [email protected].(US/CA/DE/UK/FR/IT/ES/AU) メール:[email protected]
UNPACKING INSTRUCTIONS AND IMPORTANT SAFETY INFORMATION
- Carefully open the carton, remove contents, and layout on cardboard or another protective surface to avoid damage.
- Check package contents against the Supplied Parts and Hardware List to assure that all components were received undamaged. Do not use damaged or defective parts.
- Not all parts and hardware included will be used. if you require replacement parts, contact customer service at [email protected]
- Carefully read all instructions before attempting installation.
- If you do not understand the instructions or have any concerns or questions, please contact customer service at [email protected]
- This product may contain moving parts. Use with caution.
- Do not use this product for any purpose or in any configuration not explicitly specified in this instruction. We hereby disclaim any liability for injury or damage arising from incorrect assembly, incorrect mounting, or incorrect use of this product.
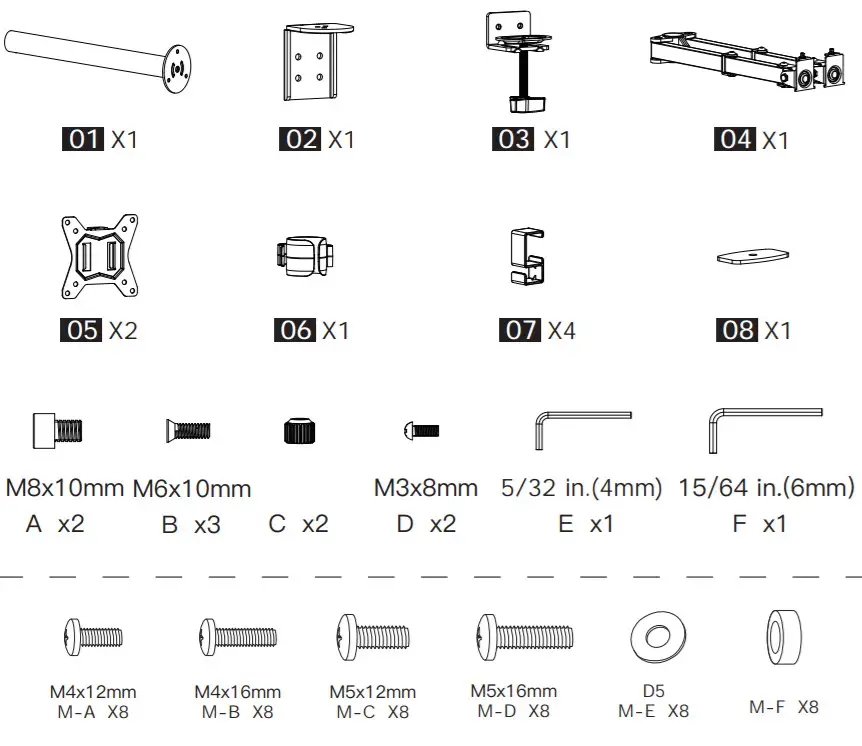
Supplied Parts and Hardware
STEP 1A For C Clamp Mounting
STEP 1A-1 Install part [02] to pole [01]

STEP 1A-2 Adjust the amount according to the thickness of desktop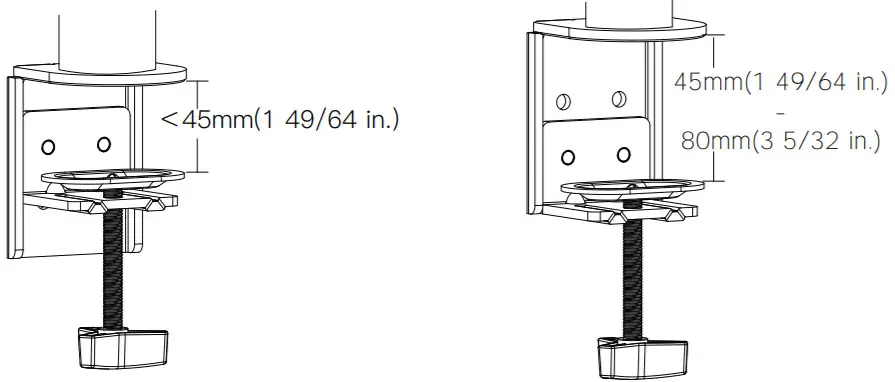
STEP 1A-3 Install part [03] to part [02]
STEP 1A-4 Secure the mount to the desktop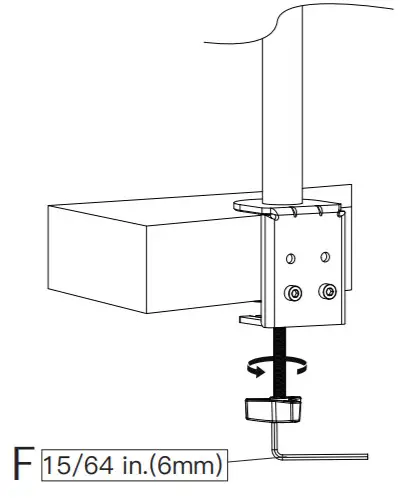
STEP 1B For Grommet Mounting
STEP 1B-1 Remove part [a] from part [03] STEP 1B-2 Secure the mount to desktop
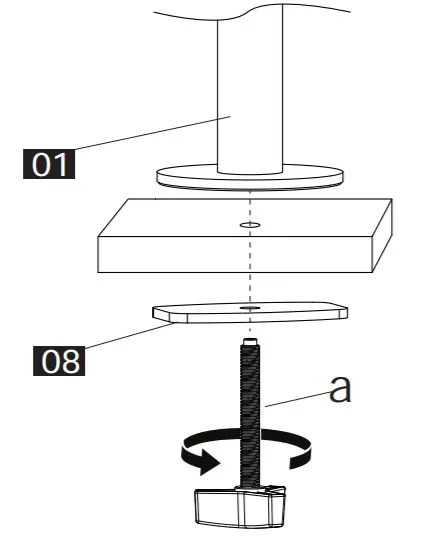
STEP 2 Install Cable Clips [06] [07] & Monitor Connector [04] to Pole [01]
STEP 2-1Slide the cable clip [06] and monitor connector [04] to the pole [01]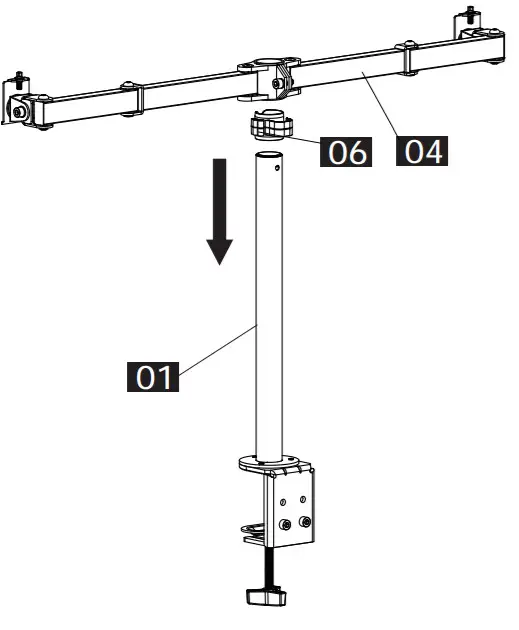 STEP 2-2 Secure monitor connector [04] to the pole [01] then attach the cable clips [07] to the monitor connector [04]
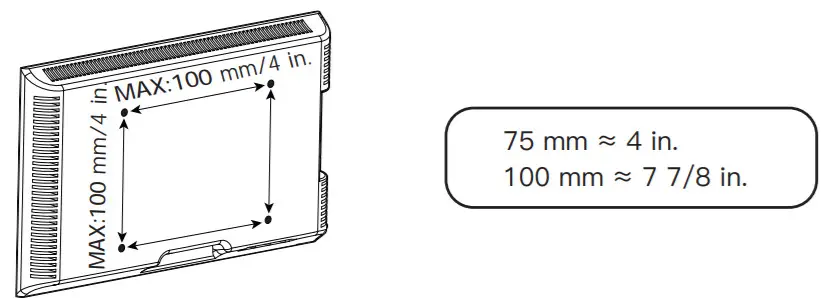
STEP 3 Check Monitor Hole Pattern and Select Monitor Bolts
 |
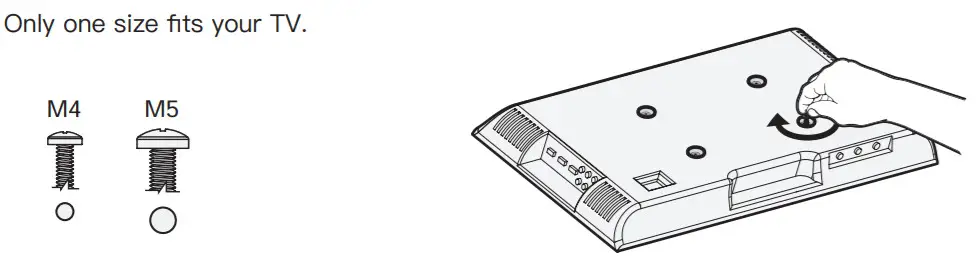 |
Bolt length: Verify adequate thread engagement with bolts or bolts/spacers combination. We recommend thread engagement by at least 5 turns.-Too short will not hold the monitor.-Too long will damage the monitor.

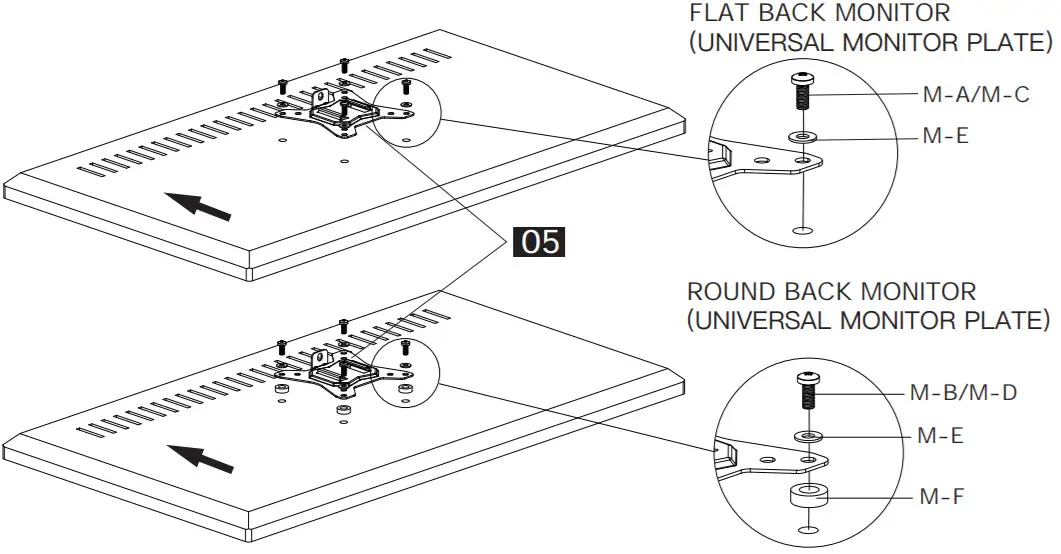
STEP 4 Attach the Monitor Plates [05] to the Monitors
STEP 5Hang Monitors to the Stand and Secure with Knob [C] and Bolts [D]
STEP 6 Fix Tilt Angle of the Monitors
STEP 7 Manage Cables
STEP 8 Store Allen Keys into the Cable Clip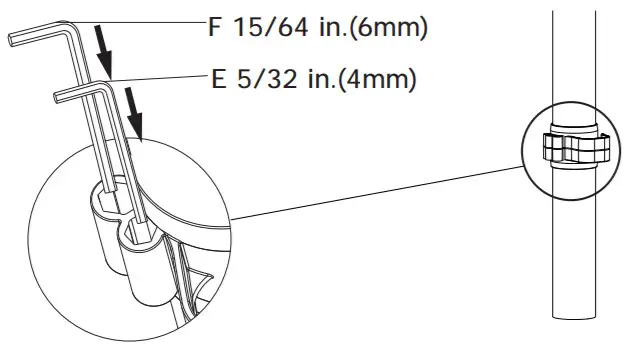
Features

Individual VESA plate height adjustment helps monitors to be perfectly aligned.
Thank you again forchoosing this Ergear product!
All of us at Ergear do appreciate your product purchase. We hope thatyou are as happy with your product as we are designing andmanufacturing it for you. We strive to provide you with the best qualityproducts and services in the industry. Should you have any issues,please don’t hesitate to contact us at[email protected] (US/CA/DE/UK/FR/IT/ES/AU)
[xyz-ips snippet=”download-snippet”]