![]() Matrix Mixer User Manual
Matrix Mixer User Manual
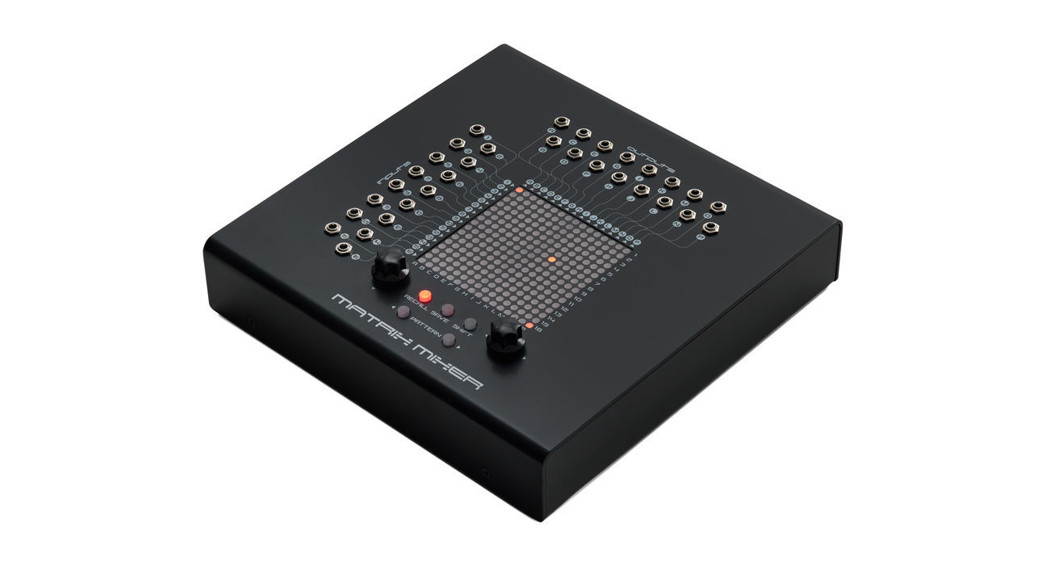
THANK YOU FOR PURCHASING THE ERICA SYNTHS MATRIX MIXER!As Eurorack users may know, it can be challenging to change a patch radically during a performance, therefore diverse performances require large systems or they end up being extremely experimental. But what if you could repatch your system with the push of a single button? The Erica Synths Matrix Mixer is a 16 – input, 16 – output desktop patch matrix – it can route and mix signals with high precision, create buffered multiples and random patches. It can also interface external instruments with your Eurorack system, and – it’s not limited to Eurorack! You can use the Matrix Mixer with semi-modular synthesizers, as well as through adapter cards with the EMS Synthi and Buchla Music Easel. Thanks to simple patch changes via panel buttons or MIDI program change messages, the Matrix Mixer will be particularly useful in performances that combine Eurorack and other performance instruments, such as drums, guitars, wind instruments, etc. Make your modular performance stand out and enjoy the Matrix Mixer!
FEATURES
16 buffered, DC-coupled inputs16 independent, buffered, DC-coupled outputs256 connections, each with 3 attenuation levels “Piano” modeRandom pattern mode with definable randomization area and density254 pattern memoryPattern change via MIDI program change messages32 3,5mm jack sockets4 6,3mm jack sockets
SPECS:
| Audio level | 10Vptp |
| Attenuation level | 1, 0.7, 0.3 |
| Power supply | 12VDC (a universal AC/DC |
| Size of the instrument | 225 x 226 x 44mm |
| Net mass | 1.25kg |
| Size of the packaging | 315x295x95 |
| Mass with the packaging |
SAFETY INSTRUCTIONS
Please follow the instructions for the use of the Erica Synths Matrix Mixer below, because only this will guarantee the proper operation of the module and ensure the warranty from Erica Synths.![]() Use the Matrix Mixer exclusively with the power supply unit (PSU) supplied with the system. Powering it with other PSU units may cause permanent damage to the device.
Use the Matrix Mixer exclusively with the power supply unit (PSU) supplied with the system. Powering it with other PSU units may cause permanent damage to the device.![]() Water is lethal for most electric devices unless they have been rendered waterproof. The Matrix Mixer is NOT intended for use in a humid or wet environment. No liquids or other conducting substances should be allowed into the module. Should this happen, the module should be disconnected from mains power immediately, dried, examined, and cleaned by a qualified technician.
Water is lethal for most electric devices unless they have been rendered waterproof. The Matrix Mixer is NOT intended for use in a humid or wet environment. No liquids or other conducting substances should be allowed into the module. Should this happen, the module should be disconnected from mains power immediately, dried, examined, and cleaned by a qualified technician.![]() Do not expose the instrument to temperatures above +50° C or below -20° C. If you have transported the instrument in extremely low temperatures, leave it at room temperature for an hour before plugging it in.
Do not expose the instrument to temperatures above +50° C or below -20° C. If you have transported the instrument in extremely low temperatures, leave it at room temperature for an hour before plugging it in.![]() Transport the instrument carefully. Never let it drop or fall over. The Warranty does not apply to instruments with visual damage.
Transport the instrument carefully. Never let it drop or fall over. The Warranty does not apply to instruments with visual damage.
You will find the Erica Synths terms of warranty at www. erica synths.lvItems for return, exchange, and/or warranty repair should be sent to us according to the guidelines support section on www. erica synths.lv
 Matrix Mixer must be shipped in the original packaging only. Any instrument shipped to us for return, exchange, and/or warranty repair must be in its original packaging. All other deliveries will be rejected and returned to you. Ensure that you keep the original packaging and technical documentation.
DISPOSAL
This device complies with EU guidelines and is manufactured and confronts RoHS without the use of lead, mercury, cadmium or chrome. Nevertheless, this device is special waste and disposal in household waste is not recommended.User manual by Girts Synths. Design by Ineta Copying, distribution or any commercial use in any way is prohibited and needs the written permission of Erica Synths.The specifications are subject to change without notice.If you have any questions, feel free to contact us on the SUPPORT section on www.ericasynths.lv
Erica SynthsAndrejostas St. 43Riga, LatviaLV-1045
Power the Matrix Mixer exclusively with the external PSU, supplied with the instrument. Using other power supply units may permanently damage the instrument.
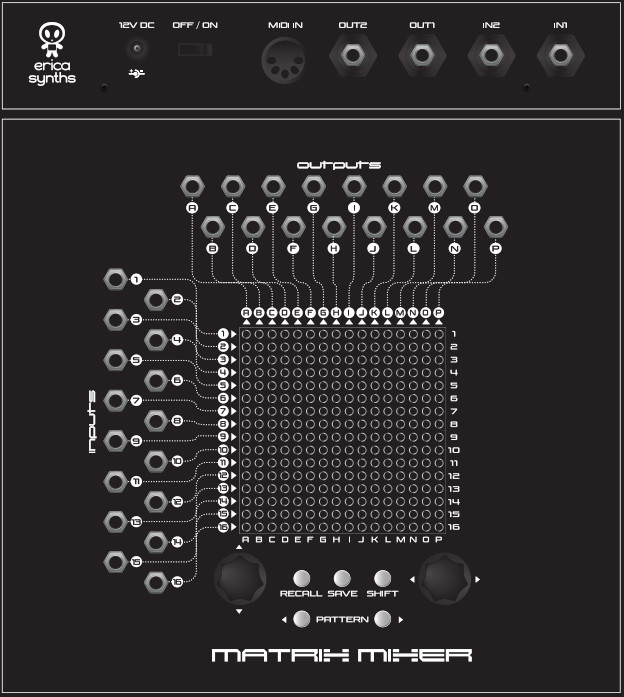
Use standard 3,5mm Eurorack patch cables to connect modules or instruments to the matrix. The matrix is unidirectional, meaning, the signal will pass from the Inputs on the left to the Outputs on top. You can send a signal from one input to several outputs simultaneously and likewise – you can mix several inputs to one output.On the back of the Matrix Mixer, you’ll find two 6,3mm input and two 6,3mm output sockets. These duplicate Input 1, Input 2, Output A and Output B, respectively. The 3,5mm sockets are prioritized– if something is patched in a 3,5mm socket, the 6,3mm one is automatically disconnected.The PATCH MATRIX has 256 possible patch points, each with three levels of attenuation, and it has a memory of 254 patches.CONFIGURATION SETTINGS.Push and hold the SHIFT button and push both PATTERN buttons simultaneously to access the configuration settings. Thereare four configuration options, each represented on the top four rows. Use the encoders to navigate a blinking patch pointthrough the settings and push the left encoder to confirm a selection.
- The first row represents a MIDI channel for patch changes. The leftmost point (column A on the matrix) represents MIDI channel 1, column B – channel 2, etc.
- The second row sets randomization “density” – how many connections appear simultaneously when the Random mode is selected. A patch point in column A represents 5% density (~5% of all patch points are activated in the random patch), and each next column adds another 5% density. Column P represents 80% density. We think more density in a random patch doesn’t make sense.
- You might want to randomize a specific area of the matrix (X columns by Y rows), while another part of the matrix remains unaltered by randomization, therefore a user-defined randomization area is implemented. The top left corner (patch point A1) is the reference point and the third row in the configuration settings sets the number of columns for the randomization area.
- The fourth row sets the number of rows in the randomization area.
TO BUILD A PATCH, navigate the matrix via the X and Y encoders and select a patch point. The left encoder allows you to make attenuated connections. Push the encoder to make a connection. The first push, makes a connection with a gain value of 1, the second – 0,7, the third – 0,3, and the fourth turns the connection off, and so on. The right encoder makes a connection with a gain value of 1 and pushing it a second time turns the connection off – basically, it works as a shortcut.
CONNECTION PREVIEW/LIVEperformance (the equivalent of making experimental sounds on the EMS Synthi by sticking a pin into the matrix and removing it) – navigate to the desired connection point, push and hold SHIFT and push either one of the encoders. While the encoder is pushed, the connection is active.RANDOM PATCHES.Push and hold the SHIFT button and push the right PATTERN button – the Matrix Mixer will generate a random patch based on randomization density and randomization area settings.SAVING PATCHES.Once you are happy with the patch, push the SAVE button, and access the “saved patches” view. Use the X/Y encoders to navigate to the desired position and push either one of the encoders to save the patch. NB! Top left and bottom right positions (half dimmed) are reserved, and you can’t access them. If you change your mind and do not want to save the patch, just push SAVE or SHIFT to exit to the patch building mode. The matrix automatically saves the last patch every 30” and after power cycling, it will remember the last active patch.RECALLING PATCHES.Push the RECALL button to access the “saved patches” mode. Use the encoders to navigate to one of the saved patches and push either one of the encoders to recall it.DELETING PATCHES.Push the SAVE button. Use the encoders to navigate to the patch you wish to delete. Push and hold RECALL for more than 5” and the LED with the patch name will turn off.INSTANT PATCH CHANGE.You can navigate through saved patches sequentially by pushing PATTERN buttons. This is particularly useful during performances when you need to change patches instantly.
PATCH CHANGE VIA MIDI.To change a patch via MIDI you need to send Program Change messages. Bank 1 Program 1 to 128 will change the patches 1 to 128 and Bank 2 program 1 to 128 will change the patches from 128 to 254. For example, if you want to access patch number 1 you need to send a “Bank 1, Program 1” MIDI message and if you want to access patch number 300 you need to send a “Bank 2, Program 44” MIDI message. NB! Take note that the first patch is located in the 1-B slot and the last patch is located in the 16-O slot because the 1-A and 16-P slots are reserved for displaying when you are in the Patch Recall screen!
References
[xyz-ips snippet=”download-snippet”]