Evolve 3 Holdings Pty Maestro-Ebook11 11.6 Inch 4G LTE NotebookUser Guide
Package contents
Product name: Maestro Ebook11Product Model numbers: Maestro-EBook11GBrand name: Evolve IIIPower adapter (100V-240V)X TMQuick guideImportant safety and legal informationRemove all components from the packaging and remove the packaging material, including the protective film. Check to ensure that the delivery is complete.If you find that there are missing or damaged components, contact customer service immediately.
Technical specifications
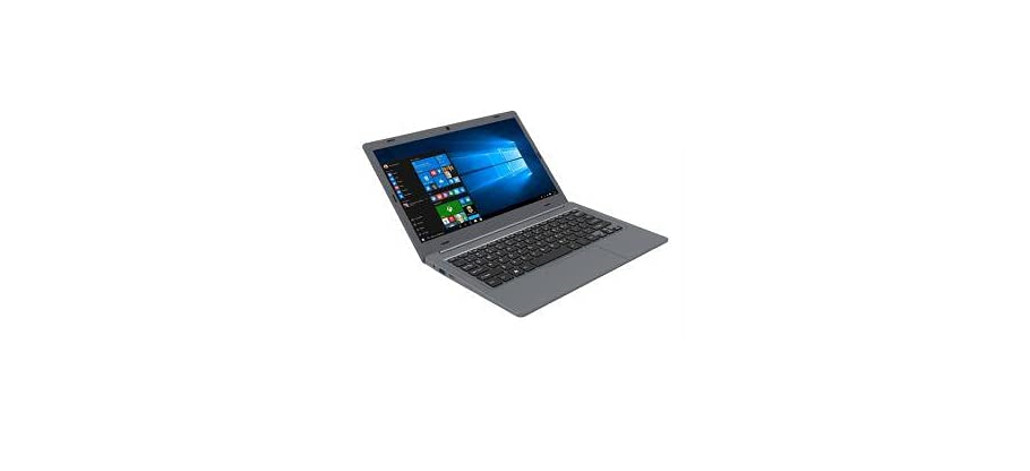
Processor (CPU): Intel® Celeron® N4120Processor (up to 2.2GHz) quad core*Operating system: Windows 10 ProRAM/Internal storage: 4GB/64GBGraphics unit (GPU): Intel® HD Graphics 600 (C)*Screen size: 11.6″Display: TN display (1366*768; 16:9)Camera: Front: 2MPInterfaces: 1x Mini-HDMI®, audio out/MIC in (3.5mm), 1x USB2.0, 1x USB3.0, Card slot: 1x TFcard slot , 1x SIM card slot.Network: WIFI 802.11 ac/b/g/n, Bluetooth 4.0More: Hall-Sensor, Analogue-microphone, Stereo speakerSize: 277mm x190.3 mm x17.8mmWeight: approx.1000gMaterial/Color: PC + ABSCool GreyBattery: Li-polymer (charging via PD adapter)
Operation and storage
Temperatures: between 5 to 30 Relative humidity: of 30% to 70%
Quick guide
Charging the NotebookPlease charge your Notebook fully before using it for the first time.Connect the DC plug on the supplied power adapter to the charging socket (PD adapter) on the Notebook.Then plug the power adapter into a socket. The charging LED lights up while the device is charging.Only leave the power adapter connected to the socket until the battery of the Notebook is fully charged. In addition, always disconnect the power adapter from the Notebook when you are not charging the Notebook.
Turning on the Notebook for the first time
Bring the screen upwards until it is standing at a minimum angle of 90° to the keyboard. Press the on/off switch for about 5 seconds to switch on the Notebook. The setup assistant will then appear on the screen.Follow the setup assistant instructions to set up your Notebook. During the start-up, the wizard prompts you to register for your Microsoft account. If you do not yet have a Microsoft account, please set up one here. After completion of the start-up, your Notebook is configured. This may take several minutes to complete. Do not turn off the Notebook during this time!
Unlocking the display
As soon as the device has been set up (and every time it is subsequently switched on and booted up), the lock screen appears, press any key on the keyboard to unlock the screen.If your Notebook is password-protected, you must then enter the password.
To display the start menu, click the Windows icon in the bottom left of the display or press the Windows button on the keyboard. Press the icon a second time to hide the Start menu.The Start menu consists of the classic navigation list (A) and a useful app area (B) to the right of the navigation list.Among other things, the navigation list includes a link to open Settings (cogwheel icon).In the app area, you can pin apps and favorites in the form of live tiles and organize them.In the navigation list (A) you find a list of all installed apps in alphabetical order. Alphabetic quick access to the navigation list appears when you click on a respective first letter.
The Action Center
The Info Center is a bar with quick links to some important Notebook functions, which you can either display or hide.To access the Info Center click the memo symbol in the bottom right-hand corner.
Activating WIFI and opening the browser
a. Call up Settings(see “Start menu”).b In the settings, click “Network & Internet”.c Click ” WiFi” on the left in the next screen.d Click the slider or the word “Off”. The word “On” now appears next to the slider. The Notebook searches for all available wireless networks nearby and then displays them as a list (“show available networks”).e Click the network that you wish to connect to.f Enter the network key (password) if necessary.g . Click “Connect”.
The Notebook connects to the selected network. The button for launching the Internet browser can be found on the taskbar at the bottom of the display. Click the little blue “e” to launch the browser. To enter an Internet address (URL), click the search bar displayed centrally at the top of the window.
Reset
If the Notebook “freezes” and no longer responds, you can reset it. Please and hold down then on/off switches off. Wait for about 20 seconds and then turn the Notebook on normally. Any files that have not been saved will be lost when the Notebook is reset. Switching off the Notebook Standby Briefly presses the on/off switch on the device to activate the standby mode. Press it again quickly to take the Notebook out of standby mode.
Shutting down
 report this ad
Open the Start menu. Click” in the bottom area of the Start menu and then tap “Shut down”. The Notebook shuts down.
Saving energy
Deactivate the WIFI function when it is not in use.Only leave the power adapter connected to the socket until the Notebook’s battery is fully charged. In addition, always disconnect the power adapter from the Notebook when you are not charging the Notebook. Reduce the display brightness under “System” Display” in the settings. Activate standby mode or turn off the Notebook completely if you are not using the Notebook.
General safety information
WARNINGRisk of multiple injuries due to reduced physical, sensory or mental capabilities and/or lack of knowledge or practical experience Children and vulnerable individuals may only use the device under direct supervision. Risk of electric shock or electrocution from live componentsDo not insert objects into the device’s ventilation slots.Do not open the power adapter.Do not touch the power adapter if your hands are wet.Do not short out the device and/or charger.Fire hazard andor risk of burns from damaged or leaking batteriesDo not use or charge the device if the battery is damaged or leaking.Do not use or charge the device if the battery is damaged or leaking.Avoid skin contact with the device and/or battery if the battery is leaking. Wear protective gloves if it is not possible to avoid touching the device/battery in such cases.Immediately wash your hands thoroughly in the event of skin contact with the battery substrate.If the battery substrate comes into contact with your eyes, rinse them out with plenty of water and consult a physician immediately.Risk of fire or explosion when using non-approved chargers and power adaptersOnly use the included power adapter or an equivalent power adapter to charge the battery.If the power adapter is defective, only exchange it for an equivalent power adapter. Please note the information in the technical specifications of the power adapter in the online user’s manual or contact customer service.Risk of multiple injuries from slipping, tripping, or fallingDo not expose the device and/or power adapter to vibrations and/or any form of impact.Do not drop the device and/or power adapter. Do not use the device/power adapter if it has been dropped and/or is damaged. Have a qualified service technician check the device/power adapter before restarting it.Always ensure that the power cord is installed securely.Do not allow the power cord to knot or kink.Notes and practical tips on maintenance and repairsWARNINGRisk of electric shock and electrocution from live componentsNever open the casing of the device and/or the power adapter. No parts inside the device require maintenance or cleaning.The battery in the device should not be removed by the user. Do not disassemble the battery, place objects into it or handle liquids near it. The battery could catch fire or explode.It is prohibited to repair or modify the device and/or power adapter. Failure to comply with these instructions may void the warranty.The device should only be serviced and repaired by a qualified service technician. Contact customer service where repairs pr servicing are required.IC Caution:
RSS-Gen Issue 4 December 2014″&”CNR-Gen 4e Décembre 2014:This device complies with Industry Canada licence-exempt RSS standard(s). Operation is subject to the following two conditions: (1) This device may not cause interference, and (2) This device must accept any interference, including interference that may cause undesired operation of the device.FCC Caution:Any changes or modifications not expressly approved by the party responsible for compliance could void the user’s authority to operate the equipment.This device complies with part 15 of the FCC Rules. Operation is subject to the following two conditions: (1) This device may not cause harmful interference, and (2) this device must accept any interference received, including interference that may cause undesired operation.IMPORTANT NOTE:Note: This equipment has been tested and found to comply with the limits for a Class B digital device, pursuant to part 15 of the FCC Rules. These limits are designed to provide reasonable protection against harmful interference in a residential installation. This equipment generates, uses, and can radiate radio frequency energy and, if not installed and used in accordance with the instructions, may cause harmful interference to radio communications. However, there is no guarantee that interference will not occur in a particular installation. If this equipment does cause harmful interference to radio or television reception, which can be determined by turning the equipment off and on, the user is encouraged to try to correct the interference by one or more of the following measures:
- Reorient or relocate the receiving antenna.
- Increase the separation between the equipment and receiver.
- Connect the equipment into an outlet on a circuit different from that to which the receiver is connected.
- Consult the dealer or an experienced radio/TV technician for help.
Exposure Statement:SAR tests are conducted using standard operating positions accepted by the FCC with the device transmitting at its highest certified power level in all tested frequency bands, although the SAR is determined at the highest certified power level, the actual SAR level of the device while operating can be well below the maximum value, in general, the closer you are to a wireless base station antenna, the lower the power output.Before a new model device is available for sale to the public, it must be tested and certified to the FCC that it does not exceed the exposure limit established by the FCC, Tests for each device are performed in positions and locations (e.g. worn on the body)as required by the FCC.For body-worn operation, this model device has been tested and meets the FCC RF exposure guidelines when used with an accessory designated for this product.
[xyz-ips snippet=”download-snippet”]