![]()
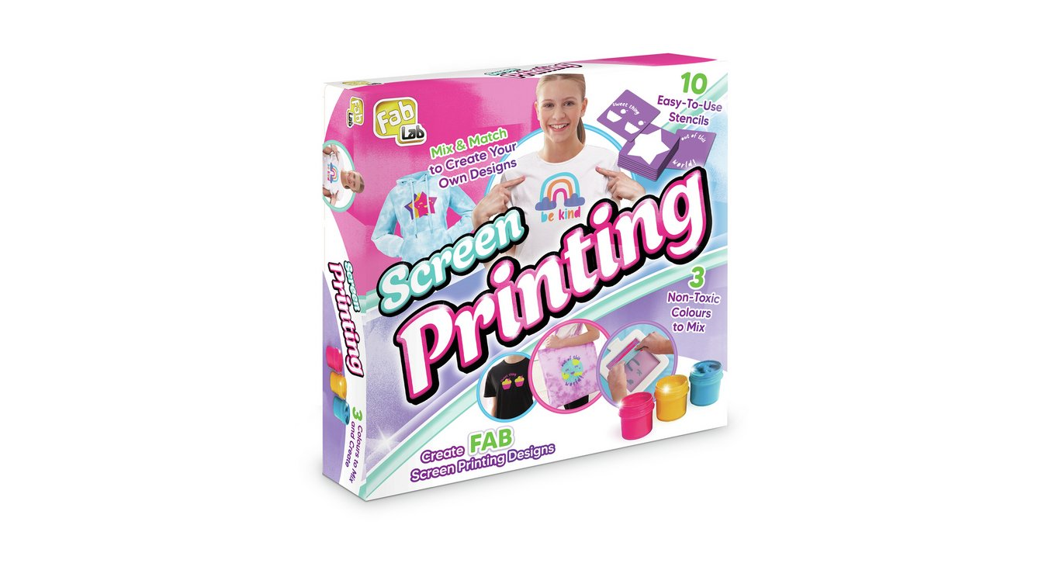
InstructionsScreen PrintingCreare FAB Screen Printing Designs
 WARNING!
Only for use by children over 8 years old.
![]() Not suitable for children under 36 months due to small parts that may represent a choking hazard.
Not suitable for children under 36 months due to small parts that may represent a choking hazard.![]() Adult supervision is recommended. Read the instructions before use, follow them and keep them for reference.
Adult supervision is recommended. Read the instructions before use, follow them and keep them for reference.
 Do not apply to the skin, or close to the eyes or mouth.
 Do not swallow or inhale the contents.Use contents within 6 months of opening the individual containers.
 The paints in the kit are water-soluble but may stain carpets, furnishings, clothes or surfaces. Please take care to avoid accidents.
INGREDIENTS: Acrylates Copolymer; Aqua; Paraffin Wax; Mineral Oil; Aqueous Ammonia; Urea; Propylene Glycol;May contain +/-: Copper Phthalocyanine; Pigment Yellow 14; Pigment Red 57:1.
Contents
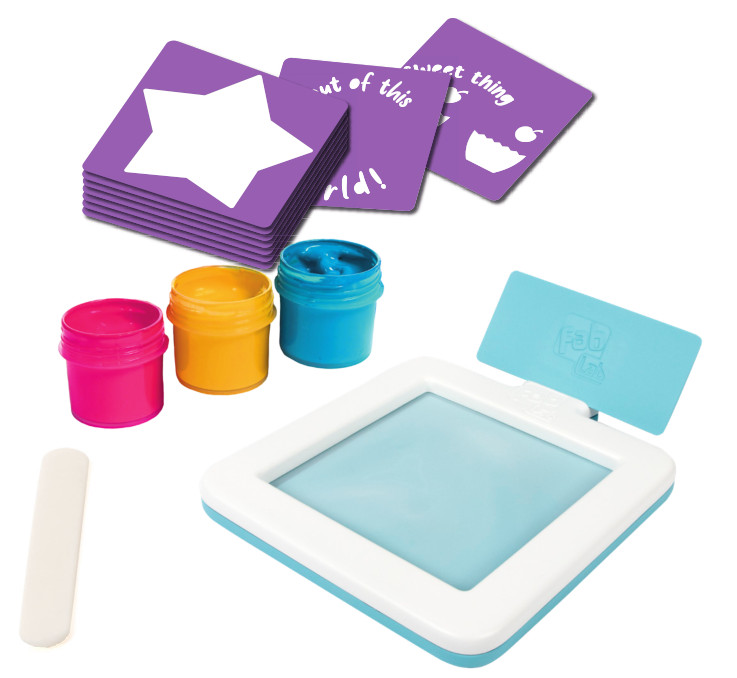 3 x Pots of Non-Toxic Paint to Mix(Pink, Blue, Yellow)Mesh Screen Frame & Holding Piece1 x Squeegee1 x Paint Stirrer10 x Sticker Stencils1 x Elastic Band1 x Pair of Gloves
What is Screen Printing?
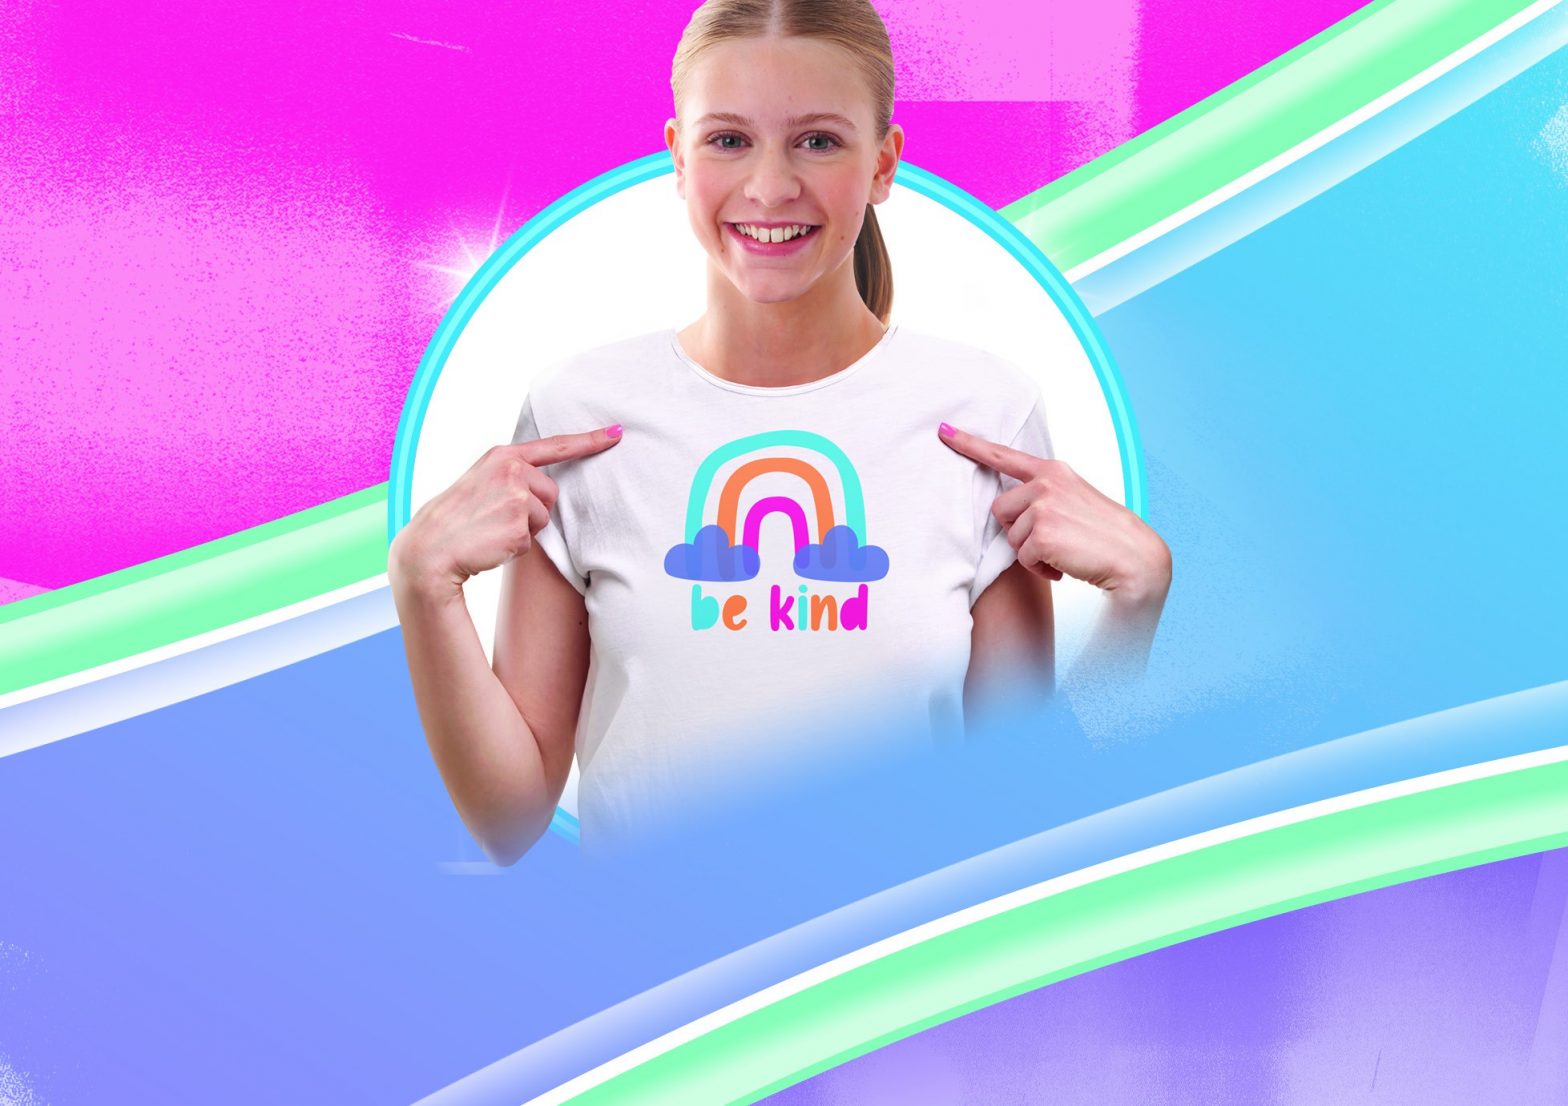
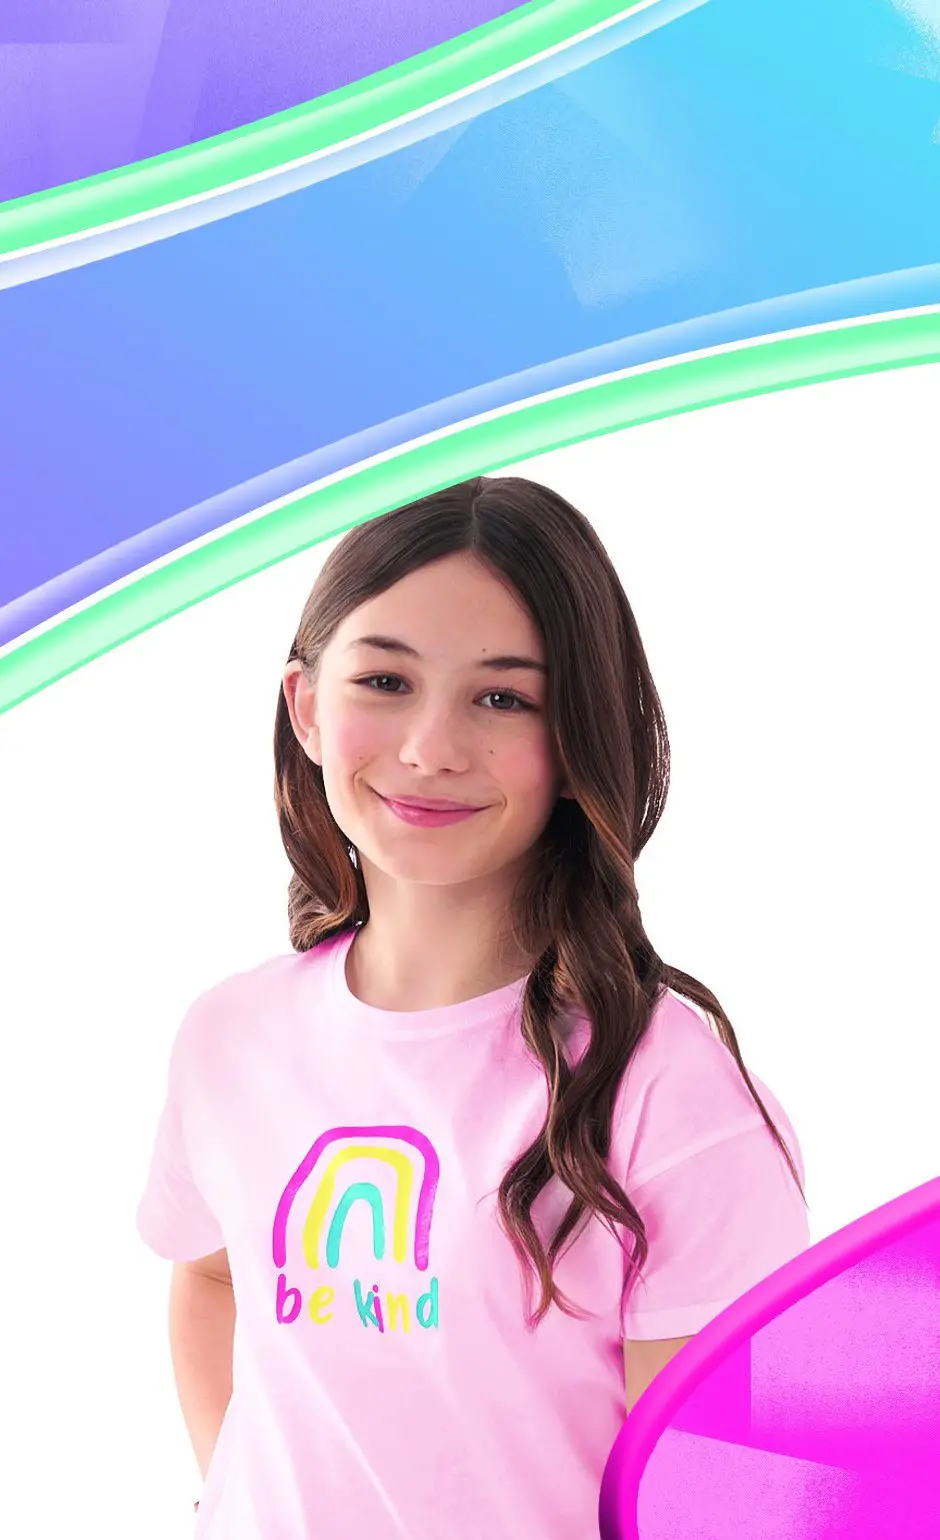
Screen printing is a method of printing where you apply paint through a fine-mesh screen onto a surface. The image is a result of blocking parts of the screen with a stencil or by creating an image directly on the screen with drawing fluid or screen filler. You can print on a variety of surfaces such as fabric, paper and cardboard.FabLab’s Screen Printing kit provides you with the tools and stencils to create your own unique prints. Just add your favourite fashion items and let your creativity run free!

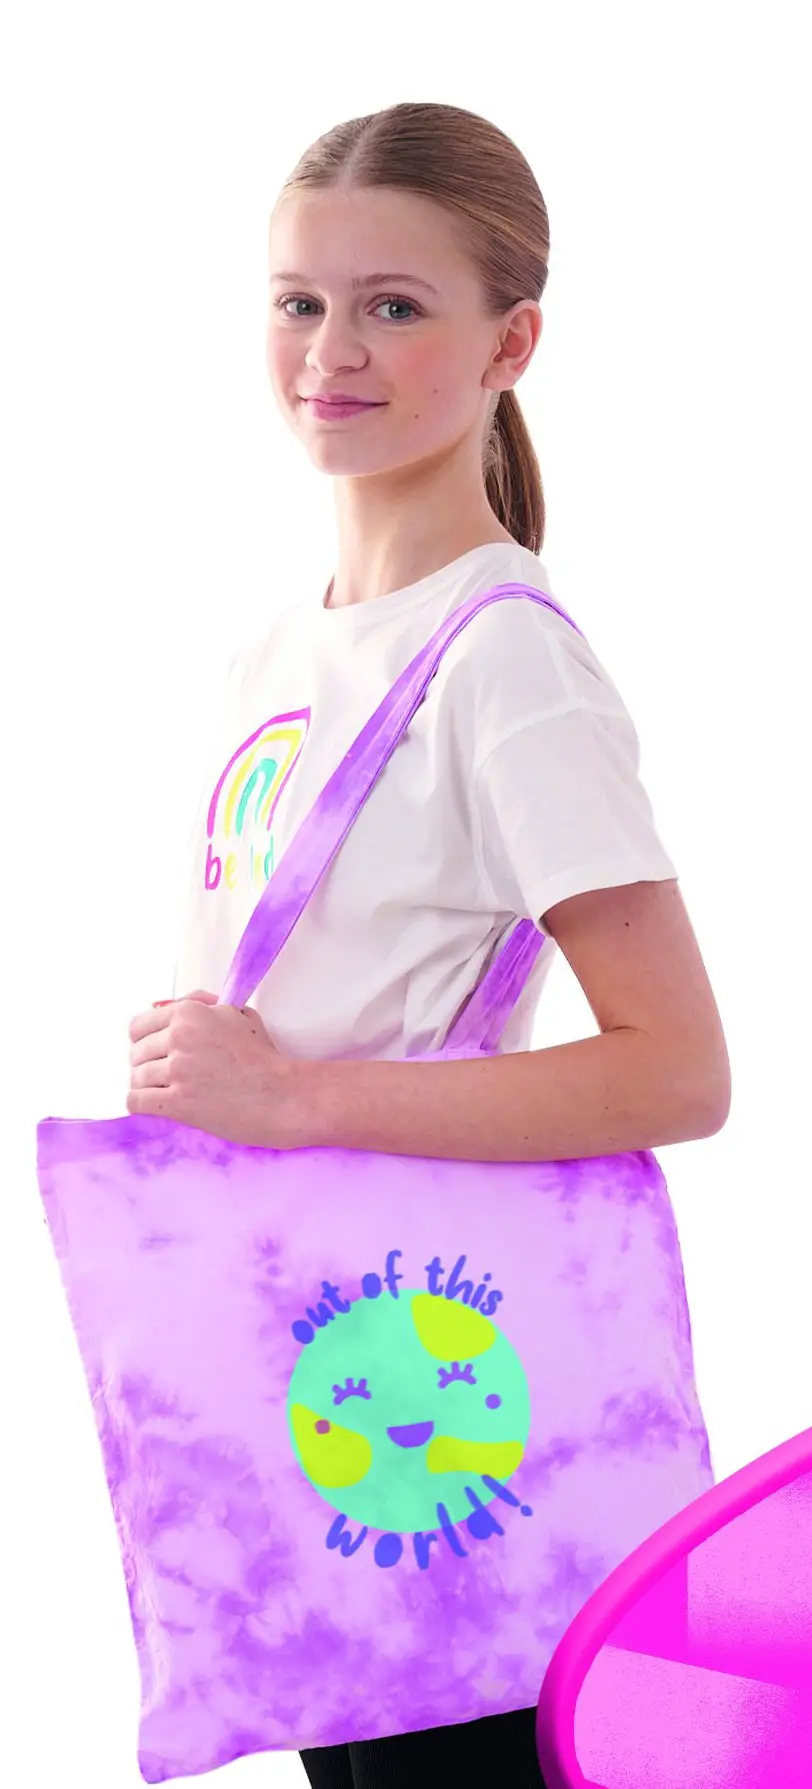
How to Use (on a T-Shirt)
- To start, set up a work area by putting down a newspaper or a plastic tablecloth away from any furniture or carpet.
- Choose a t-shirt, we recommend using 100% cotton materials, as they absorb paint better than synthetics and will therefore produce a more vibrant finish. Wash, dry and iron your t-shirt before beginning as it’s much easier to print on clean, wrinkle-free materials.
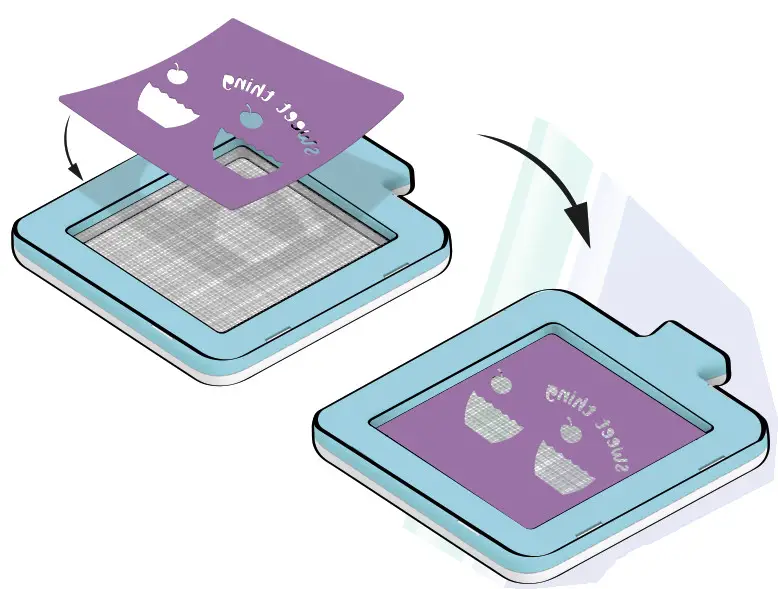
- Prepare your screen by peeling the stencil carefully from it’s back and press it flat onto the underside of the screen (this is the blue side), ensuring there are no air bubbles.

- Before applying paint you’ll need to determine where you want to position your design. You can do this by placing the holding piece inside your t-shirt (under the front) and move it around, the square base indicates the size of the design.If you want the image top/centre on your t-shirt place it 10cm down from the neckline. The holding piece will ensure that the paint does not leak through to the back of your t-shirt and provides a sturdy base to print on.
- Line up the screen on top of the holding piece when positioned.5a. If you’re creating a design with two or more stencils pull the elastic band around your t-shirt with the holding piece inside, the lip on the holding piece should keep the band in place.This ensures the holding piece doesn’t move when you take the screen on and off and will keep the multiple stencils aligned.
- Put on your gloves when handling the paint.
- Use the paint colours provided or mix your own to create your desired colour.
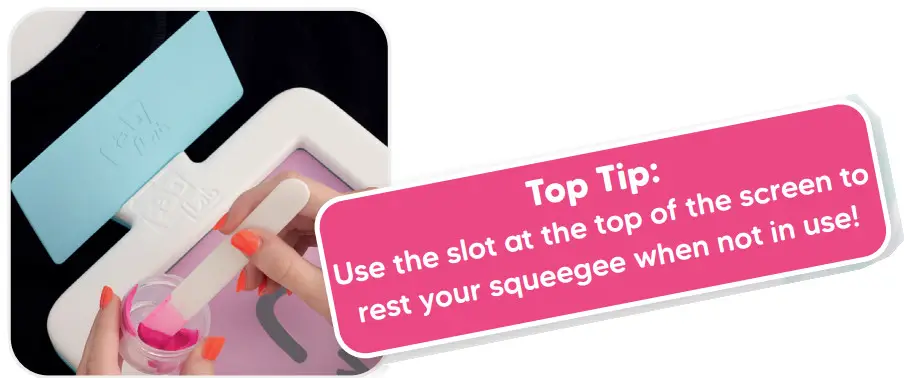
- Using the paint stirrer place a generous amount of paint along the side or top of the screen.
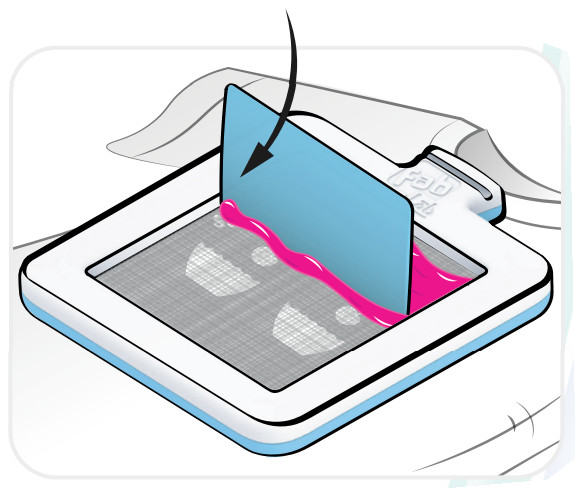
- Firmly hold the screen down with one hand (or ask someone else to hold the screen down) while you scrape the paint across the stencil with the squeegee.Be sure to press hard on the squeegee so that all of the paint goes through the screen and through the stencil. You may have to repeat scraping one or more times to ensure an even application of paint.
- Hold your t-shirt down with one hand as you lift the screen up with the other to reveal your print!If you’re only printing one design with a single stencil you can print several t-shirts/items in a row. Do this by adding more paint if necessary and swapping items over. Work quickly so that the paint doesn’t dry on the screen (you’ll see why this is so important later).If you’re printing with two or more stencils, remove the stencil and clean the screen immediately (more details on page 8). Keep the elastic band on your t-shirt. Wait until the screen is completely dry and the paint on the t-shirt is dry to touch before repeating the next printing process.
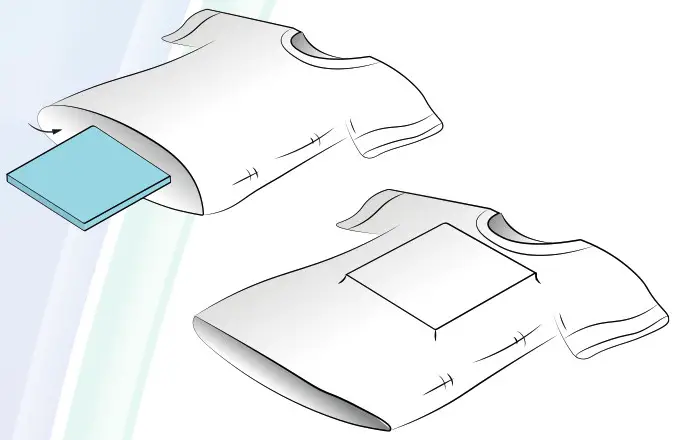 If you want the image top/centre on your t-shirt place it 10cm down from the neckline. The holding piece will ensure that the paint does not leak through to the back of your t-shirt and provides a sturdy base to print on.
 5a. If you’re creating a design with two or more stencils pull the elastic band around your t-shirt with the holding piece inside, the lip on the holding piece should keep the band in place.
 This ensures the holding piece doesn’t move when you take the screen on and off and will keep the multiple stencils aligned.
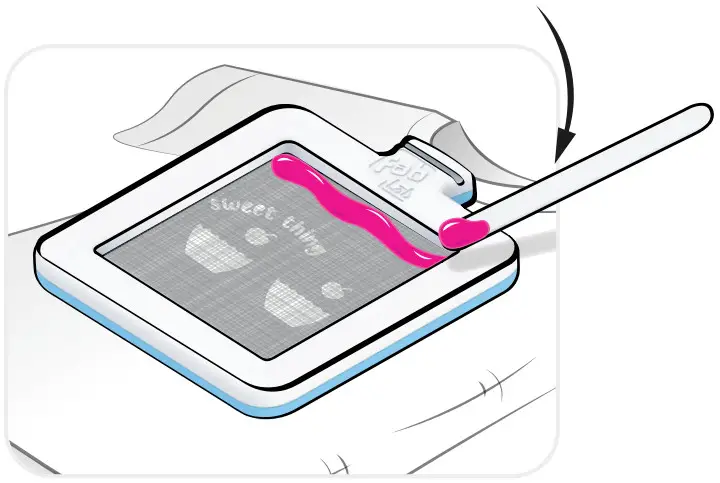
 Be sure to press hard on the squeegee so that all of the paint goes through the screen and through the stencil. You may have to repeat scraping one or more times to ensure an even application of paint.
 If you’re only printing one design with a single stencil you can print several t-shirts/items in a row. Do this by adding more paint if necessary and swapping items over. Work quickly so that the paint doesn’t dry on the screen (you’ll see why this is so important later).
 If you’re printing with two or more stencils, remove the stencil and clean the screen immediately (more details on page 8). Keep the elastic band on your t-shirt. Wait until the screen is completely dry and the paint on the t-shirt is dry to touch before repeating the next printing process.
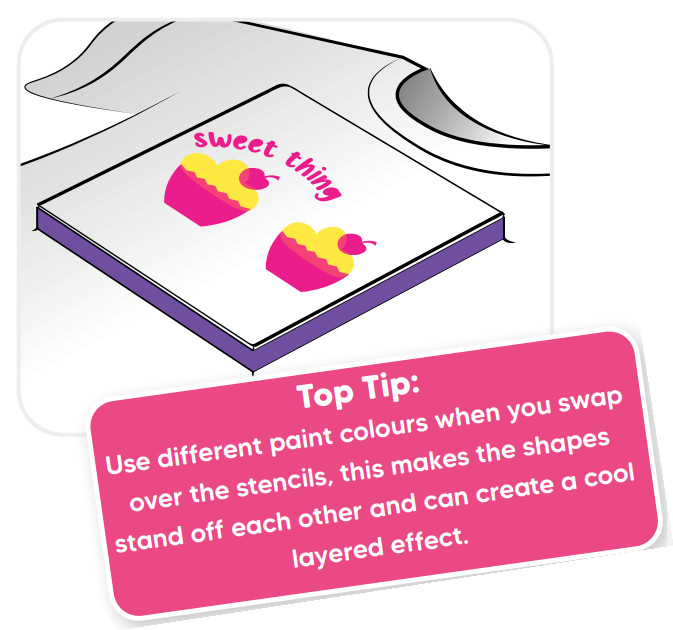
Cleaning
Once finished peel off and dispose of the stencil and clean the screen immediately. It’s also important that the holding piece is kept under the screen when washing.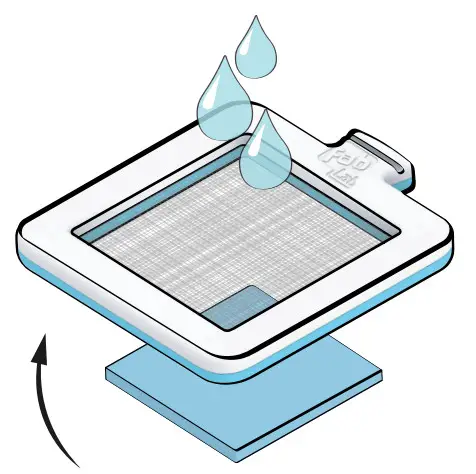 (If the holding piece is still in use when using multiple stencils find something roughly the same size to lean on when washing).Run the screen under warm water and rinse off the paint. Use a toothbrush and soap to gently scrub away any remaining paint (make sure to take care so you don’t damage the mesh). If the paint is left to dry on the screen, it can be very difficult to remove and may diminish the quality of future prints. Rinse the squeegee and paint stirrer under warm water. Let all materials dry before printing again. When drying try not to let the mesh touch any surface, such as leaning against a wall, this means it will dry quicker.
Fabric Care
Once your t-shirt is completely dry (24 hours is best), you can heat-set your cool design onto your t-shirt and make it machine washable. Set your iron to the cotton setting with no steam and place another piece of cloth or paper on top of the shirt. Iron over the printed image on both sides (inside and out) for 3-5 minutes on each side.It’s best to take care with your screen printed clothes, we recommend a delicate cycle at 30 degrees to maintain their vibrancy.
Stuck for Ideas?
Here are a few of our favourite variations: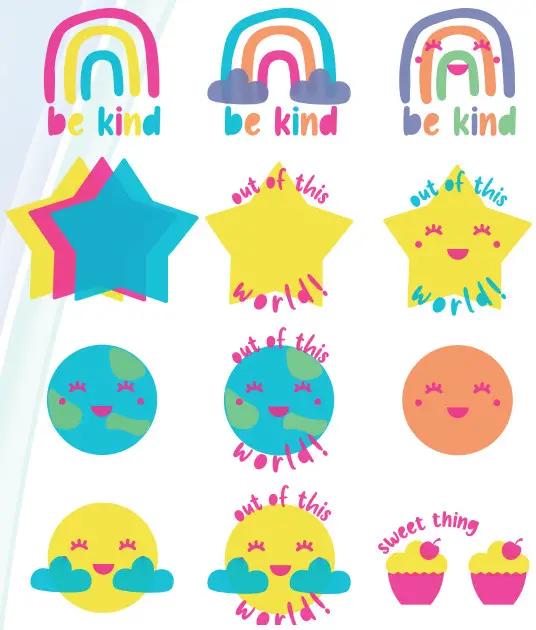
Other Fab Projects
Greeting CardsTo make cute cards to give to friends or family cut a 29 x 14.5cm rectangle of cards and fold down the middle (ask an adult to help with this!). Put the card on top of the holding piece, apply the stencil to the screen and print as you would with a T-shirt.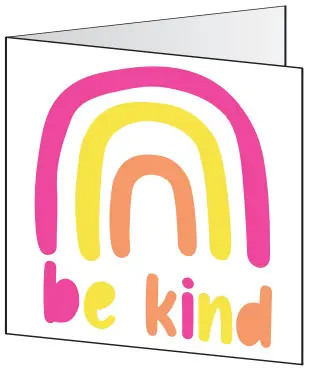 Framed PrintTo create a cool print to hang up in your room, find a 14.5 x 14.5cm square picture frame, cut out a piece of card the same size, print and frame!
DIY Hanging Wall TapestryWhy not upcycle? If you have an old plain pillowcase ask an adult to cut one side off so you’re left with a rectangle of material, using one of the simple stencils, such as the star, screenprint onto this as you would with a T-shirt but move the stencil to create rows of stars. Once you’ve left it to dry use bulldog clips and string to hang up your wall tapestry!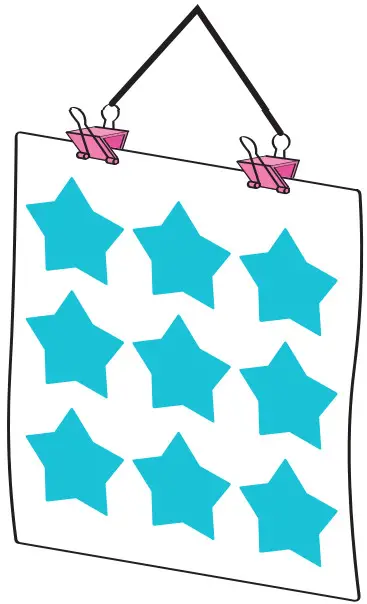
Ran Out Of Stencils?
Don’t worry – you can create your own screen print designs simply with paper and masking tape!Cut a 13 x 13cm square piece of paper, draw on your design and ask an adult to cut out carefully. Use masking tape to attach the design onto the screen, making sure you keep the paper completely flat and there are no gaps between the tape and paper. Print and enjoy!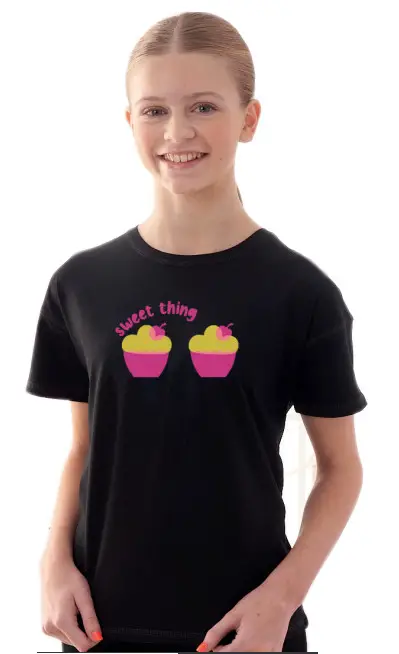
Mobile Phone Holder
Included in your FabLab kit is a mobile phone holder, which lets you easily view our cool “how-to” videos packed with exciting content to discover new techniques and styles.Simply place your phone into the holder and go to our channel at youtube.com/fablabuk.Share your favourite designs!We would love to see your creations! Share your cool screen print designs with us on social media by mentioning or tagging @fablabuk
Also in the FabLab range: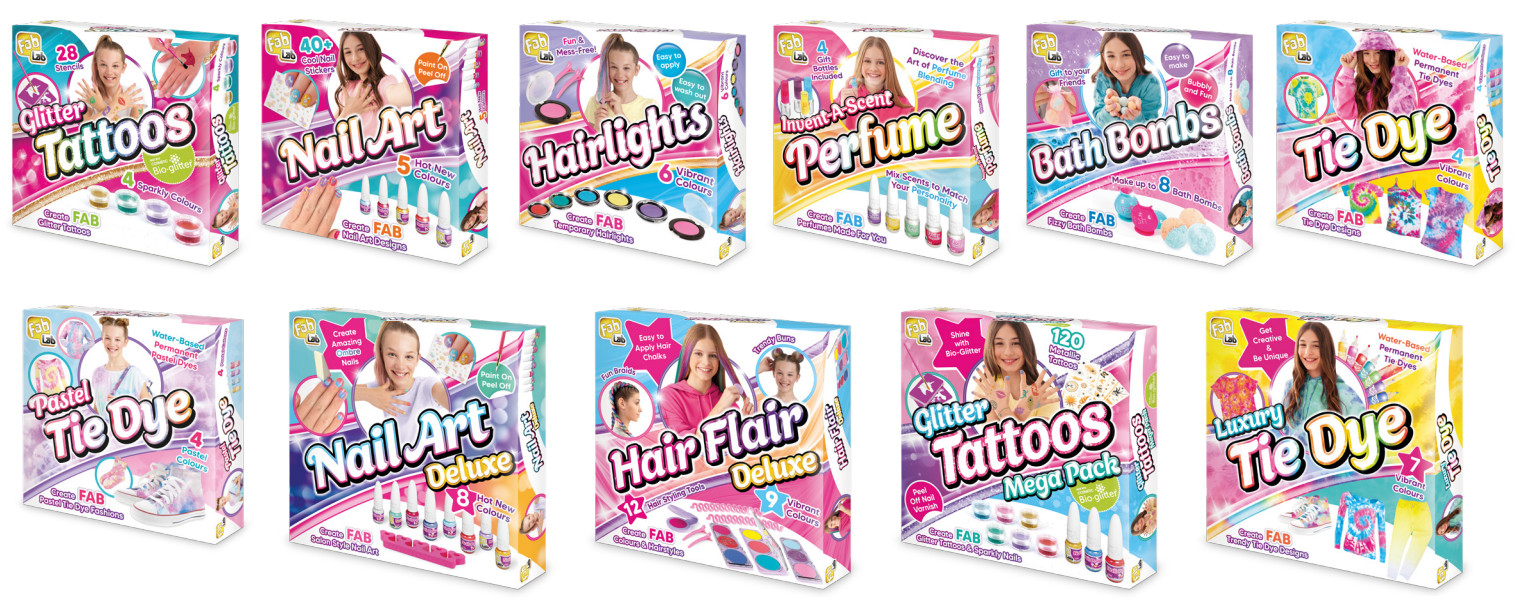
![]()
![]() See our full range of toys and gifts at: www.playmonster.co.ukDesigned and manufactured by:PlayMonster UK Ltd. Artisan, Hillbottom Road, High Wycombe. HP12 4HJ.Please retain our address for future reference.FL205 v1.0 2021 The FabLab© trademark is registered in the UK to PlayMonster UK Ltd. Made in China.Copyright ©2021 PlayMonster UK Ltd.
See our full range of toys and gifts at: www.playmonster.co.ukDesigned and manufactured by:PlayMonster UK Ltd. Artisan, Hillbottom Road, High Wycombe. HP12 4HJ.Please retain our address for future reference.FL205 v1.0 2021 The FabLab© trademark is registered in the UK to PlayMonster UK Ltd. Made in China.Copyright ©2021 PlayMonster UK Ltd.
References
[xyz-ips snippet=”download-snippet”]