![]()
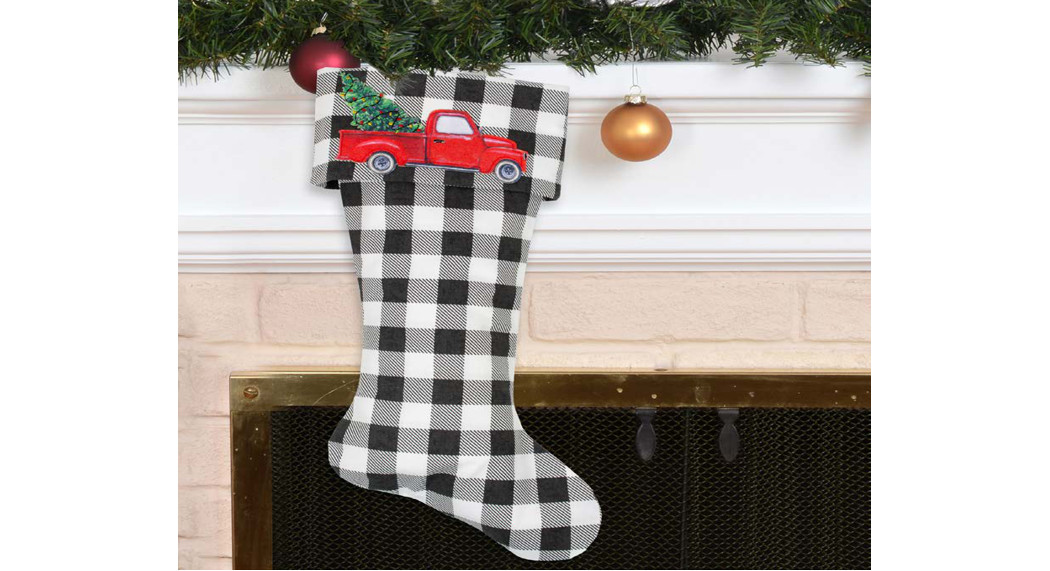
STOCKINGFinished Size:10 in x 21 in (25.4 cm x 53.34 cm)
 www.fabriceditions.comFollow us here to see more excitingprojects and ideas.#mycreateit
Supplies Needed
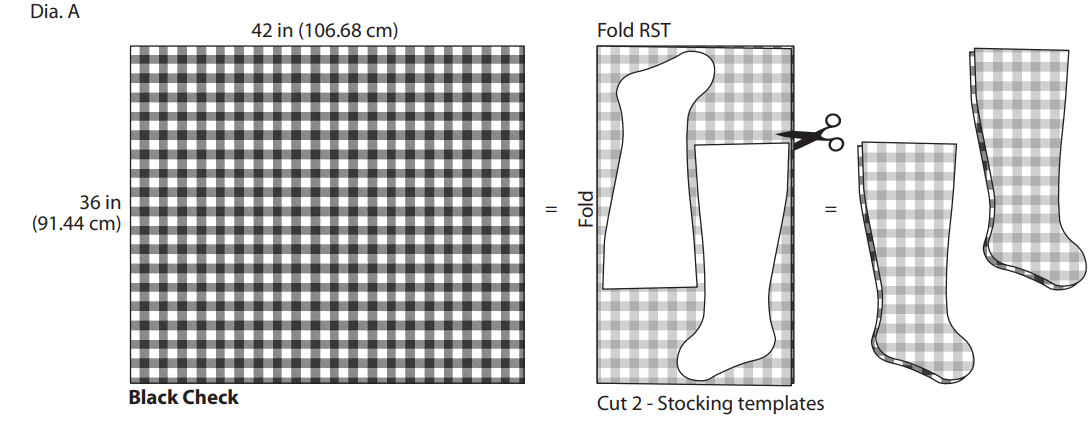
- 1 Yard Fabric Cut (36 in x 42 in / 91.44 cm x 106.68 cm)
- Iron-On Appliqué
- Coordinating thread
- Removable marker
- Tape
- Scissors
- Basic sewing supplies
- Sewing machine
- Iron, pressing surface, and press cloth
*Project made with these items from (items sold separately)588584189 – CI-FQ22-HOLWHM2 FQ22 HOLIDAY CHECK BLK595341839 – CI-APPL22-TRUCK APPLIQUE TRUCK
Before You Begin
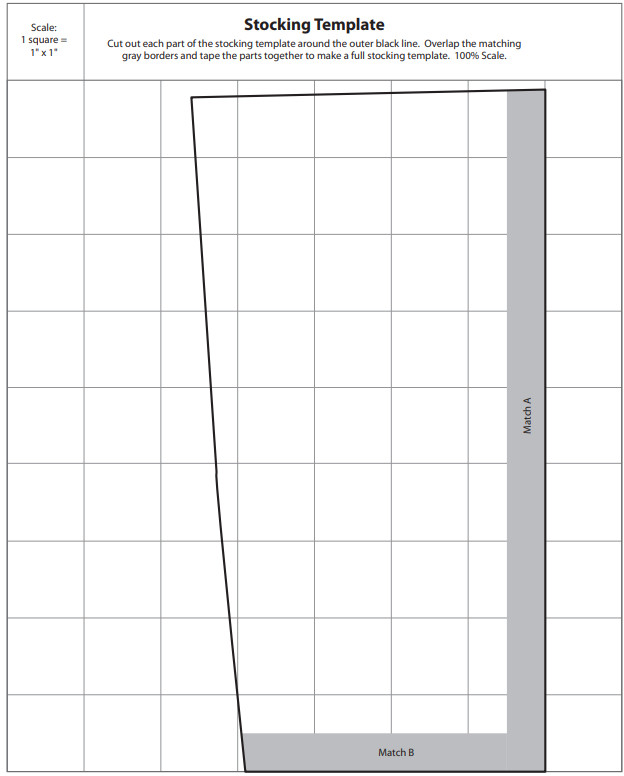
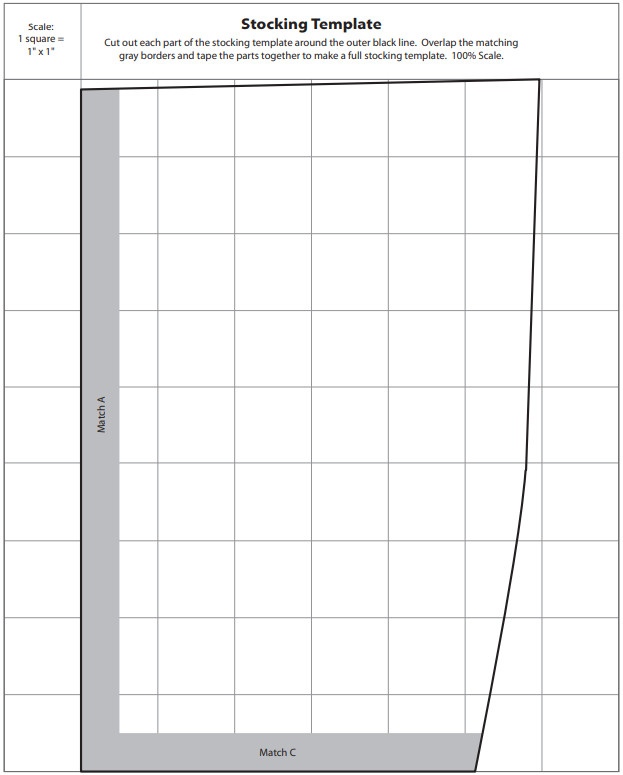
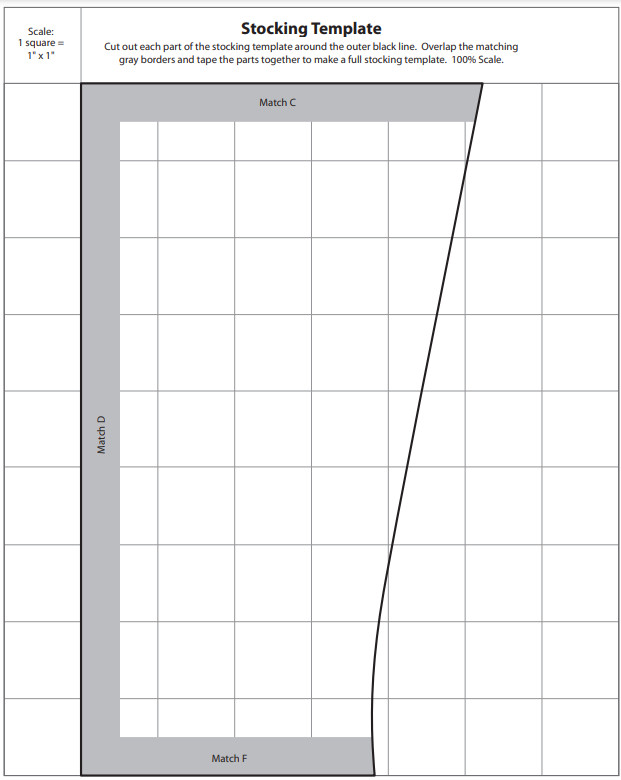
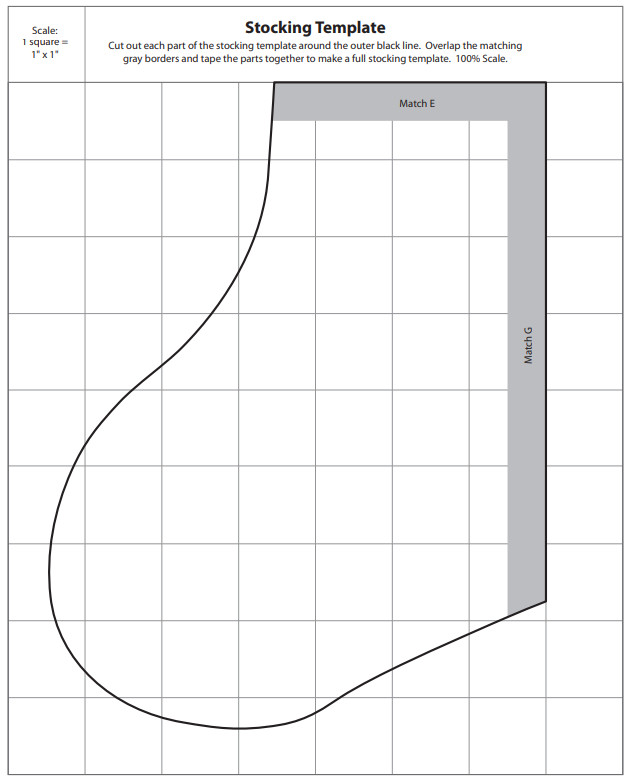
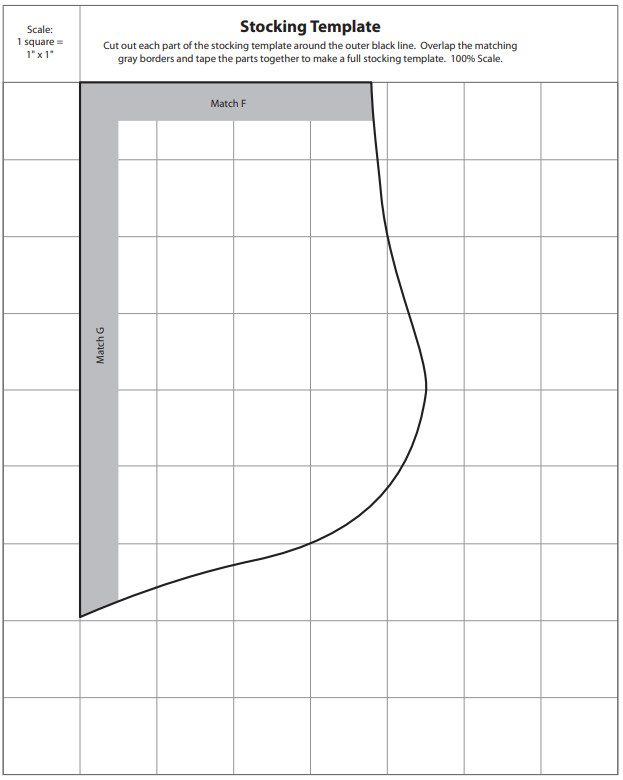
Read all instructions before beginning the project. Before cutting, press fabrics with a dry iron on the cotton setting. Use a ¼ in (3.81 mm) seam allowance and sew fabrics with right sides together (RST). Print the Stocking Templates (on pages 4 – 9) at 100% scale. Cut and tape together. Follow manufacturer‘s instructions for appliqué.
Cutting
- Fold the 1 yard cut of fabric RST, matching selvage edges. Position Stocking pattern on fabric as shown in Diagram A. Trace around pattern, pin, and cut out matching pairs, leaving pairs layered for sewing. One pair will be the Stocking Front and Lining while the other pair will be the Stocking Back and Lining.

- From the scraps of the Black Check, cut a 1 ½ in x 6 in (3.81 cm x 15.24 cm) strip for a Hanging Loop (Dia B). Sewing
- Stocking pieces are already layered RST for sewing. Ensure top edges are even, pin and sew (Dia. C). Press seams open.
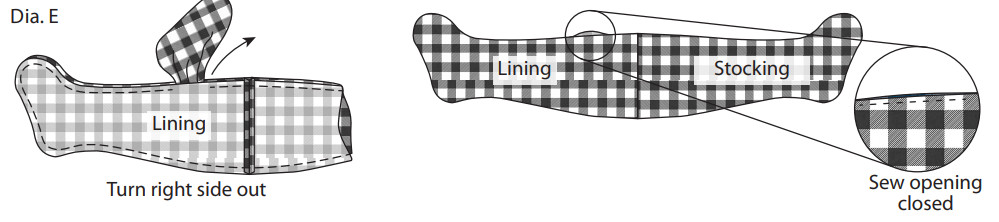
- With RST, pin the pieces as shown in Diagram D aligning all edges and matching the center seams. Sew around the outside edge, leaving a 4 in (10.16 cm) opening on the Lining side. Tip: Stitch slowly around curves.
- Turn right side out by pulling the Stocking through the opening; press if needed. Sew opening closed (Dia. E).
- Push the Lining into the Stocking. Smooth inside toe, heel, and around top edge. Fold the top edge over approximately 5 in (12.7 cm) to create the cuff (Dia. F).Appliqués
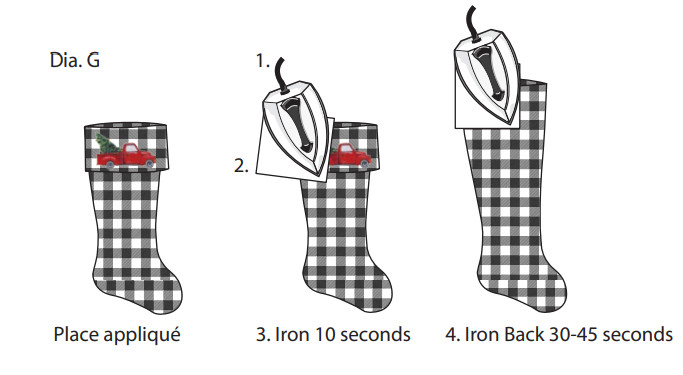
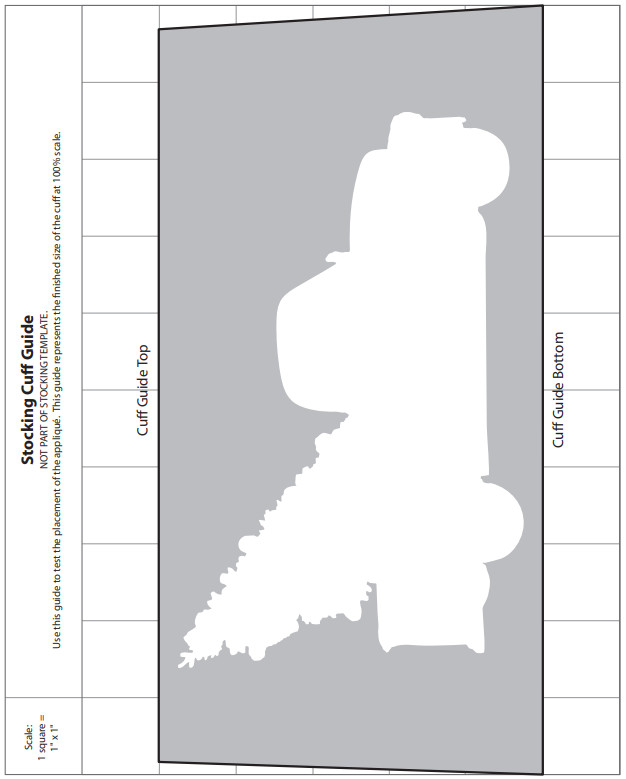
- Working on an ironing surface, place the Truck appliqué on the cuff as shown. Once the appliqué is placed, follow the pressing instructions below (Dia. G).1. Set iron to the hot, dry setting.2. Place the appliqué in the desired location and cover with a pressing cloth.3. Press using a dry iron, applying light pressure on the appliqué for approximately 10 seconds to adhere appliqué into place.4. To set appliqué, turn the Stocking cuff back up as shown. The iron back side of appliqué for approximately 30-45 seconds, applying firm pressure evenly to reinforce. Let cool and repeat step 4 if necessary. Finishing
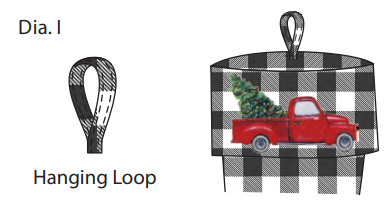
- To make the Hanging Loop (1 ½ in x 6 in / 3.81 cm x 15.24 cm), fold the wrong sides together so long edges meet. Press open and fold edges to the center crease; press. Fold in half again and topstitch close to the edges (Dia. H).
- Fold the Hanging Loop in half so cut edges meet. On the inside, pin to the center back of Stocking at the top edge, as shown in Diagram I. Sew ¼ in (6.35 mm) from the edge, then again ½ in (1.27 cm) from the edge to hold in place.
 Sewing
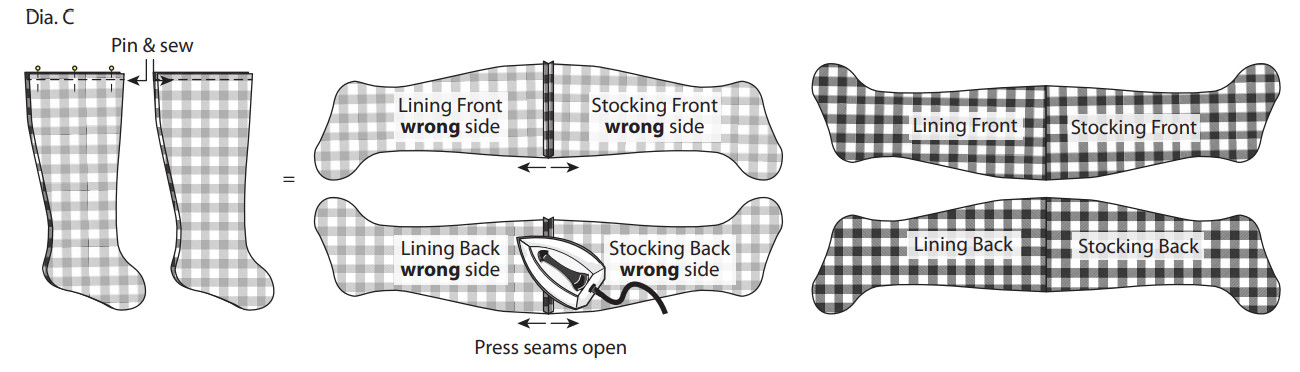

 Finishing
Finished Care InstructionsSpot clean as needed.

References
[xyz-ips snippet=”download-snippet”]