FEIT Electric UCL18/5CCT 18 inch Under Cabinet Light
Limited Warranty
This product is warranted to be free from defects in workmanship and materials for up to 5 years from date of purchase. If the product fails within the warranty period, please contact Feit Electric at [email protected], visit feit.com/contact-us or call 1-866 326-BULB (2852) for instructions on replacement or refund. REPLACEMENT OR REFUND IS YOUR SOLE REMEDY. EXCEPT TO THE EXTENT PROHIBITED BY APPLICABLE LAW, ANY IMPLIED WARRANTIES ARE LIMITED IN DURATION TO THE DURATION OF THIS WARRANTY. LIABILITY FOR INCIDENTAL OR CONSEQUENTIAL DAMAGES IS HEREBY EXPRESSLY EXCLUDED. Some states and provinces do not allow the exclusion of incidental or consequential damages, so the above limitation or exclusion may not apply to you. This warranty gives you specific legal rights, and you may also have other rights which vary from state to state or province to province.
Pre-Assembly
TOOLS REQUIRED

HARDWARE INCLUDED

|
Part |
Description | Quantity |
|
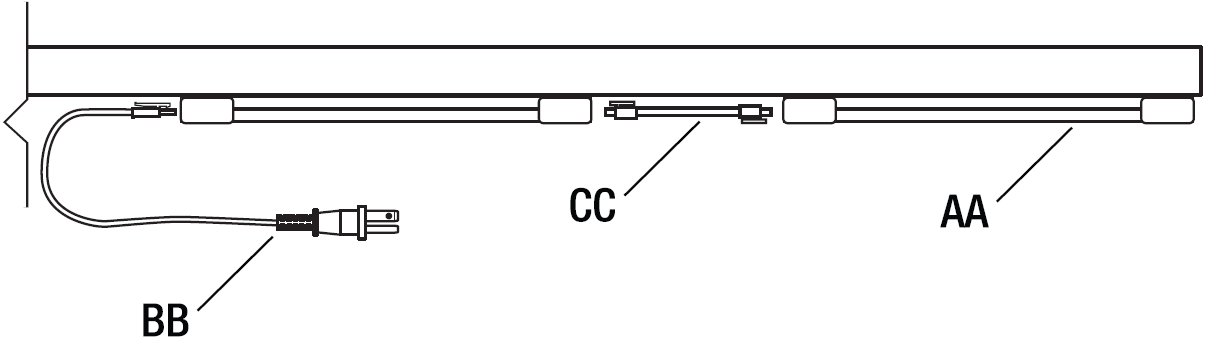
AA |
8in. LED Fixture |
1 |
|
BB |
6ft. AC Cable |
1 |
|
CC |
18in. Linking Cable |
1 |
|
DD |
Mounting Screws |
2 |
|
EE |
Mounting Bracket |
2 |
| FF |
Fixture Mounting Template |
1 |
|
Item No. |
Description |
Volts (V) |
WattagePer Fixture (W) |
InputCurrent (mA) |
Maximum Linkable Units at 120V |
Maximum Linkable Units with In-Wall Dimmer |
|
UCL18/5CCT |
18 Inch Under Cabinet LED Fixture |
120 |
13.5 |
150 |
53 |
10 |
|
LIGHTING DISTRIBUTION |
||
|
Distance |
Center Beam (Foot Candles) |
Beam Diameter |
|
3 ft |
26 |
7.2 ft |
|
5 ft |
10 |
12 ft |
|
8 ft |
3.7 |
19 ft |
|
15 ft |
1.1 |
36 ft |
|
Beam Spread: 100° |
: 238 |
Single LED Fixture Installation
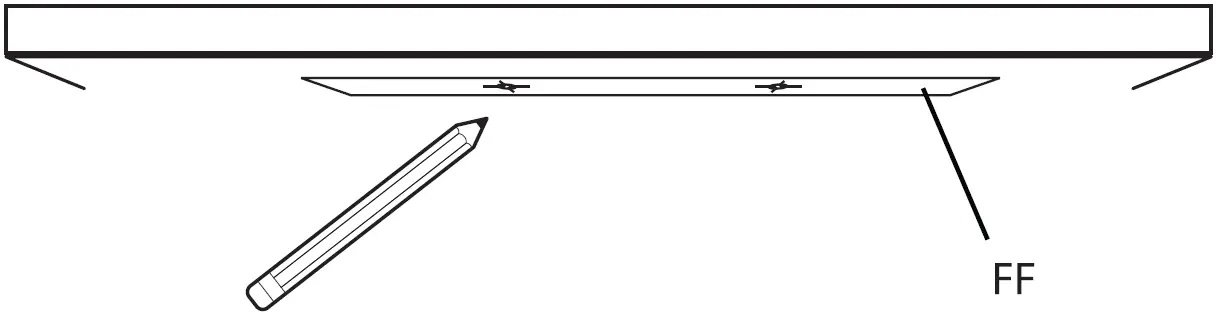
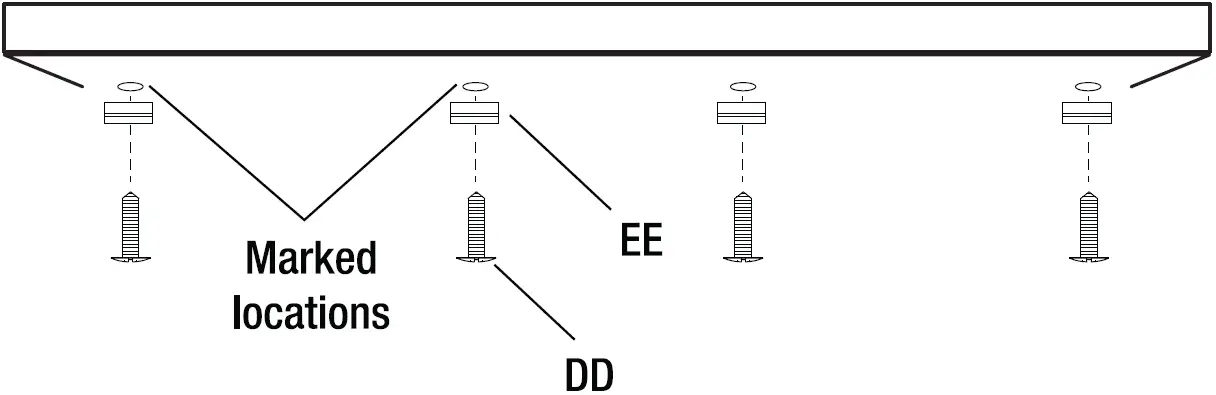
- Position the FixtureFind the desired place for the LED light fixture and mark clearly using the provided mounting bracket template (FF).

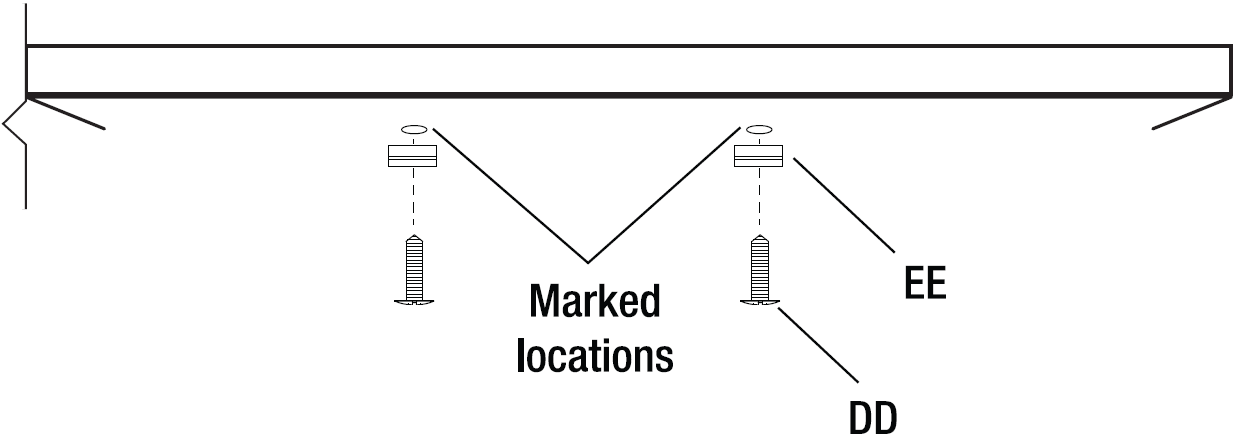
- Installing the Mounting BracketScrew in the Mounting Brackets (EE) using the Mounting Screws (DD) on the marked locations.
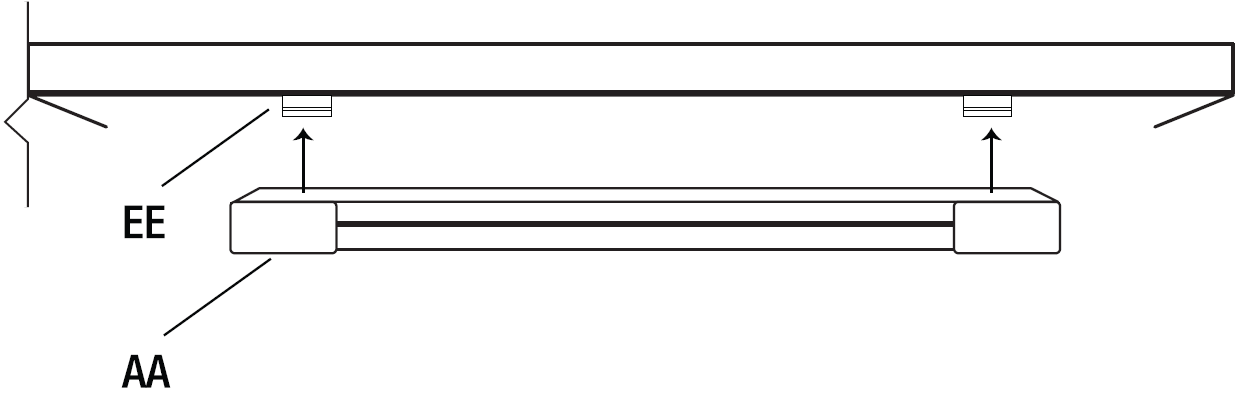
- Installing the LED FixtureAlign and Snap LED Fixture (AA) on Mounting Brackets (EE).
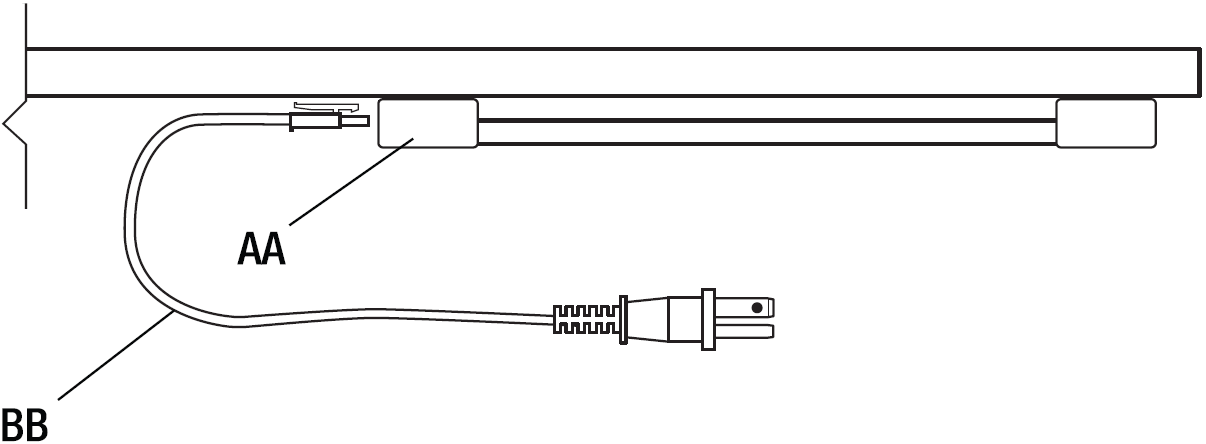
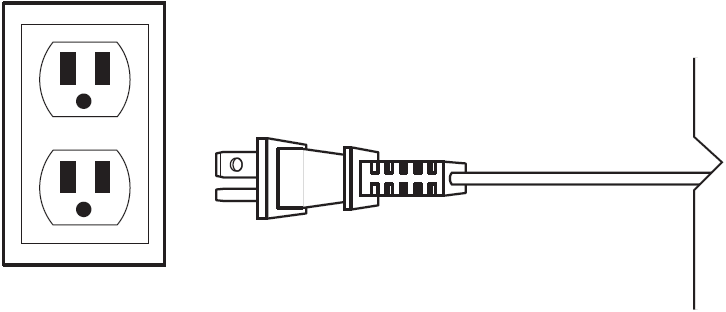
- Connecting the Electrical PlugPlug in the Electrical Plug (BB) to the LED Fixture (AA).
- Connecting to a Power OutletConnect the Electrical Plug (BB) to the power outlet on the wall.

Two or More LED Fixture Installation
- Position the FixturesFind the desired place for the LED light fixture and mark clearly using the provided mounting bracket template (FF).
- Installing the Mounting BracketsScrew in the Mounting Brackets (EE) using the Mounting Screws (DD) on the marked locations.
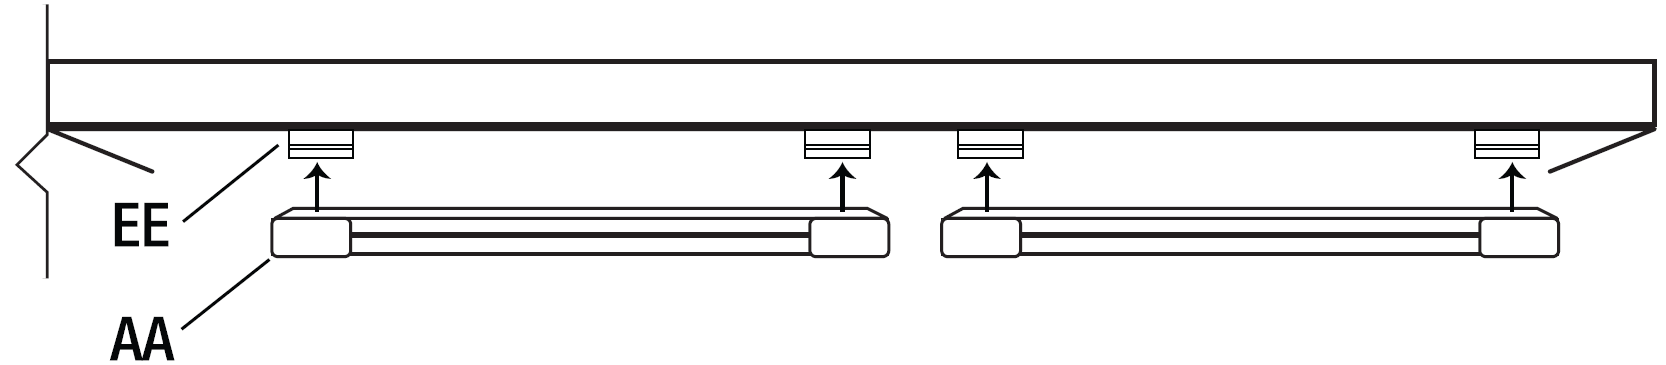
- Installing the LED FixturesAlign and snap the LED Fixtures (AA) on the Mounting Brackets (EE).
- Linking the LED FixturesConnect the LED Fixtures (AA) using the provided Linking Cable (CC).
- Connecting the Electrical PlugPlug in the Electrical Plug (BB) to the linked LED Fixtures (AA).
- Connecting to a Power OutletConnect the Electrical Plug (BB) to the power outlet on the wall.


Operating Instructions
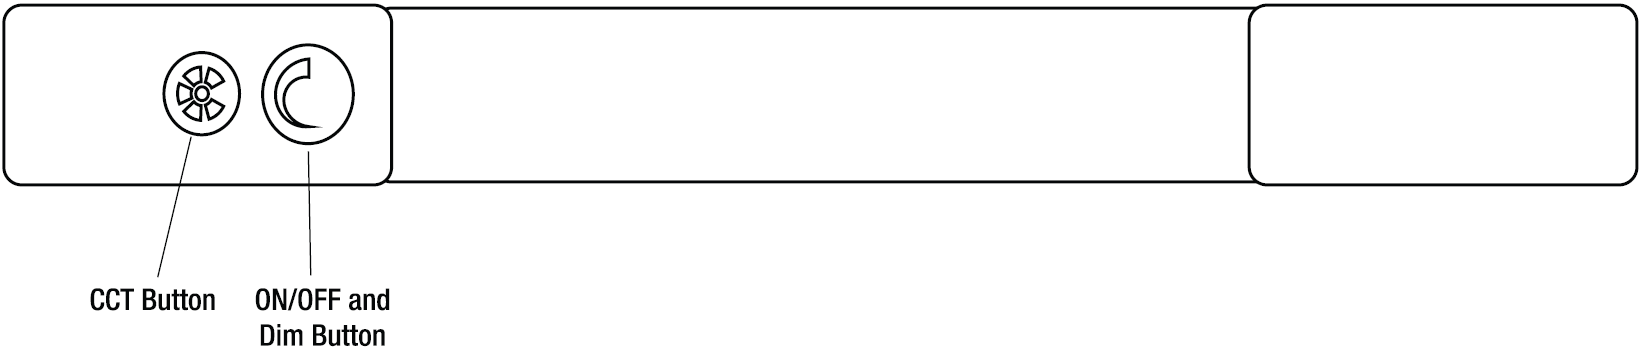
Use the ON/OFF and Dim Button for ON/OFF Operation and Changing the Dimming LevelsTo select the desired dimming level, Cycle through Dimming levels (High, Medium, Low, Dim, Off) by pressing the Dim Button. This setting will be fixed each time the ON/OFF switch is turned ON.
Changing the Color Temperature SettingTo select the desired color temperature, cycle through 27OOK – 3OOOK – 35OOK – 4OOOK – 5OOOK by pressing the CCT Button. This setting will be fixed each time the ON/OFF switch is turned ON.
This LED Fixture has the feature to operate and control multiple units, even if they are not linked.
- To control multiple fixtures, Hold the CCT button for 3 seconds on all the fixtures to be controlled in a group.
- To remove the individual fixture from the group, Hold the CCT button on the fixture that you want to control individually for 3 seconds.
![]()
[xyz-ips snippet=”download-snippet”]