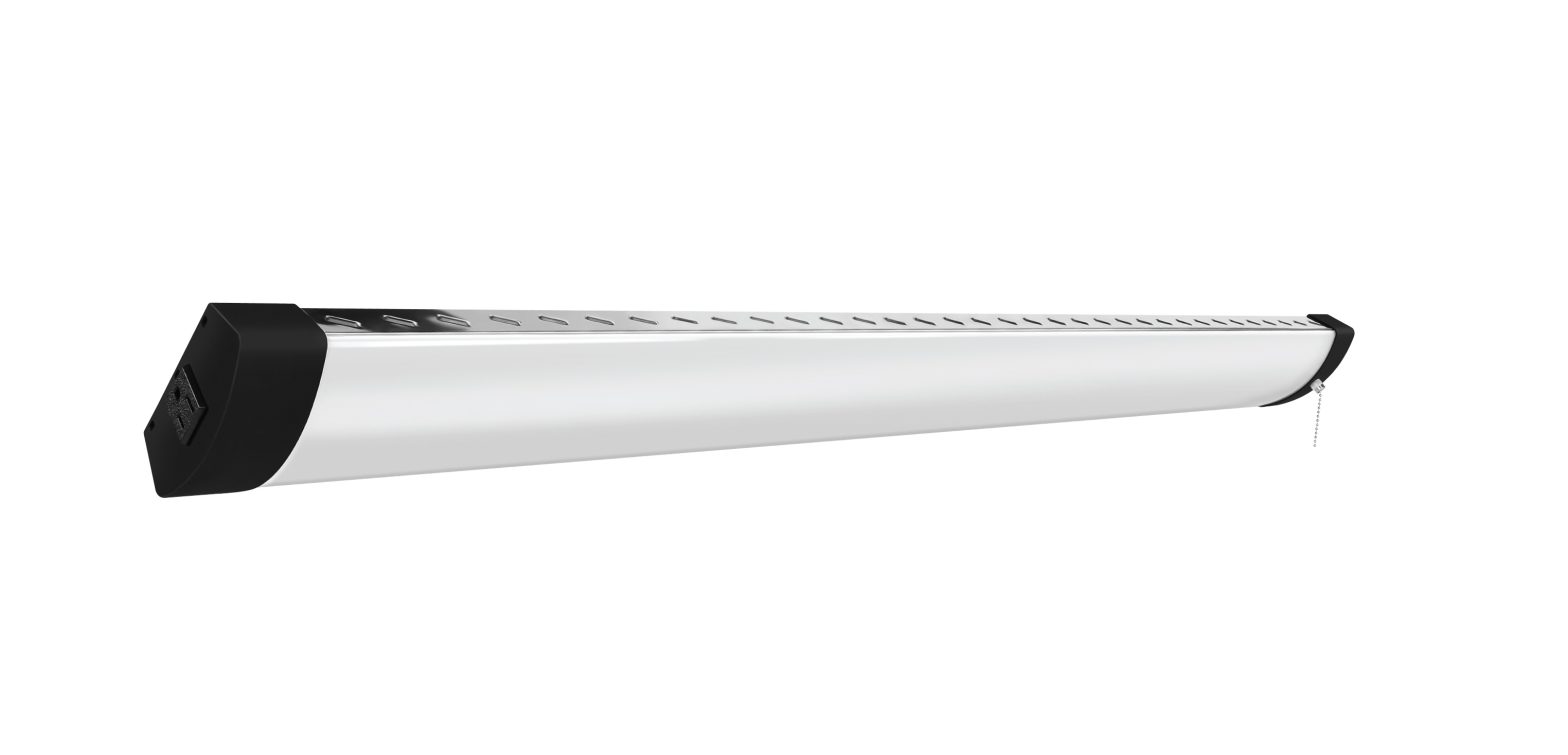
FEIT SHOP/4/CCT/AG Smart Wi-Fi LED Installation Guide
Thank you for your purchase. Questions, comments orpedback? We’d love to hear from you. Visi feit.com/help for support.
IMPORTANT, RETAIN FOR FUTURE REFERENCE:READ CAREFULLY
SMART WIFI LED SHOP LIGHT INSTALLATION INSTRUCTIONS
WARNING
- These products may represent a possible shock or fire hazard if improperly installed or attached in any way. Products should be installed in accordance with the owners manual, current electrical codes and/or the current National Electric Code (NEC).

PARTS INCLUDED
(Drawings not to scale)
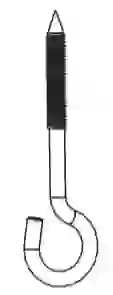
- Screw hooks x2

- V-hooks x2
- hanging chains x2
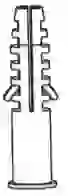
- wall anchors x3
- mounting screws x3
- cable tie xl

THIS FIXTURE IS INTENDED TO ONLY BE INSTALLED DIRECTLY BENEATH A CEILING-MOUNTED RECEPTACLE.
CAUTION: Installation not be made on a radiant-heating ceiling.CAUTION: Hooks are to engage the chain only and not the electric cord.CAUTION: This fixture needs to be grounded.
- Voltage: 120Vac
- Current: X.XXA
SUITABLE FOR DAMP LOCATIONS
LINKING MULTIPLE SHOPLIGHTS
Link up to 6 shoplights together
![]() Connect to Power Outlet
Connect to Power Outlet
![]() Connect to additional shoplight
Connect to additional shoplight
Maximum distance between interconnected units: 60 in. (1.52m)
Supplier’s Declaration of Conformity: 47 CFR § 2.1077 ComplianceInformation Responsible Party: Feit Electric Company 4901 Gregg Road, Pico Rivera, CA 90660, USA 562-463-2852Unique Identifier: SHOP/4/CCT/AG
This device complies with part 15 of the FCC Rules. Operation is subject to the following two conditions: (1) This device may not cause harmful interference, and (2) this device must accept any interference received, including interference that may cause undesired operation. Note: This equipment has been tested and found to comply with the limits for a Class B digital device, pursuant to part 15 of the FCC Rules. These limits are designed to provide reasonable protection against harmful interference in a residential installation. This equipment generates, uses and can radiate radio frequency energy and, if not installed and used in accordance with the instructions, may cause harmful interference to radio communications.However, there is no guarantee that interference will not occur in a particular installation. If this equipment does cause harmful interference to radio or television reception, which can be determined by turning the equipment off and on, the user is encouraged to try to correct the interference by one or more of the following measures: Reorient or relocate the receiving antenna. Increase the separation between the equipment and receiver. Connect the equipment into an outlet on a circuit different from that to which the receiver is connected. Consult the dealer or an experienced radio/TV technician for help. Any changes or modifications not expressly approved by the manufacturer could void the user’s authority to operate the equipment. CAN ICES-005 (B).
WARNING: OFF THE MAIN POWER AT THE CIRCUIT BREAKER BEFORE INSTALLING THE FIXTURE IN ORDER TO PREVENT POSSIBLE ELECTRIC SHOCK.
INSTALLATION OPTIOLS
Install fixture using included chain and V-hooks
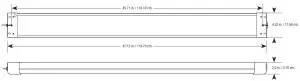
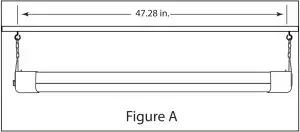
- Install provided screw-hooks directly onto ceiling. Spacing between screws should be 47.28 inches (See Figure A).For concrete ceilings/drywalls, wall anchors are required. Drill two holes (use a 1/4 inch drill bit) for provided wall anchors then use provided screw hooks (See Figure 1).
- Attach chain to V-hooks then insert hooks into mounting holes located on endcap of the fixture (See Figure 2).Do this for both ends of fixture.
- Install fixture to ceiling by hanging the chain to pre-mounted screw-hooks on ceiling (See Figure 3).
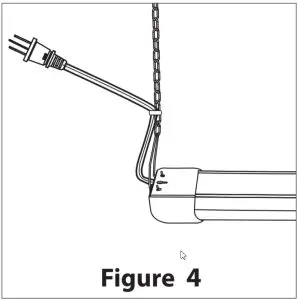
- Plug in power-cord to outlet or connect to additional SHOP/4/CCT/AG Shop Lights.
- Zip tie cord to chain so that excess cord is kept out of the work space. (see Figure 4).
 For concrete ceilings/drywalls, wall anchors are required. Drill two holes (use a 1/4 inch drill bit) for provided wall anchors then use provided screw hooks (See Figure 1).
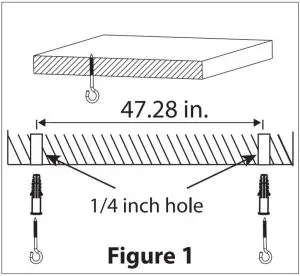

Install fixture flushmount using screws
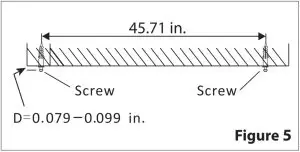
- Install provided screws directly onto mounting surface. Spacing between screws should be 45.71 inches. Gap (D) should be .079-.099 inches. For concrete/drywall surfaces, wall anchors are required. Drill two holes (use a 1/4 inch drill bit) for provided wall anchors then use provided screws (See Figure 5).
- Install fixture to mounting surface by inserting the Key Holes on top side of the fixture into the mounting screws (See Figure 6).It may be necessary to adjust the tightness of the screws (Gap D). Make sure both screws hold the fixture securely on the narrow side of the Key Holes.
- Mount a third screw next to the side of the outlet (See Figure 7).If anchor is required, mark the hole as close as possible to the fixture, remove the fixture, drill the hole on the marked position, install anchor into the drilled hole, re-install the fixture then install the screw into the wall anchor. This will secure the fixture into place.
- Plug in power-cord to outlet or connect to additional SHOP/4/CCT/AG Shop Lights.
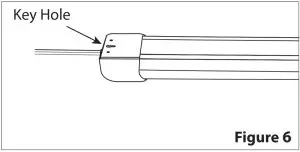 It may be necessary to adjust the tightness of the screws (Gap D). Make sure both screws hold the fixture securely on the narrow side of the Key Holes.
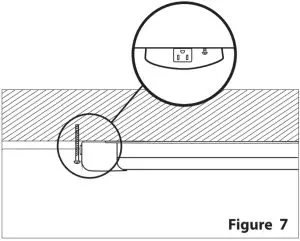 If anchor is required, mark the hole as close as possible to the fixture, remove the fixture, drill the hole on the marked position, install anchor into the drilled hole, re-install the fixture then install the screw into the wall anchor. This will secure the fixture into place.
Fixture Maintenance
- Please make sure the power is Off before maintenance.
- To avoid any damage to the product, please do not use any chemical solvents during the routine maintenance.
- To ensure better lighting, please clean the fixture regularly.
SAVE THESE INSTRUCTIONS
Smart WiFi Shop Light
Quick Install APP Guide
- Download the Feit Electric app on your smart device Felt Electric app
- Plug in your Smart Wi-Fi Shop Light Plug the Smart Wi-Fi Shop Light into any indoor receptacle.WARNING: These products may represent a possible shock or fire hazard if improperly installed or attached in any way. Products should be installed in accordance with this install guide, current electrical codes and/or the current National Electric Code (NEC).
NOTE: If the Shop Light(s) is not blinking, turn the Shop Light(s) ON-OFF-ON-OFF-ON by using the plug, wall switch or slide switch (on the Shop Light). Constant power to the Shop Light(s) is required at all times.
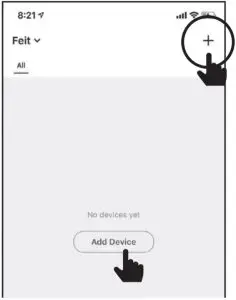
- Launch and use the Felt Electric app to complete the set up Tap Add Device or the + sign, then select Lighting Device and confirm. You will be prompted to enter your Wi-Fi network and password.Be sure to connect to a 2.4 GHz Wi-Fi network that covers your installation location.
- (Optional) Connect to Google Assistant or Alexa using the in App guide ..

 Felt Electric app
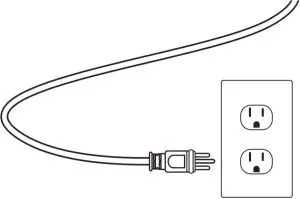 WARNING: These products may represent a possible shock or fire hazard if improperly installed or attached in any way. Products should be installed in accordance with this install guide, current electrical codes and/or the current National Electric Code (NEC).
 Be sure to connect to a 2.4 GHz Wi-Fi network that covers your installation location.
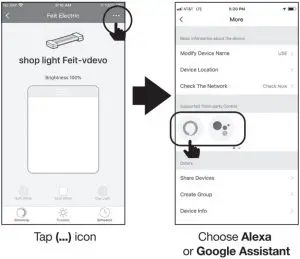
TROUBLESHOOTING TIPS
you are having difficulty connecting:
- Make sure the Wi-Fi network is a 2,4 GHz network. Smart WiFi Shop Light will not connect to a 5 GHz network.
- Test your WiFi network with other devices such as your phone to make sure it is operating properly.
- The WiFi connection may not have good coverage during set up. Try moving the Smart Wi-Fi Shop Light closer to your WiFi router.
- Your WiFi network password is case sensitive, make sure you are entering correctly.
Please also check the App User Guide for more information.
LIMITED WARRANTY
This product is warrantied to be free from defects in workmanship and materials for up to 5 years from date of purchase. If the product fails within the warranty period, please visit feit.com/help for instructions on replacement/refund or call 866.326.BULB. REPLACEMENT OR REFUND IS YOUR SOLE REMEDY. EXCEPT TO THE EXTENT PROHIBITED BY APPLICABLE LAW, ANY IMPLIED WARRANTIES ARE LIMITED IN DURATION TO THE DURATION OF THIS WARRANTY. LIABILITY FOR INCIDENTAL OR CONSEQUENTIAL DAMAGES IS HEREBY EXPRESSLY EXCLUDED. Some states and provinces do not allow the exclusion of incidental or consequential damages, so the above limitation or exclusion may not apply to you. This warranty gives you specific legal rights, and you may also have other rights which vary from state to state or province to province.
Customer Support

Need Help?Thank you for your purchase. Questions, comments or feedback? We’d love to hear from you. Visit feit.com/help for support or connect with us:
 @FeitElectric
 @FeitElectricInc
 @FeitElectriclighting
 report this ad
[xyz-ips snippet=”download-snippet”]