FJWestcott Ulite Kit Instruction Manual
Caution
Failure to read and follow the bullet points below may potentially void Westcott’s 1-year Limited Warranty.
- Failure to use the supplied silver metal locking ring could result in permanent damage to the ulite bulb and softbox. DO NOT use the ulite Softbox without the installation of the locking ring.
- Do not attempt to open or modify housing of any Westcott products. Contact Westcott for assistance.
- Never leave unattended around small children and/or pets.
- Always use the supplied front diffusion panel during use.
- Always make sure power is off and the power cord is unplugged before removing or inserting a bulb.
- Always disconnect ulite when not in use and allow to cool before collapsing, storing, and/or changing bulbs.
- Keep away from fire, water, and moisture.
- Do not submerge in water.
- Fluorescent bulbs contain mercury. Manage in accordance with disposal laws. Please refer to www.lamprecycle.org for more details.
Warranty
Westcott’s warranty obligations for this product are limited to the following terms.The F.J. Westcott Co. (“Westcott”) warrants this Westcott branded product against defects in materials and workmanship under normal use for a period of ONE (1) YEAR from the date of retail purchase from Westcott or an authorized retailer by the original end-user purchaser (“Warranty Period”). If a defect arises and a valid claim is received within the Warranty Period, at its option and to the extent permitted by law, Westcott will either (l) repair the defect at no charge, using new or refurbished replacement parts,or (2) exchange the product with a product that is new or which has been manufactured from new or serviceable used parts and is at least functionally equivalent to the original product. This Limited Warranty applies only to products manufactured by or for Westcott that can be identified by the Westcott trademark, trade name, or logo affixed to them.
This warranty does not apply to: (a) damage caused by accident, abuse, misuse, flood, fire, earthquake, mold, or other external causes; (b) damage caused by operating the product outside the permitted or intended uses described by Westcott; (c) a product or part that has been modified to alter functionality or capability without the written permission of Westcott; or (d) cosmetic damage, including but not limited to scratches, dents and broken plastic.
Disclaimer: By purchasing, borrowing and/or using this product for any event, both public or private, you, the customer, accepts all responsibility and releases Westcott, and its associates, of any and all liability in the event of manufacturer’s defect, malfunction or misuse of the product which may lead to further injuries or complications unforeseen by the user. Westcott is not responsible for any potential or incurred damage caused by failure to properly mount, hang, or store the product, which includes, but is not limited to damage to cameras, electronics, electrical equipment, buildings, building materials, personal injury, death, or disability, fire damage, or any and all other damage not mentioned previously.
Please contact Westcott Customer Support for a Return Authorization Number “RMg prior to requesting warranty service. This RMA must be clearly written on the outside of the box to the left of the shipping label. Items sent in without pre-authorization or that do not fall under the limited warranty will be returned at the expense of the sender.
Phone: 800-886-1689 / 419-243-7311 (International)Email: Shipping: F.J. Westcott Co, 1425-B Holland Rd. Maumee, OH 43537
Visit FJWESTCOTT.COM for videos, pro tips, inspiration, and more! Westcott products are made to the company’s traditionally high standards of quality and comply with all applicable government safety regulations and requirements. In an effort to provide the best quality products possible, we periodically make product modifications. Actual products may not be identical to items pictured. Made in China. ©F.J. Westcott Co. All rights reserved. EA0220
uLite Kit Assembly
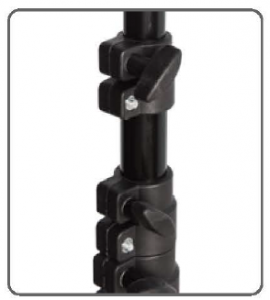
- Locate one light stand. Extend the legs outward by loosening . the knob located at the base of the light stand and applying downward pressure.When the center of the light stand is fuloor, tighhten down the knob. . approximately 1″ off of the sing t e three remaining knobs located on your light stand, adjust the height accordingly
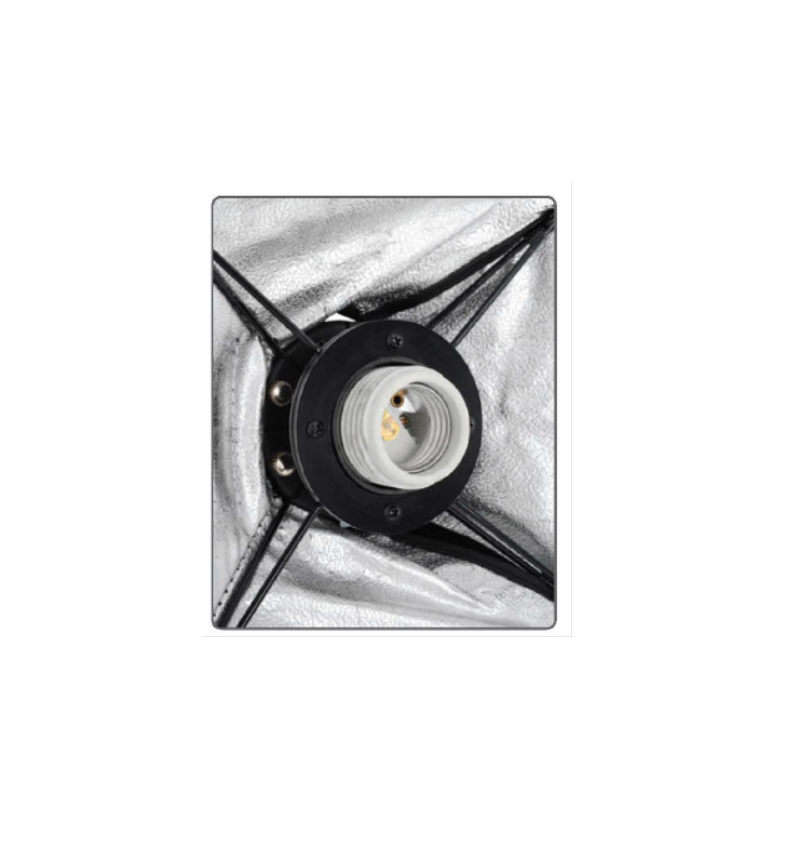
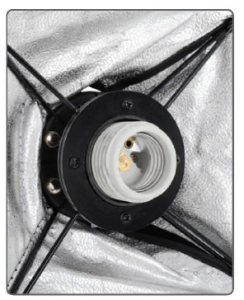
- Locate the u Lite socket and u lite soft box fabric. Attach the soft box to the u Lite by inserting thesoft box rods into the soft box pockets.Important: Attach the softbox with the heat vent positioned at the top of the uLite to ensure proper ventilation and avoid overheating.
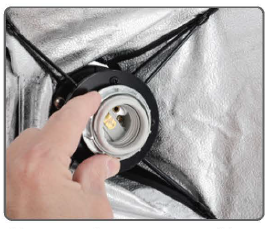
- Once attached, open the softbox by pushing the round center runner towards and around the bulb socket until it’s seated flush. Once completely open, the softbox will take shape.
- Once the round black runner is seated flat at the base of the light socket, install the supplied silver metal locking ring by rotating clockwise on socket.
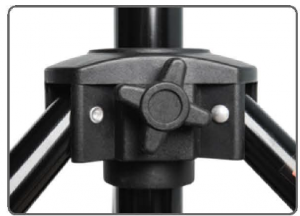
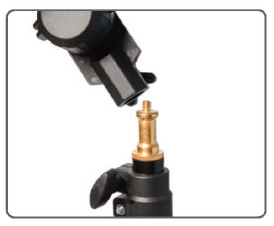
- Loosen the tension knob on the u Lite’s tilting bracket. Then place the bracket onto the top stud of the light stand. Tighten knob to lock into place.
- Ensure the unit is not plugged into any power receptacle. Locate the bulb and screw it into the ulite socket.
- Locate the white front diffusion panel for the softbox. Secure this panel to the front of the softbox using the hook-and-loop tape.
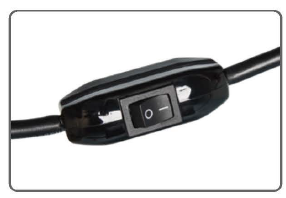
- Connect the power cord to a grounded electrical 120V outlet. Turn the light ON/ OFF using the switch located on the power cord.
- Repeat all steps above for any remaining ulites.
Collapsing the uLite Softbox
- Power OFF and unplug your ulite.
- Cooling your bulbs: Allow 3-5 minutes for 45W LED. Allow 5-7 minutes for Fluorescents. Allow 20 minutes for Photoflood.
- Unscrew the metal locking ring. Locate the round center runner and pull towards you, allowing the softbox to naturally collapse.
Removing the uLite Softbox & Frame
- Complete all steps for “Collapsing the ulite Softbox”.
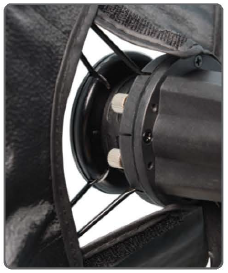
- Locate the thumb screws and turn counterclockwise until the softbox is released from the main light fixture.
- To reattach, simply line up the screw holes with the thumb screws and tighten until securely fastened.
Read More About This Manual & Download PDF:
[xyz-ips snippet=”download-snippet”]