
Formica Laminate Countertop Installation Guide
STEPS 1 & 2: MEASURE & MARK
Measure the cabinets that will be covered with your new countertop. (STEP 1) Always measure the back wall of the countertop for correct readings.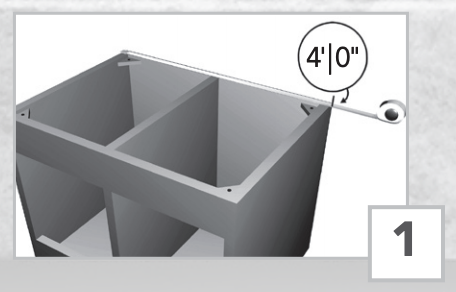
OVERHANG: When the countertop does not butt up to a wall or an appliance, allow an extra 3/4” to the total length of the countertop for the overhang. Measure section by section. For section requiring overhang, add 3/4” for each overhang. (STEP 2)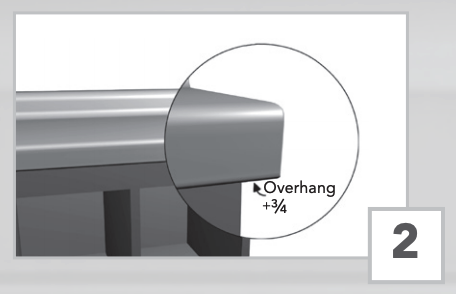
STEP 3: CUTTING
Recheck your measurements before cutting. Measure and draw a heavy pencil line where the cut is to be made on the top (decorative laminate) side of the countertop. Tape to prevent chipping while sawing. Turn the countertop over, measure and draw a heavy pencil line again where the cut is to be made. Recheck measurements and proceed to saw from the bottom side. (STEP 3)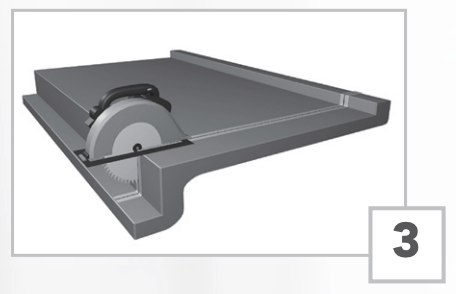
NOTE: If using a hand saw, measure and draw a heavy pencil line where the cut is to be made on the top (decorative laminate) side of the countertop. Recheck your measurements and apply tape to avoid chipping while sawing. Use a 10 to 12 teeth per inch saw for cutting on the down stroke.
STEPS 4 & 5: CUT-OUTS
Follow the instructions provided with the rim to mark the position for the cut-out. Mark around rim with a pencil on outside of vertical member. If you are installing a self-rimmed stainless steel sink, mark around the outer edge of the sink and cut out the hole 3/8” to 1/2” smaller than the line. Trace the outline and cover with transparent tape. (STEP 4)
With a sharp punch or nail, tap a starter point for drilling pilot holes at each round corner. (STEP 5)
STEPS 6 & 7: CUT-OUTS
Drill pilot holes. (STEP 6)
NOTE: If using a sabre saw, turn the countertop over and using previously drilled holes, mark a new cut line on the bottom surface.
Use a fine tooth keyhole saw to make the cut-out. (STEP 7) File or sand the edges of all inside corners.
STEP 8: BUILD-UP
A Build-up Kit (A KIT) is required on some cabinetry to ensure that the drawers have enough clearance to slide open. (STEP 8)
STEP 9: ASSEMBLING THE MITER
Miter sections should be joined together before installing on the cabinet. A Miter Bolt Kit (B KIT) is required to assemble the miter. (STEP 9)
STEP 10: END FINISHING
To finish the ends of the countertop, use an End Cap Kit (C KIT) or End Splash Kit (D KIT). (STEP 10)
STEPS 11 & 12: MOUNTING ON CABINET
The countertop can be scribed to match the wall surface. The backsplash overhang is used for this purpose. Place the countertop on the cabinet, use a pencil to mark the top edge of the countertop and file or sand to the line. (STEP 11)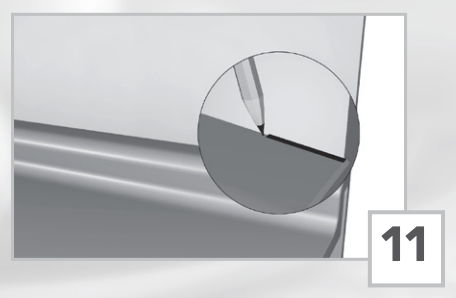
Put countertop in place, check the level and stability. Secure to cabinets with wood screws or panel adhesive. If using screws, check length to assure that they won’t protrude through the countertop. Use caulking compound to seal top to wall. Wipe off excess. (STEP 12)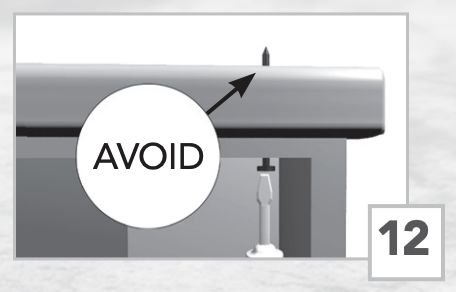
REMOVING OLD COUNTERTOP:
- For safety—disconnect all utility service.
- SHUT OFF WATER under sink or at water meter valve.
- SHUT OFF ELECTRICITY at meter panel, if removing garbage disposal or cook top unit.
- DISCONNECT SINK DRAIN AT TRAP
- DISCONNECT PLUMBING SUPPLY AT UNIONS
PROTECTING YOUR COUNTERTOP:
- Do not place hot items directly on laminate surface:
- Use a trivet or other protective surface under pots/pans, waffle irons, curling irons, clothing irons, etc.
- Do not use knives or other sharp utensils that may slice or scratch the laminate surface:
- Use a cutting board for chopping and slicing.
- Do not slide abrasive items (such as ceramics) across the laminate surface:
- Use a placemat or protective surface underneath these items.
CARING FOR YOUR COUNTERTOP:
- For everyday cleaning, use a clean, damp non-abrasive cloth with a mild detergent or household cleaner.
- For stuck-on residue, scrub with a nylon bristled brush. For difficult stains, apply a paste of baking soda and water to draw out the stain. Blot away with a damp cloth (do not rub).
- Never use cleaners containing acid, alkali or bleach.
FOLLOW INSTALLATION INSTRUCTIONS ENCLOSED WITH YOUR SINK OR SINK RIM
[xyz-ips snippet=”download-snippet”]