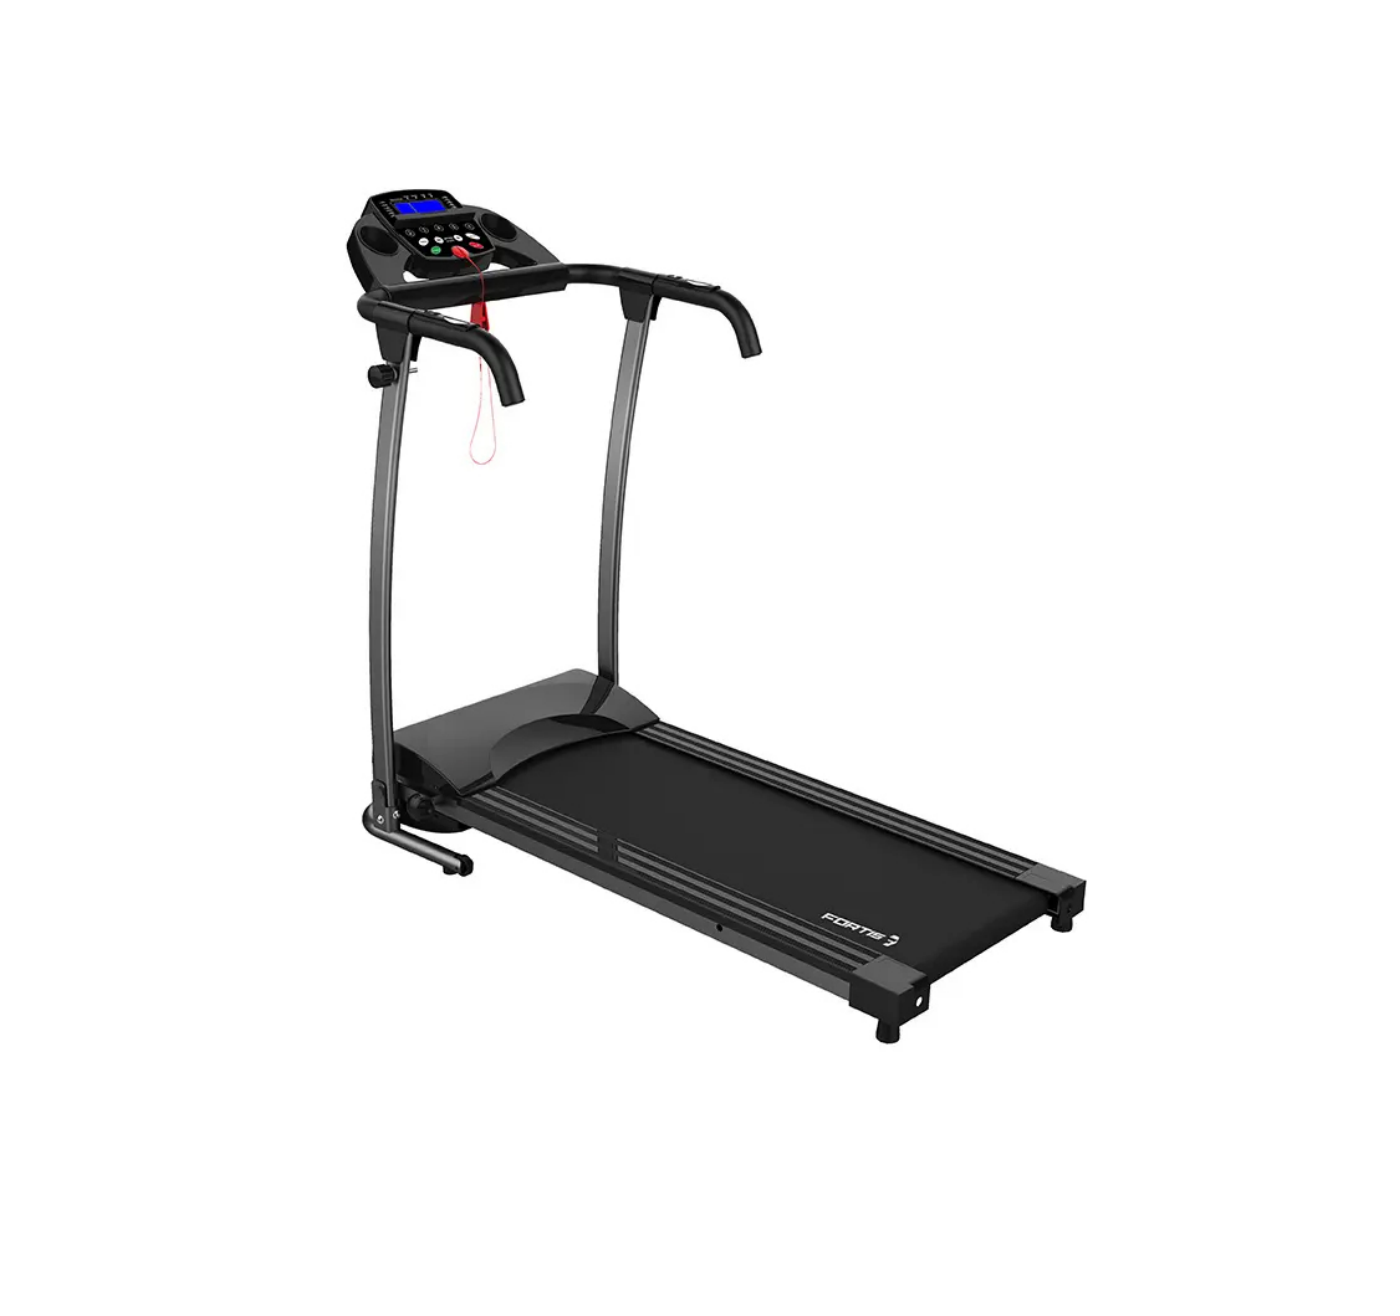
FORTIS Belt Adjustable Incline Electric Treadmill

SAFETY & WARNINGS
1. CautionTo avoid injury, please read this manual carefully before use.
- For safety purposes, do not stand on the running belt when starting the unit.
- Please stop immediately if you feel any nausea or the unit’s motion is no longer smooth.
- Always increase or decrease speed at a slow rate.
- Never adjust the belt during use.
- It is suggested to wear sports shoes when using the machine.
- Children, the elderly, pregnant women should not use the machine. · Always clip the safety key on your clothing during use.
- Firmly hold the grip bars during use
2. Safety Information
- Place the machine on flat ground. Do not use the machine in the following locations:1. Outdoors. (The machine is specially designed for indoor use only).2. Any ground that is uneven.3. Any areas in high sunlight or in close proximity to heating units.
- The input for the machine is AC 220V.
- An error may appear if the power is not stable. The unit must not have any other items connected to the same power socket and should not be used through a power board.
- It is suggested to wear sports shoes and gym clothes when using the machine.
- Always increase or decrease speed at a slow rate.
- Be careful of children or surrounding objects when folding and unfolding the machine.
- Never put the machine near wet objects or areas. The unit may produce an error if it is wet.
3. Caution during use
- If you do not feel well during exercise, please consult with your doctor.
- No liability will be accepted for improper use of the device and any resulting injuries or damage.
- Please pull out safety key after use.
- Please pull out the safety key when moving or changing any parts of the machine.
- Children, the elderly, pregnant women should not use the machine.
- Do not place any items within two meters of the machine.
- Do not start the machine when it is folded.
- Ensure water does not come in contact with the machine, especially the motor, power cable and plug.
- Never wear long dresses or other unsuitable garments during use.
- Do not use the machine in enclosed spaces, locations with uncirculated air or flammable areas.
- Do not put any objects on the machine.
- Keep the plug away from heat.
- Please switch off the unit and remove the plug after using.
- Please do not stand directly on the belt while starting the machine.
- Do not disassemble or modify this machine in any way.
- Please make sure the running belt is fastened before use.
- The running belt on this treadmill has a visible joint mark. This is completely normal and will not affect the performance or operation of your treadmill.
ASSEMBLY
Step 1:
Open the package and remove the treadmill and accessory bag.
Step 2:
Attach the left and right upright tubes to the base frame using the x4 short screws and x4 washers.Note: Do not tighten the screws.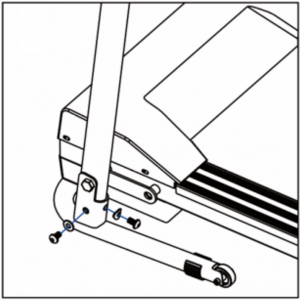
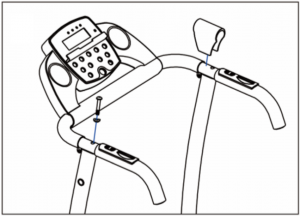
Step 3:
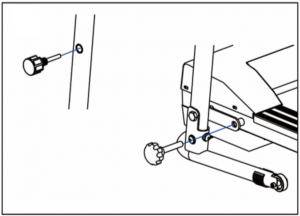
- Attach the control panel to the upright tubes using the x2 screws and x2 washers.
- Tighten all the screws including the x4 from step 2.Note: Ensure the cables in the upright tube will not be come into contact with the screws.
- Place the covers on the armrest.

Step 4:
Adjust control panel to a suitable angle using the M6 knob and plastic gasket and then insert the safety key into the panel.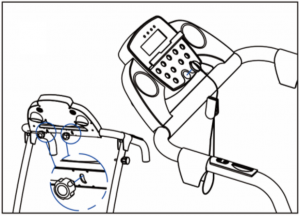
Step 5:
- Attach the M16 knob to left upright tube
- Attach the running frame to base tube by using the M12 knob.
Step 6:
Assembly is complete.
OPERATION
Control Panel
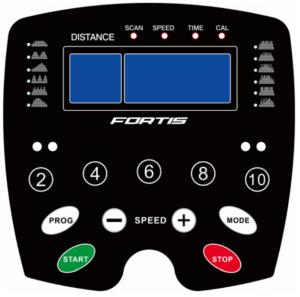
- Press “START”, the machine will start at 0.8km/h after 3 seconds.
- Press “+” key to speed up and “-” key to slow down. The fastest speed is 10.5km/h and lowest is 0.8km/h.
- Press the “mode” key, to cycle between the different functions in the following order: Speed, Time, Calorie, and Scan. When “scan” is selected the screen will automatically move between Distance, Time and Calories every 5 seconds.
- The treadmill has 12 inbuilt programs. To select a program, ensure that the treadmill is in standby with the belt stationary. Press the “PROG” button to select the desired program then press “START” to start the machine.
- For emergency stop, please pull-out safety key. The machine will stop very slowly. Pull out safety key and the screen will show “Err”, put on it will show `OFF”.
- Press “STOP” key to stop the machine after using.
TRANSPORTING
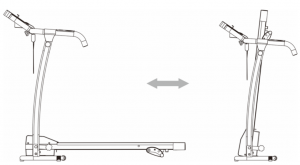
Fold:
- Turn the fixed knob then lift the running board to fold the treadmill.
- Pull out the tension knob, aimed at the platform then release the knob to fix the treadmill in place.
- The treadmill can be moved and stored safely.
Unfold:
- Pull out the tension knob then carefully lower the running board.
- Secure the treadmill using the fixed knob.
- Connect the treadmill to a power outlet. · The treadmill is ready for operation.
CLEANING & CARE
Always disconnect the unit’s power before performing any maintenance or cleaning.
- Clean the belt and dial plate using a slightly damp, clean cloth.
- Check and tighten the screws and spines at fixing point.
- Do not hang clothes or other objects on the machine.
Lubrication
- Pull up the running belt carefully.
- Apply silicone oil to running board.
- Start the machine and let it run for 3 minutes without any weight applied.
- This should be completed after every 30 hours of use and will increase the lifespan for your unit.

Adjusting the Belt
1. If the belt is deviating to the left:
- Start the machine and adjust to 2-3km/h without loading, use a hex key to tighten 1/4 of a rotation.
- Let the unit run without loading for 1-2 minutes. · Repeat this process until the belt is centered.
2. If the belt is deviating to the right:
- Start the machine and adjust to 2-3km/h without loading, use a hex key to tighten 1/4 of a rotation.
- Let the unit run without loading for 1-2 minutes.
- Repeat this process until the belt is centered.
3. Running belt has jammed:
If the running belt is unable to move, use a hex key to tighten 1/2 a rotation on the left and right until the unit is able to move.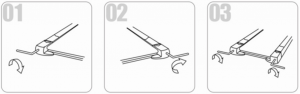
Need more information?We hope that this user guide has given you the assistance needed for a simple set-up. For the most up-to-date guide for your product, as well as any additional assistance you may require,head online to help.kogan.com.
[xyz-ips snippet=”download-snippet”]