
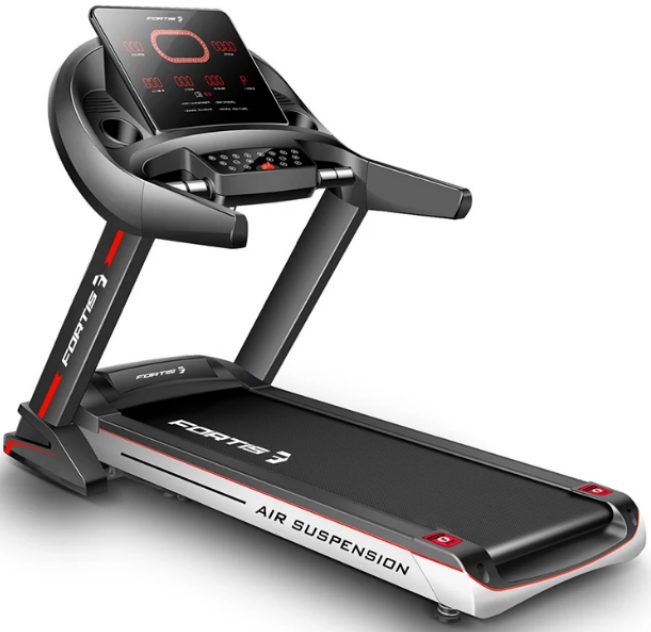
 USER GULDE520MM BELT LUXURY TREADMILLFSEFBTM520A
SAFETY & WARNINGS
- Install the treadmill in a dry location away from water, dampness, and dust.
- Do not run on the treadmill with bare feet. Wear appropriate exercise clothing.
- Plug the treadmill into a grounded electrical socket.
- Do not plug into an extension board.
- Keep children away from the treadmill.
- Before operating, ensure a safety clip is attached to you so the emergency stop is activated at the time of the accident.
- After using silicone oil, keep it away from children’s reach to avoid accidental ingestion.
- Before using the treadmill, check your clothes are buttoned up or zipped up.
- Do not wear clothes that can easily hook onto the treadmill.
- Keep the power cord away from hot objects and surfaces.
- Do not use the treadmill in the open air.
- Do not perform repairs yourself or allow non-authorized persons to disassemble or perform repairs on the treadmill. If repairs are required, cease use immediately and contact Kogan.com for assistance.
- Only one person can use the treadmill at a time.
- During the exercise, if you feel dizzy, have chest pain, nausea, or shortness of breath, stop exercising immediately and consult your doctor.
- Do not use the treadmill if it is damaged in any way.
- Intended for home use only.
- Do not use when intoxicated.
- The treadmill can support a maximum weight of 150kg.
- Power off and unplug the treadmill before moving.
- Clean the treadmill regularly. See the Cleaning & Care section of this user guide.
- Switch off the treadmill after use.
- The running belt on this treadmill has a visible joint mark. This is completely normal and will not affect the performance or operation of your treadmill.
Electrical Grounding
- Use this product with appropriate electrical grounding. If there is a malfunction, the grounding system will provide a low resistance pathway to the ground to protect against the electric path.
- Install this product using an Equipment-Grounding Conductor (EGC) and grounding plug. The plug must be inserted into the proper plug base that has been correctly installed and grounded according to the local laws or regulations.
- If the ECG is connected improperly, it may cause the danger of electric shock. If you doubt whether the grounding of this product is right, authorize a professional electrician to check.
- If the grounding plug attached with this product does not match with the plug base, authorize a professional electrician to install the right plug.
- Ensure that the grounding plug of this product is connected to the plug base that has the same shape. Do not use a plug base adapter.
OVERVIEW

- Upper Frame
- Control Console
- Input Keys
- Handles
- Upright Post
- Gas Strut
- Running Deck
- Running Belt
- Rear Guard
- Folding Lock
- Side Cover
- Lower Frame
ASSEMBLY
Step 1:
 |
1. Raise the Upper Frame upright into the position. |
 |
2. Fix the Control Console into the position using the following:Half-Round Head Hexagon Screw (M8x20) x2M8 Flat Washer x2
|
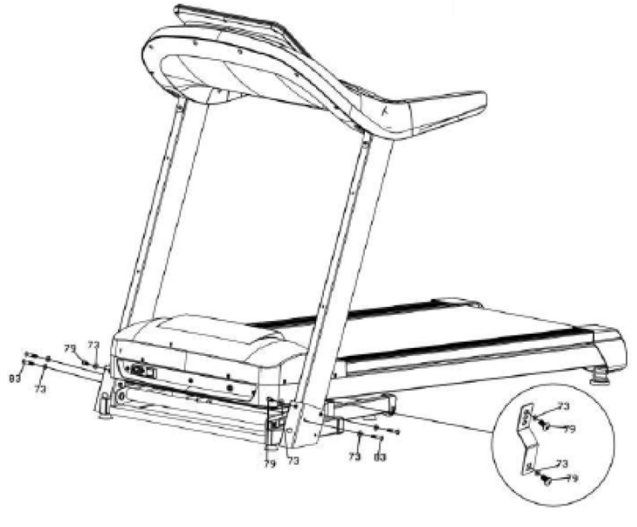 |
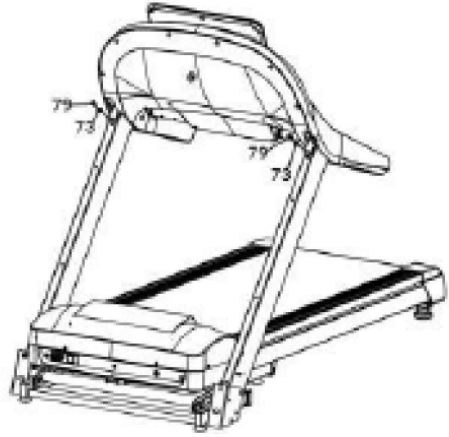
3. Fix the left and right Upright Post onto the pedestal using the following:Half-Round Head Hexagon Screw (M8x20) x2Half-Round Head Hexagon Screw (M8x65) x4M8 Flat Washer x2 |
Step 2:
- Fix the left and right Side Covers on both sides of the pedestal with drilling screws.
- Connect the electrical line and place it into the small round tube and then fix left and right handles onto the electronic meter with drilling crews.
- Fix the Rear Guard at the end of the Running Belt with drilling screws. You have finished assembling the treadmill.Cross Head with Flat Self – Tapping & Self Drilling Screws (ST4.2×16)

OPERATION
Note: Always use a power outlet that is earthed.1. Insert the power cord into the back of the treadmill and then connect it to a power outlet.2. Turn on the power switch on the back of the treadmill, it will illuminate red light to indicate the treadmill has been powered on.3. The treadmill will “beep” and the display will be turned on.4. Before operating the treadmill, ensure the safety tether is attached to an item of your clothing, and that the tether insert is attached to the treadmill’s console.
 Console Operation
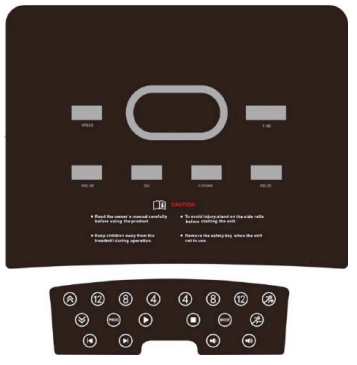
| START | To start the treadmill. | |
| STOP | To stop the treadmill. | |
| PROG | Following modes are available:• Manual Control• Automatic Program• Custom Program• HRC Program• Body Fat TestTo c h a n g e functions, do the following:• When in Manual Control, press the PROG button to enter the Automatic Program.• Press PROG again to enter Body Fat Test.• Press PROG again to return to Manual Control. | |
 |
MODE | To select the Countdown mode. |
| SPEED | To a d j, u s t t h e running speed. | |
| INCLINE | • To a d j u s t t h e incline speed.• When the console is in the standby state, press the MODE key to change from speed to incline adjustment | |
| VOLUME | To adjust the volume of music playback. | |
| LAST/NEXT | To c ycle between the tracks during music playback. | |
| Speed Adjustment Key | ||
| Incline Adjustment Key |
Manual Control Mode
- When the treadmill is on standby, press the START key to start the treadmill and enter manual control mode.
- The initial speed will be is 1 kilometer/hour.
- Time, Distance, and Calorie counts will start from 0.
- The speed and incline of the treadmill can be adjusted in real-time using the SPEED and INCLINE keys on the console.
- If exercise time exceeds 99: 59 minutes, the time will reset to 0.
Countdown ModeThe treadmill can be set to stop automatically when you reach the desired goal of either Time, Distance or Calories.
- To enter the Time Countdown Mode, do the following:1. In the Manual Control mode, press the Mode key to select the Time Countdown mode.2. The time display shows 30:00 minutes. The running time can be set via Speed +/key or Incline +/- key.3. Set time range from 8:00 ~ 99:00 minutes. Press the START key to start the timer countdown.
- To enter Distance Countdown mode, do the following1. In the Manual Control mode, press the Mode key to select the Distance Countdown mode.2. The distance display shows 1.0 km and the distance goal can be set by pressing the Speed +/- key or Incline +/- key.3. Set distance range 1.0 ~ 99.0 km. Press the START key to start the distance countdown.
- To enter the Calorie Countdown mode, do the following1. In the Manual Control mode, press the Mode key to select the Calorie mode.2. The calorie display shows 50 calories and the calorie be 6can be set by pressing the Speed +/- key or Incline +/- key.|3. Set calorie range from 20 ~ 99.0. Press the START key to enter the Calorie mode operation.
During any countdown mode when START is pressed the initial speed will be 1 km/h.The countdown down mode you have chosen will begin the countdown as the other parameters increases.The speed and incline of the treadmill can be adjusted manually in real-time using the SPEED and INCLINE keys.As the countdown parameter reaches its goal the treadmill will slow down and enter standby mode.
Automatic Program Function
- In the Manual Control mode state or MODE setting state, press the PROG key to enter the Automatic Program function.
- The display shows 30:00 minutes and can be adjusted by pressing the SPEED +/key or INCLINE +/- key. Set the range to 8:00 ~ 99: 00t minutes.
- Press the START key to start an automatic program.
- The automatic program is divided into 20 sections. The Speed and Incline values for each segment run is determined by the automatic program. The run time for each segment is 1/20 of the total set time.
- The time display resets the count at the start of each segment. Distance and Calories displays start from 0 and increases.
- Speed and incline can be adjusted during the automatic program by pressing the SPEED and INCLINE keys.
- When the automatic program is complete the treadmill will enter standby mode.
Body Fat Test Function
- In the Manual Control mode or MODE setting state, press the PROG key to enter the Body Fat Test function.
- After entering the body fat test settings status, the SPEED display will show the parameter’s name.
- The TIME display shows a parameter value to be set. Adjust the parameter value by using the SPEED +/- key or INCLINE +/- key.
- Press the MODE key to select and enter the following parameters:
- After entering the parameters, test your Body Fat percentage.
- Hold the steel sensor plates on the handlebars for about 5 seconds.
- The body fat percentage will be calculated based on your input parameters and will be displayed on the screen.
|
Parameters |
Initial Value | Range | |
| F-1 | Gender | 1 | Male: 1 and Female: 2 |
| F-2 | Age | 25 years | 10 to 99 years |
| F-3 | Height | 170 centimeters | 100 to 220 centimeters |
| F-4 | Weight | 70 kilograms | 20 to 150 kilograms |
| F-5 | Body Fat | — |
Heart Rate Function
- Hold the steel sensor plates on the handlebars. Use a natural grip on both handles.
- After about 5 seconds, the LED pulse display window will display a heartbeat initial value. Keep your hands still on the sensors for roughly 30 seconds to get an accurate heart rate measurement.
- The heart rate data will change in real-time if your hands are placed on the sensors.
Note: This heart rate test data is not medically accurate and should be used for sporting purposes only.
Sleep Function
- When the treadmill stops running and there is no operation for more than 10 minutes, the sleep mode will be activated. The display is turned off automatically.
- Press any key to wake it up.
Safety Tether and Safety Lock
- Before operating the treadmill, ensure the safety tether is placed in the specified location.
- If the safety tether is missing or not correctly connected the control console will display E07 or “—” with a warning note.
- If the safety tether is removed when operating the treadmill, the system will quickly shut down and the safety lock is activated. The data in the display will be cleared.
USB Functions
- Insert a USB device containing audio files in the MP3 format while the treadmill is powered off.
- Audio will automatically play from the inserted USB device.
Display Parameters Range
|
Initial |
Program Initial Value | Setting Range | Display Range | |
| Time (Min: Sec) | 0:00 | 30:00 | 8:00 – 99:00 | 0:00 ~ 99:59 |
| Speed (Km/h) | 0.0 | 1 | 1-18 | 1 – 18 |
| Distance (Km) | 0.00 | 1.00 | 1. O – 99.0 | 0.0 – 99.9 |
| Pulse (Times/Min) | P | N/A | N/A | 40 – 199 |
| Calories (Kcal) | 0.0 | 50.0 | 20 – 990 | 0 – 999 |
| Incline (Level) | 0 | 0 | 0 – 15 | 0 – 15 |
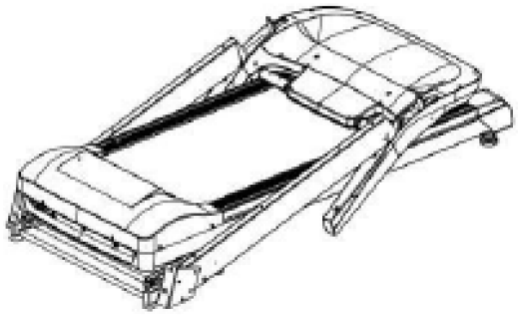
Folding the Treadmill
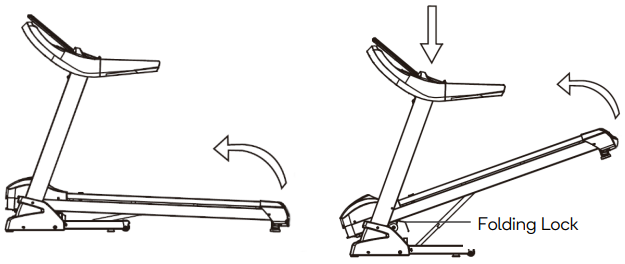 |
 |
- Before moving the treadmill, ensure it is turned off and unplugged from the power outlet.
- Release the Folding Lock. Fold the Running Deck towards the Upper Frame by holding the Rear Guard as shown in the image. Folding Lock
- The Gas Strut will lock the Running Deck in the upright position. Gas Strut
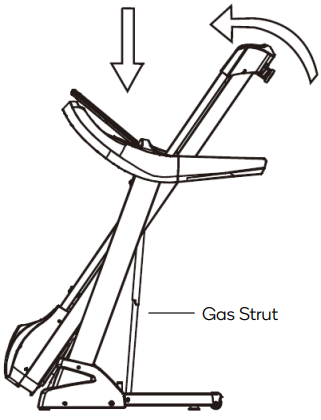
Moving the Treadmill
 |
 |
- Fold the treadmill as per the instructions under the Folding Treadmill section.
- Move the treadmill by placing afoot at the base to hold it steady. Pull the treadmill towards you by the hands.
- After moving to a safe place for storing, gently tread the Gas Strut as shown in the image below. The Running Deck will slowly fall to its position.
CLEANING & CARE
Appropriate maintenance is required to keep your treadmill in optimal condition. Incorrect maintenance will damage or shorten the service life of the treadmill. Regulate the Running Belt
- The running belt can be adjusted in two variables: the degree of tightness and central position of the running belt.
- The running belt has been adjusted when leaving the factory, but it will be stretched after use. Deviation from a central position can cause damage by wearing the trim strip and rear protecting cover. It is normal for the belt to stretch throughout its use.
Adjust the Running BeltIf the running belt is slipping during use or tends to get caught and not run smoothly, adjust the tightness of the belt. Follow the below instructions:
- Insert the regulating screw on the back left of the running belt using 5 millimeters hexagon wrench. Turn the wrench by 1/4 of a circle clockwise to regulate the rear roller to tighten the running belt.
- Repeat step 1 to adjust the screw on the right. Ensure that the regulating screw is turned by the same distance to make the rear roller parallel with the frame.
- Repeat steps 1 and 2 until the running belt is tight.Note: The running belt should not be too tight as it can damage the running belt, roller bearing and increase the pressure of the front/rear roller causing abnormal sound or other problems.
- If the running belt is too tight, to reduce the tension of the running belt, turn the wrench anticlockwise by the same distance on both sides.
Adjust Running Belt PositionWhen using the treadmill, the force of your feet can cause pressure on the running belt and making it unbalanced, which makes the running belt deviate from the center portion. Such deviation is normal. It will return to the center position when nobody is running on the running belt. Adjustment is needed if the belt fails to return to the central position. Follow the instructions below to adjust the position of the belt:
- Activate the treadmill without a runner on it and adjust speed to 6 kilometers/hour.
- Observe the distance of the running belt from the left edge strip to the right edge strip.
- Do the following:· If the running belt tilts towards the left, turn the left screw by 1/4 of a circle clockwise with a hexagon wrench.· If the running belt tilts towards the right, turn the right screw by 1/4 of a circle clockwise with a hexagon wrench.· If the running belt is still not in the middle, repeat the above steps until it is in the middle.· After adjusting the belt set the speed to 16 kilometers/hour. Observe deviation of running belt and running smoothness. Repeat the adjustment steps in case of deviation.
- Ensure that after the adjustment the running belt is not too tight nor loose.Note: The running belt should not be too tight as it can damage the running belt, roller bearing and increase the pressure of the front/rear roller causing abnormal sound or other problems.
- If the running belt is too tight, to reduce the tension of the running belt, turn the wrench anticlockwise by same distance on both sides as shown in the image.
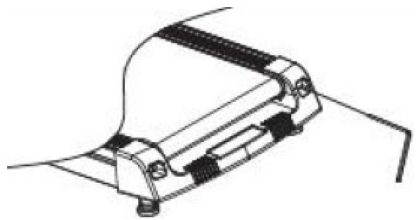
Lubricating OilThe treadmill is oiled when leaving the factory, but lubrication of the treadmill should be inspected frequently to maintain the condition of the treadmill. The treadmill must be oiled after 1 year or running for 100 hours.
- Lift one side of the running belt and touch the surface of the running platform after running for 30 hours or 30 days. It is unnecessary to lubricate if there is silicone oil on the surface.
- If the surface is dry, open the oil cap and pour the non-petroleum silicone oil into the oil port as shown in the image. Turn on the treadmill to run for some time.Note: Do not operate the treadmill while lubricating. Use only non-petroleum silicone oil.Cleaning |Frequently clean the treadmill to guarantee its service life.
- Cut off the power when cleaning the treadmill. The power line must be pulled out from the outlet.
- Clean sweat stains on the instrument and other parts with a clean towel and damp cloth.
- Do not use corrosive articles and liquid to prevent damage to electronic elements. Do not expose electronic elements to sunlight.
- Place the treadmill in a clean and dry environment. Ensure that the power switch is off and is not plugged into a power outlet.
TROUBLESHOOTING
Note: The visible line or mark on the belt is the seam. This is not a fault and does not affect the operation of the treadmill.
Error CodesIf any error codes appear on the screen, please attempt the following:
|
Code |
Description | Solution |
| E01 | Poor Communication between Speed Sensors and Control Console | Inspect connections between speed sensors and control console. |
| If there is no display, contact Kogan.com to replace it. | ||
| If there is no signal from the control console, contact Kogan.com to replace it. | ||
| E02 | Short Circuit | If there is an open circuit in the treadmill motor, cease use immediately and contact Kogan.com |
| If there is poor contact with the motor, check the connection. | ||
| If the power cable is damaged, cease use immediately and contact Kogan.com | ||
| E03 | Speed Sensor Failure | If the speed sensor is not in the correct position, adjust its position. |
| If the speed sensor is damaged, contact Kogan.com to replace it. | ||
| E04 | Overvoltage | Ensure the power supply matches the treadmill’s rated power. |
| Contact Kogan.com to replace the motor or speed sensor. | ||
| Contact Kogan.com to replace the control console. | ||
| E05 | Overcurrent Protection | Ensure the resistance of the running deck is not too high. If it is, lubricate the treadmill.
See the Cleaning & Care section of this user guide. |
| If the motor is damaged. Contact Kogan.com | ||
| E06 | Diagnostic Testing Error | Contact Kogan.com to replace the control console. |
| E07 or — | Safety Tether is inIncorrect Position | Ensure to connect the safety tether to the control console. |
| Safety Lock System Error | Contact Kogan.com to replace the control console. |
Need more information?
We hope that this user guide has given you the assistance needed for a simple setup. For the most up-to-date guide for your product, as well as any additional assistance you may require,head online to help.kogan.com

[xyz-ips snippet=”download-snippet”]