![]()
Quick Setup Guide
 For detailed manuals, tools, etc., please visit foscam.com/downloads. V1.3 1
Security Tips
- Do not install the wireless NVR in a humid and dusty environment.
- Put the wireless NVR in a drafty environment in case of the ventilation port is blocked.
- Check the power supply to avoid damage because of voltage mismatch.
- Make sure the wireless NVR working within a suitable temperature and humidity environment.
- Please install the wireless NVR horizontally, and avoid vibration.
- Short circuit may occur when the dust becomes wet on the circuit board. Please clean the dust on the circuit board, connectors, and NVR case.
- Explosion may happen because of improper replacement of the battery, do not replace it by yourself; If you need, make sure it is the same type of battery. And do not open or repair it.
- Please use a suitable and professional hard disk to ensure continuous and stable recording.
- Lightning protection is needed when the device is connected to communication cables. Ethernet cable which comes from outside, connecting to the wireless NVR directly is forbidden.
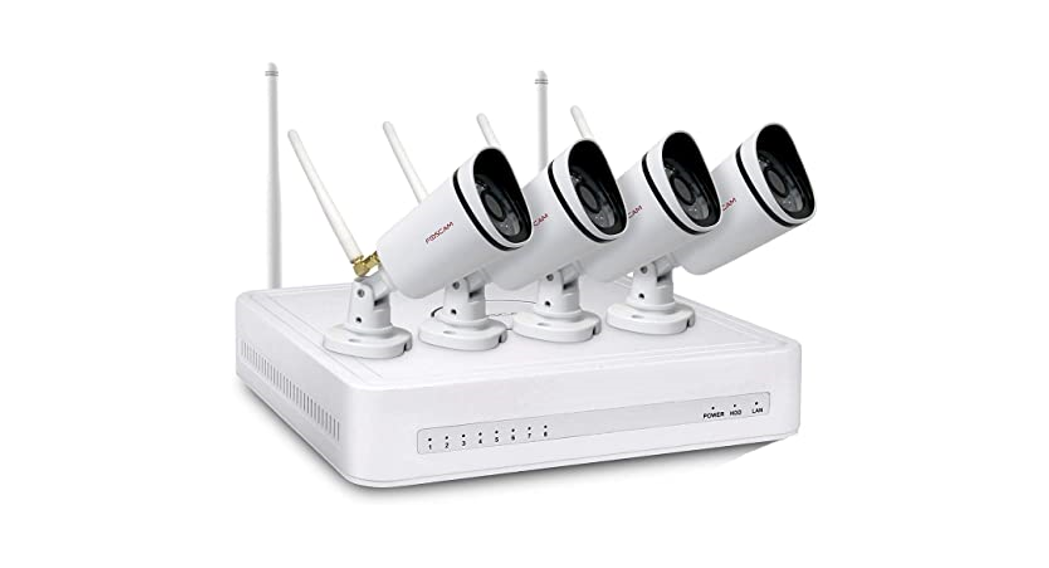
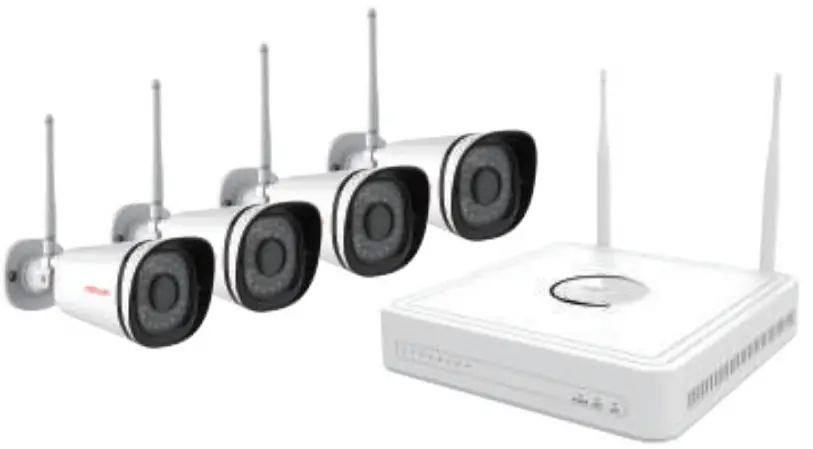
NVR Kit Contents
| 4-Channel NVR | |
| 4 x 1080P Bullet IP Cameras | 1.5m (5 ft) Ethernet Cable |
| 4 x Power Adapters for Cameras | 1 x Power Adapter for NVR |
| Quick Setup Guide | Warranty Card |
| USB Mouse | Mounting Screws |
NVR Rear Panel
Wireless Connectivity
Placement of WirelessIP Camera
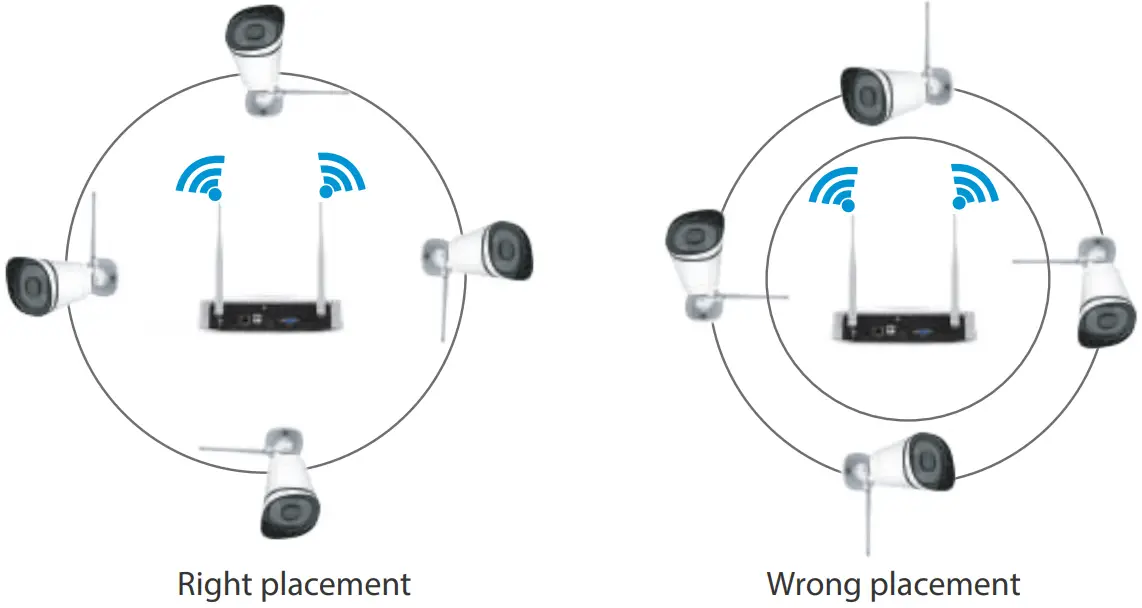
The shape of wireless NVR signal coverage is a ball, the antenna is located in the center. The signal is strong around the antenna, and weak in the dented area of the 2 antennas.Based on the signal spreading ways, please make the wireless IP Camera keeping parallel or tangent with wireless NVR, which ensures stable signal transmission and better picture quality.
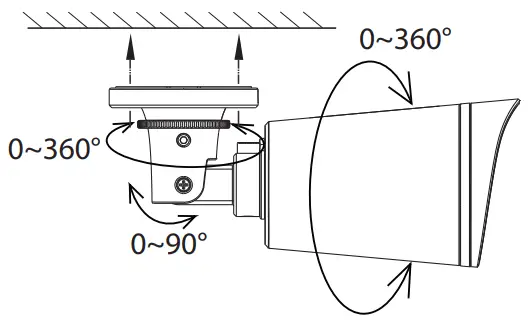
Camera Installation
Place the cameras in your preferred locations and use the included screws to mount them.
 |
|
Important Note:When installing the cameras please ensure that the connection ports at the end of the pigtail wiring are not exposed, as they are not weather-resistant.
Powering Up
|
|
Please make sure the voltage of the power supply is matched with wireless NVR, and the ground connection works well in socket. Connect the NVR and cameras as shown in the figures above. Once the NVR is plugged in, press the power switch located on the rear panel.After the NVR starts up successfully, the Power LED indicators will turn green, it means system runs smoothly.
Software Operation
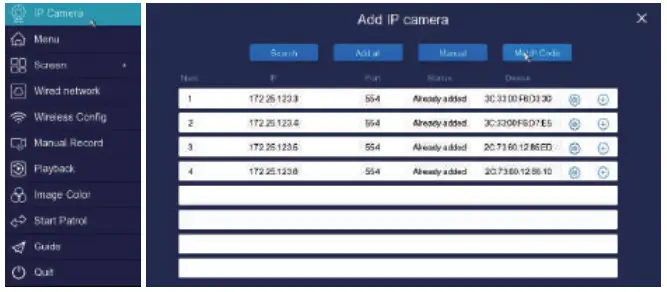
1. NVR adds IP Camera methodNote: The NVR and IP Camera are already paired. If you need to rematch, please refer to the following steps.
- Right-click on the main interface, select IP Camera – Add Match Code.
- If just match one device, please connect IP Camera and NVR with IP cable in WAN port. For multiple matching, please connect IP Camera to switch, and connect NVR to witch in WAN port.
- Click Match Code, the system will match the code between IP Camera and NVR.
- When finished code matching, click Search, then select Add All. Users also can click
 to add it and view pictures.
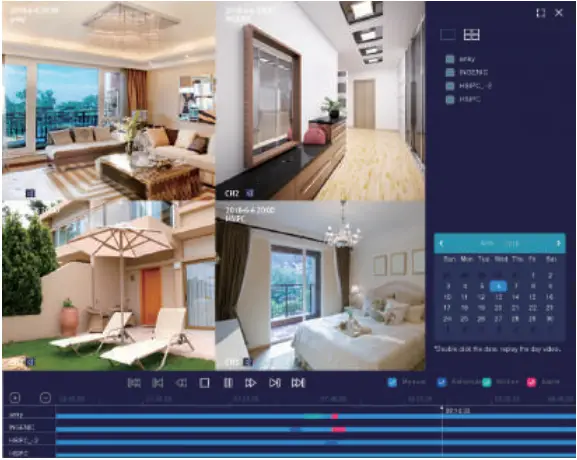
2. Record and Playback
- Manual Record: Right-click → Manual Record → choose recording channel → Save (Actually, the Wi-Fi NVR system has a default set 24th recording).
- Playback: Right-click → Playback → choose channel and date → double click date to query → double click timeline to check record.
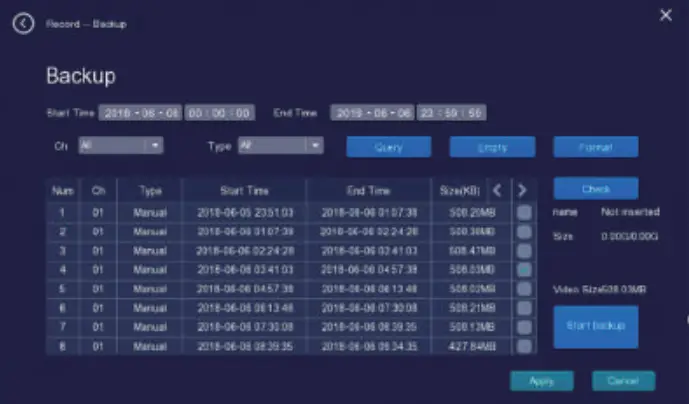
3. BackupInsert U disk to NVR USB port → Right-click→ Menu →Record → Backup → choose the time, channel and type→Query → select target file → Start Backup (If there is no free USB port, please click Start Backup with the mouse, then pull it out the USB port and insert within 45 seconds the USB backup disk).Note: If the target file can not be searched out, please click Empty→Query. Please remove the files which is not needed before backup.Ensure insert device (like USB) in 45 seconds, as system reserved searching time for it is 45 seconds.
4. Motion Detection Record① Right-click → Menu → Alarm → Motion Detect → choose target channel→ click Enable → Set Sensitivity & Area & Time & Alarm mode → Choose Channels for recording when Motion Detection Alarm is triggered → Apply. Back to Record interface → Record time, → Custom → set record period of target channel → click Motion → Apply. Users can also set shelter and linkage alarms in the same way above.
|
|
5. Internet ConnectingMenu → Wire NetworkIn LAN, there are 2 ways for wireless NVR to connect to the Internet.Manual setting: Fill in IP address, DNS data, and click Apply.DHCP: open DHCP, the device will connect to the Internet automatically, no need data sets.If the user doesn’t familiar with the network environment, prefer to use DHCP first, please.
6. Auto BridgeBy new mesh network auto-bridging function, without any manual setting, wireless camera in the further area will have a judgment about the WIFI signal and auto-connect to the camera which has a better WIFI signal, to achieve more stable and reliable video transmission.Auto bridging is designed to expand the coverage area of the wireless signal, instead of enhancing the signal. When a camera is a little far away from NVR, or there are too many interference factors/sources between them, the camera in a further area will auto bridge/connect to the one nearby to transmit the video data.
- Check the bridging information Right-click →Channel → Bridge.
- Then, the bridging relationship will be shown on the interface automatically.
- Picture above shows 2 auto bridging connect types One by one: CH1 → CH3 → NVR Connected directly to NVR: CH4 → NVR

Note: please ensure there is no obstacle in two cameras, let them be visible in pairs, which means when the person in one camera installing position, he/she can see the other camera, as it will benefit for the image to transmit stably.
7. Wire connectWireless connection is very convenient, and wire connection is also a good supplement.In some complicated scenes, like too much thick obstacles/metal which will weaken the signal, even lead to disconnection, then wire connects will help to solve it to ensure image clarity and stability.Steps:
- Connect IP Camera and NVR with network cable directly or through the switch, Menu → IP camera → Search-select target IP address (as the IP address is the same before modification) → Modify the device IP.
- Delete the channel which does not needs to add → double-click the target IP address to finish the connection.
Foscam App
- You can also simply go to the App Store or Google Play and search for the term “Foscam”. Download the APP to your smartphone, or scan the QR Code on below, it will take you to the download page to install the Foscam APP.
http://www.foscam.com/d - Run the Foscam APP, and then register for a Foscam account.
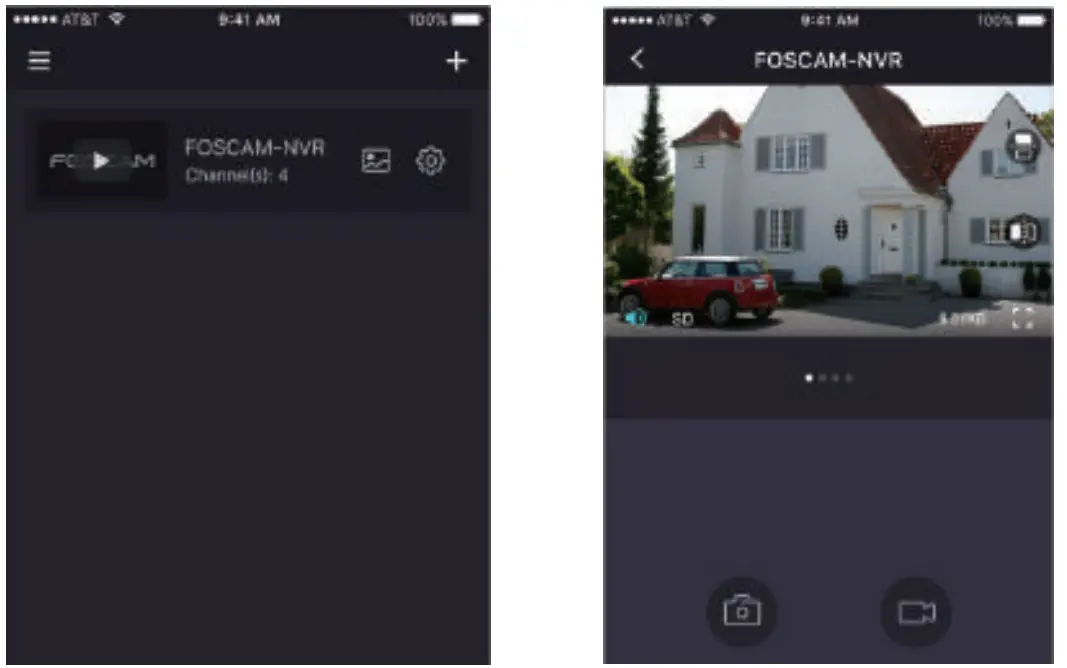
- Device Adding: Once logged in, you can tap the “+” button on the APP, and then select “NVR Kit”, after scanning the QR code, which is located at the bottom of your NVR.
- Preview: click the device in the list to enter preview interface,select a channel to view its a picture, click to enter,as follow shows:


Foscam VMS
Foscam VMS is a new tool for PC. It does not require plug-ins and is compatible with Windows & Mac, It supports all Foscam HD cameras and up to 36 cameras at the same time. If you would like to manage multiple cameras, we suggest you install the Foscam VMS. You can download the “Foscam VMS” from foscam.com/vms.
Add the NVR
- Run Foscam VMS, then you can create a local administrator account and login.
- Tap the “+” button on the Foscam VMS and follow the setup wizard to add your NVR.Please refer to the user manual for more detailed adding steps.
- Preview: click device in Lan Device list to enter preview interface, select a channel to view its a picture, click to enter, as follow shows:
Upgrade
1. Upgrade with NVR SoftwareYou can upgrade your NVR and cameras system with NVR Software.NVR Upgrade:Download the firmware to the U disk → Insert U disk to NVR USB port → Right-click→ Menu → Upgrade→ NVR Upgrade → click Start to upgrade your NVR.
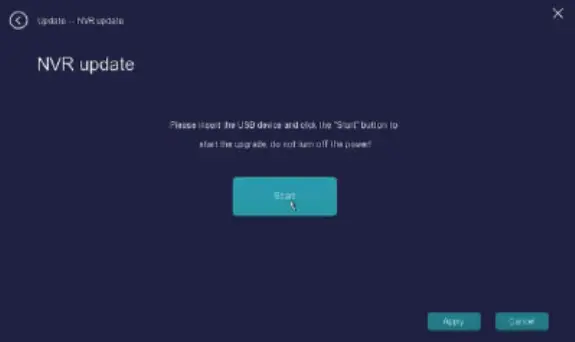
Note:Don’t shut down the power during the upgrade. After upgrading, NVR restarts.
IPC Upgrade:Download the firmware to the U disk → Insert U disk to NVR USB port → Right-click→ Menu → Upgrade→ IPC Upgrade → Search → click ![]() to update this camera or click All upgrades to upgrade your all cameras.IPC Restore default:Right-click→ Menu → Upgrade→ IPC Upgrade → Search →click
to update this camera or click All upgrades to upgrade your all cameras.IPC Restore default:Right-click→ Menu → Upgrade→ IPC Upgrade → Search →click ![]() to restore default this camera or click Reset to restore default your all cameras.
to restore default this camera or click Reset to restore default your all cameras.
![]()
Note:
- The upgrade file must be placed under the root directory of the U disk.
- Don’t lose power for 5 minutes during the upgrade.
2. Upgrade with Foscam AppYou can upgrade the firmware of your NVR and cameras with Foscam App.Open Foscam APP and log in the NVR, select Settings > NVR Firmware or Camera Firmware Upgrade.
![]()
3. Upgrade with Foscam VMSYou can upgrade the firmware of your NVR and cameras with Foscam VMS.Open and Login Foscam VMS, select ![]() Setup > System >System Upgrade or Camera Upgrade.Firmware upgrade step:
Setup > System >System Upgrade or Camera Upgrade.Firmware upgrade step:
- Click “Select firmware version” button, choose file firmware version you want to upgrade on the web page and copy its link address.
- Paste the link address in the input box, then “Upgrade” button and wait till it’s finished.

Note:In all upgrade methods, don’t shut down the power during upgrade. After upgrading, NVR restarts.
Product Performance
WLAN frequency range: 2400 MHz – 2483.5 Mhz.Maximum transmission power: < 20dBm Wireless Standard: IEEE802.11b/g/nPower Supply: DC 12V 2.0A 24W (NVR) DC 12V 1.0A 12W (IPC)
Technical Support
If you have problems with your Foscam device, please contact the reseller you purchased from, or you can e-mail the headquarter technical support team: [email protected]Your valuable comments and suggestions on improving Foscam products are welcomed!
![]()
![]()
CE Certificate statement Website: https://www.foscam.com/company/ce-certificate.htmlExporter and Importer Information Opened to Public: https://www.foscam.com/company/open-information.htmlManufacturer: Shenzhen Foscam Intelligent Technology Co., LtdAddress: 9/F, Block F5, TCL International E City, No.1001ZhongShanyuan Rd., NanShan District, Shenzhen, China, 518055
As a result of product upgrades and other reasons, this guide may not be able to update in time, resulting in inconsistency with the official website information, please take the oficial website(www.foscam.com) information as the standard.
References
[xyz-ips snippet=”download-snippet”]